Pioneer PRO-101FD Owner's Manual
Pioneer PRO-101FD - Elite® Signature Series 50" Plasma TV Manual
 |
UPC - 012562905754
View all Pioneer PRO-101FD manuals
Add to My Manuals
Save this manual to your list of manuals |
Pioneer PRO-101FD manual content summary:
- Pioneer PRO-101FD | Owner's Manual - Page 1
- Pioneer PRO-101FD | Owner's Manual - Page 2
servicing) instructions in the literature accompanying the appliance. D3-4-2-1-1_En-A 1) Read these instructions. 2) Keep these instructions. 3) Heed all warnings. 4) Follow all instructions outlet. 10) Protect the power cord from being walked Use only with the cart, stand, tripod, bracket, or table - Pioneer PRO-101FD | Owner's Manual - Page 3
best entertainment experiences possible. Please spend some time reading through this owner's guide and manual to learn about the many features and benefits that make this Elite KURO monitor Panel Life ...28 4.2.2 Adjust the Power Indicator Brightness ...28 4.2.3 Set Input Priority...28 4.2.4 Turn On - Pioneer PRO-101FD | Owner's Manual - Page 4
Control 48 6.1.5 Control a Pioneer Receiver ...48 6.1.6 Control a Cable (CBL) or Satellite (SAT) System 49 6.1.7 Control a Video Cassette Recorder (VCR) ...50 6.1.8 Control a DVD Player/DVR Recorder/BD Player 51 6.2 Apply Settings for Other Equipment...52 6.2.1 Apply Settings for an AV System - Pioneer PRO-101FD | Owner's Manual - Page 5
Mode ...70 6.10.1 Explore the Integrator Mode Menus ...71 7 Helpful Information ...75 7.1 Frequently Asked Questions (FAQs) ...75 7.2 Cleaning Methods...76 7.3 Troubleshooting & Service 8.7 Prevent Burning ...82 INPUT 5 through 8 (HDMI) - Video Signals (Digital 97 9.2.4 INPUT 3 (D-Sub) - PC Signals - Pioneer PRO-101FD | Owner's Manual - Page 6
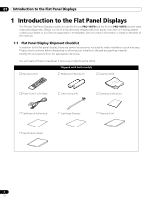
The Pioneer Flat Panel Display models include the 60-inch PRO-141FD and the 50-inch PRO-101FD (screen sizes measured diagonally). Below is a list of all accessories shipped with your panel. If an item is missing, please contact your dealer or our Service organization immediately. Service contact - Pioneer PRO-101FD | Owner's Manual - Page 7
terminals only, check the terminal position sheet located near the panel's terminal compartment. PRO-141FD/PRO-101FD: Face of Panel 1 2 1 - Power On indicator 2 - STANDBY indicator 3 - Power On () button 4 - Room Light sensor 5 - Remote Control sensor (upper bank) 12 3 8 9 7 6 3 45 67 - Pioneer PRO-101FD | Owner's Manual - Page 8
01 Introduction to the Flat Panel Displays 1.2.2 Operating the Remote Control The remote control for the flat panel display is a powerful tool. This section provides a brief introduction to your remote control while later sections explore more advanced operations. Insert the Batteries into the - Pioneer PRO-101FD | Owner's Manual - Page 9
Introduction to the Flat Panel Displays 01 Remote Control Issues There are a small number of issues that can affect your remote control but the most common is weak batteries. Weak batteries in the remote control can cause communication to fail or only operate sporadically. In this situation, try - Pioneer PRO-101FD | Owner's Manual - Page 10
audio/video settings AV Source: OPTIMUM, STANDARD, DYNAMIC, MOVIE, PURE, SPORT, GAME, USER PC Source: STANDARD, USER AUTO SET KURO LINK functions only Player/Recorder Control: 14 Use buttons for control of connected equipment SELECT: 15 Select for MONITOR, STB, CBL/SAT, BDP/LD, DVD/DVR, VCR MONITOR - Pioneer PRO-101FD | Owner's Manual - Page 11
MONITOR INPUT 1 2 3 16 4 5 6 7 8 SUB PIP 17 18 SPLIT INPUT SWAP SHIFT AV AUTO SCREEN 19 20 SELECTION SETUP FREEZE SIZE 1 2 3 4 5 6 7 8 9 KURO LINK 0 21CH ENTER 22 DISPLAY INFO 23 P/CH MUTING 24 EXIT TOP MENU GUIDE INFO: Display the current monitor status 23 i +/-: - Pioneer PRO-101FD | Owner's Manual - Page 12
to perform the installation • Use the supplied bolts • For details, refer to the instruction manual that came with the optional stand (or equivalent items) Rear view (PRO-141FD) Rear view (PRO-101FD) Use the supplied bolts when attaching the stand's supports at the holes indicated by a circle. 12 En - Pioneer PRO-101FD | Owner's Manual - Page 13
• Use the following mounting holes for installation Rear view (PRO-141FD) Mounting hole Mounting hole Side view Mounting surface Mounting bracket (or equivalent item) M8 screw 12 mm to 18 mm (0.5 inches to 0.7 inches) Rear view (PRO-101FD) Mounting hole Mounting hole Note: Some installation - Pioneer PRO-101FD | Owner's Manual - Page 14
example of a stand-mounted panel with proper ventilation. Over 10 cm (3 15/16 inches) Over 50 cm (19 11 and cables safely No danger of power overloads Separate from other IR equipment or by dragging the panel by its handles. (PRO-141FD) (PRO-101FD) Note: Do not use the handles to hang the - Pioneer PRO-101FD | Owner's Manual - Page 15
instructions for the different mounting and anchoring options. Anchor the Panel When Using a Stand When using a stand, stabilize the panel to keep it from tipping over. Please use the metal fittings and screws supplied with the optional stand to anchor the panel to a wall or other solid support - Pioneer PRO-101FD | Owner's Manual - Page 16
your flat panel display. 1 ) Mark locations for metal fittings and screws on the back edge of the table using the panel stand to determine placement. (PRO-141FD) Wood screw (commercially available, 4 mm x 20 mm (5/32 inch x 13/16 inch) min.) Falling prevention metal fitting (supplied with the - Pioneer PRO-101FD | Owner's Manual - Page 17
operating instructions that other audio/visual manual that came with the DVD player. PC Use a DVI-D 24-pin (digital only) cable to connect a PC equipped with a DVI output terminal (digital RGB signal). After completing connections, follow the onscreen setup directions (page 52). INPUT 4 supports - Pioneer PRO-101FD | Owner's Manual - Page 18
a VCR or other recording equipment. For details, refer to the operation manual that came with the device. Connect a game console or camcorder: HDMI equipment game console, camcorder, or other audio/visual equipment. For details, refer to the operation manual that came with the game console - Pioneer PRO-101FD | Owner's Manual - Page 19
plasma as well as saves energy. Plug the cord in to the panel but do NOT plug it in to a power outlet yet. Rear Front 2.5 Route then Bundle the Power Cord and Cables Once the flat panel display is mounted to the back of the panel. Use the cable clamps as necessary. PRO-141FD PRO-101FD 19 En - Pioneer PRO-101FD | Owner's Manual - Page 20
02 Install Your Flat Panel Display Follow the steps below to attach a cable clamp. 1 ) Thread the clamp band through the holder and bundle the cable(s) in the cable clamp. 2 ) Push and hold the levers then insert the hook into an appropriate hole on the rear of the flat panel display. 3 ) Pull up - Pioneer PRO-101FD | Owner's Manual - Page 21
Power On, Standby, and Power Off. Standby saves energy but allows the remote control to turn on the panel. The following instructions use that the Power On indicator lights blue. (PRO-101FD) Standby indicator Power On indicator Note: While in Standby, pressing the remote control's MONITOR ( a - Pioneer PRO-101FD | Owner's Manual - Page 22
MONITOR INPUT 1 2 3 4 5 6 7 8 SUB PIP SPLIT INPUT SWAP SHIFT AV AUTO SCREEN SELECTION SET menu item. Remote control EXIT TOP MENU GUIDE HOME MENU ENTER 4) Highlight the selected menu HOME MENU FLAT PANEL DISPLAY Picture Screen Power Control Option Input Setup Control Setup Exit - Pioneer PRO-101FD | Owner's Manual - Page 23
58 69 Option Energy Save Power Management No Signal Off No Operation Off Language Input Priority Blue LED Dimmer Orbiter Video Pattern Long Life Settings Room Light Sensor PIP Detect Input Setup 1/2 Input Setup 2/2 IP Control Setting KURO LINK Setting Serial Setting 3.2.3 Use the Simplified User - Pioneer PRO-101FD | Owner's Manual - Page 24
follow the steps below. 1 ) Access Language through the Option menu. Language : Input Priority : Blue LED Dimmer : Orbiter : Video Pattern : Long Life Settings : Room Light Sensor : PIP Detect : English Off Low Off Off No Off Auto 2 ) Select a language from the submenu. 3 ) Press HOME - Pioneer PRO-101FD | Owner's Manual - Page 25
your room and automatically adjusts the screen brightness for the best picture. Bright rooms require stronger coloring so images appear : Input Priority : Blue LED Dimmer : Orbiter : Video Pattern : Long Life Settings : Room Light Sensor : PIP Detect : English Off Low Off Off No Off - Pioneer PRO-101FD | Owner's Manual - Page 26
below. AV Selection Contrast Brightness Color Tint Sharpness Color Temp Red Green Blue Gamma Pro Adjust Reset Picture : STANDARD : 40 : 0 : 0 : 0 : 0 picture adjustment settings for that view. Although repositioning is available in most screen views, when the screen is set to Dot - Pioneer PRO-101FD | Owner's Manual - Page 27
lead to the best picture for your viewing area. As each option changes, refer back to the previously set image for comparison. If no selections are made within 60 seconds, the menu closes automatically and the current settings are saved to memory. "Before" is canceled if: • The STANDBY/ON button, - Pioneer PRO-101FD | Owner's Manual - Page 28
Size: Wide Zoom •Side Mask - Detection: Mode 1 •Orbiter (AV source): Mode 1 •Orbiter (PC source): Mode 1 •Energy Save: Save 1 •AV Selection: OPTIMUM (only when it was set to DYNAMIC previously) 3 ) Press HOME MENU to exit the menu. 4.2.2 Adjust the Power Indicator Brightness Adjust the brightness of - Pioneer PRO-101FD | Owner's Manual - Page 29
to protect against burn-in is the Orbiter Also, when the Orbiter function is set to Mode 1 or Mode 2, the image may appear to drop screen is on, only the remote's MONITOR (a) button and the panel's STANDBY/ON 1 consumes less power than Standard Save 2 Picture Off consumes less power than Save 1 - Pioneer PRO-101FD | Owner's Manual - Page 30
to five minutes, a reminder appears on screen each minute until the time has elapsed. To set the Sleep Timer, follow the steps below. 1 ) Press USER MENU. 2 ) Select MENU again to exit the menu. Note: When the sleep timer has been set, "Remain ---min" appears at the top of the menu. The Video Pattern - Pioneer PRO-101FD | Owner's Manual - Page 31
power for the best image from manual image quality adjustment unavailable for movies reflects input signals as faithfully as possible for checking image materials, for example for sports programs lowers image brightness for easier viewing allows customizing settings as desired (set the mode - Pioneer PRO-101FD | Owner's Manual - Page 32
locks out manual adjustments for specific options. The DYNAMIC setting blocks Contrast from the submenu. AV Selection OPTIMUM STANDARD DYNAMIC MOVIE PURE SPORT GAME USER 3 ) Press HOME MENU to exit below. 1 ) Access Pro Adjust through the Picture menu. 2 ) Select Other from the Pro Adjust menu. 3 ) - Pioneer PRO-101FD | Owner's Manual - Page 33
Options 05 5.2 Adjust Specific Picture Elements Plasma technology delivers one of the best images available today. However, the viewing area to adjust the picture for your best viewing experience. 5.2.1 Choose a Screen Size (Automatically or Manually) Automatic Screen Sizing The flat panel - Pioneer PRO-101FD | Owner's Manual - Page 34
05 Additional Picture Adjustment Options Manual Screen Sizing Manually select an appropriate screen size if an duration. For example, an HD picture with side masks (4:3 content) causes uneven wear of the plasma cells. If side masks appear around a broadcast, after that movie or program is over, - Pioneer PRO-101FD | Owner's Manual - Page 35
arrow buttons to highlight an option then press ENTER. 3 ) Select an option to adjust. Picture AV Selection Contrast Brightness Color Tint Sharpness Color Temp Gamma Pro Adjust Reset Exit : STANDARD : +38 : -7 : -6 : 5 : 4 : Mid : 5 (AV source) 35 En - Pioneer PRO-101FD | Owner's Manual - Page 36
earlier in this manual. This section explores the value offered through Pioneer's Pro Adjust support, top quality Wide Mode from the submenu. 3 ) Select Mode 1 or Mode 2 to activate HD Wide Mode. • Mode 1: screen mode sets to WIDE 1 when detecting side masks. • Mode 2: screen mode sets to WIDE - Pioneer PRO-101FD | Owner's Manual - Page 37
to exit the menu. Restore Default Screen To restore the factory default screen settings, follow the directions below. 1 ) Access Reset through the Screen menu. the submenu. Parameter High Mid-High Mid Mid-Low Low Manual Description white with bluish tone intermediate tone between High and Mid - Pioneer PRO-101FD | Owner's Manual - Page 38
HD picture quality. The function supports both film and text material. To set the PureCinema level for your HD material, follow the steps below. 1 ) Access Pro Adjust through the Picture menu. 2 ) Select PureCinema from the Pro Adjust menu. 3 ) Select Film Mode or Text Optimization, depending on - Pioneer PRO-101FD | Owner's Manual - Page 39
menu. 2 ) Select Intelligent Mode from the Pro Adjust menu. 3 ) Select Mode 1 or Mode 2 (or Off ). 4 ) Select the desired parameter. Parameter Off Mode 1 Mode 2 Description No effect compensates for more effective picture settings compensates for appropriate picture settings 5 ) Press HOME MENU - Pioneer PRO-101FD | Owner's Manual - Page 40
images for Off optimum contrast) On No effect activates ACL Enhancer Mode (processes the 1 (Hard) image's high frequency (detailed) area To set the CTI and Color Space options, follow the steps below. 1 ) Access Pro Adjust through the Picture menu. 2 ) Select Color Detail from the Pro Adjust - Pioneer PRO-101FD | Owner's Manual - Page 41
Use the Color Management option to fine adjust image coloring. To set the Color Management option, follow the steps below. 1 ) Access Pro Adjust through the Picture menu. 2 ) Select Color Detail from the Pro Adjust menu. 3 ) Select Color Management from the submenu. 4 ) Select the desired - Pioneer PRO-101FD | Owner's Manual - Page 42
Pro Adjust through the Picture menu. 2 ) Select Other from the Pro Adjust menu. 3 ) Select 3DYC, I-P Mode, Drive Mode, Game Control Pref. or Blue Only Mode Blue Only Mode (displays Off images in blue only) On No effect activates Blue Only Mode Drive Mode is unavailable when setting Game Control - Pioneer PRO-101FD | Owner's Manual - Page 43
Additional Picture Adjustment Options 05 5.4 View in Multi-Screen The flat panel display can show multiple screens at the same time; two-screen or picture-in-picture. The pictures may be reversed (in 2-screen and P-in-P) or moved to various locations on the screen (P-in-P). 2-Screen Picture-in- - Pioneer PRO-101FD | Owner's Manual - Page 44
. MONITOR INPUT 1 2 3 4 5 6 7 8 SUB PIP SPLIT INPUT SWAP SHIFT AV AUTO SCREEN SELECTION SET UP FREEZE SIZE The multi-screen function is unavailable when viewing source from a single input or from two analog or digital input sources. Warning: Displaying pictures in multi-screen mode - Pioneer PRO-101FD | Owner's Manual - Page 45
remote's MONITOR (a) button or the panel's STANDBY/ON button reactivates the flat panel display. When the panel enters Standby with Mode 1 panel display to turn On. When the panel enters the Power Management status with Mode 2 selected (no signals received), receiving signals again causes the - Pioneer PRO-101FD | Owner's Manual - Page 46
manual. 6.1.1 Use the Learning Function The Learning function allows the panel's remote control to memorize codes to control other devices. To set again to exit the Lean mode after the code is confirmed. 1 2 3 4 5 6 7 8 SUB PIP INPUT SELECT BDP EDIT/LEARN MONITOR STB LD VCR CBL DVD - Pioneer PRO-101FD | Owner's Manual - Page 47
MONITOR STB LD VCR CBL DVD SAT DVR Factory default manufacture codes: STB (Set-top Box): Pioneer (0329) BDP/LD/DVD/DVR: Pioneer (2052) VCR (VTR): Pioneer . The selected mode indicator flashes when the remote control is ready to search the code library. 3 ) Sample a code using a SOURCE POWER, PLAY, - Pioneer PRO-101FD | Owner's Manual - Page 48
Codes from the Remote Control To return all learned and preset codes to the defaults (PIONEER), follow the steps below. 1 ) Simultaneously press EDIT and MONITOR () buttons to begin. Selection can be in any mode. 2 ) Press the Yellow button to clear added codes. Confirm that the selected - Pioneer PRO-101FD | Owner's Manual - Page 49
System When Mode is set to CBL the equipment power on and MONITOR INPUT 1 2 3 4 5 6 7 8 SUB PIP SPLIT INPUT SWAP SHIFT AV AUTO SCREEN SELECTION SET UP FREEZE SIZE 1 2 3 1 4 5 6 7 8 9 KURO LINK 0 CH ENTER 5 DISPLAY INFO 2 P/CH MUTING EXIT USER MENU TOP MENU GUIDE - Pioneer PRO-101FD | Owner's Manual - Page 50
Cassette Recorder (VCR) When Mode is set to VCR, verify that the KURO LINK 0 CH ENTER DISPLAY INFO 1 P/CH MUTING EXIT USER MENU TOP MENU GUIDE HOME MENU ENTER TOOLS RETURN MENU 6 2 ONDEMAND FAVORITE 7 3 SOURCE DVD/HDD 8 4 RECEIVER VOL INPUT 5 SELECT BDP EDIT/LEARN MONITOR - Pioneer PRO-101FD | Owner's Manual - Page 51
MENU GUIDE HOME MENU MENU USER MENU TOOLS ENTER RETURN ONDEMAND FAVORITE SOURCE DVD/HDD RECEIVER VOL INPUT SELECT BDP EDIT/LEARN MONITOR STB LD VCR CBL DVD SAT DVR 10 11 12 13 14 6 & 12 STOP RECord (DVD Recorder only) (press and hold then press to stop recording applies to Pioneer DVD - Pioneer PRO-101FD | Owner's Manual - Page 52
connected equipment including devices using Composite Video, Component Video, and DVI equipment as well as a PC. For connection details, see page 17. 6.2.1 Apply Settings for an AV System After connecting other equipment to your flat panel display, you may need to enter an input name, color signal - Pioneer PRO-101FD | Owner's Manual - Page 53
The Auto Setup option automatically adjusts these settings but the image position and clock can be adjusted manually too. This section covers the automatic PC image and try again. Manual Image Position and Clock Adjustments Usually Auto Setup for a PC is the best practice for adjusting the image - Pioneer PRO-101FD | Owner's Manual - Page 54
INPUT 7, INPUT 8 are HDMI terminals for incoming digital video signals. The flat panel display supports KURO LINK functions so that when a piece of operating manual(s) that came with the equipment. One of the benefits of using your flat panel display to control other equipment is the support of - Pioneer PRO-101FD | Owner's Manual - Page 55
to PC when receiving computer signals. In PC mode, the image displays in full size for optimum image quality. Video (over-scan) PC (under-scan) 6.3.3 Specify a Digital HDMI Signal Type For the correct digital video signal type, check the operating manual that came with the other equipment. To - Pioneer PRO-101FD | Owner's Manual - Page 56
Pioneer AV system, or BD/DVD player that supports the KURO LINK or HDMI Control functions featured in conventional Pioneer products. The KURO or player (for details, see the operation manual that came with the device) Receiver/amplifier Except for Power OFF and Display Language Setup functions, only a single HDMI - Pioneer PRO-101FD | Owner's Manual - Page 57
, two (2) playback devices, and one (1) AV system at a time. To select and use the various KURO LINK functions for a connected Pioneer AV system, recorder, or player, use the panel's KURO LINK menu. To access the KURO LINK menu, follow the steps below. 1 ) Press USER MENU on the remote. 2 ) Select - Pioneer PRO-101FD | Owner's Manual - Page 58
all other equipment. 2 ) Confirm that the panel's Input Setting for KURO LINK Setting options comply with directions in the device(s)' operating instructions. 3 ) Confirm that the other equipment is set for KURO LINK. 4 ) Check that the audio and video are playing back properly from the equipment - Pioneer PRO-101FD | Owner's Manual - Page 59
LINK menu then select the function again. AV Systems 1 Cycles the surround mode in sequence 2 Switches the input source in reverse order 3 Switches the surround mode in reverse order 4 Closes the screen to return to KURO LINK menu 5 Lists the connected equipment (model number/up to eight characters - Pioneer PRO-101FD | Owner's Manual - Page 60
06 Use Other Equipment With Your Flat Panel Display 6.4.4 Add an AV Amp or a BD Player To add an AV amp and/or a BD Player, refer to the appropriate cabling diagram below. AV Amp & BD Player BD Player only Rear view Rear view HDMI compliant cable (HDMI cable having the HDMI mark) AV amp HDMI - Pioneer PRO-101FD | Owner's Manual - Page 61
in error, it can be reactivated. To power on the flat panel display automatically when a connected Pioneer recorder or player is turned On (images are sent), follow the steps below. 1 ) Access KURO LINK Setting through the Control Setup menu. 2 ) Select Power On Ready from the submenu. 3 ) Select On - Pioneer PRO-101FD | Owner's Manual - Page 62
the KURO LINK option to test whether equipment connected to the panel via an HDMI port can power up. Each device must be properly assigned to an Input for this function to perform. To confirm that the Power On/Off control function is working, follow the steps below. 1 ) Access KULO LINK Setting - Pioneer PRO-101FD | Owner's Manual - Page 63
services from your service provider. • Connecting to a network may require additional settings on your PC. • After connection to a network, enter correct settings. • Pioneer and/or service provider. Also refer to the instruction manual that came with the device. - Settings are unavailable for - Pioneer PRO-101FD | Owner's Manual - Page 64
IP Control DHCP IP Address Subnet Mask Default Gateway MAC Address LED KURO LINK Setting Input Setting Power Off Control Power On Ready Hold Sound Status Power On Test Power Off Test Serial Setting ID No. Set Baud Rate : Disable : Off : On : Off : Off : Off : Off : Off : Off : All : 9600bps - Pioneer PRO-101FD | Owner's Manual - Page 65
in the "Temporary Internet Files" section to select "Every time you start Internet Explorer" under "Check for newer versions of stored pages:". Display Settings When switching browser screens, find the needed screen from the list on the left. Do not use browser buttons and menus, such as Previous - Pioneer PRO-101FD | Owner's Manual - Page 66
isf-DAY 7 8 PURE isf-NIGHT SPORT isf-AUTO GAME Detail Adjust Picture Contrast Brightness Color : 40 Set 0 Set 0 Color Temp. : Manual R.High White Balance : 0 Set G.High Set 0 B.High Set 0 R.Low 0 G.Low Set 0 B.Low Set 0 Gamma : 3 Blue only mode : Off Screen size - Pioneer PRO-101FD | Owner's Manual - Page 67
setting Energy save : Standard Set Power management : Off Set No signal off : Disable Set No operation off : Disable Set Room light sensor : Off Set KURO LINK setting Input Setting : Off Set Power off control : Off Set Power on ready : Off Set Hold sound status : Off Set - Pioneer PRO-101FD | Owner's Manual - Page 68
an E-mail at a specified interval (every 500 hours if set to "500") Input change sends an E-mail when the input mode changes Loss of input signal sends an E-mail when no input signal appears Power toggle sends an E-mail when the power status changes Note: Your flat panel display does not have - Pioneer PRO-101FD | Owner's Manual - Page 69
Control : DHCP : IP Address Subnet Mask Default Gateway MAC Address LED : KURO LINK Setting Input Setting : Power Off Control : Power On Ready : Hold Sound Status : Power On Test Power Off Test Serial Setting ID No.Set : Baud Rate : Disable On On Off Off Off Off All 9600bps - Pioneer PRO-101FD | Owner's Manual - Page 70
, the following options remain unchanged: • Power Control • Option • Input Setup • Control Setup To switch to the Integrator Mode, follow the directions below. 1 ) Press INPUT to select the desired input. 2 ) Press DISPLAY to reveal current settings. Status information on the selected input appears - Pioneer PRO-101FD | Owner's Manual - Page 71
down. The panel switches to Integrator Mode. INTEGRATOR MENU Picture Picture Preset Studio Mode : Monotone Mode : Drive Mode : FRC Mode : Option Fan Control : OSD Display : Power On Mode Input : Power On Mode (Input) Mirror Mode : Banner PIP Translucent : Banner PIP : IP - Pioneer PRO-101FD | Owner's Manual - Page 72
rate conversion switches the frame rate conversion *Factory default Note: FRC Mode is available only for input PC signals. Fan Control This option surrounding area should be taken into consideration. On-screen Display This option sets the menu display to On or Off. Parameter On* Off Description - Pioneer PRO-101FD | Owner's Manual - Page 73
Your Flat Panel Display 06 Power On Mode This option automatically selects the input when the panel is turned On. Parameter Description INPUT 1 through INPUT 8 displays the selected input Last* displays the last input selected *Factory default Note: This setting applies to all input sources - Pioneer PRO-101FD | Owner's Manual - Page 74
the small window image. Signals that support Banner PIP are XGA 60 Hz and WXGA 60 Hz. IP Control Lock This locks or unlocks the IP Control settings. Parameter On Off* Description locks the IP Control settings No effect *Factory default Note: This setting applies to all input sources. Network - Pioneer PRO-101FD | Owner's Manual - Page 75
buying Pioneer! 7.1 Frequently Asked Questions (FAQs) This section answers some of the questions received by our Support modes until the MONITOR up other audio/video equipment Pioneer flat panel display turn on? It may be that your remote has failing batteries or has been damaged. Check the power - Pioneer PRO-101FD | Owner's Manual - Page 76
power cord from the outlet. Plug in the panel again after one to two minutes. If this fails to solve the problem, contact your dealer or Pioneer Customer Support (see back cover). What can I do to prevent image retention or burn-in? Burn-in or Image Retention is a side effect of plasma technology - Pioneer PRO-101FD | Owner's Manual - Page 77
Troubleshooting & Service Information General Issue Possible Solutions No power • Check the connection seating at the wall and panel. • See if the panel's main power switch is turned ON. • Confirm that the remote is set to MONITOR. If the panel indicator lights red, press MONITOR • Review the - Pioneer PRO-101FD | Owner's Manual - Page 78
the panel and the HDMI equipment. • Confirm that settings for the equipment are correct. For details, refer to the operating instructions that came with the equipment. Panel sounds/noises • Some sounds are appropriate for plasma technology. Examples: fan motor noise, electrical circuit humming - Pioneer PRO-101FD | Owner's Manual - Page 79
• power cord or plug damaged • liquid spilled or an object dropped into the panel • exposed to rain or water • noticeable abnormality in panel operation Occasionally a part within the flat panel display may fail. Verify that your service professional uses only replacement parts specified by Pioneer - Pioneer PRO-101FD | Owner's Manual - Page 80
power on and run the panel to maintain functionality. 8.1 Installation Details It is best to use parts and accessories designed by Pioneer. Use of accessories other than the Pioneer stand mount or stand rather than leaning the panel against a wall or other support guidelines. • Set the flat panel - Pioneer PRO-101FD | Owner's Manual - Page 81
mode problem with your flat panel display. Pixel Information Plasma screens show pictures using pixels. Pioneer flat panel displays contain a very large number of pixels. The size of the panel determines the number of pixels. With the PRO-141FD/PRO-101FD, there are over 6.2 million pixels in the 50 - Pioneer PRO-101FD | Owner's Manual - Page 82
plasma displays because it is a consequence of the technology. 8.7 Prevent Burning After mode (WIDE, for example). Refer to "5.2.1 Choose a Screen Size (Automatically or Manually)." • Select auto screen sizing (page 33) then set the Side Mask detection function to Mode 1 or Mode 2 (page 36). • Set - Pioneer PRO-101FD | Owner's Manual - Page 83
for use only with KRP-TS01 (Pioneer Corporation.) stand. Use with other stands is capable of resulting in instability causing possible injury. This PRO-101FD for use only with KRP-TS02 (Pioneer Corporation.) or KRP-SW01 (Pioneer Corporation.) stand. Use with other stands is capable of resulting - Pioneer PRO-101FD | Owner's Manual - Page 84
For Canadian model] This Class B digital apparatus complies with Canadian ICES-003. PRO-141FD/PRO-101FD Product Category: Class B Personal Computers & Peripherals Responsible Party Name: PIONEER ELECTRONICS SERVICE and used in accordance with the instructions, may cause harmful interference to radio - Pioneer PRO-101FD | Owner's Manual - Page 85
0237, 0877, 1060, 1068, 1577, 1877 Panama 0107 Panasonic 0000, 0008, 0107, 0144, 1488 Paragon 0000, 0008, 0525 Penney 0000 Philips 0317, 0817, 1305 Pioneer 0144, 0533, 0877, 1021, 1500, 1877 Brand/Code Prism 0012 Pulsar 0000 PVP Stereo Visual Matrix 0003 Quasar 0000 Regal 0276 Runco 0000 Sagem 0817 - Pioneer PRO-101FD | Owner's Manual - Page 86
Homecast 1214 Hornet 1300 Houston 0775 HTS 0775, 1775 Hughes Network Systems 0749, 1142, 1442, 1749 Humax 1176, 1427, 1675, 1808 iCan 1367 ID Digital 1176 Imperial 1334, 1429, 1672 Indovision 0856, 0887 Innova 0099 Interstar 1214 ISkyB 0887 ITT Nokia 0723 Jadeworld 0642 Jaeger 1334 Jerrold 0869 JVC - Pioneer PRO-101FD | Owner's Manual - Page 87
0173 peeKTon 1457 Philips 0099, 0173, 0200, 0722, 0749, 0775, 0819, 0847, 0853, 0856, 0887, 1076, 1114, 1142, 1442, 1672, 1749 Pino 1334 Pioneer 0329, 0853, 1308 PMB 1611 Preisner 1113 Premier 0723, 0853, 1429 Primacom 1111 Primestar 0869 Proscan 0392, 0566 QNS 1367, 1404 Radiola 0200 RadioShack - Pioneer PRO-101FD | Owner's Manual - Page 88
, 0226, 0278 Anam National 0162, 0226, 1162, 1562 Ansonic 0000 Aristona 0081 Brand/Code ASA 0037, 0081 Astra 0035 Asuka 0000, 0037, 0038, 0081 Audio-Technica 0058 Audiolab 0081 Audiosonic 0278 Audiovox 0037, 0038, 0278 Avis 0000 AVP 0000 Awa 0037, 0043, 0278, 0642 Baird 0000, 0278 Basic Line 0278 - Pioneer PRO-101FD | Owner's Manual - Page 89
Appendix 09 Brand/Code Brand/Code Brand/Code Brand/Code Brand/Code Brand/Code Criterion 0000 Crosley 0000, 0035, 0081, 0149 Crown 0037, 0278 Curtis Mathes 0000, 0035, 0060, 0162, 0278 CyberPower 1972 Cyrus 0081 Daewoo 0037, 0045, 0209, 0278, 0642 Dansai 0278 Daytron 0037, 0278 De Graaf 0042, - Pioneer PRO-101FD | Owner's Manual - Page 90
, 0209, 0226 Philips 0000, 0035, 0045, 0048, 0081, 0162, 0209, 0226, 0616, 0739 Phoenix 0278 Phonola 0081 Pilot 0037 Pioneer 0042, 0058, 0067, 0081, 0162, 0168 Polk Audio 0081 Portland 0278 Precision 0058 Prinz 0000 Profitronic 0081 Proline 0000, 0278, 0320, 0642 Proscan 0060 Prosco 0278 Prosonic - Pioneer PRO-101FD | Owner's Manual - Page 91
1972 ZX 0209, 0348 9.1.4 BDP (Blu-ray) Brand/Code LG 0741 Brand/Code Microsoft 2083 Onkyo 1769 Brand/Code Panasonic 1641 Philips 2084 Brand/Code Pioneer 0142, 2052 RCA 1769 Brand/Code Samsung 0199 Sony 1516 Brand/Code Toshiba 1769 Xbox 2083 91 En - Pioneer PRO-101FD | Owner's Manual - Page 92
9.1.5 DVD-R Brand/Code Accurian 0675 Apex Digital 1056 Aristona 0646 Cat 1421 Centrum 1227 CyberHome Loewe 0741 Magnavox 0646, 0675 Mitsubishi 1403 Palsonic 1056 Brand/Code Panasonic 0490 Philips 0646, 1340 Pioneer 0571, 0631, 1475, 1476, 2216 Pye 0646 RCA 0522 Roadstar 1227 Samsung 0490 Brand/Code - Pioneer PRO-101FD | Owner's Manual - Page 93
1224 Amitech 0850 Amstrad 0713 Ansonic 0759 Apex Digital 0533, 0672, 1056, 1061 Arena 1115 Aristona 0690, 0713, 0723 C-Tech 1152 California Audio Labs 0490 Cambridge Soundworks 0690 Cat 0789, EagleTec 0714 eBench 1152 Eclipse 0723 Elfunk 0713, 0850 Elite 1152 Ellion 0850, 1421 Elta 0672, 0690, - Pioneer PRO-101FD | Owner's Manual - Page 94
0585, 0646, 0675, 1340, 1354, 2056, 2084 Pioneer 0142, 0490, 0525, 0571, 0631, 1475, 1476, 1571, 2052, 2216 Plu2 0850 Polaroid 1061 Polk Audio 0539 Presidian 0675 Prima 1228 Proceed 0672 Proline 0672 Proscan 0789 Teletech 0713 Tensai 0690 Tevion 0898, 1227 Theta Digital 0571 Thomson 0511, 0522, 0551 - Pioneer PRO-101FD | Owner's Manual - Page 95
Brand/Code Magnavox 0194, 0217, 0241 Marantz 0194 Mitsubishi 0059, 0241 NAD 0059 Nagsmi 0059 Brand/Code Optimus 0059 Panasonic 0204 Philips 0194 Pioneer 0023, 0059, 0241, 1274 Polk Audio 0194 Brand/Code Quasar 0204 Realistic 0203 Sega 0023 Sony 0201 Technics 0204 Brand/Code Telefunken 0059 Theta - Pioneer PRO-101FD | Owner's Manual - Page 96
the table below, set the Color Decoding option to Comp. 1 or Comp. 2. Resolution Hf Vf (kHz) (Hz) Screen Mode DOT 4:3 FULL Yes Yes Yes - - Yes Yes 576i 15.6 50.0 - Yes Yes - Yes Yes Yes - - Yes Yes 576p 31.3 50.0 - Yes Yes - Yes Yes Yes - - Yes Yes 720p 37.5 50.0 - Yes Yes - Yes - - Yes - Pioneer PRO-101FD | Owner's Manual - Page 97
Digital) When reproducing the digital signals in the table below, set the Signal Type option to Video. Resolution Hf Vf (kHz) (Hz) Screen Mode - - Yes Yes 576i 15.6 50.0 - Yes Yes - Yes Yes Yes - - Yes Yes 576p 31.3 50.0 - Yes Yes - Yes Yes Yes - - Yes Yes 720p 37.5 50.0 - Yes Yes - Yes - - Pioneer PRO-101FD | Owner's Manual - Page 98
the Color Decoding option to RGB. If the picture does not appear properly, change the Signal Format setting to the desired resolution. Resolution Hf Vf Dot-Line (kHz) (Hz) Screen Mode Remarks DOT 4:3 FULL FULL2 ZOOM CINEMA WIDE WIDE WIDE FULL CINEMA BY (FULL1) 1 2 14:9 14:9 DOT 720 × 400 - Pioneer PRO-101FD | Owner's Manual - Page 99
) When reproducing the digital signals in the table below, set the Signal Type option to PC. If the picture does not appear properly, change the Signal Format setting to the desired resolution. Resolution Hf Vf Dot-Line (kHz) (Hz) Screen Mode Remarks DOT 4:3 FULL FULL2 ZOOM CINEMA WIDE WIDE - Pioneer PRO-101FD | Owner's Manual - Page 100
Appendix Resolution Hf Vf Dot-Line (kHz) (Hz) Screen Mode Remarks DOT 4:3 FULL FULL2 ZOOM CINEMA WIDE WIDE WIDE FULL - 1600 × 1200 75.0 60.0 - Yes Yes - - - - - - - - 1920 × 1200RB 74.0 60.0 - Yes Yes - - - - - - - - Banner PIP supports 1360 x 768 and 1024 x 768 signals. 100 En - Pioneer PRO-101FD | Owner's Manual - Page 101
is a technology used to protect copyrighted digital contents that use the Digital Visual Interface (DVI). Note: Design and specifications are subject to change without notice. Dimensions 64 (2-17/32) PRO-141FD (60" panel) 1465 (57-11/16) 64 (2-17/32) PRO-101FD (50" panel) 1233 (48-17/32) 876 - Pioneer PRO-101FD | Owner's Manual - Page 102
. • Microsoft is a registered trademark of Microsoft Corporation. • VESA and DDC are registered trademarks of Video Electronics Standards Association. • Power Management and Sun Microsystems are registered trademarks of Sun Microsystems, Inc. • VGA and XGA are registered trademarks of International - Pioneer PRO-101FD | Owner's Manual - Page 103
as a flat panel display. HDMI The High-Definition Multimedia Interface (HDMI) is a digital data transmission standard for consumer electronics/home appliances. HDMI connects digital audio/video sources to a compatible digital audio and/or video device, such as a flat panel display. HDMI also allows - Pioneer PRO-101FD | Owner's Manual - Page 104
Configuration Protocol (DHCP) provides a mechanism to automatically allocate network settings such as IP Address, Default Gateway and Subnet mask. A DHCP server must be activated on a network to use the DHCP function. DNS The Domain Name Service (DNS) server functions to exchange IP Address to the - Pioneer PRO-101FD | Owner's Manual - Page 105
, 39, 62 Game Control Pref 39 Green 35, 51 H HD Wide Mode 36 HDMI Input 54 HDMI port 56 HDMI terminal 18, 54 HOME MENU 10 I Input 10 Installation 12, 80 K KURO LINK 54, 56 KURO LINK Setting 58 L Language 24, 56 Long Life Settings 28, 76, 82 M MOVIE 10, 27, 31 multi-screen 43 - Pioneer PRO-101FD | Owner's Manual - Page 106
OF CANADA, INC. 300 Allstate Parkway, Markham, Ontario L3R 0P2, Canada TEL: 1-877-283-5901, 905-479-4411 PIONEER EUROPE NV Haven 1087, Keetberglaan 1, B-9120 Melsele, Belgium TEL: 03/570.05.11 PIONEER ELECTRONICS ASIACENTRE PTE. LTD. 253 Alexandra Road, #04-01, Singapore 159936 TEL: 65-6472-7555
-
 1
1 -
 2
2 -
 3
3 -
 4
4 -
 5
5 -
 6
6 -
 7
7 -
8
-
9
-
10
-
11
-
12
-
13
-
14
-
15
-
16
-
17
-
18
-
19
-
20
-
21
-
22
-
23
-
24
-
25
-
26
-
27
-
28
-
29
-
30
-
31
-
32
-
33
-
34
-
35
-
36
-
37
-
38
-
39
-
40
-
41
-
42
-
43
-
44
-
45
-
46
-
47
-
48
-
49
-
50
-
51
-
52
-
53
-
54
-
55
-
56
-
57
-
58
-
59
-
60
-
61
-
62
-
63
-
64
-
65
-
66
-
67
-
68
-
69
-
70
-
71
-
72
-
73
-
74
-
75
-
76
-
77
-
78
-
79
-
80
-
81
-
82
-
83
-
84
-
85
-
86
-
87
-
88
-
89
-
90
-
91
-
92
-
93
-
94
-
95
-
96
-
97
-
98
-
99
-
100
-
101
-
102
-
103
-
104
-
105
-
106
 |
 |
