Pioneer SC-99 Owner s Manual
Pioneer SC-99 Manual
 |
View all Pioneer SC-99 manuals
Add to My Manuals
Save this manual to your list of manuals |
Pioneer SC-99 manual content summary:
- Pioneer SC-99 | Owner s Manual - Page 1
Operating Instructions AV Receiver 99 SC97 SC- - Pioneer SC-99 | Owner s Manual - Page 2
exclamation point within an equilateral triangle is intended to alert the user to the presence of important operating and maintenance (servicing) instructions in the literature accompanying the appliance. D3-4-2-1-1b_A1_En WARNING This equipment is not waterproof. To prevent a fire or shock hazard - Pioneer SC-99 | Owner s Manual - Page 3
Name: AV Receiver Model Number: SC-99 Responsible Party Name: PIONEER ELECTRONICS (USA) INC. SERVICE SUPPORT DIVISION Address: 1925 E. DOMINGUEZ ST , feet and ankles). D8-9-2-7-4_A1_En This device complies with Industry Canada licence-exempt RSS standard(s). Operation is subject to the following two - Pioneer SC-99 | Owner s Manual - Page 4
Thank you for buying this Pioneer product. Please read through these operating instructions so you will know how to operate built into this receiver 51 Setting by referring to the operating instructions...53 Setting network connection...53 Automatically conducting optimum sound tuning (Full - Pioneer SC-99 | Owner s Manual - Page 5
Manual speaker setup...113 MHL Setup...115 The Other Setup menu...116 Making network settings using Safari...119 Using Safari to set a friendly name...119 Using Safari to update the firmware...119 13 FAQ Troubleshooting...122 Power...122 No sound...122 Other audio problems Setting Guide...140 About - Pioneer SC-99 | Owner s Manual - Page 6
PRO menu (page 104 ) ! The System Setup and Other Setup menus (page 112 ) j 14 Making maximum use of the remote control ! Operating multiple receivers (page 99) ! Setting the remote to control other components (page - Pioneer SC-99 | Owner s Manual - Page 7
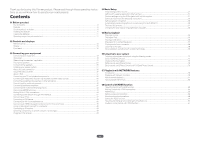
Before you start Our philosophy...8 Features...8 Checking what's in the box...10 Installing the receiver...11 Loading the batteries...11 Operating range of remote control unit 11 7 - Pioneer SC-99 | Owner s Manual - Page 8
SC-99 and SC-97 have received the AIR Studios Monitor certification. Pioneer has match the viewing environment or your taste by manual correction. % Virtual Speakers By turning on channel environment. Video % Ultra HD (with 4K/60p video support) - Pass-through and upscaling Up to 4K/60p resolution - Pioneer SC-99 | Owner s Manual - Page 9
-Fi mobile device. % Spotify Connect Spotify is a digital music-streaming service that gives you access to millions of songs instantly. This receiver is a gap. Connectivity % USB-DAC (NATIVE DSD and LPCM transmission supported) SC-99 only Music files on a computer can be played by connecting the - Pioneer SC-99 | Owner s Manual - Page 10
network. In addition, Interactive Operation Guide can also be used, which visually with HDZONE, ZONE 2 and ZONE 3. HDZONE supports HD audio/video streaming to a separate room Onkyo & Pioneer Corporation. Unauthorized transfer, duplication, broadcast, public transmission, translation, sales, lending - Pioneer SC-99 | Owner s Manual - Page 11
01 Before you start Installing the receiver ! When installing this unit, make sure to put it on a level and stable surface. ! Don't install it on the following places: - on a color TV (the screen may distort) - near a cassette deck (or close to a device that gives off a magnetic field). This may - Pioneer SC-99 | Owner s Manual - Page 12
Controls and displays Remote control...13 Display...15 Front panel...16 12 - Pioneer SC-99 | Owner s Manual - Page 13
zone. 4 SOURCE CONTROL buttons Switches the input. Also, switches remote control operation mode for operating other devices or each input (TUNER, etc.) (page 99 ). The input for HDMI , NET and ALL switches each time these buttons are pressed. 5 TV control buttons These buttons can be used to - Pioneer SC-99 | Owner s Manual - Page 14
02 13 u SOURCE Press to turn on/off the power to the Pioneer device connected to the receiver. 14 Remote control LED Lights when a command is sent from the remote control. 15 first and then press this button. 18 RCU SETUP Used to set the remote control (page 99 ). Controls and displays 14 - Pioneer SC-99 | Owner s Manual - Page 15
02 Controls and displays Display 1 2 3 4 5 6 7 8 9 10 11 12 13 14 15 AUTO L C HDMI DIGITAL ANALOG SL XL XC LFE AUTO SURROUND STREAM DIRECT R DIGITAL PLUS DSD PCM FULL BAND SR TrueHD MULTI-ZONE PQLS ALC DTS HD ES 96/24 S.RTRV SOUND UP MIX XR MSTR CD TUNER PHONO iPod DVD TV BD - Pioneer SC-99 | Owner s Manual - Page 16
02 Controls and displays Front panel 1 2 3 4 3 5 5 Remote sensor Receives the signals from the remote control (page 11 ). 6 6 MASTER VOLUME dial 7 Front panel controls To access the front panel controls, catch the sides of the door with your fingers and pull forward. INPUT - Pioneer SC-99 | Owner s Manual - Page 17
02 21 iPod/iPhone terminals Use to connect your Apple iPod/iPhone as an audio source (page 47 ), or connect a USB device for audio and photo playback (page 48 ). 22 HDMI 5 INPUT terminal Use for connection to a compatible HDMI device (Video camera, etc.) (page 48 ). Controls and displays - Pioneer SC-99 | Owner s Manual - Page 18
Connecting your equipment Connecting your equipment...19 Rear panel...19 Determining the speakers' application 20 Placing the speakers...24 Connecting the speakers...26 Installing your speaker system...27 About the audio connection...36 About the video converter...37 About HDMI...37 Connecting your - Pioneer SC-99 | Owner s Manual - Page 19
names may differ from the explanations in this manual. Also refer to the operating instructions of the respective devices. Important ! Illustration shows the SC-99, however connections for the SC-97 are the same except where noted. Rear panel SC-99 Y IN 1 (SAT/ CBL) IN 2 (DVD) MONITOR OUT NETWORK - Pioneer SC-99 | Owner s Manual - Page 20
should be connected differ according to the speaker layout/usage pattern. Select one speaker layout/usage pattern before connecting the speakers. For instructions on connections, see Installing your speaker system on page 27 . However, the 5.2 +ZONE 2+ZONE 3 and Multi-ZONE Music settings can be - Pioneer SC-99 | Owner s Manual - Page 21
03 Connecting your equipment ! Speaker System setting: 7.2.4ch SB Pre out, 7.2.4ch Front Pre out - Speaker Setting TFw: Dolby Sp (Front) and TBw: Dolby Sp (Surr) TBwL SL TFwL TFwR C L R SW1 SW2 TBwR SR SBL SBR - Speaker Setting TFw: Dolby Sp (Front) and TBw: Dolby Sp (SB) TFwL C L SL - Pioneer SC-99 | Owner s Manual - Page 22
03 Connecting your equipment [E] 7.2.4 channel surround (Front Pre Out) connection ! Speaker System setting: 7.2.4ch Front Pre out TBwL TBwR TFwL TFwR L C R SL SW1 SW2 SR SBL SBR A 7.2.4 ch surround system connects the left and right front speakers (L/R), the center speaker (C), the - Pioneer SC-99 | Owner s Manual - Page 23
03 Connecting your equipment [I] 5.2 channel surround system & Front Bi-amping connection (High quality surround) & HDZONE connection (Multi Zone) ! Speaker System setting: 5.2 Bi-Amp+HDZONE Main zone Front Bi-Amp HDZONE Sub zone C L R SW1 SL SW2 SR L R With these connections you can - Pioneer SC-99 | Owner s Manual - Page 24
03 Connecting your equipment [M] 5.2 channel surround system & Center and Surround Bi-amping connection (High quality surround) ! Speaker System setting: 5.2ch C+Surr Bi-Amp C L SW1 Center Bi-Amp SW2 R SL SR Surround Bi-Amp Bi-amping connection of the center and surround speakers for high - Pioneer SC-99 | Owner s Manual - Page 25
quality of the sound. The following guidelines should help you to get the best sound from your system. ! The subwoofer can be placed on the floor. the leading edge of the front left and right speakers. ! It is best to angle the speakers towards the listening position. The angle depends on the - Pioneer SC-99 | Owner s Manual - Page 26
these up with the terminals on the speakers themselves. This unit supports speakers with a nominal impedance of 4 W to 16 W. CAUTION amping the speakers or you could severely damage the amplifier. See your speaker manual for more information. ! If your speakers have a removable crossover network, - Pioneer SC-99 | Owner s Manual - Page 27
03 Connecting your equipment Bi-wiring your speakers Your speakers can also be bi-wired if they support bi-amping. ! With these connections, the Speaker System setting makes no difference. CAUTION ! Don't connect different speakers from the same terminal in this way. ! When - Pioneer SC-99 | Owner s Manual - Page 28
03 Connecting your equipment [B] Dolby Enabled Speaker system connection Top middle channel connection ! When Speaker System is set to 7.2.2/5.2.2/7.2ch (page 113 ) - When TMd is set to Dolby Sp (Front) in Speaker Setting (page 114) Dolby Enabled Speaker Subwoofer 1 Top middle right Front - Pioneer SC-99 | Owner s Manual - Page 29
03 Connecting your equipment - When TMd is set to Dolby Sp (SB) in Speaker Setting (page 114 ) Front right Subwoofer 1 Center Subwoofer 2 LINE LEVEL INPUT LINE LEVEL INPUT Front left SUBWOOFER FRONT CENTER SURROUND SURR BACK T MIDDLE EXTRA 1 EXTRA 2 1 (Single) SPEAKERS R FRONT 2 - Pioneer SC-99 | Owner s Manual - Page 30
03 Connecting your equipment - When TFw is set to Dolby Sp (Front), and TBw is set to Dolby Sp (SB) in Speaker Setting (page 114 ) Dolby Enabled Speaker Dolby Enabled Speaker Top forward right Subwoofer 1 LINE LEVEL INPUT Center Subwoofer 2 LINE LEVEL INPUT Top forward left Front right - Pioneer SC-99 | Owner s Manual - Page 31
03 Connecting your equipment [D] 7.2.4 channel surround (Surround back Pre Out) connection ! Select '7.2.4ch SB Pre out' from the Speaker System menu. See Speaker system setting on page 113 to do this. ! Surround back is output from the PRE OUT EXTRA 2 terminals of the receiver. Connect the EXTRA - Pioneer SC-99 | Owner s Manual - Page 32
03 Connecting your equipment [F] 7.2.2 channel surround system & Front Bi-amping connection (High quality surround) ! Select '7.2.2ch Front Bi-Amp' from the Speaker System menu. See Speaker system setting on page 113 to do this. ! When only connecting one surround back speaker, connect it to the - Pioneer SC-99 | Owner s Manual - Page 33
03 Connecting your equipment [H] 7.2 channel surround system & HDZONE connection (Multi Zone) ! Select '7.2ch + HDZONE' from the Speaker System menu. See Speaker system setting on page 113 to do this. ! When only connecting one surround back speaker, connect it to the SURROUND BACK L (Single) - Pioneer SC-99 | Owner s Manual - Page 34
03 Connecting your equipment [J] 5.2 channel surround system & Speaker B Bi-amping connection ! Select '5.2ch + SP-B Bi-Amp' from the Speaker System menu. See Speaker system setting on page 113 to do this. Front right Subwoofer 1 Center Subwoofer 2 Front left LINE LEVEL INPUT LINE LEVEL - Pioneer SC-99 | Owner s Manual - Page 35
03 Connecting your equipment [L] 5.2 channel surround system & Front and Center Bi-amping connection (High quality surround) ! Select '5.2ch F+C Bi-Amp' from the Speaker System menu. See Speaker system setting on page 113 to do this. Bi-amp compatible speaker Front right Bi-amp compatible - Pioneer SC-99 | Owner s Manual - Page 36
03 Connecting your equipment [N-1] Multi-ZONE Music connection [N-2] 5.2 channel surround system & ZONE 2/HDZONE connection (Multi Zone) [N-3] 5.2 channel surround system & ZONE 2/ZONE 3 connection (Multi Zone) See Speaker system setting on page 113 to do this. ! [N-1] Speaker System setting: - Pioneer SC-99 | Owner s Manual - Page 37
Y PB PR COMPONENT VIDEO MONITOR OUT (SC-99 only) VIDEO MONITOR OUT Video signals can but so long as there is no problem with displaying video this is not a malfunction make sure that the component connected to this receiver also supports the corresponding format. ! Use a High Speed HDMI®/TM - Pioneer SC-99 | Owner s Manual - Page 38
When the TV and receiver are connected by HDMI connections, if the TV supports the HDMI ARC (Audio Return Channel) function, the sound of the TV refer to the TV's operation manual for directions on connections and setup for the TV. ! If the TV to be connected using HDMI supports 4K/60p, you can - Pioneer SC-99 | Owner s Manual - Page 39
38 ). - When the TV and receiver are connected by HDMI connections, if the TV supports the HDMI ARC (Audio Return Channel) function, the sound of the TV can be input DIGITAL AUDIO ASSIGNABLE 1 - 2 COAXIAL IN 1 IN 2 (SAT/CBL) (DVD) IN 1 IN 2 OPTICAL (TV) (DVR/BDR) ( 5 V 0.9 A ) OUT SC-99 only 39 - Pioneer SC-99 | Owner s Manual - Page 40
both HDMI and other video output (composite, etc.) simultaneously, and it may be necessary to make video output settings. Please refer to the operating instructions supplied with your player for more information. ! If you want to listen to the sound of the TV over the receiver, connect the receiver - Pioneer SC-99 | Owner s Manual - Page 41
03 Connecting your equipment Connecting a satellite/cable receiver or other set-top box Satellite and cable receivers, and terrestrial digital TV tuners are all examples of so-called 'set-top boxes'. When you set up the receiver you'll need to tell the receiver which input you connected the set- - Pioneer SC-99 | Owner s Manual - Page 42
03 Connecting your equipment Connecting other audio components This receiver has both digital and analog inputs, allowing you to connect audio components for playback. When you set up the receiver you'll need to tell the receiver which input you connected the component to (see also The Input Setup - Pioneer SC-99 | Owner s Manual - Page 43
SC-99 only For your Blu-ray Disc player and DVD player may have 5.1, 6.1 or 7.1 channel analog outputs (depending on whether your player supports MULTI CH IN ! For instructions on playing the multichannel analog best reception. 5 Connect the FM wire antenna into the FM antenna socket. For best - Pioneer SC-99 | Owner s Manual - Page 44
terminals without disconnecting the supplied AM loop antenna. For the best possible reception, suspend horizontally outdoors. Outdoor antenna ANTENNA FM apply when one of the above inputs is selected for the HDZONE. ! SC-99 only: If you wish to select USB-DAC for HDZONE, set Speaker System - Pioneer SC-99 | Owner s Manual - Page 45
03 Connecting your equipment Basic MULTI-ZONE setup (ZONE 2) % Connect a separate amplifier to the AUDIO ZONE 2 OUT jacks on this receiver. You should have a pair of speakers attached to the sub zone amplifier as shown in the following illustration. Sub zone (ZONE 2) Main zone AUDIO IN RL - Pioneer SC-99 | Owner s Manual - Page 46
03 Connecting your equipment MULTI-ZONE setup using HDMI terminal (HDZONE) Important ! MAIN/HDZONE at ZONE Setup must be set to HDZONE in order to use the HDZONE function (page 117 ). ! To use the HDZONE functions, set Control or Control Mode in HDMI Setup to OFF. For details, see HDMI Setup on - Pioneer SC-99 | Owner s Manual - Page 47
with an ISP (Internet Service Provider) beforehand. When connected necessary to set up the network manually. For details, see Setting network to the receiver. For details on supported models and versions of the respec connection, also refer to the operating instructions for your iPod. ! When connecting - Pioneer SC-99 | Owner s Manual - Page 48
panel of this receiver. ! This receiver does not support a USB hub. ! For instructions on playing the USB device, see Playing a 6 7 //MHL ( 5 V 0.9 A ) Using a USB cable to connect to a computer SC-99 only By using a USB cable (sold separately) to connect this unit's USB-DAC IN terminal to the - Pioneer SC-99 | Owner s Manual - Page 49
receiver to link it to the IR receiver. Please see the manual supplied with your IR receiver for the type of cable necessary for cord once in a while. If you find it damaged, ask your nearest Pioneer authorized independent service company for a replacement. ! Do not use any power cord other than - Pioneer SC-99 | Owner s Manual - Page 50
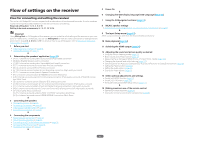
special application (Start-up Navi 51 Perform settings using the AVNavigator built into this receiver 51 Setting by referring to the operating instructions 53 Setting network connection...53 Automatically conducting optimum sound tuning (Full Auto MCACC 59 The Input Setup menu...61 Changing the - Pioneer SC-99 | Owner s Manual - Page 51
start the special application, the settings can be done according to the instructions by the application. ! For those using an iPad, iPhone, or iPod 5 (OS 4.4.4) ! AVNavigator uses an Internet browser. The following browsers are supported: - Windows PC: Internet Explorer® 8, 9, 10, 11 - Mac/iPad/ - Pioneer SC-99 | Owner s Manual - Page 52
SC-99> or displayed in 'Bonjour' on the Bookmarks bar. Basic Setup ! When using an iPad/iPhone/iPod touch, from the App Store, download iControlAV5, which is a free application. After launching iControlAV5, follow the instructions easily. ! Interactive Operation Guide - The receiver will be - Pioneer SC-99 | Owner s Manual - Page 53
by referring to the operating instructions Use HOME MENU when referring to the operating instructions for various settings. About 53 ). ! MCACC PRO - Use this to make automatic settings and detailed manual settings for the surround sound. For details, see Making receiver settings from the MCACC - Pioneer SC-99 | Owner s Manual - Page 54
are neces- sary. Check the setting value with the provider or network administrator in advance when executing the settings. Also refer to the user's manual for network equipment. ! IP Address The IP address to be entered must be defined within the following ranges. If the IP address defined is - Pioneer SC-99 | Owner s Manual - Page 55
04 Basic Setup C: Perform this receiver's settings using the iOS equipment (iOS version 7.1 or later) The Wi-Fi settings of your iPod/iPhone/iPad (equipment with iOS version 7.1 or later) can be applied to this receiver. ! The iOS equipment and router must be connected through Wi-Fi. ! Check that - Pioneer SC-99 | Owner s Manual - Page 56
on wireless LAN equipment that is WPS-compatible. Follow the instructions shown on the screen of this receiver. This setting method is depending on wireless LAN equipment. For details, refer to the user's manual of the wireless LAN equipment. E: Automatically setting wireless LAN connection - Pioneer SC-99 | Owner s Manual - Page 57
on your computer. [Pioneer Setup:xxxxxxxx] will be shown in the SSID field. "xxxxxxxx" represents a number unique to each product. 000001 000002 000003 XX.XX :xxxxxx ! For your computer, iPhone, tablet computer, or wireless equipment, refer to the respective user's manual. ! Because this - Pioneer SC-99 | Owner s Manual - Page 58
04 Basic Setup H: Directly connecting this receiver with a smart phone by wireless (Wireless Direct) 1 Select 'Network Connection' from the Network, Bluetooth menu. 2 Select 'Wireless Direct' from the Network Connection menu. 3 Select 'Security Protocol' at i/j. 4 Select the encryption method with - Pioneer SC-99 | Owner s Manual - Page 59
press ENTER. 3 Select 'YES' and press ENTER. Parental Lock Set restrictions for using Internet services. Also set the password accompanying the usage restrictions. ! Upon shipment from the factory, the PHONES MCACC SETUP MIC (HDMI) 5V 1 A HDMI 5 INPUT SC-99 Microphone SC-97 Tripod 59 - Pioneer SC-99 | Owner s Manual - Page 60
Select 'START', then press ENTER. 6 Follow the instructions on-screen. Make sure the microphone is connected, and nections. If there doesn't seem to be a problem, you can simply use i/j to select the speaker is also possible to adjust these settings manually using The MCACC PRO menu on page - Pioneer SC-99 | Owner s Manual - Page 61
Problems if necessary. If there are any instructions showing in the front panel display, please menu. 3.System Setup a.Input Setup b.HDMI Setup c.Manual SP Setup Exit Return d.MHL Setup e.OSD Language f. For details, see HDMI Setup on page 85 . a SC-99 only b When ARC at HDMI Setup is set to ON - Pioneer SC-99 | Owner s Manual - Page 62
the OSD display language (OSD Language) The language used on the Graphical User Interface screen can be changed. ! The explanations in these operating instructions are for when English is selected for the GUI screen. ! With factory default settings, the on-screen display will be output from all - Pioneer SC-99 | Owner s Manual - Page 63
Basic playback Playing a source...64 Playing an iPod...65 Playing a USB device...66 Playing an MHL-compatible device 67 Playing music from a computer...68 Listening to the radio...68 Music playback using Bluetooth wireless technology 69 63 - Pioneer SC-99 | Owner s Manual - Page 64
05 Basic playback Playing a source Here are the basic instructions for playing a source (such as a DVD disc) with converted. In this case, use an analog video connection. Selecting the multichannel analog inputs SC-99 only If you have connected a decoder or a DVD player as above, you must - Pioneer SC-99 | Owner s Manual - Page 65
and tested for the software version of iPod/iPhone indicated on the website of Pioneer. http://pioneer.jp/homeav/support/ios/na/ ! Installing software versions other than indicated on the website of Pioneer to your iPod/iPhone may result in incompatibility with this receiver. ! iPod and iPhone - Pioneer SC-99 | Owner s Manual - Page 66
digital audio players (MP3 players) of format FAT16/32. ! Pioneer cannot guarantee compatibility (operation and/or bus power) with all adapter (supplied with the device) for USB power. If this doesn't remedy the problem, it is likely your USB device is incompatible. Playing back audio files stored on - Pioneer SC-99 | Owner s Manual - Page 67
9 may be playable but some parts of the specification are not supported; specifi- cally, Pro, Lossless, Voice. d Uncompressed FLAC files are not supported. Pioneer does not guarantee playback. e 32 kHz, 176.4 kHz and 192 kHz support 2-channel audio sources only. f DSD files cannot be played in the - Pioneer SC-99 | Owner s Manual - Page 68
from a computer SC-99 only Use this may not be produced if your computer does not support USB 2.0 HS. ! This unit does not support use of a USB hub. Always use a in to FM and AM radio broadcasts using the automatic (search) and manual (step) tuning functions. If you already know the frequency of the - Pioneer SC-99 | Owner s Manual - Page 69
that do not have Bluetooth functionality. Please refer to the user's manual for your Bluetooth capable device for more details. Notes ! The Bluetooth wireless technology enabled device must support A2DP profiles. ! Pioneer does not guarantee proper connection and operation of this unit with all - Pioneer SC-99 | Owner s Manual - Page 70
capable device close to the unit. ! Please refer to the user's manual for your Bluetooth capable device for details on when pairing can be per- the equipment that has the Bluetooth functionality is "SC-99 XXXXXX (equipment unique symbol)" or "SC-97 XXXXXX (equipment unique symbol)". ! When PIN - Pioneer SC-99 | Owner s Manual - Page 71
noise appears in your television image, there is the possibility that a Bluetooth wireless technology enabled device or this unit (including products supported by this unit) are causing signal interference with the antenna input connector of your television, video, satellite tuner, etc. In this - Pioneer SC-99 | Owner s Manual - Page 72
Listening to your system Enjoying various types of playback using the listening modes 73 Selecting MCACC presets...75 Choosing the input signal...75 Better sound using Phase Control 75 Better sound using Phase Control and Full Band Phase Control 76 72 - Pioneer SC-99 | Owner s Manual - Page 73
Neo:X CINEMA, Neo:X MUSIC, or Neo:X GAME mode, C.GAIN can be adjusted (page 89 ). ! When listening through headphones, you can select STEREO mode only. ! SC-99 only: When playing DSD sources via USB-DAC, the NATIVE DSD mode is set. Other modes cannot be selected. ! When Dolby Surround is selected - Pioneer SC-99 | Owner s Manual - Page 74
, SOUND RETRIEVER AIR (only with the BT AUDIO input), PHONES SURR, ECO MODE 1 and ECO MODE 2 can be selected. About Dolby Atmos This AV receiver supports the latest Dolby Atmos surround sound system. Dolby Atmos is a new technology in which, through real time calculation of audio data and meta data - Pioneer SC-99 | Owner s Manual - Page 75
connections (page 36 ) and set the signal input to DIGITAL. ! Some DVD players don't output DTS signals. For more details, refer to the instruction manual supplied with your DVD player. 1 Press MAIN RECEIVER to switch the remote control to the receiver operation mode, and then press AUDIO P.. 2 Use - Pioneer SC-99 | Owner s Manual - Page 76
the speakers calibrated and the corrected characteristics of group delay can be displayed in 3-dimension on your PC. For details, refer to the operating instructions for the MCACC PRO PC Display Application Software included on the CD-ROM. ! Depending on the input signal and listening mode, it may - Pioneer SC-99 | Owner s Manual - Page 77
Playback with NETWORK features Introduction...78 Playback with Network functions 79 About network playback...81 About playable file formats...83 77 - Pioneer SC-99 | Owner s Manual - Page 78
service exclusively for use with the Pioneer with an ISP (Internet Service Provider) beforehand. ! Photo This receiver supports this DMR function Pioneer website. http://pioneer.jp/homeav/support/ set up the network manually. Otherwise, you cannot play authorize this receiver manually on the PC - Pioneer SC-99 | Owner s Manual - Page 79
Pioneer website for up to date information about compatible devices and audio format support. http://www.pioneerelectronics.com/htc (for USA) http://www.pioneerelectronics.ca/htc (for Canada song. For detailed operating instructions, refer to the section the Internet, as services are not transmitted - Pioneer SC-99 | Owner s Manual - Page 80
this receiver is created, edited, and managed by the vTuner database service exclusively for use with this receiver. For details about vTuner, see vTuner ://www.radio-pioneer.com Access the above site and use the access code in step 3 to perform user registration, following the instructions on the - Pioneer SC-99 | Owner s Manual - Page 81
some setting changes of software or other devices may be required. Please refer to the operating instructions for the software or device for more information. DLNATM, the DLNA Logo and DLNA CERTIFIEDTM are trademarks, service marks, or certification marks of the Digital Living Network Alliance. 81 - Pioneer SC-99 | Owner s Manual - Page 82
supported depending on the server type or version used. ! Supported file formats vary by server. As such, files not supported PIONEER OR ITS CUSTOMER SERVICES REPRESENTATIVES WILL CREATE ANY SUCH WARRANTY. IN NO EVENT WILL PIONEER If there are problems within the network ). For best performance, - Pioneer SC-99 | Owner s Manual - Page 83
or below. d Files encoded using Windows Media Codec 9 may be playable but some parts of the specification are not supported; specifically, Pro, Lossless, Voice. e Uncompressed FLAC files are not supported. Pioneer does not guarantee playback. f DSD files cannot be played in the sub zone. 83 - Pioneer SC-99 | Owner s Manual - Page 84
Control with HDMI function About the Control with HDMI function 85 Making Control with HDMI connections 85 HDMI Setup...85 Before using synchronization...86 About synchronized operations...86 Setting the PQLS function...87 About Sound Retriever Link and Stream Smoother Link 87 Cautions on the - Pioneer SC-99 | Owner s Manual - Page 85
not support Control with HDMI. ! We only guarantee this receiver will work with Pioneer settings, etc., refer to also the operating instructions for each component. Making Control with HDMI caused by timing errors (jitter), giving you the best possible digital-to-analog conversion when you use the - Pioneer SC-99 | Owner s Manual - Page 86
in effect even if the receiver's input is switched to a component other than one connected by HDMI. The operations below can also be used on Pioneer Control with HDMI-compatible TVs. ! When the receiver's volume is adjusted or the sound is muted, the volume status is displayed on the TV's screen - Pioneer SC-99 | Owner s Manual - Page 87
works when playing CDs. Please refer to the operating instructions supplied with your player for more information. This function errors (jitter), giving you the best possible digital-to-analog conversion when you with HDMI function. When a player supporting the respective function is connected to - Pioneer SC-99 | Owner s Manual - Page 88
Using other functions Setting the Audio options...89 Setting the Video options...91 Switching the output (OUTPUT PARAMETER 93 HDMI 4K/60p signal input setting 94 Changing the channel level while listening 94 Using the MULTI-ZONE controls...95 Making an audio or a video recording 96 Network - Pioneer SC-99 | Owner s Manual - Page 89
the sound's sense of density and modulation. Also, when a player supporting the Sound Retriever Link function is connected to the receiver by HDMI 's sampling frequency and bit rate to achieve high quality playback sound. MANUAL AUTO Creates a wider dynamic range with digital sources like CDs, DVDs - Pioneer SC-99 | Owner s Manual - Page 90
Please select another input signal if this is a problem. DRC (Dynamic Range Control) Adjusts the is 32 kHz. e ! This can be set when MANUAL is selected for AScale. ! This function does not work only available when the connected display supports the automatic audio/video synchronizing capability - Pioneer SC-99 | Owner s Manual - Page 91
a sampling frequency of 48 kHz or less. o ! This can be set when MANUAL is selected for V.SPs. ! You can't use the Virtual Height mode when the automatically turns on when network contents are played on the player supporting Stream Smoother Link and connected to this unit by HDMI (assuming - Pioneer SC-99 | Owner s Manual - Page 92
09 Setting YNR CNR BNR MNR DETAIL What it does Reduces noise in the luminance (Y) signal. Option(s) c d (The image is only an example for checking the effect.) Reduces noise in the input's color (C) signal. c 0 to +8 d Default: 0 c c 0 to +8 d Default: - Pioneer SC-99 | Owner s Manual - Page 93
1 and HDMI OUT 2 are switched. For details, see Switching the HDMI output on page 94 . ! The subwoofer output depends on the settings you made in Manual speaker setup on page 113 . However, if SP: B ON is selected above, no sound is heard from the subwoofer (the LFE channel is not downmixed - Pioneer SC-99 | Owner s Manual - Page 94
when connecting to a 4K/60p 4:4:4 24 bit compatible TV using HDMI. More high quality video images can be enjoyed. - When the HDMI cable does not support 4K/60p 4:4:4 24 bit (18 Gbps transmission), video image may not be output properly. In that case, select 4:2:0 to watch a 4K/60p 4:2:0 24 bit video - Pioneer SC-99 | Owner s Manual - Page 95
09 Using other functions Using the MULTI-ZONE controls The following steps use the front panel controls to adjust the sub zone volume and select sources. See ZONE 2 remote controls and HDZONE remote controls on page 95 . Important ! The settings must be changed at ZONE Setup in order to use the - Pioneer SC-99 | Owner s Manual - Page 96
the recorder if you are unsure how to do this. Most video recorders set the audio recording level automatically-check the component's instruction manual if you're unsure. 5 Start recording, then start playback of the source component. Network settings from a web browser Network settings and Pandora - Pioneer SC-99 | Owner s Manual - Page 97
09 Using other functions Resetting the system Use this procedure to reset all the receiver's settings to the factory default. Use the front panel controls to do this. Set MULTI-ZONE to MULTI ZONE OFF. ! Disconnect the iPod and USB memory device from the receiver beforehand. ! Set the Control with - Pioneer SC-99 | Owner s Manual - Page 98
Controlling the rest of your system About the Remote Setup menu...99 Operating multiple receivers...99 Setting the remote to control other components 99 Selecting preset codes directly...99 Programming signals from other remote controls 100 Erasing one of the remote control button settings 100 - Pioneer SC-99 | Owner s Manual - Page 99
. Setting What it does Change RC mode If you have multiple Pioneer receivers, amplifiers, etc., this setting can be used to prevent allow these devices to be operated. See Selecting preset codes directly on page 99 . Code learning If the desired operations cannot be performed even though you - Pioneer SC-99 | Owner s Manual - Page 100
) after assigning a preset code. The remote can store about 120 preset codes from other components (this has been tested with codes of Pioneer format only). Certain buttons represent operations that cannot be learned from other remote controls. The buttons available are shown below: STANDBY/ON - Pioneer SC-99 | Owner s Manual - Page 101
The All Zone Standby can be used to turn all zones to OFF when the receiver's power is switched to standby. Also, when using separate Pioneer amplifiers/receivers for the sub zones, they can also be set to standby simultaneously. ! In order to set the power of amplifiers/receivers connected to - Pioneer SC-99 | Owner s Manual - Page 102
codes (see Setting the remote to control other components on page 99 for more on this). Use the input function buttons to select ENTER - ENTER TOP MENU - LIST i/j/k/l ENTER TOOLS/GUIDE/ EPG USER MENU TOOLS GUIDE - i/j/k/l i/j/k/l i/j/k/l i/j/k/l - ENTER ENTER ENTER - Pioneer SC-99 | Owner s Manual - Page 103
10 Audio/Video components Button(s) u SOURCE Number buttons LD POWER ON/OFF numerics CLR +10 ENTER (CLASS) ENTER TOP MENU i/j/k/l ENTER d e g m n o p AUDIO - i/j/k/l ENTER - RETURN d e g m n o p AUDIO DISP DISPLAY/INFO a Controls for MD. b Controls for SACD. CD/CD-R/SACD POWER ON/OFF - Pioneer SC-99 | Owner s Manual - Page 104
The MCACC PRO menu Making receiver settings from the MCACC PRO menu 105 Automatic MCACC (Expert)...105 Manual MCACC setup...107 Checking MCACC Data...109 Data Management...110 104 - Pioneer SC-99 | Owner s Manual - Page 105
The MCACC (Multi Channel ACoustic Calibration) PRO system was developed in Pioneer's laboratories with the aim of making it possible for home users to to calibrate the sound field automatically and fine-adjust the sound field data manually. 1 Press u STANDBY/ON to switch on the receiver and your TV - Pioneer SC-99 | Owner s Manual - Page 106
5V 1 A HDMI 5 INPUT SC-99 Microphone SC-97 Tripod If you have a tripod then press ENTER. 5 Follow the instructions on-screen. 6 Wait for the displayed isn't correct), there may be a problem with the speaker connection. If selecting RETRY the setting manually using the Manual speaker setup on - Pioneer SC-99 | Owner s Manual - Page 107
connect the microphone to this receiver. ! See Problems when using the Auto MCACC Setup on page 61 turn up the volume to the middle position. 1 Select 'Manual MCACC' from the MCACC PRO menu. See Making receiver on page 108 ). ! Precision Distance (SC-99 only) - Fine-adjusting the positions of - Pioneer SC-99 | Owner s Manual - Page 108
. If this happens, bring the level down until OVER! disappears from the display. 3 When you're finished, press RETURN. You will return to the Manual MCACC setup menu. Notes ! Changing the frequency curve of one channel too drastically will affect the overall balance. If the speaker bal- ance seems - Pioneer SC-99 | Owner s Manual - Page 109
graphical output on page 125 for troubleshooting information. 4 If you selected without reverb measurement, it is best to use the measurement results as on-screen. Precision Distance SC-99 only Before using this function RETURN. You will return to the Manual MCACC setup menu. Checking MCACC Data At - Pioneer SC-99 | Owner s Manual - Page 110
11 The MCACC PRO menu Speaker Setting Use this to display the speaker size and number of speakers. See Speaker Setting on page 114 for more on this. 1 Select 'Speaker Setting' from the MCACC Data Check menu. 2 Select the channel you want to check. Use i/j to select the channel. The corresponding - Pioneer SC-99 | Owner s Manual - Page 111
11 Copying MCACC preset data If you want to manually adjust the Acoustic Calibration EQ (see Manual MCACC setup on page 107 ), we recommend copying your current settings to an unused MCACC preset. Instead of just a flat EQ curve, this will give - Pioneer SC-99 | Owner s Manual - Page 112
System Setup and Other Setup menus Making receiver settings from the System Setup menu 113 Manual speaker setup...113 MHL Setup...115 The Other Setup menu...116 Making network settings using Safari 119 Using Safari to set a friendly name 119 Using Safari to update the firmware 119 112 - Pioneer SC-99 | Owner s Manual - Page 113
component video inputs (see The Input Setup menu on page 61 ). ! HDMI Setup - Synchronizes this receiver with your Pioneer component supporting Control with HDMI (page 84 ). ! Manual SP Setup - Sets the placement of the speakers, usage pattern, as well as the size, number, distance and overall - Pioneer SC-99 | Owner s Manual - Page 114
MCACC presets, and cannot be set independently. 1 Select 'Speaker Setting' from the Manual SP Setup menu. 2 Choose the set of speakers that you want to set, and SMALL alternatively and let your ears judge which sounds best. If you're having problems, the easiest option is to route all the bass - Pioneer SC-99 | Owner s Manual - Page 115
). 3 When you're finished, press RETURN. You will return to the Manual SP Setup menu. Speaker Distance For good sound depth and separation from your MHL-compatible device is charged. (This receiver supports charging of devices up to 0.9 A.) Note For best surround sound, make sure the surround back - Pioneer SC-99 | Owner s Manual - Page 116
of this receiver (page 116 ). ! Software Update - Use to update the receiver's software and check the version (page SC-99 only: Multi Ch In Setup - Specifies the optional settings for a multi-channel input (page 118) . ! Maintenance Mode - This is used to receive maintenance from a Pioneer service - Pioneer SC-99 | Owner s Manual - Page 117
back on and try updating the software again. If this message flashes, updating has failed. Update via a USB memory device. Put the update file on a USB mode. 4 Follow the instructions on the screen to change the remote control's setting. See Operating multiple receivers on page 99 . 5 When you're - Pioneer SC-99 | Owner s Manual - Page 118
re finished, press RETURN. You will return to the Other Setup menu. Multi Channel Input Setup SC-99 only You can adjust the level of the subwoofer for a multi-channel input. Also, when Maintenance Mode Only use this if so instructed by a Pioneer service engineer or custom installer. 118 - Pioneer SC-99 | Owner s Manual - Page 119
, select Network Setup. 4 Click Network Configuration. 5 Setup the network settings manually and then press Apply. The System Setup and Other Setup menus Using Safari menu screen, select Network Setup. 4 Click Firmware Update. Note This setting for the network has been confirmed for OS X v 10 - Pioneer SC-99 | Owner s Manual - Page 120
files have the extension "fw". Select a file with the extension "fw". The confirmation screen is displayed. If you continue the firmware update, press OK. Once the firmware update process starts, you cannot stop it. Wait until the file is uploaded (about one minute may be required depending on your - Pioneer SC-99 | Owner s Manual - Page 121
FAQ Troubleshooting...122 Power...122 No sound...122 Other audio problems...123 BT AUDIO...124 Video...124 Settings...125 Professional Calibration EQ graphical output 125 Display...125 Remote control...126 HDMI...126 MHL...127 Built-in - Pioneer SC-99 | Owner s Manual - Page 122
Troubleshooting Incorrect operations are often mistaken for trouble and malfunctions. If you think that there is something wrong with this component, check the points below. Sometimes the trouble a serious problem. Disconnect from the power and call a Pioneer authorized independent service company. - Pioneer SC-99 | Owner s Manual - Page 123
one speaker. No digital sound is output. SC-99 only: No sound is produced even if MULTI MULTI CH IN is selected. Other audio problems Symptom Remedy Speaker switching sound (clicking sound subwoofer, the setting where you think it has the best overall effect on the sound). Make sure the speaker - Pioneer SC-99 | Owner s Manual - Page 124
unit or the Bluetooth wireless technology device. Reset the pairing. Check that the profile is correct. Use a Bluetooth wireless technology device that supports A2DP profile and AVRCP profile. Video Symptom Remedy No image is output when an input is selected. Check the video connections of the - Pioneer SC-99 | Owner s Manual - Page 125
set up the surround sound manually (page 113 ). When using problem. Can't adjust the Fine Speaker Distance setting properly. Check that the speakers are all in phase (make sure the positive (+) and negative (-) terminals are matched up properly). SC-99 the TV does not support HDMI, watch this - Pioneer SC-99 | Owner s Manual - Page 126
multiple receivers on page 99 ). Check whether the problem still persists when connecting your HDMI component directly to your monitor, please consult the component or monitor manual or contact the manufacturer for support setting to on (see TV's operating instructions). Connect the TV to the HDMI - Pioneer SC-99 | Owner s Manual - Page 127
94) . When the HDMI cable does not support 4K/60p 4:4:4 24 bit (18 Gbps transmission), the MHL control mode. There is a problem with the power supply for the MHL middle of Wiring Navi, you are instructed to turn off the power of the Wiring Navi or Interactive Operation Guide is launched, a warning - Pioneer SC-99 | Owner s Manual - Page 128
control to the iPod USB control mode. There is a problem with the power supply for the USB memory. After turning using another server. Refer to the operation manual supplied with your server. The component connected work settings, security settings, etc. Supported file formats vary by server. For - Pioneer SC-99 | Owner s Manual - Page 129
file was recorded in a format supported by this receiver. Check whether consult with your network service provider if necessary application. If the above does not solve the problem, turn this unit's power off then back ZONE Setup to MAIN (page 59 ). SC-99 only: AirPlay or DMR mode cannot be used - Pioneer SC-99 | Owner s Manual - Page 130
SC-99 not in use. For audio device select "Pioneer USB Audio Device". Install the driver software on executing network settings. Refer to the user's manual for your router for information on SSID. key or shared key authentication. The receiver does not support WEP 152-bit length code key or shared key - Pioneer SC-99 | Owner s Manual - Page 131
notice...133 Surround sound formats...138 Auto Surround, ALC and Stream Direct with different input signal formats 139 Speaker Setting Guide...140 About messages displayed when using network functions 141 Important information regarding the HDMI connection 141 Cleaning the unit...141 Glossary - Pioneer SC-99 | Owner s Manual - Page 132
OS X are trademarks of Apple Inc., registered in the U.S. and other countries. The AirPlay logo is a trademark of Apple Inc. App Store is a service mark of Apple Inc. Windows 8 This product is Windows 8 Compatible. The terms HDMI and HDMI High-Definition Multimedia Interface, and the HDMI Logo are - Pioneer SC-99 | Owner s Manual - Page 133
DAMAGES (INCLUDING, BUT NOT LIMITED TO, PROCUREMENT OF SUBSTITUTE GOODS OR SERVICES; LOSS OF USE, DATA, OR PROFITS; OR BUSINESS INTERRUPTION) HOWEVER CAUSED owned by Bluetooth SIG, Inc. and any use of such marks by PIONEER CORPORATION is under license. Other trademarks and trade names are those of - Pioneer SC-99 | Owner s Manual - Page 134
(INCLUDING, BUT NOT LIMITED TO, PROCUREMENT OF SUBSTITUTE GOODS OR SERVICES; LOSS OF USE, DATA, OR PROFITS; OR BUSINESS INTERRUPTION) HOWEVER changes to the project, please see CONTRIBUTIONS file for more instructions. License This software may be distributed, used, and modified under - Pioneer SC-99 | Owner s Manual - Page 135
Use/Fair Use Rights. Nothing in this License is intended to reduce, limit, or restrict any rights arising from fair use, fair dealing, first sale or other limitations on the exclusive rights of the copyright owner under copyright law or other applicable laws. 3 License Grant. Subject to the terms - Pioneer SC-99 | Owner s Manual - Page 136
LIABLE FOR ANY DIRECT, INDIRECT, INCIDENTAL, SPECIAL, EXEMPLARY, OR CONSEQUENTIAL DAMAGES (INCLUDING, BUT NOT LIMITED TO, PROCUREMENT OF SUBSTITUTE GOODS OR SERVICES; LOSS OF USE, DATA, OR PROFITS; OR BUSINESS INTERRUPTION) HOWEVER CAUSED AND ON ANY THEORY OF LIABILITY, WHETHER IN CONTRACT, STRICT - Pioneer SC-99 | Owner s Manual - Page 137
NOT LIMITED TO, PROCUREMENT OF SUBSTITUTE GOODS OR SERVICES; LOSS OF USE, DATA, OR PROFITS; OR used in advertising or otherwise to promote the sale, use or other dealings in this Software without notice and this permission notice appear in supporting documentation, and that the name of M.I.T. - Pioneer SC-99 | Owner s Manual - Page 138
. The Contributing Authors and Group 42, Inc. specifically permit, without fee, and encourage the use of this source code as a component to supporting the PNG file format in commercial products. If you use this source code in a product, acknowledgment is not required but would be appreciated - Pioneer SC-99 | Owner s Manual - Page 139
14 Additional information DTS The DTS technologies are explained below. See http://www.dts.com for more detailed information. For DTS patents, see http://patents.dts.com. Manufactured under license from DTS Licensing Limited. DTS, DTS-HD, the Symbol, & DTS and the Symbol together are registered - Pioneer SC-99 | Owner s Manual - Page 140
ALC Channel decode Channel decode Speaker Setting Guide In order to achieve an even better sound field will seem cramped. Testing by the Pioneer Multi-channel Research Group has shown that a good for electric delay, and is not a problem. Positional relationship between speakers and monitor Position - Pioneer SC-99 | Owner s Manual - Page 141
display using an HDMI cable. Then use the most convenient connection (digital is recommended) for sending audio to the receiver. See the operating instructions for more on audio connections. Set the display volume to minimum when using this configuration. Notes ! If your display only has one HDMI - Pioneer SC-99 | Owner s Manual - Page 142
of the director as meta data, it is possible to customize play back for every home. ! Soundtracks are scaled to achieve best performance through your specific speaker system. ! Dolby Atmos uses a multi layering approach for building soundtracks. In combination with the conventional channel - Pioneer SC-99 | Owner s Manual - Page 143
function Synchronized operations below with a Control with HDMI-compatible Pioneer TV or Blu-ray Disc player are possible when the component configuration. This AV receiver supports both push-button configuration and PIN code configuration. SSID Abbreviation of Service Set IDentifier. A wireless - Pioneer SC-99 | Owner s Manual - Page 144
14 Bluetooth function Bluetooth wireless technology A short-range wireless communications standard for digital devices. Information is exchanged between devices several meters to several tens of meters apart using radio waves. It uses radio waves on the 2.4 GHz band which does not require - Pioneer SC-99 | Owner s Manual - Page 145
See Automatically conducting optimum sound tuning (Full Auto MCACC) on page 59 . Automatic MCACC (Expert) See Automatic MCACC (Expert) on page 105 . Manual MCACC setup See Manual MCACC setup on page 107 . PQLS See Setting the PQLS function on page 87. Phase Control See Better sound using Phase - Pioneer SC-99 | Owner s Manual - Page 146
Bluetooth profiles...A2DP, AVRCP Supported Codec...SBC (Subband Codec), AAC Digital In/Out Section HDMI terminal...19-pin (Not DVI) HDMI output type...5 V, 55 mA HDMI input/MHL terminal...5 V, 900 mA USB terminal...USB2.0 High Speed (Type A) 5 V, 1 A USB terminal (SC-99 only USB2.0 High Speed - Pioneer SC-99 | Owner s Manual - Page 147
-99...17.6 kg (38.8 lb) SC-97...17.5 kg (38.6 lb) Number of Furnished Parts MCACC Setup microphone...1 Remote control unit...1 AAA size IEC R03 dry cell batteries...2 AM loop antenna...1 FM wire antenna...1 Power cord CD-ROM Quick start guide Safety Brochure Warranty sheet Notes ! Specifications and - Pioneer SC-99 | Owner s Manual - Page 148
14 Preset code list You should have no problem controlling a component if you find the manufacturer in from another remote control (see Programming signals from other remote controls on page 100 ). TV Pioneer 0004, 0006, 0113, 0233, 0252, 0275, 0291, 0305 Admiral 0001, 0014 Adventura 0012 - Pioneer SC-99 | Owner s Manual - Page 149
) If operations are not possible using the preset codes below, you may be able to conduct operations with the preset codes for the DVD, BD. Pioneer 2078, 2099, 2107, 2260, 2261, 2264, 2265, 2266, Sharp 2267, 2275 Toshiba 2274 2109, 2144, 2193, 2194, 2195, 2270 Sony 2268, 2271, 2272, 2273, 2196 - Pioneer SC-99 | Owner s Manual - Page 150
6032 Philips 6113, 6114 Proscan 6110 Samsung 6114 Sonicview 6055, 6107 Sony 6062 Star Choice 6032 Tivo 6113, 6114, 6115, 6116 Cable Set Top Box Pioneer 0297, 6028, 6029, 6095, 6099, 6325, 6328, 6329 ABC 6122 Accuphase 6122 Amino 6077, 6078 Auna 6082 BCC 6072 Bell & Howell 6122 Bright House 6074 - Pioneer SC-99 | Owner s Manual - Page 151
service location, to purchase replacement parts, operating instructions, or accessories, please go to one of following URLs : Pour enregistrer votre produit, trouver le service FRANCE Tel :+33(0)969 368 050 "Pioneer" is a trademark of Pioneer Corporation, and is used under license. © 2015 Onkyo
-
 1
1 -
 2
2 -
 3
3 -
 4
4 -
 5
5 -
 6
6 -
 7
7 -
8
-
9
-
10
-
11
-
12
-
13
-
14
-
15
-
16
-
17
-
18
-
19
-
20
-
21
-
22
-
23
-
24
-
25
-
26
-
27
-
28
-
29
-
30
-
31
-
32
-
33
-
34
-
35
-
36
-
37
-
38
-
39
-
40
-
41
-
42
-
43
-
44
-
45
-
46
-
47
-
48
-
49
-
50
-
51
-
52
-
53
-
54
-
55
-
56
-
57
-
58
-
59
-
60
-
61
-
62
-
63
-
64
-
65
-
66
-
67
-
68
-
69
-
70
-
71
-
72
-
73
-
74
-
75
-
76
-
77
-
78
-
79
-
80
-
81
-
82
-
83
-
84
-
85
-
86
-
87
-
88
-
89
-
90
-
91
-
92
-
93
-
94
-
95
-
96
-
97
-
98
-
99
-
100
-
101
-
102
-
103
-
104
-
105
-
106
-
107
-
108
-
109
-
110
-
111
-
112
-
113
-
114
-
115
-
116
-
117
-
118
-
119
-
120
-
121
-
122
-
123
-
124
-
125
-
126
-
127
-
128
-
129
-
130
-
131
-
132
-
133
-
134
-
135
-
136
-
137
-
138
-
139
-
140
-
141
-
142
-
143
-
144
-
145
-
146
-
147
-
148
-
149
-
150
-
151
 |
 |

Operating Instructions
AV Receiver
SC-
97
SC-
99