Pioneer SVM 1000 SVM-1000 Operating Instructions - Page 36
Perform Utility Setup
 |
UPC - 012562870540
View all Pioneer SVM 1000 manuals
Add to My Manuals
Save this manual to your list of manuals |
Page 36 highlights
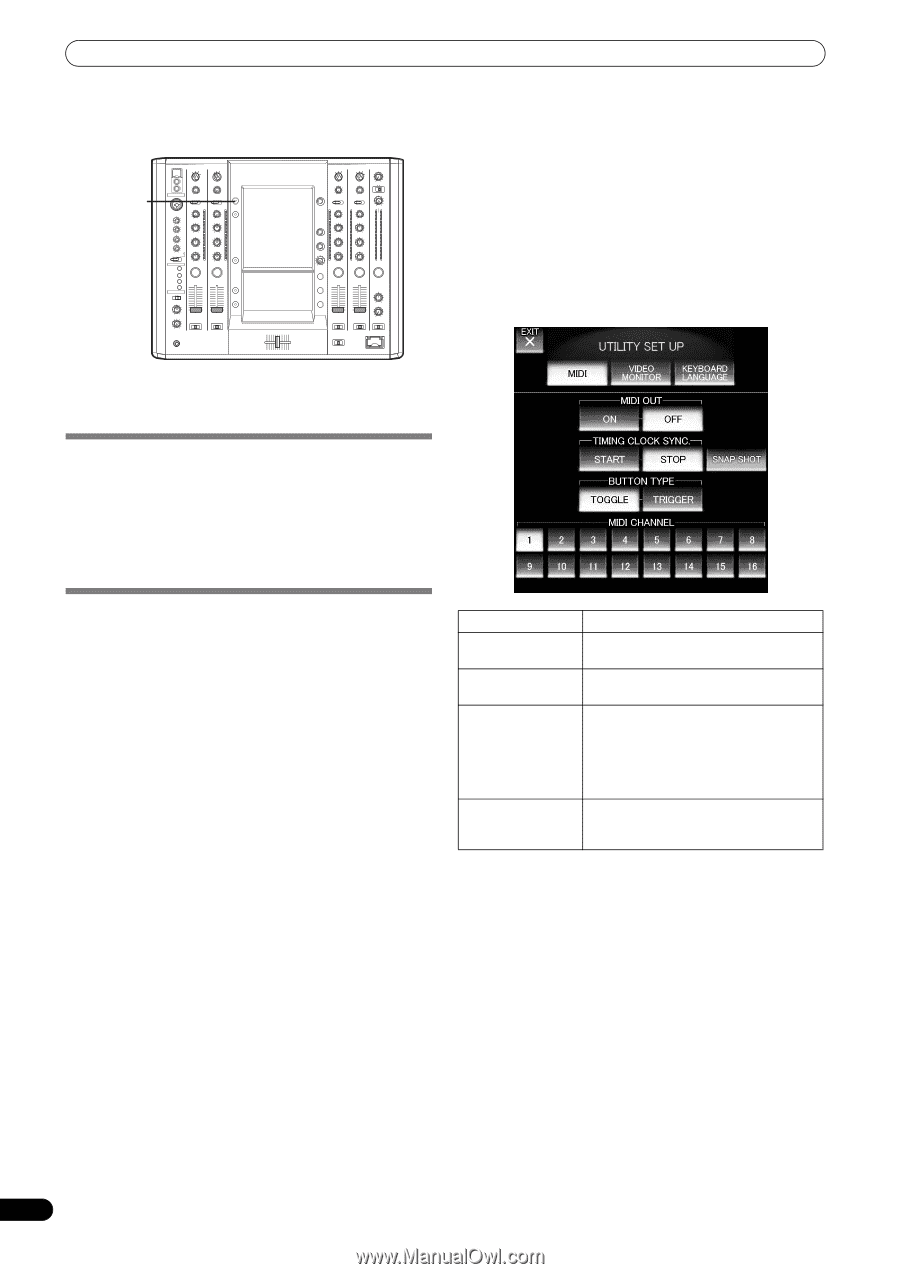
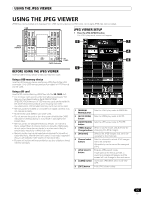
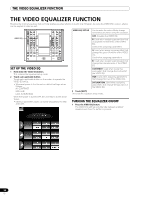
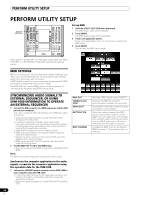
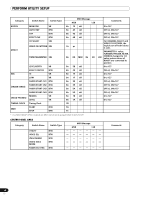
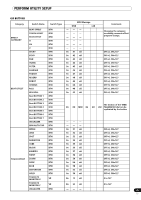
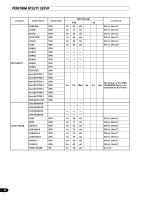
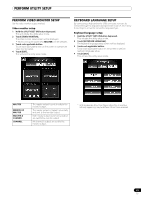
PERFORM UTILITY SETUP PERFORM UTILITY SETUP UTILITY (SET UP) HI Set up MIDI 1 Hold the UTILITY (SET UP) button depressed. The MIDI setup mode will be initiated. 2 Touch [MIDI]. The MIDI setup screen will be displayed. 10 10 9 9 8 8 7 7 6 6 5 5 4 4 3 3 2 2 1 1 0 0 3 Touch each applicable button. Touch each applicable button on the screen to operate the MIDI setup. 4 Touch [EXIT]. This will end the MIDI setup mode. When power is turned OFF, all utility setup values other than MIDI CHANNEL and KEYBOARD LANGUAGE revert to their default values. MIDI SETTINGS MIDI is an acronym for "Musical Instrument Digital Interface" and refers to a protocol developed for the exchange of data between electronic instruments and computers. A MIDI cable is used to connect components equipped with MIDI connectors to enable the transmission of data. The SVM-1000 will use the MIDI function to send operational information for hardware and BPM (timing clock). SYNCHRONIZING AUDIO SIGNALS TO EXTERNAL SEQUENCER, OR USING SVM-1000 INFORMATION TO OPERATE AN EXTERNAL SEQUENCER 1 Connect the DIN connector to a MIDI sequencer, and the USB port to your computer. This unit is equipped with both DIN type and USB type output connectors. • Supported operating systems include Windows Vista, Windows XP or Mac OSX. • For details regarding computer setup, refer to the instruction manual for your computer and operating system. For application setup instructions, refer to the instruction manual for the application involved. • Set the MIDI sequencer's synch mode to "Slave". • MIDI sequencers that do not support MIDI timing clock cannot be synchronized. • Synch may not be achieved if the track's BPM cannot be detected and measured stably. • BPM values set with the TAP mode can also be used to output the timing clock. 2 Set the MIDI OUT to ON in the MIDI setup. • The output range of the MIDI timing clock is 40 BPM to 250 BPM. Note: The BPM may not be measured correctly with some tracks. Synchronize the computer application to the audio signals, or operate the computer application using the operation data for the SVM-1000. 1 Connect the USB MIDI output connector of the SVM-1000 to your computer using the USB cable. • Perform the MIDI settings for the application program. For further information, refer to the instruction manual for application program. • Supported operating systems include Windows XP and Mac OSX. MIDI OUT TIMING CLOCK SYNC. SNAP SHOT BUTTON TYPE MIDI CHANNEL Alternates MIDI signal output ON/OFF. Switches the MIDI timing clock synchronization between start and stop. Current MIDI information regarding dials and buttons is transmitted. Select the method in which the MIDI signal is transmitted. Options include toggle type and trigger type. In the trigger type, any MIDI codes set to OFF will not be sent, and MIDI codes set to ON will be sent each time the button is pressed. Changes the MIDI channel. Configures MIDI channels (1-16) and stores them in memory. 36 En
-
 1
1 -
2
-
3
-
4
-
5
-
6
-
7
-
8
-
9
-
10
-
11
-
12
-
13
-
14
-
15
-
16
-
17
-
18
-
19
-
20
-
21
-
22
-
23
-
24
-
25
-
26
-
27
-
28
-
29
-
30
-
 31
31 -
 32
32 -
 33
33 -
 34
34 -
 35
35 -
 36
36 -
 37
37 -
 38
38 -
 39
39 -
 40
40 -
 41
41 -
42
-
43
-
44
-
45
-
46
-
47
-
48
 |
 |