Pioneer SVM 1000 SVM-1000 Operating Instructions - Page 5
Features - audio and video mixer
 |
UPC - 012562870540
View all Pioneer SVM 1000 manuals
Add to My Manuals
Save this manual to your list of manuals |
Page 5 highlights
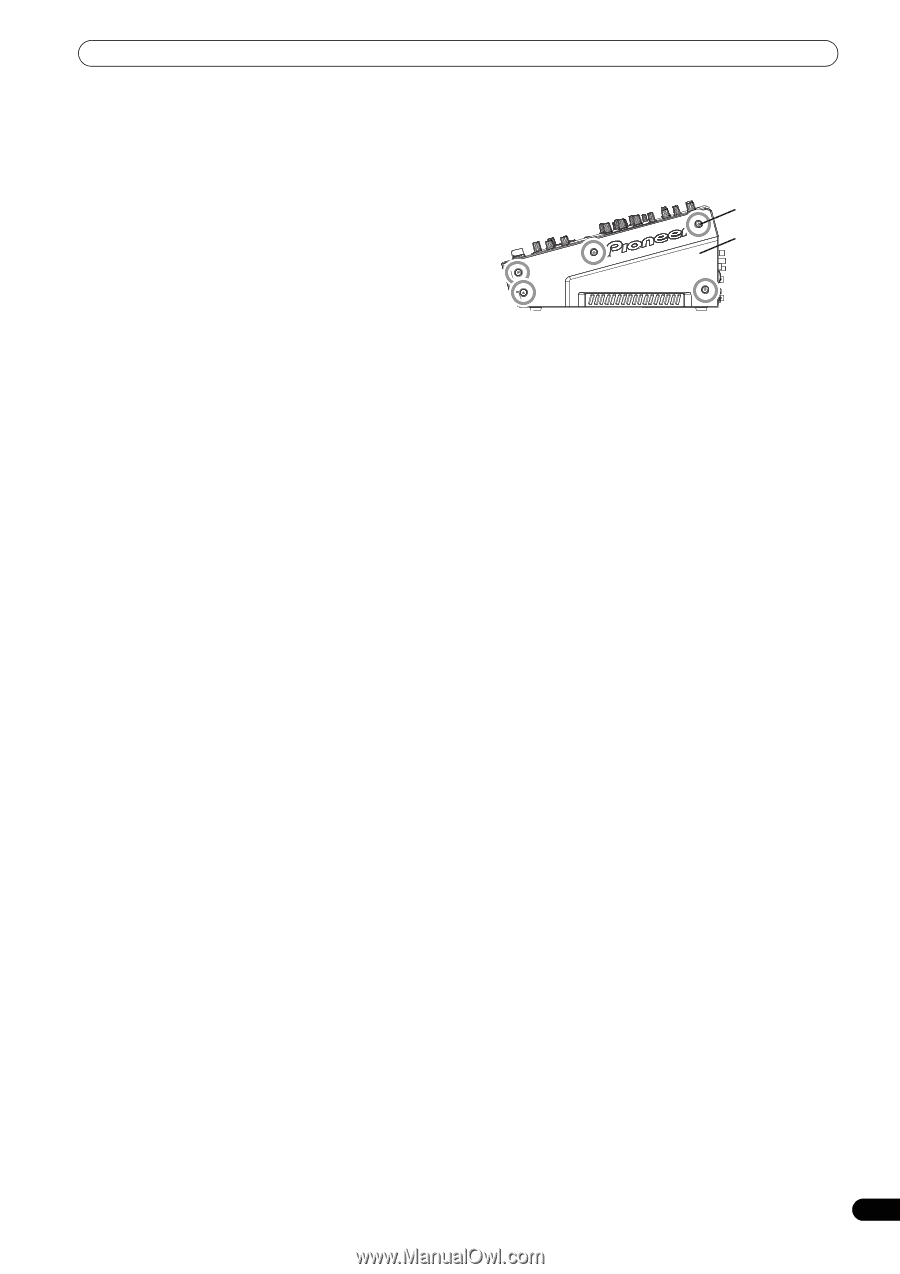
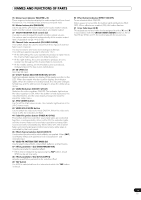
FEATURES Improved design and operability for new club culture Based on the concept of creating "a design that fascinates," the boxy-shape of previous DJ mixers has been restyled toward an edgier and more solid design. Great attention has been given to details of materials and design, such as employing an "illumination display" on the rear panel visible from the dance floor. Operating panel design emphasizes convenience for simultaneous performances of music and video, with a "channel symmetry layout" centered around the 11-inch LCD touch panel. By arranging each channel section symmetrically, further improvements in operability have been made to assist easy mixing between music and video, so that effects can be enabled dynamically from the LCD touch panel. Other DJ/VJ performance functions made possible through digital technology 1 "VIDEO TRIM" allows adjustment of the luminance of images input to each channel. 2 "VIDEO EQUALIZER" assigns parameters such as [RGB], [CONTRAST], [HUE], and [SATURATION] to the equalizer, allowing synchronization of audio equalizing and video controls. 3 "AV SYNC" allows the user to select whether audio and video controls are linked or adjusted separately. 4 "VIDEO MONITOR SELECTOR" allows the user to choose whether the monitor video output shows master only, all channels, master and each channel, master mixing inversion, etc. 5 "FULLY ASSIGNABLE MIDI" allows control of DJ effecter, DJ/ VJ application programs, and other external components. Installing the SVM-1000 in an EIA rack The screw holes located on the left and right ends of the front panel (within the side cover) match the 19-inch EIA rack. • Remove the 10 screws (five screws each located on the left and right sides of the unit) before installing the unit to the rack. Screws Side cover • Holes for rack installation can be located when the side covers are removed. • Attach the unit to the rack using screws of the appropriate size (screws not provided with the unit). • When installing the unit in a rack, take care to avoid pinching your fingers. Note • Never place this unit directly above a power amplifier, as the heat given off by the amplifier might result in damage to the unit. Placing the unit directly above a power amplifier might also result in ham radio signals being picked up or in other types of interference. • Allow at least 1U (43.7 mm) space between this component and the one mounted above it, so as to assure that the cords connected to this unit's input/output connectors and terminals do not touch the component above. • Always be sure to remove the unit from its rack before shipping. • When moving the unit while still installed in its rack, exercise caution to avoid subjecting the unit to shocks or vibration. 5 En
-
 1
1 -
 2
2 -
 3
3 -
 4
4 -
 5
5 -
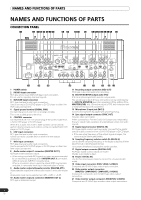 6
6 -
 7
7 -
 8
8 -
 9
9 -
 10
10 -
 11
11 -
12
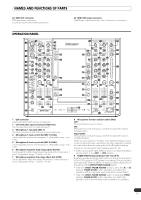
-
13
-
14
-
15
-
16
-
17
-
18
-
19
-
20
-
21
-
22
-
23
-
24
-
25
-
26
-
27
-
28
-
29
-
30
-
31
-
32
-
33
-
34
-
35
-
36
-
37
-
38
-
39
-
40
-
41
-
42
-
43
-
44
-
45
-
46
-
47
-
48
 |
 |