Pioneer VSX-521-K Owner's Manual - Page 33
The Pre Out Setting, The Auto Power Down menu, The FL Demo Mode menu - hdmi pass through
 |
UPC - 884938133043
View all Pioneer VSX-521-K manuals
Add to My Manuals
Save this manual to your list of manuals |
Page 33 highlights
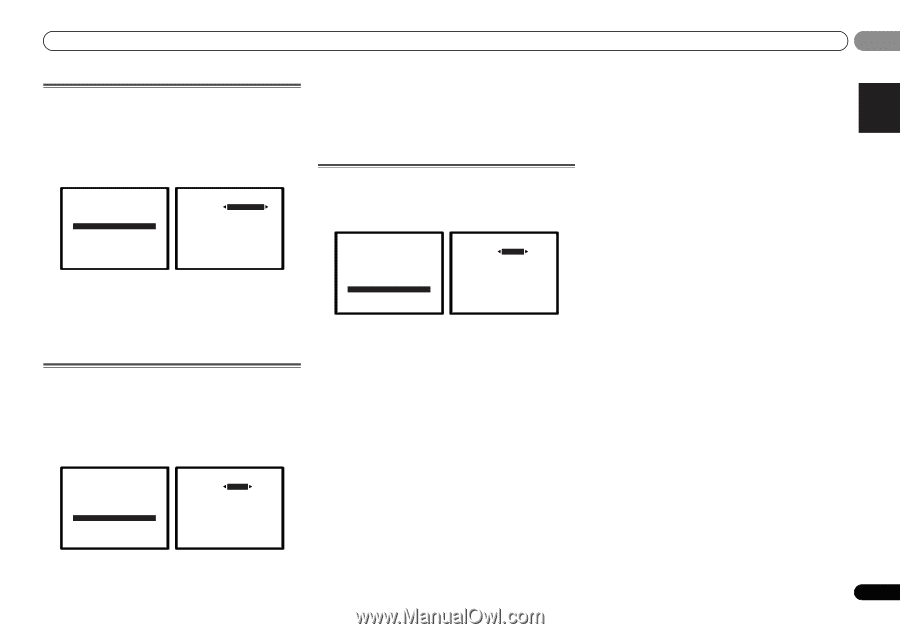
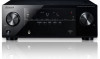
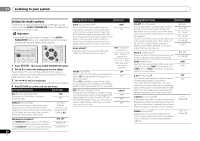
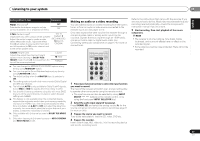
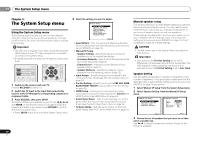
The System Setup menu 06 English Français Español The Pre Out Setting Specify either using the surround back speaker or the front height speaker connection with the PRE OUT SURR BACK/ FRONT HEIGHT outputs. An additional amplifier is required for the speaker connection. • Default setting: Surr. Back 1 Select 'Pre Out Setting' from the System Setup menu. System Setup 1 . Auto MCACC 2 . Manual SP Setup 3 . Input Assign 4 . Pre Out Setting 5 . HDMI Setup 6 . Auto Power Down 7 . FL Demo Mode 4.Pre Out Setting Pre Out Surr. Back Return Return 2 Select which speaker to connect to the PRE OUT SURR BACK/FRONT HEIGHT outputs using Surr. Back - Connect the surround back speaker. • Height - Connect the front height speaker. 3 When you're finished, press RETURN. You return to the System Setup menu. The Auto Power Down menu Set to automatically turn off the receiver after a specified time has passed (when the power has been on with no operation for several hours. • Default setting: OFF 1 Select 'Auto Power Down' from the System Setup menu. System Setup 1 . Auto MCACC 2 . Manual SP Setup 3 . Input Assign 4 . Pre Out Setting 5 . HDMI Setup 6 . Auto Power Down 7 . FL Demo Mode 6.Auto Power Down OFF Return Return 2 Specify the amount of time to allow before the power is turned off (when there has been no operation). • You can select 2, 4 or 6 hours, or OFF (if no automatic shutoff is desired). 3 When you're finished, press RETURN. You return to the System Setup menu. The FL Demo Mode menu Set whether or not various demos are to be shown on the front panel display. 1 Select 'FL Demo Mode' from the System Setup menu. System Setup 1 . Auto MCACC 2 . Manual SP Setup 3 . Input Assign 4 . Pre Out Setting 5 . HDMI Setup 6 . Auto Power Down 7 . FL Demo Mode 7.FL Demo Mode FL Demo ON Return 2 Choose ON or OFF for the demo display. 3 When you're finished, press RETURN. You return to the System Setup menu. Return 33 En
-
 1
1 -
2
-
3
-
4
-
5
-
6
-
7
-
8
-
9
-
10
-
11
-
12
-
13
-
14
-
15
-
16
-
17
-
18
-
19
-
20
-
21
-
22
-
23
-
24
-
25
-
26
-
27
-
 28
28 -
 29
29 -
 30
30 -
 31
31 -
 32
32 -
 33
33 -
 34
34 -
 35
35 -
 36
36 -
 37
37 -
 38
38 -
39
-
40
-
41
-
42
-
43
-
44
-
45
-
46
-
47
-
48
-
49
-
50
-
51
-
52
-
53
-
54
-
55
-
56
-
57
-
58
-
59
-
60
-
61
-
62
-
63
-
64
-
65
-
66
-
67
-
68
-
69
-
70
-
71
-
72
-
73
-
74
-
75
-
76
-
77
-
78
-
79
-
80
-
81
-
82
-
83
-
84
-
85
-
86
-
87
-
88
-
89
-
90
-
91
-
92
-
93
-
94
-
95
-
96
-
97
-
98
-
99
-
100
-
101
-
102
-
103
-
104
-
105
-
106
-
107
-
108
-
109
-
110
-
111
-
112
-
113
-
114
-
115
-
116
-
117
-
118
-
119
-
120
 |
 |