Pioneer VSX-820-K Owner's Manual
Pioneer VSX-820-K Manual
 |
UPC - 884938109277
View all Pioneer VSX-820-K manuals
Add to My Manuals
Save this manual to your list of manuals |
Pioneer VSX-820-K manual content summary:
- Pioneer VSX-820-K | Owner's Manual - Page 1
AUDIO/VIDEO MULTI-CHANNEL RECEIVER RECEPTEUR AUDIOVISUEL A VOIES MULTIPLES RECEPTOR MULTICANAL DE AUDIO/VÍDEO VSX-820 Register your product on http://www.pioneerelectronics.com (US) http://www.pioneerelectronics.ca (Canada) • Protect your new investment The details of your purchase will be - Pioneer VSX-820-K | Owner's Manual - Page 2
User Alterations or modifications carried out without appropriate authorization may invalidate the user in accordance with the instructions, may cause harmful interference AUDIO/VIDEO MULTI-CHANNEL RECEIVER Model Number: VSX-820 Responsible Party Name: PIONEER ELECTRONICS (USA) INC. SERVICE SUPPORT - Pioneer VSX-820-K | Owner's Manual - Page 3
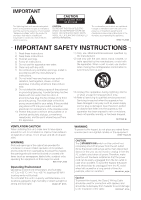
COVER (OR BACK). NO USER-SERVICEABLE PARTS INSIDE. REFER SERVICING TO QUALIFIED SERVICE PERSONNEL. The exclamation point within an equilateral triangle is intended to alert the user to the presence of important operating and maintenance (servicing) instructions in the literature accompanying the - Pioneer VSX-820-K | Owner's Manual - Page 4
batteries 7 Installing the receiver 7 Ventilation 8 04 Basic Setup Automatically setting up for surround sound (MCACC 29 Other problems when using the Auto MCACC Setup 31 02 Controls and displays Front panel 9 Operating range of remote control 10 Display 11 Remote control 13 03 Connecting - Pioneer VSX-820-K | Owner's Manual - Page 5
59 Watching photos and video content 60 About iPod 60 Connecting a USB device 61 Connecting your USB device to the receiver 61 Basic playback controls 61 Compressed audio compatibility 62 Bluetooth® ADAPTER for Wireless Enjoyment of Music 63 Wireless music play 63 Connecting Optional - Pioneer VSX-820-K | Owner's Manual - Page 6
37) • Using surround back channel processing (page 37) • Setting the Up Mix function (page 38) • Setting the Audio options (page 38) • Choosing the input signal (page 41) • Manual speaker setup (page 43) 9 Making maximum use of the remote control • Setting the remote to control other components - Pioneer VSX-820-K | Owner's Manual - Page 7
received the following supplied accessories: • Setup microphone • Remote control • Dry cell batteries (AAA size IEC R03) x2 • AM loop antenna • FM wire antenna • iPod cable • These operating instructions off a magnetic field). This may interfere with the sound. - in direct sunlight - in damp or wet - Pioneer VSX-820-K | Owner's Manual - Page 8
space is provided between the unit and walls or other equipment, heat will build up inside, interfering with performance and/or causing malfunctions. Receiver 40 cm (16 inches) Slot and openings in the cabinet are provided for ventilation and to protect the equipment from overheating. To prevent - Pioneer VSX-820-K | Owner's Manual - Page 9
DIMMER DISPLAY BAND 6 7 8 AUDIO/ VIDEO MULTI- CHANNEL RECEIVER VSX-820 TUNE TUNER EDIT PRESET ENTER MASTER VOLUME PHONES AUTO/DIRECT LISTENING MODE STEREO/ALC STANDARD ADV SURROUND iPod iPhone DIRECT CONTROL VIDEO INPUT USB iPod iPhone VIDEO L AUDIO R MCACC SETUP MIC 9 10 11 - Pioneer VSX-820-K | Owner's Manual - Page 10
(page 34). 11 iPod iPhone DIRECT CONTROL Change the receiver's input to the iPod and enable iPod operations on the iPod (page 60). 12 iPod iPhone/USB terminal Use to connect your Apple iPod or USB mass storage device as an audio source (page 58 and page 61). 13 AUDIO/VIDEO input See Connecting to - Pioneer VSX-820-K | Owner's Manual - Page 11
FM broadcast is being received in auto stereo mode. 4 TUNE Lights when a normal broadcast channel or SIRIUS channel is being received. 5 Speaker indicators Lights source with DTS 96/24 encoded audio signals is detected. NEO:6 When one of the NEO:6 modes of the receiver is on, this lights to indicate - Pioneer VSX-820-K | Owner's Manual - Page 12
when a source with Dolby TrueHD encoded audio signals is detected. EX Lights to indicate Dolby Digital EX decoding. 2PLll(x) Lights to indicate 2 Pro Logic II / 2 Pro Logic IIx decoding. Light will go off during 2 Pro Logic IIz decoding. (see Listening in surround sound on page 33 for more on this - Pioneer VSX-820-K | Owner's Manual - Page 13
CD-R CH 5 ADAPTER iPod USB VIDEO TUNER SIRIUS SIGNAL SEL VOL 6 AUTO/ STEREO/ BD MENU 7 DIRECT A.L.C. STANDARD ADV SURR AUDIO PARAMETER TOP 8 MENU TUNE TUNER EDIT MASTER TOOLS VOLUME MENU PRESET ENTER 9 HOME MENU SETUP iPod CTRL CATEGORY TUNE BAND RETURN DTV/ TV MUTE 10 BASS TRE - Pioneer VSX-820-K | Owner's Manual - Page 14
RECEIVER first to access: AUDIO PARAMETER Use to access the Audio options (page 38). SETUP Press to access the System Setup menu (page 42). RETURN receiver controls (page 60). 9 TUNE /, PRESET /), ENTER Use the arrow buttons when setting up your surround sound input modes for Pioneer flat panel - Pioneer VSX-820-K | Owner's Manual - Page 15
quality sound to compressed audio sources (page 36). SB CH Press to select ON, AUTO, OFF the surround back channel. CH SELECT Press repeatedly to select a channel 12 SOURCE Press to turn on/off other components connected to the receiver (see page 54 for more on this). 13 TV CONTROL buttons These - Pioneer VSX-820-K | Owner's Manual - Page 16
the left and right surround speakers (SL/SR), and the subwoofer (SW), a 5.1 ch surround system can be enjoyed. Further ch surround system. To achieve the best possible surround sound, install your speakers as shown below. 5.1 channel surround system: 6.1 channel surround (Surround back) system: - Pioneer VSX-820-K | Owner's Manual - Page 17
on the speaker placement Where you put your speakers in the room has a big effect on the quality of the sound. The following guidelines should help you to get the best sound from your system. • The subwoofer can be placed on the floor. Ideally, the other speakers should be at about ear-level when - Pioneer VSX-820-K | Owner's Manual - Page 18
03 Connecting your equipment Connecting the speakers The receiver will work with just two stereo speakers (the front speakers in the diagram) but using at least three speakers is recommended, and a complete setup is best for surround sound. You can use the speakers connected to the B speaker - Pioneer VSX-820-K | Owner's Manual - Page 19
SBL/FHL SBR/FHR Surround back or front height channel amplifier ANALOG INPUT L R IN BD SUBWOOFER PRE OUT CD-R/TAPE DVR/VCR SURR BACK / L IN R AUDIO IN M ANTENNA BD FM UNBAL 75 SIRIUS IN IN AM LOOP • You can use the additional amplifier on the surround back channel pre-outs for - Pioneer VSX-820-K | Owner's Manual - Page 20
page 43. However, if SPB is selected above, no sound is heard from the subwoofer (the LFE channel is not downmixed). 2 You can use speakers with a normal want to hear HDMI audio output from your TV or flat panel TV (no sound will be heard from this receiver). • If the video signal does not appear - Pioneer VSX-820-K | Owner's Manual - Page 21
, SACD, Dolby Digital Plus, Dolby TrueHD, DTS-HD Master Audio (see below for limitations), Video CD/Super VCD and CD. This receiver incorporates High-Definition Multimedia Interface (HDMI™) technology. This receiver supports the functions described below through HDMI connections.1 • Digital transfer - Pioneer VSX-820-K | Owner's Manual - Page 22
your equipment Component video cables Use component video cables to get the best possible color reproduction of your video source. The color video cables Green (Y) Blue (PB) Red (PR) About video outputs connection This receiver is not loaded with a video converter. When you use component video - Pioneer VSX-820-K | Owner's Manual - Page 23
VIDEO IN HDMI IN This connection is required in order to listen to the sound of the TV over the receiver. HDMI OUT OPTICAL R L DIGITAL AUDIO OUT ANALOG AUDIO OUT Select one HDMI/DVI-compatible TV HDMI/DVI-compatible Blu-ray disc player Note 1 If you wish to see the OSD screen (for setup - Pioneer VSX-820-K | Owner's Manual - Page 24
12 Class 2 Wiring L VIDEO IN TV 2 1 OPTICAL R L DIGITAL AUDIO OUT ANALOG AUDIO OUT Select one This connection is required in order to listen to the sound of the TV over the receiver. R L OPTICAL COAXIAL ANALOG AUDIO OUT DIGITAL AUDIO OUT Select one DVD player VIDEO OUT Note 1 If - Pioneer VSX-820-K | Owner's Manual - Page 25
IN 1 (BD) ASSIGNABLE 12 1 STB OPTICAL R PLAY L DIGITAL AUDIO OUT ANALOG AUDIO OUT Select one R REC L ANALOG AUDIO IN VIDEO IN VIDEO OUT DVR, VCR, LD player, etc. Note 1 If the connection was made using an optical cable, you'll need to tell the receiver which digital input you connected the - Pioneer VSX-820-K | Owner's Manual - Page 26
TV connected to this receiver's COMPONENT VIDEO OUT jacks. Connecting other audio components The number and kind of connections depends on the kind of component you're connecting.1 Follow the steps below to connect a CD-R, MD, DAT, tape recorder or other audio component.2 SUBWOOFER PRE OUT SURR - Pioneer VSX-820-K | Owner's Manual - Page 27
antenna as shown below. To improve reception and sound quality, connect external antennas (see Using external antennas below AM antenna terminal without disconnecting the supplied AM loop antenna. For the best possible reception, suspend horizontally outdoors. Outdoor antenna ANTENNA FM UNBAL 75 - Pioneer VSX-820-K | Owner's Manual - Page 28
video connections. CONTROL ON / OFF MASTER VOLUME VIDEO INPUT USB iPod iPhone VIDEO L AUDIO R MCACC SETUP MIC This receiver VIDEO L R AUDIO/VIDEO OUTPUT Video camera (etc.) Plugging in the receiver Pioneer authorized independent service company for a replacement. • The receiver should - Pioneer VSX-820-K | Owner's Manual - Page 29
used in the Auto MCACC Setup are output at high volume. RECEIVER SLEEP TV SOURCE CONTROL RECEIVER INPUT SELECT BD DVD TV INPUT AUDIO PARAMETER TOP MENU TUNE TUNER EDIT MASTER TOOLS VOLUME MENU PRESET ENTER HOME MENU SETUP iPod CTRL CATEGORY TUNE BAND RETURN DTV/ TV MUTE 1 Switch on - Pioneer VSX-820-K | Owner's Manual - Page 30
2.Manual SP Setup 3.Input Assign 4.Pre Out Setting Return Try to be as quiet as possible after pressing ENTER. The system outputs a series of test tones to establish the ambient noise level. 5 Follow the instructions on-screen. • Make sure the microphone is connected. • Make sure the subwoofer is - Pioneer VSX-820-K | Owner's Manual - Page 31
Setup has finished! You return to the System Setup menu. The settings made in the Auto MCACC Setup should give you excellent surround sound from your system, but it is also possible to adjust these settings manually using the System Setup . If there are any instructions showing in the front panel - Pioneer VSX-820-K | Owner's Manual - Page 32
. Basic playback Here are the basic instructions for playing a source (such as a DVD disc) with your home theater system. 1 Switch on your system components and receiver. Start by switching on the playback component (for example a DVD player), your TV1 and subwoofer (if you have one), then the - Pioneer VSX-820-K | Owner's Manual - Page 33
sound Using this receiver, you can listen to any source in surround sound. However, the options available will depend on your speaker setup - Up to 7.1 channel sound5 • NEO:6 CINEMA - See above • NEO:6 MUSIC - See above • DOLBY PRO LOGIC - See above • Straight Decode - Plays back without the DOLBY - Pioneer VSX-820-K | Owner's Manual - Page 34
channel sound1 • Straight Decode - Plays channel sound, especially suited to video games • NEO:6 CINEMA - Up to 6.1 channel sound, especially suited to movie sources • NEO:6 MUSIC - Up to 6.1 channel sound, especially suited to music sources4 • DOLBY PRO LOGIC - 4.1 channel surround sound (sound - Pioneer VSX-820-K | Owner's Manual - Page 35
(ALC), this unit equalizes playback sound levels if each sound level varies with the music source recorded in a portable audio player. AUTO/ STEREO/ BD MENU function allows you to create natural surround sound effects using just the front speakers and the subwoofer. AUTO/ STEREO/ BD MENU DIRECT - Pioneer VSX-820-K | Owner's Manual - Page 36
process, sound quality often suffers from an uneven sound image. The Sound Retriever feature employs new DSP technology that helps bring CD quality sound back to compressed 2-channel audio by restoring sound pressure and smoothing jagged artifacts left over after compression.2 RECEIVER SLEEP TV - Pioneer VSX-820-K | Owner's Manual - Page 37
' and an unreliable sound image will be produced. • If your subwoofer has a phase control switch, set it to the plus (+) sign (or 0°). However, the effect you can actually feel when PHASE CONTROL is set to ON on this receiver depends on the type of your subwoofer. Set your subwoofer to maximize the - Pioneer VSX-820-K | Owner's Manual - Page 38
TOP MENU TUNE TUNER EDIT MASTER TOOLS VOLUME MENU PRESET PRESET RECEIVER INPUT SELECT INPUT ENTER BD DVD TV HOME MENU SETUP iPod CTRL C GO TUNE BAND RETURN 1 Press RECEIVER on the remote control, then press AUDIO PARAMETER button. 2 Use / to select the setting you want to adjust - Pioneer VSX-820-K | Owner's Manual - Page 39
new DSP technology that helps bring CD quality sound back to compressed 2-channel audio by restoring sound pressure and smoothing jagged artifacts left over after compression. DUAL MONOd Specifies how dual mono encoded Dolby Digital soundtracks should be played. CH1 - Channel 1 is heard only - Pioneer VSX-820-K | Owner's Manual - Page 40
using this with most SACD discs, but if the sound distorts, it is best to switch the gain setting back to 0 dB. g. This feature is only available when the connected display supports the automatic audio/video synchronizing capability ('lip-sync') for HDMI. If you find the automatically set delay - Pioneer VSX-820-K | Owner's Manual - Page 41
to C1/O1/O2 (DIGITAL). • Some DVD players don't output DTS signals. For more details, refer to the instruction manual supplied with your DVD player. 2 When the HDMI option in Setting the Audio options on page 38 is set to THRU, the sound will be heard through your TV, not from this receiver. 41 En - Pioneer VSX-820-K | Owner's Manual - Page 42
MENU PRESET PRESET ENTER HOME MENU SETUP iPod CTRL CATEGORY TUNE BAND RETURN DTV/ TV MUTE 1 Switch on the receiver and your TV. Use the RECEIVER button to switch on.1 Switch the TV input so that it connects to the receiver in analog. 2 Press RECEIVER on the remote control, then press the - Pioneer VSX-820-K | Owner's Manual - Page 43
sound (MCACC) on page 29 are correct. 1 Select 'Speaker Setting' from the Manual SP Setup menu. 2.Manual SP Setup a.Speaker Setting b.Crossover Network c.Channel Level d.Speaker Distance 2a.Speaker Setting Front SMALL Center [ SMALL ] Surr [ SMALL ] Surr. Back [ NO ] Subwoofer: YES Return - Pioneer VSX-820-K | Owner's Manual - Page 44
). 3 When you're finished, press RETURN. You return to the Manual SP Setup menu. Tip • If you have a subwoofer and like lots of bass, it may seem logical to select LARGE for your front speakers and PLUS for the subwoofer. This may not, however, yield the best bass results. Depending on the speaker - Pioneer VSX-820-K | Owner's Manual - Page 45
be sent to the subwoofer (or LARGE speakers). 3 When you're finished, press RETURN. You return to the Manual SP Setup menu. Channel Level Using the channel level settings, you can adjust the overall balance of your speaker system, an important factor when setting up a home theater system. 1 Select - Pioneer VSX-820-K | Owner's Manual - Page 46
the listening position. The receiver can then add the proper delay needed for effective surround sound. 1 Select 'Speaker Distance' from the Manual SP Setup menu. 2.Manual SP Setup a.Speaker Setting b.Crossover Network c.Channel Level d.Speaker Distance Return 2d.Speaker Distance Front L Center - Pioneer VSX-820-K | Owner's Manual - Page 47
Press RECEIVER on the remote control, then press the SETUP button. An on-screen display (OSD) appears on your TV. Use and ENTER on the remote control to navigate through the screens and select menu items. Press RETURN to confirm and exit the current menu. System Setup 1.Auto MCACC 2.Manual SP Setup - Pioneer VSX-820-K | Owner's Manual - Page 48
30 stations.1 RECEIVER SLEEP TV SOURCE CONTROL RECEIVER INPUT SELECT BD DVD TV INPUT DVR CD CD-R CH AUDIO PARAMETER TOP MENU TUNE TUNER EDIT MASTER TOOLS VOLUME MENU ENTER HOME MENU SETUP iPod CTRL CATEGORY TUNE BAND RETURN DTV/ TV MUTE ADAPTER iPod USB VIDEO TUNER SIRIUS SIGNAL - Pioneer VSX-820-K | Owner's Manual - Page 49
pressing ENTER, the preset number stop blinking and the receiver stores the station. Listening to station presets You You can also use the number buttons on the remote control to recall the station preset. Naming preset stations return to the frequency display, press DISP several times to show the - Pioneer VSX-820-K | Owner's Manual - Page 50
if you are unsure how to do this. Most video recorders set the audio recording level automatically-check the component's instruction manual if you're unsure. 5 Start recording, then start playback of the source component.1 Note 1 • The receiver's volume, balance, tone (bass, treble, loudness), and - Pioneer VSX-820-K | Owner's Manual - Page 51
the model that you are using.1 Note • You can cancel or exit any of the steps by pressing RECEIVER . • After one minute of inactivity, the remote automatically exits the operation. Selecting preset codes directly RECEIVER INPUT SELECT BD DVD TV INPUT DVR CD CD-R CH ADAPTER iPod USB VIDEO - Pioneer VSX-820-K | Owner's Manual - Page 52
the remote control settings You can clear all presets and restore the factory default settings. • While pressing the RECEIVER button, press and hold the '0' button for three seconds. Default preset codes MULTI CONTROL button Preset code BD 2255 DVD 2256 TV 0291 DVR 2257 VIDEO - Pioneer VSX-820-K | Owner's Manual - Page 53
DTV and analog TV input modes TV/DTV for Pioneer flat panel TVs. HOME MENU Use as the GUIDE button for navigating. Cable TV/Satellite TV/TV/DTV RETURN Use to select closed captioning with DTV. DTV Number buttons Use to select a specific TV channel. Cable TV/Satellite TV/TV/DTV ENTER Use to - Pioneer VSX-820-K | Owner's Manual - Page 54
remote control can control these components (BD, DVD, CD, DVR (BDR), VCR, CD-R) after entering the proper codes or teaching the receiver Stops playback (on some models, pressing this when the disc RETURN Navigates BD/DVD menu/options. HOME MENU Displays the HOME MENU. CH +/- Selects channels - Pioneer VSX-820-K | Owner's Manual - Page 55
should have no problem controlling a component if list will not work for the model that you are using. There preset code is entered. BD Manufacturer Code Pioneer 2255, 2192, 2281 Denon 2310, 2311 2066 California Audio Labs 2068 2077, 2080 GFM 2043 Go Video 2087 Gradiente 2068 Greenhill 2080 Haier - Pioneer VSX-820-K | Owner's Manual - Page 56
, 2269 Sharp 2267, 2275 Sony 2268, 2271, 2272, 2273, 2276 Toshiba 2274 VCR Manufacturer Code Pioneer 1053, 1108 ABS 1017 Adventura 1005 Aiwa 1005 Alienware 1017 American High 1004 Asha 1002 Audio Dynamics 1000 Audiovox 1003 Bang & Olufsen 1032 Beaumark 1002 Bell & Howell 1001 Calix 1003 Candle 1002 - Pioneer VSX-820-K | Owner's Manual - Page 57
1002, 1003 Touch 1017 UltimateTV 1031 Unitech 1002 Vector Research 1000 Video Concepts 1000 Videosonic 1002 Viewsonic 1017 Voodoo 1017 Wards 1002, 1003, British Sky Broadcasting 6030 Canal 6105 Cable Set Top Box Manufacturer Code Pioneer 6029, 6028, 6095, 6099, 0297 ABC 6122 Accuphase 6122 Amino - Pioneer VSX-820-K | Owner's Manual - Page 58
on the PUSH OPEN tab to access the iPod terminal. CONTROL ON / OFF VIDEO INPUT USB iPod iPhone VIDEO L AUDIO R MCACC SETUP MIC MASTER VOLUME iPod cable This receiver Music Genius > Playlists Artists Albums Songs Radio Genres Composers Audiobooks MENU iPod Connecting - Pioneer VSX-820-K | Owner's Manual - Page 59
return to the previous level any time, press RETURN. 2 Use the / buttons to browse the selected category (e.g., albums). • Use / to move to previous/next levels. 3 Continue browsing until you arrive at what you want to play iPhone) will be inoperable when connected to this receiver (Pioneer - Pioneer VSX-820-K | Owner's Manual - Page 60
Top menu screen. RETURN Press to return to the previous level. Watching photos and video content To view photos or video on your iPod, since video control is not possible using this receiver, you must use the main controls of your iPod instead.1 Important • To play photos or video on your iPod - Pioneer VSX-820-K | Owner's Manual - Page 61
name Elapsed time Bit rates CONTROL ON / OFF MASTER VOLUME USB VIDEO INPUT iPod iPhone VIDEO L AUDIO R MCACC SETUP MIC USB mass storage device This receiver Connecting your USB device to the receiver 1 Switch on the receiver and your TV. 2 Press iPod USB on the remote control to switch - Pioneer VSX-820-K | Owner's Manual - Page 62
73. If this doesn't remedy the problem, it is likely your USB device is incompatible. About MPEG-4 AAC Advanced Audio Coding (AAC) is at the rate) MP3/WMA/MPEG-4 AAC playback: Yes1 • DRM (Digital Rights Management) protection compatible: Yes (DRM-protected audio files will not play in this receiver - Pioneer VSX-820-K | Owner's Manual - Page 63
device: Digital music player Device not equipped with Bluetooth wireless technology: Digital music player + Bluetooth audio transmitter (sold commercially) Music data This receiver Bluetooth® ADAPTER Wireless music play When the Bluetooth ADAPTER (Pioneer Model No. AS-BT100) is connected to this - Pioneer VSX-820-K | Owner's Manual - Page 64
wireless technology device with Your System 1 Press ADAPTER on the remote control to switch the receiver to ADAPTER input mode. 2 Connect the Bluetooth wireless technology device to the Bluetooth ADAPTER. Note 1 When the Bluetooth ADAPTER is not plugged into the ADAPTER PORT, NO ADAPTER will - Pioneer VSX-820-K | Owner's Manual - Page 65
. Easy to follow installation and setup instructions are provided with the SIRIUS tuner. There are a variety of programming packages available, including the option of adding 'The Best of XM' programming to the SIRIUS service. The 'Best of XM' service is not available to SIRIUS Canada subscribers - Pioneer VSX-820-K | Owner's Manual - Page 66
IN 1 (CD-R/TAPE) HDMI ASSIGNABLE 12 IN R TV/SAT DVD L IN R AUDIO IN MONITOR OUT DV ANTENNA PR PB BD FM UNBAL 75 SIRIUS IN IN AM LOOP COMPONENT VID This receiver Antenna SIRIUS H SIRIUS H SiriusConnectTM HOME tuner AC adapter 1 Connect a SiriusConnect tuner to the SIRIUS IN jack on - Pioneer VSX-820-K | Owner's Manual - Page 67
stop blinking and the receiver stores the SIRIUS channel. Listening to channel presets You will need to have some presets stored to do this. • Press / to select the channel preset you want. • You can also use the number buttons on the remote control to recall the channel preset. Using the SIRIUS - Pioneer VSX-820-K | Owner's Manual - Page 68
make sure you're assigned the correct input. • The video input selected on the TV monitor is incorrect. Refer to the instruction manual supplied with the TV. No sound from subwoofer. • Make sure the subwoofer is switched on. • If the subwoofer has a volume knob, make sure it's turned up. • The - Pioneer VSX-820-K | Owner's Manual - Page 69
) (refer to page 41). • Refer to the instruction manual supplied with the DVD player. No sound is output or a • Set the digital volume level of the player to full, or to the neutral noise is output when position. software with DTS is played • Make sure the player's settings are correct and - Pioneer VSX-820-K | Owner's Manual - Page 70
the obstacle or operate from another position. • Avoid exposing the remote sensor on the front panel to direct light. The display is dark or off. • Press DIMMER on the control repeatedly to return to the default. The Bluetooth wireless • Check that no object that emits electromagnetic waves in - Pioneer VSX-820-K | Owner's Manual - Page 71
. No picture. OSD does not appear. No sound, or sound suddenly ceases. Remedy • If the problem still persists when connecting your HDMI component directly to your monitor, please consult the component or monitor manual or contact the manufacturer for support. • Video signals that are input from the - Pioneer VSX-820-K | Owner's Manual - Page 72
sending audio to the receiver. See the operating instructions for more on audio audio output is reduced to 2 channels for a monitor with stereo audio limitations). • If you want to switch the input source, you'll have to switch functions on both the receiver and your display unit. • Since the sound - Pioneer VSX-820-K | Owner's Manual - Page 73
There is a problem with the signal path Switch off the receiver and reconnect (I/U ERR1) from the USB to the receiver. the USB to the receiver. iPod/USB Updating Unit is updating channels. Wait until the encryption code has been updated. Invalid Channel Selected channel is not available/does - Pioneer VSX-820-K | Owner's Manual - Page 74
the receiver has been reset to the factory default settings. Specifications Amplifier section Continuous average power output of 80 watts* per channel, setup 1 Remote control 1 Dry cell batteries (AAA size IEC R03 2 AM loop antenna 1 FM wire antenna 1 iPod cable 1 These operating instructions - Pioneer VSX-820-K | Owner's Manual - Page 75
Selecting fine audio equipment such by playing it at a safe level. One that lets the sound come through comfortable sound level: • Set the dial and leave it there. Taking a minute to do this now will help to Pioneer Corporation. Copyright © 2009 Pioneer Corporation. All rights reserved. 75 - Pioneer VSX-820-K | Owner's Manual - Page 76
AVERTISSEMENT Cet appareil n'est pas étanche. Pour éviter les risques d'incendie et de décharge électrique, ne placez près de lui un récipient rempli d'eau, tel qu'un vase ou un pot de fleurs, et ne l'exposez pas à des gouttes d'eau, des éclaboussures, de la pluie ou de l'humidité. D3-4-2-1-3_A1_Fr - Pioneer VSX-820-K | Owner's Manual - Page 77
appropriée. Ce remplacement et la fixation d'une fiche secteur sur le cordon d'alimentation de cet appareil doivent être effectués par un personnel de service qualifié. En cas de branchement sur une prise secteur, la fiche de coupure peut provoquer une sérieuse décharge électrique. Assurez-vous qu - Pioneer VSX-820-K | Owner's Manual - Page 78
cet achat d'un produit Pioneer. Nous vous demandons de 35 Utilisation des modes Stream Direct 36 Utilisation de la fonction Sound Retriever . . . 36 Un son meilleur grâce à Réglage de la fonction Up Mix 38 Réglage des options audio 38 Choix du signal d'entrée 41 Utilisation du casque d'écoute - Pioneer VSX-820-K | Owner's Manual - Page 79
60 Raccordement d'un appareil USB 61 Raccordement de votre périphérique USB au récepteur 61 Commandes de lecture de base 61 Compatibilité des fichiers audio compressés 62 ADAPTATEUR Bluetooth® pour profiter de la musique sans fil 63 Lecture de musique sans fil 63 Raccordement de l'ADAPTATEUR - Pioneer VSX-820-K | Owner's Manual - Page 80
AV (FHL) *Avant-haut droite (FHR) Subwoofer (SW) Avant droite (R) Avant gauche • Utilisation des divers modes d'écoute • Utilisation de la fonction Sound Retriever (page 36) • Un son meilleur grâce à fonction Up Mix (page 38) • Réglage des options audio (page 38) • Choix du signal d'entrée (page - Pioneer VSX-820-K | Owner's Manual - Page 81
Chapitre 1: Avant de commencer English Français Español Vérification des accessoires livrés avec l'appareil Veuillez vérifier que les accessoires suivants sont livrés avec l'appareil : • Microphone de configuration • Télécommande • Piles à anode sèche (AAA IEC R03) x2 • Antenne cadre AM • Antenne - Pioneer VSX-820-K | Owner's Manual - Page 82
- en présence de vibrations ou autres mouvements - à la poussière - à la fumée ou aux émanations graisseuses (cuisine par ex.) Ventilation En installant cet appareil, veuillez vous assurer de bien laisser un espace de ventilation suffisant autour afin de permettre une meilleur dispersion de la - Pioneer VSX-820-K | Owner's Manual - Page 83
BAND 6 7 TUNE TUNER EDIT PRESET 8 AUDIO/ VIDEO MULTI- CHANNEL RECEIVER VSX-820 ENTER MASTER VOLUME PHONES AUTO/DIRECT LISTENING MODE STEREO/ALC STANDARD ADV SURROUND iPod iPhone DIRECT CONTROL VIDEO INPUT USB iPod iPhone VIDEO L AUDIO R MCACC SETUP MIC 9 10 11 12 13 14 - Pioneer VSX-820-K | Owner's Manual - Page 84
12 Borne iPod iPhone/USB Permet de raccorder votre Apple iPod ou votre périphérique de stockage de masse USB en tant que source audio (page 58 et page 61). 13 Entrée AUDIO/VIDEO Voir la section Raccordement à la borne vidéo du panneau frontal, page 28. 14 Prise MCACC SETUP MIC Permet de raccorder - Pioneer VSX-820-K | Owner's Manual - Page 85
ou DTSHD encodés est détectée. ES S'allume pour indiquer que le décodage DTS-ES est activé. 96/24 S'allume lorsqu'une source comportant des signaux audio DTS 96/24 encodés est détectée. NEO:6 Lorsque l'un des modes NEO:6 du récepteur est sélectionné, ce voyant s'allume pour indiquer qu'un traitement - Pioneer VSX-820-K | Owner's Manual - Page 86
surround avancés, page 34). 13 Voyants SIGNAL SELECT DIGITAL S'allume lorsqu'un signal audio numérique est sélectionné. Clignote lorsqu'un signal audio numérique est sélectionné et que l'entrée audio sélectionnée n'existe pas. HDMI S'allume lorsqu'un signal HDMI est sélectionné. Clignote lorsqu - Pioneer VSX-820-K | Owner's Manual - Page 87
CD-R CH 5 ADAPTER iPod USB VIDEO TUNER SIRIUS SIGNAL SEL VOL 6 AUTO/ STEREO/ BD MENU 7 DIRECT A.L.C. STANDARD ADV SURR AUDIO PARAMETER TOP 8 MENU TUNE TUNER EDIT MASTER TOOLS VOLUME MENU PRESET ENTER 9 HOME MENU SETUP iPod CTRL CATEGORY TUNE BAND RETURN DTV/ TV MUTE 10 BASS TRE - Pioneer VSX-820-K | Owner's Manual - Page 88
RECEIVER pour accéder au menu : AUDIO PARAMETER Permet d'accéder aux options audio (page 38). SETUP Appuyez pour accéder au menu de configuration du système (page 42). RETURN BD/DVD. HOME MENU Permet d'afficher l'écran HOME MENU. RETURN Permet de écran plat Pioneer. Remarque 1 Les commandes de tonalit - Pioneer VSX-820-K | Owner's Manual - Page 89
d'un CD, etc. Certaines touches sont accessibles en pressant d'abord sur la touche RECEIVER . (Par exemple, MIDNIGHT, etc.) HDD*, DVD*, VCR* Ces touches permettent sur cette touche pour restaurer un son de qualité CD vers des sources audio compressées (page 36). SB CH Appuyez sur cette touche pour sé - Pioneer VSX-820-K | Owner's Manual - Page 90
être obtenu en connectant les enceintes avant gauche et droite (L/R), l'enceinte centrale (C), les enceintes surround gauche et droite (SL/SR) et le subwoofer (SW). De plus, à l'aide d'un amplificateur externe, vous pouvez connecter les enceintes surround gauche et droite (SBL/SBR) et les enceintes - Pioneer VSX-820-K | Owner's Manual - Page 91
haut que vos oreilles et légèrement inclinées vers le bas. Assurez-vous que les enceintes ne sont pas face à face. Pour les signaux DVD-Audio, les enceintes doivent être plus rapprochées de l'auditeur que lors de la lecture sur un appareil de cinéma à domicile. • Si les enceintes surround - Pioneer VSX-820-K | Owner's Manual - Page 92
SURROUND L L IN R TV/SAT DVD L IN R AUDIO IN MONITOR OUT DVD IN BD IN SPEAKERS B ANTENNA PR PB Y MONITOR OUT BD FM UNBAL 75 SIRIUS IN R IN 2 (DVD) IN AM LOOP COMPONENT VIDEO IN 1 (BD) ASSIGNABLE 12 Class 2 Wiring L CENTER SW Subwoofer amplifié Système d'enceintes B L R 18 Fr - Pioneer VSX-820-K | Owner's Manual - Page 93
panneau arrière, l'alimentation peut être coupée par mesure de sécurité. IN BD SUBWOOFER PRE OUT CD-R/TAPE DVR/VCR SURR BACK / FRONT DVD HEIGHT ADAPTER (OUTPUT 5 (CD-R/TAPE) HDMI ASSIGNABLE 12 IN R TV/SAT DVD L IN R AUDIO IN M ANTENNA BD FM UNBAL 75 SIRIUS IN IN AM LOOP • Vous - Pioneer VSX-820-K | Owner's Manual - Page 94
raccorder la borne dans le sens qui convient. Remarque 1 La sortie du subwoofer dépend des réglages effectués à la section Réglage des enceintes, page AB. 3 • Réglez le paramètre HDMI (voir la section Réglage des options audio, page 38) sur THRU (THROUGH) et le signal d'entrée (voir la section Choix - Pioneer VSX-820-K | Owner's Manual - Page 95
numériques aux formats suivants :3 - Dolby Digital, Dolby Digital Plus, DTS, Son à débit élevé (Dolby TrueHD, DTS-HD Master Audio), DVD-Audio, CD, SACD (signal DSD), Video CD, Super VCD HDMI, le logo HDMI et High-Definition Multimedia Interface sont des marques commerciales ou des marques déposées - Pioneer VSX-820-K | Owner's Manual - Page 96
par la sortie HDMI OUT. Périphérique de lecture Borne pour le raccordement d'une source PR PB Y HDMI IN COMPONENT VIDEO IN VIDEO IN PR PB Y HDMI OUT COMPONENT VIDEO OUT MONITOR OUT Borne pour le raccordement d'un téléviseur L'affichage OSD n'apparaît pas. TV Signaux vidéo pouvant être - Pioneer VSX-820-K | Owner's Manual - Page 97
affichage OSD de l'appareil sur le téléviseur. IN BD DVD TV/SAT SUBWOOFER PRE OUT SURR BACK / FRONT HEIGHT L (Single) CD-R/TAPE DVR/ VIDEO IN HDMI IN Cette liaison est nécessaire pour pouvoir écouter le son du téléviseur ou du récepteur. HDMI OUT OPTICAL R L DIGITAL AUDIO OUT ANALOG AUDIO - Pioneer VSX-820-K | Owner's Manual - Page 98
borne HDMI à cet appareil.123 IN BD DVD TV/SAT SUBWOOFER PRE OUT SURR BACK / FRONT HEIGHT L (Single) VIDEO IN 1 (BD) ASSIGNABLE 12 Class 2 Wiring L VIDEO IN TV 2 1 OPTICAL R L DIGITAL AUDIO OUT ANALOG AUDIO OUT Sélectionnez-en une R L OPTICAL COAXIAL ANALOG AUDIO OUT DIGITAL AUDIO - Pioneer VSX-820-K | Owner's Manual - Page 99
sont tous des exemples de ce que l'on appelle boîtiers décodeurs.12 SUBWOOFER PRE OUT SURR BACK / FRONT HEIGHT L (Single) CD-R/TAPE DVR/VCR VIDEO IN 1 (BD) ASSIGNABLE 12 1 STB OPTICAL R PLAY L DIGITAL AUDIO OUT ANALOG AUDIO OUT Sélectionnez-en une R REC L ANALOG AUDIO IN VIDEO IN VIDEO - Pioneer VSX-820-K | Owner's Manual - Page 100
DAT, un magnétophone ou tout autre appareil audio.2 SUBWOOFER PRE OUT SURR BACK / FRONT HEIGHT L VIDEO 2 PR PB Y COMPONENT VIDEO IN PR PB Y COMPONENT VIDEO OUT TV Lecteur de BD/DVD OPTICAL COAXIAL R PLAY L DIGITAL AUDIO OUT ANALOG AUDIO OUT Sélectionnez-en une R REC L ANALOG AUDIO - Pioneer VSX-820-K | Owner's Manual - Page 101
English Français Español Raccordement des antennes Raccordez l'antenne cadre AM et l'antenne filaire FM comme indiqué ci-dessous. Pour améliorer la réception et la qualité du son, raccordez les antennes externes (voir la section Utilisation des antennes externes, ciaprès). fig. a fig. b - Pioneer VSX-820-K | Owner's Manual - Page 102
OFF MASTER VOLUME VIDEO INPUT USB iPod iPhone VIDEO L AUDIO R MCACC SETUP MIC Ce récepteur VIDEO L R AUDIO/VIDEO OUTPUT Jeux vidéo Si le cordon est endommagé, demandez-en le remplacement auprès du service aprèsvente agréé Pioneer le plus proche. • Lorsque le récepteur n'est pas utilisé - Pioneer VSX-820-K | Owner's Manual - Page 103
-Channel RECEIVER SLEEP TV SOURCE CONTROL RECEIVER INPUT SELECT BD DVD TV INPUT AUDIO PARAMETER TOP MENU TUNE TUNER EDIT MASTER TOOLS VOLUME MENU PRESET ENTER HOME MENU SETUP iPod CTRL CATEGORY TUNE BAND RETURN VOLUME VIDEO INPUT USB iPod iPhone VIDEO L AUDIO R MCACC SETUP MIC - Pioneer VSX-820-K | Owner's Manual - Page 104
Setup 1.Auto MCACC 2.Manual SP Setup 3.Input Assign 4.Pre Out Setting Return Veillez à faire le moins de bruit possible après avoir appuyé sur ENTER. Le système émet une série de tonalités de test pour établir le niveau de bruit ambiant. 5 Suivez les instructions Subwoofer [ YES ] 10:Next OK Return - Pioneer VSX-820-K | Owner's Manual - Page 105
System Speaker Distance Channel Level Acoustic Cal EQ Return microphone) il se ces réglages manuellement en utilisant le menu System Setup (voir page 42).1 Autres problèmes lors des enceintes, page 43. • Le réglage de la distance du subwoofer peut être supérieur à la distance réelle de la position - Pioneer VSX-820-K | Owner's Manual - Page 106
base Voici les instructions de base pour lire une source (telle qu'un DVD) avec votre système home cinéma. VIDEO est bien sélectionnée). 2 Si vous devez modifier manuellement le type de signal d'entrée, appuyez sur SIGNAL SEL (page 41). 3 • Vous devrez peut-être vérifier les réglages de sortie audio - Pioneer VSX-820-K | Owner's Manual - Page 107
sources à 2 canaux en mode NEO:6 CINEMA ou NEO:6 MUSIC, vous avez également la possibilité d'ajuster l'effet C.IMG (voir la section Réglage des options audio, page 38). 5 Lors de l'écoute de sources à 2 canaux en mode DOLBY PLIIz HEIGHT, il est aussi possible de régler l'effet HEIGHT GAIN (voir la - Pioneer VSX-820-K | Owner's Manual - Page 108
de l'écoute de sources à 2 canaux en mode DOLBY PLIIz HEIGHT, il est aussi possible de régler l'effet HEIGHT GAIN (voir la section Réglage des options audio, page 38). 2 • Si le traitement de canal surround arrière (voir page 37) est désélectionné ou si les enceintes surround arrière sont réglées - Pioneer VSX-820-K | Owner's Manual - Page 109
en utilisant seulement les enceintes avant et le caisson de basses (subwoofer). AUTO/ STEREO/ BD MENU DIRECT A.L.C. STANDARD ADV SURR É STEREO - L'audio est reproduit selon vos réglages surround et vous pouvez toujours utiliser les fonctions Midnight, Loudness, Phase Control, Sound Retriever et - Pioneer VSX-820-K | Owner's Manual - Page 110
lors de l'étape Surround Setup sont appliqués à la fonction Sound Retriever Lorsque des données audio sont PHASE CH SHIFT • Appuyez sur RECEIVER , puis sur S.RETRIEVER pour sé Subwoofer N Position d'écoute Remarque 1 En mode DIRECT, les fonctions Phase Control, Acoustic Calibration EQ, Sound - Pioneer VSX-820-K | Owner's Manual - Page 111
7.1 (par exemple, avec les supports 5.1 encodés). Avec les sources 5.1 surround arrière. RECEIVER SLEEP TV SOURCE CONTROL RECEIVER INPUT SELECT INPUT son sera 'déphasé' et l'image audio produite sera de mauvaise qualité. • . • Réglez le commutateur du filtre passe-bas intégré de votre caisson de - Pioneer VSX-820-K | Owner's Manual - Page 112
comme il devrait l'être normalement.1 • La fonction Up Mix s'avère d'une grande efficacité lorsque les enceintes du système RECEIVER INPUT SELECT BD DVD TV INPUT ENTER HOME MENU SETUP iPod CTRL TUNE BAND RETURN 1 Appuyez sur la touche RECEIVER de la télécommande, puis sur la touche AUDIO - Pioneer VSX-820-K | Owner's Manual - Page 113
graves et des aigus lors de l'écoute de sources musicales à faible volume. M/L OFF MIDNIGHT LOUDNESS S.RTVb Lorsque des données audio sont éliminées pendant le OFF (Sound Retriever) procédé de compression WMA/MP3c, la qualité du son est ON souvent affectée par une image sonore inégale. La - Pioneer VSX-820-K | Owner's Manual - Page 114
image entre les composants raccordés avec un câble HDMI. Le délai d'attente audio est paramétré en ON fonction de l'état opérationnel de l'écran de la touche MIDNIGHT. b. Vous pouvez modifier à tout moment la fonction Sound Retriever à l'aide de la touche S.RETRIEVER. c. Lecture de fichiers WMA - Pioneer VSX-820-K | Owner's Manual - Page 115
entrées, comme décrit ci-dessous.1 1 Appuyez sur la touche RECEIVER de la télécommande. 2 Appuyez sur la touche SIGNAL SEL pour sé 192 kHz), Dolby TrueHD, Dolby Digital Plus, DTS-EXPRESS, DTS-HD Master Audio et DVD-Audio (192 kHz compris). Pour les autres formats de signaux numériques, spécifiez - Pioneer VSX-820-K | Owner's Manual - Page 116
composite pour configurer le système. RECEIVER SLEEP TV SOURCE CONTROL RECEIVER INPUT SELECT BD DVD TV INPUT AUDIO PARAMETER TOP MENU TUNE TUNER EDIT MASTER TOOLS VOLUME MENU PRESET PRESET ENTER HOME MENU SETUP iPod CTRL CATEGORY TUNE BAND RETURN DTV/ TV MUTE 1 Allumez le récepteur - Pioneer VSX-820-K | Owner's Manual - Page 117
Setting' dans le menu Manual SP Setup. 2.Manual SP Setup a.Speaker Setting b.Crossover Network c.Channel Level d.Speaker Distance 2a.Speaker Setting Front SMALL Center [ SMALL ] Surr [ SMALL ] Surr. Back [ NO ] Subwoofer: YES Return Return 2 Choisissez l'ensemble d'enceintes à régler - Pioneer VSX-820-K | Owner's Manual - Page 118
NO (les fréquences graves seront émises par les autres enceintes). 3 Lorsque vous avez terminé, appuyez sur RETURN. Vous retournez au menu Manual SP Setup. Astuce • Si vous possédez un subwoofer et si vous désirez beaucoup de graves, il est tout à fait logique de sélectionner LARGE pour vos - Pioneer VSX-820-K | Owner's Manual - Page 119
Setup. 2.Manual SP Setup a.Speaker Setting b.Crossover Network c.Channel Level d.Speaker Distance 2b.Crossover Network Frequency 100Hz Return Return 2 Choisissez le point de coupure de fréquence. Les fréquences qui se trouvent en-dessous de ce point de coupure seront envoyées vers le subwoofer - Pioneer VSX-820-K | Owner's Manual - Page 120
Manual SP Setup. 2.Manual SP Setup a.Speaker Setting b.Crossover Network c.Channel Level d.Speaker Distance Return 2d.Speaker Distance Front L Center Front R Surround R Surr. Back R Surr. Back L Surround L Subwoofer sur la touche RECEIVER de la télécommande, puis sur la touche SETUP. Un affichage - Pioneer VSX-820-K | Owner's Manual - Page 121
Back 1 Appuyez sur la touche RECEIVER de la télécommande, puis sur la touche SETUP. Un affichage à l'écran appara Setup 1.Auto MCACC 2.Manual SP Setup 3.Input Assign 4.Pre Out Setting Return 2 Sélectionnez 'Pre Out Setting' à partir du menu System Setup. System Setup 1.Auto MCACC 2.Manual SP Setup - Pioneer VSX-820-K | Owner's Manual - Page 122
30 stations.1 RECEIVER SLEEP TV SOURCE CONTROL RECEIVER INPUT SELECT BD DVD TV INPUT DVR CD CD-R CH AUDIO PARAMETER TOP MENU TUNE TUNER EDIT MASTER TOOLS VOLUME MENU ENTER HOME MENU SETUP iPod CTRL CATEGORY TUNE BAND RETURN DTV/ TV MUTE ADAPTER iPod USB VIDEO TUNER SIRIUS SIGNAL - Pioneer VSX-820-K | Owner's Manual - Page 123
1 Pour régler une station de radio que vous désirez mémoriser. Pour plus d'informations à ce sujet, consultez la section Pour écouter la radio, page 48. 2 Appuyez sur la touche TUNER EDIT. L'écran affiche PRESET, puis un MEM clignotant et une station préréglée. 3 Appuyez sur la touche PRESET / - Pioneer VSX-820-K | Owner's Manual - Page 124
sur les raccordements vidéo). RECEIVER SLEEP TV SOURCE CONTROL RECEIVER INPUT SELECT BD DVD TV règlent le niveau d'enregistrement audio automatiquement-consultez le mode d'emploi puis la lecture de l'appareil source.1 ADAPTER iPod USB VIDEO TUNER SIRIUS SIGNAL SEL VOL Remarque 1 • Le volume - Pioneer VSX-820-K | Owner's Manual - Page 125
d'inactivité, la télécommande quitte automatiquement l'opération. Sélectionner directement des codes de préréglage RECEIVER INPUT SELECT BD DVD TV INPUT DVR CD CD-R CH ADAPTER iPod USB VIDEO MEMORY HDD 1 DVD 2 VCR 3 DISP S.RETRIEVER SB CH CH SELECT EQ 4 5 6 CH MIDNIGHT SPEAKERS - Pioneer VSX-820-K | Owner's Manual - Page 126
glages d'usine. • Tout en appuyant sur la touche RECEIVER , maintenez la touche '0' enfoncée pendant trois secondes. glage BD 2255 DVD 2256 TV 0291 DVR 2257 VIDEO 1053 CD 5000 CD-R 5001 TV CONTROL 0 écran plat Pioneer. HOME MENU Utilisez cette touche comme la touche GUIDE pour la Télé - Pioneer VSX-820-K | Owner's Manual - Page 127
English Français Español Touche(s) RETURN Touches numériques ENTER MENU ENTER CH +/- Fonction Composants Permet de sélectionner le sous-titrage codé avec la télévision numérique. Télévision numérique S'utilisent - Pioneer VSX-820-K | Owner's Manual - Page 128
menu 'supérieur' du disque d'un lecteur de BD/ DVD. MENU ENTER & RETURN Affiche les menus du BD/DVD ou DVR que vous utilisez. Permet de naviguer dans le menu/les options du BD/DVD. HOME MENU Affiche l'écran HOME MENU. CH +/- Sélectionne les chaînes. DVR, VCR HDD Permet de passer aux - Pioneer VSX-820-K | Owner's Manual - Page 129
code de préréglage indiqué est entré. BD Fabricant Code Pioneer 2255, 2192, 2281 Denon 2310, 2311, 2312 Hitachi 2307, Boston 2059 Broksonic 2066 California Audio Labs 2068 CambridgeSoundWorks 2065 CineVision GE 2016, 2077, 2080 GFM 2043 Go Video 2087 Gradiente 2068 Greenhill 2080 Haier 2094 Harman/ - Pioneer VSX-820-K | Owner's Manual - Page 130
Sharp 2267, 2275 Sony 2268, 2271, 2272, 2273, 2276 Toshiba 2274 Magnétoscope Fabricant Code Pioneer 1053, 1108 ABS 1017 Adventura 1005 Aiwa 1005 Alienware 1017 American High 1004 Asha 1002 Audio Dynamics 1000 Audiovox 1003 Bang & Olufsen 1032 Beaumark 1002 Bell & Howell 1001 Calix 1003 Candle 1002 - Pioneer VSX-820-K | Owner's Manual - Page 131
1002, 1003 Touch 1017 UltimateTV 1031 Unitech 1002 Vector Research 1000 Video Concepts 1000 Videosonic 1002 Viewsonic 1017 Voodoo 1017 Wards 1002, 1003, Yamaha 1000, 1001 Zenith 1013, 1018 ZT Group 1017 CD Fabricant Code Pioneer 5000, 5011 AKAI 5043 Asuka 5045 Denon 5019 Fisher 5048 Goldstar 5040 - Pioneer VSX-820-K | Owner's Manual - Page 132
OFF VIDEO INPUT USB iPod iPhone VIDEO L AUDIO R MCACC SETUP MIC supports que l'utilisateur a légalement le droit de reproduire. • La fonction d'égalisation ne peut pas être commandée à l'aide de ce récepteur. Nous recommandons de désactiver l'égaliseur avant de connecter le récepteur. • Pioneer - Pioneer VSX-820-K | Owner's Manual - Page 133
écédent à tout moment, appuyez sur RETURN. 2 Utilisez les touches / pour Passe successivement à Repeat One, Repeat All et Repeat Off (pression répétée). Remarque 1 Les commandes de votre iPod (excepté iPod touch et iPhone) seront désactivées tant que ce dernier sera raccordé au récepteur (Pioneer - Pioneer VSX-820-K | Owner's Manual - Page 134
Passe lecture d'un livre audio (Audiobook), permet de affichage du menu iPod Top. RETURN Permet de revenir au niveau appuyant sur la touche iPod iPhone DIRECT CONTROL sur le panneau iPhone » ont été conçus pour fonctionner avec un iPhone Unis et d'autres pays. iPhone est une marque commerciale d'Apple - Pioneer VSX-820-K | Owner's Manual - Page 135
USB VIDEO INPUT iPod iPhone VIDEO L AUDIO R MCACC SETUP MIC dy Kevin Jackson We are all one 32kbps 0:01 Return Numéro de fichier/ dossier Format de fichier Reprise ou une lecture USB. • Pioneer n'est pas en mesure s'avère impossible de lire le fichier sélectionné, ce récepteur passe - Pioneer VSX-820-K | Owner's Manual - Page 136
TOP MENU Appuyez sur cette touche pour revenir à l'écran des menus. RETURN Permet de revenir au niveau précédent. Important Si un message USB AAC VBR (Variable Bit Rate) : Oui1 • Compatibilité avec la protection DRM (Digital Rights Management) : Oui (les fichiers audio bénéficiant de la protection - Pioneer VSX-820-K | Owner's Manual - Page 137
numérique Périphérique non équipé de la technologie sans fil Bluetooth : Lecteur de musique numérique + Émetteur audio Bluetooth (vendu dan le commerce) Lecture de musique sans fil Lorsque l'ADAPTATEUR Bluetooth (modèle Pioneer nº AS-BT100) est raccordé à cet appareil, un produit équipé de la - Pioneer VSX-820-K | Owner's Manual - Page 138
de /, puis appuyez sur ENTER. PAIRING clignote. Important • Vous pouvez utiliser n'importe lequel des codes PIN 0000/1234/8888. Un périphérique à technologie sans fil Bluetooth utilisant un autre code PIN ne peut pas être utilisé avec ce système. 4 Allumez le périphérique à technologie sans fil - Pioneer VSX-820-K | Owner's Manual - Page 139
. Des instructions d'installation et de configuration simples à suivre sont fournies avec le tuner SIRIUS. Un grand nombre de bouquets de programmation sont disponibles, y compris la possibilité d'ajouter les programmes 'The Best of XM' au service SIRIUS. Le service 'Best of XM' n'est pas accessible - Pioneer VSX-820-K | Owner's Manual - Page 140
réservés. Service non disponible SiriusConnect.1 IN BD SUBWOOFER PRE OUT DVD TV ADAPTER PORT (OUTPUT 5 V 100 mA MAX) VIDEO DVR/VCR OUT I L COAXIAL ASSIGNABLE DVR/VCR IN IN R TV/SAT DVD L IN R AUDIO IN MONITOR OUT DV ANTENNA PR PB BD Home pour , pressez la touche RETURN. Remarque 1 Pour - Pioneer VSX-820-K | Owner's Manual - Page 141
CHANNEL SKIP CLEAR - Permet d'annuler la fonction Channel Skip réglée par le syntoniseur SiriusConnect. Si la fonction Channel parental n'apparaissent pas dans le guide des stations, mais vous mot de passe du verrouillage parental. • PASSWORD SET - Permet d'entrer le mot de passe de verrouillage - Pioneer VSX-820-K | Owner's Manual - Page 142
mentaires Guide âce à la liste de contrôle ci-dessous, consultez le service après-vente Pioneer indépendant agréé le plus proche pour effectuer la réparation. que vous écoutez peut ne pas avoir de canal LFE. • Réglez le subwoofer sur YES ou PLUS, comme indiqué dans la section Réglage des enceintes, - Pioneer VSX-820-K | Owner's Manual - Page 143
canaux, page 45). La fonction PHASE CONTROL semble n'avoir aucun effet audible. • Le cas échéant, vérifiez que le commutateur du filtre passe-bas de votre caisson de basses (subwoofer) est désactivé, ou que le point de coupure du filtre est réglé sur la fréquence la plus élevée. Si votre caisson - Pioneer VSX-820-K | Owner's Manual - Page 144
y ait un retard entre les enceintes et la sortie du subwoofer. • Reportez-vous à la section Configuration automatique du son le interrompu. périphérique à technologie sans fil Bluetooth et l'appareil. Placez le périphérique à technologie sans fil Bluetooth et l'appareil de façon à ce que - Pioneer VSX-820-K | Owner's Manual - Page 145
reportez-vous au manuel du composant ou du moniteur ou prenez contact avec le service après-vente du fabricant. Pas d'image. • Les signaux vidéo qui sont me. Pas de son, ou interruption • Si vous avez établi des connexions audio séparées, vérifiez que vous soudaine du son. avez affecté la/les - Pioneer VSX-820-K | Owner's Manual - Page 146
peut être limitée au nombre de canaux disponibles sur l'unité d'affichage connectée (par exemple, la sortie audio est limitée à 2 canaux pour un moniteur avec limitations audio stéréo). • Si vous souhaitez changer de source d'entrée, vous devrez modifier les fonctions à la fois sur le récepteur - Pioneer VSX-820-K | Owner's Manual - Page 147
à jour du code de cryptage soit terminée. Updating L'appareil met les stations à jour. Attendez que la mise à jour du code de cryptage soit terminée. Invalid Channel La station sélectionnée n'est pas disponible/n'existe pas. Sélectionnez une autre station. 73 Fr - Pioneer VSX-820-K | Owner's Manual - Page 148
de la Commission fédérale du commerce sur les exigences de puissance de sortie des amplificateurs. ** Mesure prise avec un analyseur de spectre audio Section audio Entrée (Sensibilité de mesure/Impédance) LINE 200 mV/47 kΩ Sortie (niveau/impédance) Sortie REC OUTPUT 200 mV/2,2 kΩ Rapport signal - Pioneer VSX-820-K | Owner's Manual - Page 149
la cire ou un détergent. • N'utilisez jamais de diluants, de benzine, d'insecticides ou autres produits chimiques qui pourraient corroder la surface de l'appareil. Publication de Pioneer Corporation. © 2009 Pioneer Corporation. Tous droits de reproduction et de traduction réservés. 75 Fr - Pioneer VSX-820-K | Owner's Manual - Page 150
ADVERTENCIA Este aparato no es impermeable. Para evitar el riesgo de incendio y de descargas eléctricas, no ponga ningún recipiente lleno de líquido (como pueda ser un vaso o un florero) cerca del aparato ni lo exponga a goteo, salpicaduras, lluvia o humedad. D3-4-2-1-3_A1_Es ADVERTENCIA Antes de - Pioneer VSX-820-K | Owner's Manual - Page 151
IMPORTANTE La luz intermitente con el símbolo de punta de flecha dentro un triángulo equilátero. Está convenido para avisar el usuario de la presencia de "voltaje peligrosa" no aislada dentro el producto que podría constituir un peligro de choque eléctrico para las personas. CAUTION RISK OF - Pioneer VSX-820-K | Owner's Manual - Page 152
. . . . 35 Uso de Stream Direct 36 Uso de Sound Retriever 36 Sonido mejorado con Phase Control 36 Reproducción con el ecualizador opciones de Audio 38 Selección de la señal de entrada 41 Uso de los auriculares 41 06 El menú System Setup Uso del menú System Setup 42 Configuración manual de los - Pioneer VSX-820-K | Owner's Manual - Page 153
básica 61 Compatibilidad de sonido comprimido . . . . 62 ADAPTADOR Bluetooth® para el disfrute inalámbrico de la música 63 Reproducción inalá . DTS y el símbolo son marcas registradas, y DTS-HD, DTS-HD Master Audio y los logotipos DTS son marcas de fábrica de DTS, Inc. El producto incluye software. - Pioneer VSX-820-K | Owner's Manual - Page 154
AV completo Derecho Altura (FHR) Subwoofer (SW) Delantero Posici sonido • Uso de varios modos de escucha • Uso de Sound Retriever (página 36) • Sonido mejorado con Phase Control las opciones de Audio (página 38) • Selección de la señal de entrada (página 41) • Configuración manual de los altavoces - Pioneer VSX-820-K | Owner's Manual - Page 155
Mando a distancia • Pilas secas (tamaño AAA IEC R03) x2 • Antena de cuadro de AM • Antena alámbrica de FM • Cable iPod • Este manual de instrucciones Colocación de las pilas • Aunque distintas pilas tengan la misma forma, pueden tener tensiones diferentes. No mezcle pilas de distinto tipo. • Cuando - Pioneer VSX-820-K | Owner's Manual - Page 156
Ventilación Al instalar esta unidad, asegúrese de dejar espacio alrededor de la unidad a fin de que la ventilación mejore la dispersión de calor (al menos 40 cm en la parte superior). Si no se deja suficiente espacio entre la unidad y las paredes u otros equipos, la acumulación de calor en el - Pioneer VSX-820-K | Owner's Manual - Page 157
DIMMER DISPLAY BAND 6 7 8 AUDIO/ VIDEO MULTI- CHANNEL RECEIVER VSX-820 TUNE TUNER EDIT PRESET ENTER MASTER VOLUME PHONES AUTO/DIRECT LISTENING MODE STEREO/ALC STANDARD ADV SURROUND iPod iPhone DIRECT CONTROL VIDEO INPUT USB iPod iPhone VIDEO L AUDIO R MCACC SETUP MIC 9 10 11 - Pioneer VSX-820-K | Owner's Manual - Page 158
12 Terminal de iPod/iPhone/USB Utilícelo para conectar su iPod de Apple o dispositivo de almacenamiento masivo USB como fuente de sonido (página 58 y página 61). 13 Entrada de AUDIO/VIDEO Consulte Conexión al terminal de vídeo del panel frontal en la página 28. 14 Conector MCACC SETUP MIC Utilícelo - Pioneer VSX-820-K | Owner's Manual - Page 159
de visualización de caracteres Muestra diversos datos del sistema. 10 Indicadores de DTS DTS Se ilumina cuando se detecta una fuente con señales de audio codificadas en DTS. HD Se ilumina cuando se detecta una fuente con señales de sonido codificadas DTSEXPRESS o DTS-HD. ES Se ilumina para indicar - Pioneer VSX-820-K | Owner's Manual - Page 160
señal DIGITAL Se ilumina cuando se selecciona una señal de sonido digital. Parpadea cuando se ha seleccionado una señal de audio digital y la entrada de audio seleccionada no está disponible. HDMI Se ilumina cuando se selecciona una señal HDMI. Parpadea cuando se ha seleccionado una señal HDMI - Pioneer VSX-820-K | Owner's Manual - Page 161
CD-R CH 5 ADAPTER iPod USB VIDEO TUNER SIRIUS SIGNAL SEL VOL 6 AUTO/ STEREO/ BD MENU 7 DIRECT A.L.C. STANDARD ADV SURR AUDIO PARAMETER TOP 8 MENU TUNE TUNER EDIT MASTER TOOLS VOLUME MENU PRESET ENTER 9 HOME MENU SETUP iPod CTRL CATEGORY TUNE BAND RETURN DTV/ TV MUTE 10 BASS TRE - Pioneer VSX-820-K | Owner's Manual - Page 162
RECEIVER primero para acceder: AUDIO PARAMETER Utilícelo para acceder a las opciones de Audio (página 38). SETUP Pulse para acceder al menú System Setup (página 42). RETURN TV analógica y DTV para los televisores de pantalla plana Pioneer. 11 Botones de número y otros controles de componentes Utilice - Pioneer VSX-820-K | Owner's Manual - Page 163
English Français Español S.RETRIEVER Pulse para restaurar el sonido con calidad de CD a fuentes de audio comprimidas (página 36). SB CH Púlselo para seleccionar ON, AUTO, OFF para el canal trasero de sonido envolvente. CH SELECT Pulse este botón repetidamente para - Pioneer VSX-820-K | Owner's Manual - Page 164
conecta los altavoces delanteros izquierdo y derecho (L/R), el altavoz central (C), los altavoces de sonido envolvente derecho e izquierdo (SL/SR), y el subwoofer (SW), podrá disfrutar de un sistema de sonido envolvente de 5.1 canales. Si, además, utiliza un amplificador externo, podrá conectar los - Pioneer VSX-820-K | Owner's Manual - Page 165
las siguientes pautas para obtener el mejor sonido del sistema. • El subwoofer se puede colocar en el suelo. Lo ideal es que los otros Asegúrese de que los altavoces no queden frente a frente. Para DVD-Audio, los altavoces deben situarse más directamente detrás del oyente que para la reproducci - Pioneer VSX-820-K | Owner's Manual - Page 166
R SURROUND L L IN R TV/SAT DVD L IN R AUDIO IN MONITOR OUT DVD IN BD IN SPEAKERS B ANTENNA PR PB Y MONITOR OUT BD FM UNBAL 75 SIRIUS IN R IN 2 (DVD) IN AM LOOP COMPONENT VIDEO IN 1 (BD) ASSIGNABLE 12 Class 2 Wiring L CENTER SW Subwoofer activo Sistema de altavoces B L R 18 Es - Pioneer VSX-820-K | Owner's Manual - Page 167
, podría provocar un corte de corriente como medida de seguridad. IN BD SUBWOOFER PRE OUT CD-R/TAPE DVR/VCR SURR BACK / FRONT DVD HEIGHT ADAPTER (OUTPUT IN 1 (CD-R/TAPE) HDMI ASSIGNABLE 12 IN R TV/SAT DVD L IN R AUDIO IN M ANTENNA BD FM UNBAL 75 SIRIUS IN IN AM LOOP • También se - Pioneer VSX-820-K | Owner's Manual - Page 168
embargo, si seleccionó SPB anteriormente, no se escuchará ningún sonido por el subwoofer (el canal LFE no está mezclado). 2 Puede utilizar los altavoces con una SPAB. 3 • Ajuste el parámetro de HDMI en Ajuste de las opciones de Audio en la página 38 a THRU (THROUGH) y ajuste la señal de entrada en - Pioneer VSX-820-K | Owner's Manual - Page 169
digital con el que sea compatible el componente conectado, incluido DVD-Video, DVD-Audio, SACD, Dolby Digital Plus, Dolby TrueHD, DTS-HD Master Audio (consulte las limitaciones más adelante), Video CD/Super VCD y CD. Este receptor incorpora tecnología Interfaz Multimedia de Alta Definición (HDMI - Pioneer VSX-820-K | Owner's Manual - Page 170
no saldrán por HDMI OUT. Componente de reproducción Terminal para conectar con la fuente PR PB Y HDMI IN COMPONENT VIDEO IN VIDEO IN PR PB Y HDMI OUT COMPONENT VIDEO OUT MONITOR OUT Terminal para conectar con el monitor de TV La información en pantalla (OSD) no se mostrará. TV - Pioneer VSX-820-K | Owner's Manual - Page 171
pantalla (OSD) del equipo en el televisor. IN BD DVD TV/SAT SUBWOOFER PRE OUT SURR BACK / FRONT HEIGHT L (Single) CD-R/TAPE DVR/ VIDEO IN HDMI IN Esta conexión se necesita para poder escuchar el sonido del televisor a través del receptor. HDMI OUT OPTICAL R L DIGITAL AUDIO OUT ANALOG AUDIO - Pioneer VSX-820-K | Owner's Manual - Page 172
ón) sin un terminal HDMI.123 IN BD DVD TV/SAT SUBWOOFER PRE OUT SURR BACK / FRONT HEIGHT L (Single) CD VIDEO IN 1 (BD) ASSIGNABLE 12 Class 2 Wiring L VIDEO IN TV 2 1 OPTICAL R L DIGITAL AUDIO OUT ANALOG AUDIO OUT Seleccione una R L OPTICAL COAXIAL ANALOG AUDIO OUT DIGITAL AUDIO - Pioneer VSX-820-K | Owner's Manual - Page 173
digital terrestre son todos ejemplos de los llamados 'módulos de conexión'.12 SUBWOOFER PRE OUT SURR BACK / FRONT HEIGHT L (Single) CD-R/TAPE VIDEO IN 1 (BD) ASSIGNABLE 12 1 STB OPTICAL R PLAY L DIGITAL AUDIO OUT ANALOG AUDIO OUT Seleccione una R REC L ANALOG AUDIO IN VIDEO IN VIDEO - Pioneer VSX-820-K | Owner's Manual - Page 174
consulte los manuales correspondientes. u otro componente de audio.2 SUBWOOFER PRE OUT SURR BACK VIDEO 2 PR PB Y COMPONENT VIDEO IN PR PB Y COMPONENT VIDEO OUT TV Reproductor Blu-ray/DVD OPTICAL COAXIAL R PLAY L DIGITAL AUDIO OUT ANALOG AUDIO OUT Seleccione una R REC L ANALOG AUDIO - Pioneer VSX-820-K | Owner's Manual - Page 175
English Français Español Conexión de antenas Conecte la antena de cuadro de AM y la antena alámbrica de FM como se indica a continuación. Para mejorar la recepción y la calidad de sonido, conecte antenas exteriores (consulte Uso de antenas exteriores abajo). fig. a fig. b 2 4 ANTENNA 3 AM - Pioneer VSX-820-K | Owner's Manual - Page 176
/ OFF MASTER VOLUME VIDEO INPUT USB iPod iPhone VIDEO L AUDIO R MCACC SETUP MIC Este receptor VIDEO L R AUDIO/VIDEO OUTPUT Videocámara (etc que está dañado, pida un cable de recambio al representante autorizado de Pioneer más cercano. • Cuando no esté en uso (por ejemplo, durante las - Pioneer VSX-820-K | Owner's Manual - Page 177
de un altavoz trasero de sonido envolvente.) RECEIVER SLEEP TV SOURCE CONTROL RECEIVER INPUT SELECT BD DVD TV INPUT AUDIO PARAMETER TOP MENU TUNE TUNER EDIT MASTER TOOLS VOLUME MENU PRESET ENTER HOME MENU SETUP iPod CTRL CATEGORY TUNE BAND RETURN DTV/ TV MUTE 1 Encienda el receptor - Pioneer VSX-820-K | Owner's Manual - Page 178
Setup en la página 31). 1.Auto MCACC Check! Front [ YES ] Center [ YES ] Surr [ YES ] Surr. Back [YESx2] Subwoofer [ YES ] 10:Next OK Return Analyzing Surround Analyzing Speaker System Speaker Distance Channel Level Acoustic Cal EQ Return Return • Para conseguir unos ajustes de altavoz - Pioneer VSX-820-K | Owner's Manual - Page 179
que esto sucede, apague el televisor mientras lleva cabo la configuración Auto MCACC Setup. Nota 1 • Dependiendo de las características de la habitación, el uso Ajuste de altavoz en la página 43. • El ajuste de distancia del subwoofer puede ser mayor que la distancia real que hay desde la posición de - Pioneer VSX-820-K | Owner's Manual - Page 180
de DVD), el televisor1 y el subwoofer (si tiene uno) y, a continuación, encienda el receptor (pulse RECEIVER). • Asegúrese de que el VIDEO). 2 Si tiene que cambiar manualmente el tipo de señal de entrada, pulse SIGNAL SEL (página 41). 3 • Es aconsejable que compruebe los ajustes de salida de audio - Pioneer VSX-820-K | Owner's Manual - Page 181
de 2 canales en el modo DOLBY PLII MUSIC, hay tres parámetros adicionales que puede ajustar: C.WIDTH, DIMEN., y PNRM.. Consulte Ajuste de las opciones de Audio en la página 38 para modificarlos. 4 Si está escuchando fuentes de dos canales en modo NEO:6 CINEMA o NEO:6 MUSIC, también puede ajustar el - Pioneer VSX-820-K | Owner's Manual - Page 182
de 2 canales en el modo DOLBY PLIIx MUSIC, hay tres parámetros adicionales que puede ajustar: C.WIDTH, DIMEN., y PNRM.. Consulte Ajuste de las opciones de Audio en la página 38 para modificarlos. 4 Si está escuchando fuentes de dos canales en modo NEO:6 CINEMA o NEO:6 MUSIC, también puede ajustar el - Pioneer VSX-820-K | Owner's Manual - Page 183
través de los altavoces frontales izquierdo y derecho (y, posiblemente, del subwoofer, según la configuración de los altavoces). Las fuentes multicanal Dolby y también están disponibles las funciones Midnight, Loudness, Phase Control, Sound Retriever y Tone. • ALC - Para escuchar en el modo est - Pioneer VSX-820-K | Owner's Manual - Page 184
acuerdo con los ajustes de Surround Setup (configuración de altavoces, volumen de digital. Uso de Sound Retriever Al quitar los datos de audio durante el proceso LEV PHASE CH SHIFT • Pulse RECEIVER y, a continuación, S.RETRIEVER baja frecuencia se asignan al subwoofer y al altavoz más adecuado. - Pioneer VSX-820-K | Owner's Manual - Page 185
9 DIMMER LEV PHASE CH SHIFT • Al escuchar una fuente, pulse RECEIVER y, a continuación, EQ para activar o desactivar la Ecualización de calibración desfasado" y se generará una imagen no fiable del sonido. • Si su subwoofer cuenta con un interruptor de control de fase, ajústelo al signo más (+) - Pioneer VSX-820-K | Owner's Manual - Page 186
MENU TUNE TUNER EDIT MASTER TOOLS VOLUME MENU PRESET PRESET RECEIVER INPUT SELECT BD DVD TV INPUT ENTER HOME MENU SETUP iPod CTRL TUNE BAND RETURN 1 Pulse RECEIVER en el mando a distancia y, a continuación, AUDIO PARAMETER. 2 Utilice / para seleccionar el ajuste que desea modificar - Pioneer VSX-820-K | Owner's Manual - Page 187
la calidad de sonido ON sonido) sufre de una imagen de sonido desigual. La función Sound Retriever utiliza la nueva tecnología DSP, que le ayuda a devolver el sonido en calidad CD al audio de 2 canales comprimido restaurando la presión del sonido y suavizando los artefactos de sonido dentado - Pioneer VSX-820-K | Owner's Manual - Page 188
. L (Bajo) M (Medio) H (Alto) a. Puede cambiar las opciones MIDNIGHT/LOUDNESS en cualquier momento con el botón MIDNIGHT. b. Puede modificar la función Sound Retriever en cualquier momento con el botón S.RETRIEVER. c. Reproducción de WMA y MP3 sólo está disponible a través de la entrada iPod/USB - Pioneer VSX-820-K | Owner's Manual - Page 189
para las distintas entradas, tal como se describe abajo.1 1 Pulse RECEIVER en el mando a distancia. 2 Pulse SIGNAL SEL para seleccionar más detalles, consulte el manual de instrucciones suministrado con el reproductor de DVD. 2 Cuando la opción HDMI de Ajuste de las opciones de Audio en la página 38 - Pioneer VSX-820-K | Owner's Manual - Page 190
de componentes o de vídeo compuesto. RECEIVER SLEEP TV SOURCE CONTROL RECEIVER INPUT SELECT BD DVD TV INPUT AUDIO PARAMETER TOP MENU TUNE TUNER EDIT MASTER TOOLS VOLUME MENU PRESET PRESET ENTER HOME MENU SETUP iPod CTRL CATEGORY TUNE BAND RETURN DTV/ TV MUTE 1 Encienda el receptor - Pioneer VSX-820-K | Owner's Manual - Page 191
recomendamos ajustar las opciones en orden: 2.Manual SP Setup a.Speaker Setting b.Crossover Network c.Channel Level d.Speaker Distance 2a.Speaker Setting Front SMALL Center [ SMALL ] Surr [ SMALL ] Surr. Back [ NO ] Subwoofer: YES Return Return 2 Seleccione el conjunto de altavoces que - Pioneer VSX-820-K | Owner's Manual - Page 192
, seleccione NO (las frecuencias bajas son emitidas desde otros altavoces). 3 Cuando termine, pulse RETURN. Volverá al menú Manual SP Setup. Sugerencia • Si tiene un subwoofer y desea obtener un sonido rico en graves, puede parecer lógico seleccionar la opción LARGE para los altavoces delanteros - Pioneer VSX-820-K | Owner's Manual - Page 193
SP Setup. 2.Manual SP Setup a.Speaker Setting b.Crossover Network c.Channel Level d.Speaker Distance 2b.Crossover Network Frequency 100Hz Return Return 2 Seleccione el punto de corte de frecuencia. Las frecuencias que se encuentren por debajo del punto de corte serán enviadas al subwoofer - Pioneer VSX-820-K | Owner's Manual - Page 194
Manual SP Setup. 2.Manual SP Setup a.Speaker Setting b.Crossover Network c.Channel Level d.Speaker Distance Return 2d.Speaker Distance Front L Center Front R Surround R Surr. Back R Surr. Back L Surround L Subwoofer VIDEO OUT RECEIVER en el mando a distancia y, a continuación, pulse el botón SETUP - Pioneer VSX-820-K | Owner's Manual - Page 195
: Surr. Back 1 Pulse RECEIVER en el mando a distancia y, a continuación, pulse el botón SETUP. Aparecerá una pantalla (OSD Setup 1.Auto MCACC 2.Manual SP Setup 3.Input Assign 4.Pre Out Setting Return 2 Seleccione 'Pre Out Setting' en el menú System Setup. System Setup 1.Auto MCACC 2.Manual SP Setup - Pioneer VSX-820-K | Owner's Manual - Page 196
30 estaciones.1 RECEIVER SLEEP TV SOURCE CONTROL RECEIVER INPUT SELECT BD DVD TV INPUT DVR CD CD-R CH AUDIO PARAMETER TOP MENU TUNE TUNER EDIT MASTER TOOLS VOLUME MENU ENTER HOME MENU SETUP iPod CTRL CATEGORY TUNE BAND RETURN DTV/ TV MUTE ADAPTER iPod USB VIDEO TUNER SIRIUS SIGNAL - Pioneer VSX-820-K | Owner's Manual - Page 197
1 Sintonice la emisora que desea memorizar. Para más detalles, consulte Recepción de radio en la página 48. 2 Pulse TUNER EDIT. La pantalla muestra PRESET, luego MEM parpadeante y una presintonía. 3 Pulse PRESET / para seleccionar la presintonización de emisoras deseada. También se pueden usar los - Pioneer VSX-820-K | Owner's Manual - Page 198
de vídeo). RECEIVER SLEEP TV SOURCE CONTROL RECEIVER INPUT SELECT BD DVD TV INPUT DVR CD CD-R CH ADAPTER iPod USB VIDEO TUNER SIRIUS de las videograbadoras el nivel de grabación de audio se ajusta automáticamente-consulte el manual de instrucciones del componente si tiene dudas. 5 - Pioneer VSX-820-K | Owner's Manual - Page 199
, el mando a distancia cancelará automáticamente la operación. Selección directa de códigos de preajuste RECEIVER INPUT SELECT BD DVD TV INPUT DVR CD CD-R CH ADAPTER iPod USB VIDEO MEMORY HDD 1 DVD 2 VCR 3 DISP S.RETRIEVER SB CH CH SELECT EQ 4 5 6 CH MIDNIGHT SPEAKERS - Pioneer VSX-820-K | Owner's Manual - Page 200
brica. • Mientras mantiene pulsado el botón RECEIVER , pulse el botón '0' durante 3 BD 2255 DVD 2256 TV 0291 DVR 2257 VIDEO 1053 CD 5000 CD-R 5001 TV CONTROL pantalla plana Pioneer. HOME MENU Utilícelo como botón GUIDE para navegar. TV por cable/TV satélite/TV/ DTV RETURN Úselo - Pioneer VSX-820-K | Owner's Manual - Page 201
English Français Español Botón(es) MENU ENTER CH +/- Función Componentes Púlselo para acceder al menú DTV. DTV Para seleccionar la pantalla de menú. TV por cable/TV satélite/TV Pulse este botón para seleccionar o ajustar elementos TV por cable/TV satélite/TV/ en la pantalla de menú, o - Pioneer VSX-820-K | Owner's Manual - Page 202
Botón(es) ENTER & RETURN Función Para navegar por los menús/opciones de BD/DVD. HOME MENU Muestra la pantalla HOME MENU. CH +/- Para seleccionar canales. HDD Para cambiar a los controles de disco duro al utilizar (SHIFT + 1) una grabadora de HDD/DVD. DVD Para cambiar a los - Pioneer VSX-820-K | Owner's Manual - Page 203
2262 Yamaha 2297, 2298, 2299 DVD Fabricante Código Pioneer 2256, 2014 Accurian 2092 Advent 2072 Aiwa 2012 Akai Boston 2059 Broksonic 2066 California Audio Labs 2068 CambridgeSoundWorks 2065 CineVision 2091 GE 2016, 2077, 2080 GFM 2043 Go Video 2087 Gradiente 2068 Greenhill 2080 Haier 2094 Harman/ - Pioneer VSX-820-K | Owner's Manual - Page 204
, 2269 Sharp 2267, 2275 Sony 2268, 2271, 2272, 2273, 2276 Toshiba 2274 VCR Fabricante Código Pioneer 1053, 1108 ABS 1017 Adventura 1005 Aiwa 1005 Alienware 1017 American High 1004 Asha 1002 Audio Dynamics 1000 Audiovox 1003 Bang & Olufsen 1032 Beaumark 1002 Bell & Howell 1001 Calix 1003 Candle 1002 - Pioneer VSX-820-K | Owner's Manual - Page 205
1002, 1003 Touch 1017 UltimateTV 1031 Unitech 1002 Vector Research 1000 Video Concepts 1000 Videosonic 1002 Viewsonic 1017 Voodoo 1017 Wards 1002, 1003, 1000, 1001 Zenith 1013, 1018 ZT Group 1017 CD Fabricante Código Pioneer 5000, 5011 AKAI 5043 Asuka 5045 Denon 5019 Fisher 5048 Goldstar 5040 - Pioneer VSX-820-K | Owner's Manual - Page 206
al terminal iPod. CONTROL ON / OFF VIDEO INPUT USB iPod iPhone VIDEO L AUDIO R MCACC SETUP MIC MASTER VOLUME Cable iPod Este receptor se recomienda desactivar el ecualizador antes de realizar la conexión. • Pioneer no se hace responsable, bajo ninguna circunstancia, de ninguna pérdida - Pioneer VSX-820-K | Owner's Manual - Page 207
categoría. • Para volver al nivel anterior en cualquier momento, pulse RETURN. 2 Utilice los botones / para desplazarse por los elementos de (salvo iPod touch e iPhone) estarán desactivados mientras el dispositivo esté conectado al receptor (en la pantalla del iPod aparecerá Pioneer). 2 • Tenga en - Pioneer VSX-820-K | Owner's Manual - Page 208
volver a la pantalla del menú iPod Top. RETURN Pulse para volver al nivel anterior. Visionado de realizando una única acción: pulsando el botón iPod iPhone DIRECT CONTROL en el panel frontal para habilitar las á conectado a la entrada iPod VIDEO del panel frontal. · • Esta función sólo se puede - Pioneer VSX-820-K | Owner's Manual - Page 209
OFF MASTER VOLUME VIDEO INPUT USB iPod iPhone VIDEO L AUDIO R MCACC SETUP MIC Dispositivo de Púlselo para volver a la pantalla del menú. RETURN Pulse para volver al nivel anterior. Nota 1 personal para la reproducción USB. • Pioneer no puede garantizar la compatibilidad (funcionamiento - Pioneer VSX-820-K | Owner's Manual - Page 210
No Información de otras compatibilidades • Reproducción de VBR (Variable Bit Rate) MP3/WMA/MPEG-4 AAC: Sí1 • Compatible con protección DRM (gesti AAC, lo que constituye la base de la tecnología de compresión de audio MPEG-4. El formato de archivo y la extensión utilizados dependen de la aplicación - Pioneer VSX-820-K | Owner's Manual - Page 211
inalámbrica: Reproductor de música digital + Transmisor de audio con Bluetooth (de venta en tiendas) Datos de música Este receptor ADAPTADOR Bluetooth® Reproducción inalámbrica de música Cuando el ADAPTADOR Bluetooth (Modelo de Pioneer Nº AS-BT100) está conectado a esta unidad, puede utilizarse - Pioneer VSX-820-K | Owner's Manual - Page 212
mando a distancia para cambiar el receptor al modo de entrada ADAPTER. 2 Conecte el dispositivo de tecnología inalámbrica Bluetooth al ADAPTADOR Bluetooth. Nota 1 Si el ADAPTADOR Bluetooth no está conectado al ADAPTER PORT, aparecerá NO ADAPTER si el modo de entrada seleccionado es ADAPTER. 2 • Se - Pioneer VSX-820-K | Owner's Manual - Page 213
y los logotipos Bluetooth® son marcas registradas propiedad de Bluetooth SIG, Inc., y cualquier uso de dichas marcas por Pioneer Corporation se hace bajo ón de añadir la programación 'The Best of XM' al servicio SIRIUS. Por el momento, el servicio 'Best of XM' no está disponible para suscriptores - Pioneer VSX-820-K | Owner's Manual - Page 214
SiriusConnect.1 IN BD SUBWOOFER PRE OUT DVD TV PORT (OUTPUT 5 V 100 mA MAX) VIDEO DVR/VCR OUT I L COAXIAL ASSIGNABLE DVR/VCR IN TV/SAT DVD L IN R AUDIO IN MONITOR OUT DV ANTENNA PR cualquier momento, pulse RETURN. Sugerencia • Para del final de este manual. Conecte SIRIUS en Internet - Pioneer VSX-820-K | Owner's Manual - Page 215
para seleccionar los canales que desea colocar bajo bloqueo parental. Los canales colocados bajo bloqueo parental no aparecen en la Channel Guide, pero se puede acceder a ellos introduciendo directamente su número de canal y proporcionando la contraseña de bloqueo parental. • PASSWORD SET - Defina - Pioneer VSX-820-K | Owner's Manual - Page 216
, llame a una empresa de servicio técnico independiente autorizada por Pioneer. No hay emisión de sonido cuando se selecciona una función. manual de instrucciones suministrado con el televisor. El subwoofer no emite sonido. • Asegúrese de que el subwoofer está conectado. • Si el subwoofer dispone - Pioneer VSX-820-K | Owner's Manual - Page 217
más alto. Si hay un ajuste PHASE en el subwoofer, ajústelo a 0º (o dependiendo del subwoofer, el ajuste que crea que tiene el mejor efecto sean correctos y/o que la salida de señal DTS esté activada. Consulte el manual de instrucciones suministrado con el reproductor de DVD. • Ajuste el tipo de se - Pioneer VSX-820-K | Owner's Manual - Page 218
subwoofer). Después de utilizar la • El ruido de baja frecuencia puede estar provocado por un aparato de función Auto MCACC aire acondicionado o un motor. Apague todos los aparatos en la Setup de tecnología inalámbrica manejarse. El dispositivo Bluetooth) cerca de la unidad. Si dicho objeto - Pioneer VSX-820-K | Owner's Manual - Page 219
su componente HDMI directamente al monitor, consulte el manual del componente o del monitor, o bien pó del terminal de video analógico no saldrán por el terminal HDMI. Las señales de video procedentes del • Si ha realizado conexiones separadas para el audio, asegúrese de que ha asignado el/los - Pioneer VSX-820-K | Owner's Manual - Page 220
ía estar limitada por el número de canales disponibles de la unidad de pantalla conectada (por ejemplo, la salida de audio se reduce a 2 canales para una pantalla con limitaciones de audio estéreo). • Si desea cambiar la fuente de entrada, deberá cambiar las funciones tanto en el receptor como en - Pioneer VSX-820-K | Owner's Manual - Page 221
cifrado se haya actualizado. Updating La unidad está actualizando los canales. Espere a que el código de cifrado se haya actualizado. Invalid Channel El canal seleccionado no está disponible o Seleccione otro canal. no existe. Restablecimiento de los ajustes por defecto del equipo Lleve a cabo - Pioneer VSX-820-K | Owner's Manual - Page 222
** Medida con analizador de espectro de audio Sección de audio Entrada (sensibilidad/impedancia) LINE 200 mV/47 1 Antena alámbrica de FM 1 Cable iPod 1 Este manual de instrucciones Nota • Con el propósito de introducir mejoras por Pioneer Corporation. Copyright © 2009 Pioneer Corporation. Todos los - Pioneer VSX-820-K | Owner's Manual - Page 223
75 Es English Français Español - Pioneer VSX-820-K | Owner's Manual - Page 224
76 Es - Pioneer VSX-820-K | Owner's Manual - Page 225
77 Es English Français Español - Pioneer VSX-820-K | Owner's Manual - Page 226
AND INSTALLATION OF THE PRODUCT. PUSA OR POC, AS APPROPRIATE, WILL PAY TO RETURN THE REPAIRED OR REPLACEMENT PRODUCT TO YOU WITHIN THE COUNTRY OF PURCHASE. PRODUCT WARRANTY PERIOD Home Audio and Video ...Microphones, Headphones, Phono Cartridges and Styluses Parts 1 Year 90 Days Labor 1 Year 90 - Pioneer VSX-820-K | Owner's Manual - Page 227
ÉTÉ EFFECTUÉ. PÉRIODE DE GARANTIE DES PRODUITS Pièces Main-d'œuvre Produits audio et vidéo pour la maison ... Micros, écouteurs, stylets et cartouches phono AUPRÈS D'UNE SOURCE AUTRE QU'UNE SOCIÉTÉ DE SERVICE OU AUTRE AUTORISÉE OU DÉSIGNÉE PAR PIONEER. LA PRÉSENTE GARANTIE NE COUVRE PAS LES DÉ - Pioneer VSX-820-K | Owner's Manual - Page 228
service location, to purchase replacement parts, operating instructions, or accessories, please go to one of following URLs : Pour enregistrer votre produit, trouver le service 479-4411 PIONEER EUROPE NV Haven 1087, Keetberglaan 1, B-9120 Melsele, Belgium TEL: 03/570.05.11 PIONEER ELECTRONICS
-
 1
1 -
 2
2 -
 3
3 -
 4
4 -
 5
5 -
 6
6 -
 7
7 -
8
-
9
-
10
-
11
-
12
-
13
-
14
-
15
-
16
-
17
-
18
-
19
-
20
-
21
-
22
-
23
-
24
-
25
-
26
-
27
-
28
-
29
-
30
-
31
-
32
-
33
-
34
-
35
-
36
-
37
-
38
-
39
-
40
-
41
-
42
-
43
-
44
-
45
-
46
-
47
-
48
-
49
-
50
-
51
-
52
-
53
-
54
-
55
-
56
-
57
-
58
-
59
-
60
-
61
-
62
-
63
-
64
-
65
-
66
-
67
-
68
-
69
-
70
-
71
-
72
-
73
-
74
-
75
-
76
-
77
-
78
-
79
-
80
-
81
-
82
-
83
-
84
-
85
-
86
-
87
-
88
-
89
-
90
-
91
-
92
-
93
-
94
-
95
-
96
-
97
-
98
-
99
-
100
-
101
-
102
-
103
-
104
-
105
-
106
-
107
-
108
-
109
-
110
-
111
-
112
-
113
-
114
-
115
-
116
-
117
-
118
-
119
-
120
-
121
-
122
-
123
-
124
-
125
-
126
-
127
-
128
-
129
-
130
-
131
-
132
-
133
-
134
-
135
-
136
-
137
-
138
-
139
-
140
-
141
-
142
-
143
-
144
-
145
-
146
-
147
-
148
-
149
-
150
-
151
-
152
-
153
-
154
-
155
-
156
-
157
-
158
-
159
-
160
-
161
-
162
-
163
-
164
-
165
-
166
-
167
-
168
-
169
-
170
-
171
-
172
-
173
-
174
-
175
-
176
-
177
-
178
-
179
-
180
-
181
-
182
-
183
-
184
-
185
-
186
-
187
-
188
-
189
-
190
-
191
-
192
-
193
-
194
-
195
-
196
-
197
-
198
-
199
-
200
-
201
-
202
-
203
-
204
-
205
-
206
-
207
-
208
-
209
-
210
-
211
-
212
-
213
-
214
-
215
-
216
-
217
-
218
-
219
-
220
-
221
-
222
-
223
-
224
-
225
-
226
-
227
-
228
 |
 |
Register your product on
http://www.pioneerelectronics.ca (Canada)
http://www.pioneerelectronics.ca (Canada)
•
Protect your new investment
The details of your purchase will be on file for reference in the event of an
insurance claim such as loss or theft.
•
Improve product development
Your input helps us continue to design products that meet your needs.
•
Receive a free Pioneer newsletter
Registered customers can opt in to receive a monthly newsletter.
•
Receive free tips, updates and service bulletins on
your new product
AUDIO/VIDEO MULTI-CHANNEL RECEIVER
RECEPTEUR AUDIOVISUEL A
VOIES MULTIPLES
RECEPTOR MULTICANAL DE AUDIO/VÍDEO
VSX-820
Operating Instructions
Mode d
’
emploi
Manual de instrucciones