Pioneer VSX-820-K Owner's Manual - Page 23
Connecting a TV and playback components, Connecting using HDMI - speaker setup
 |
UPC - 884938109277
View all Pioneer VSX-820-K manuals
Add to My Manuals
Save this manual to your list of manuals |
Page 23 highlights
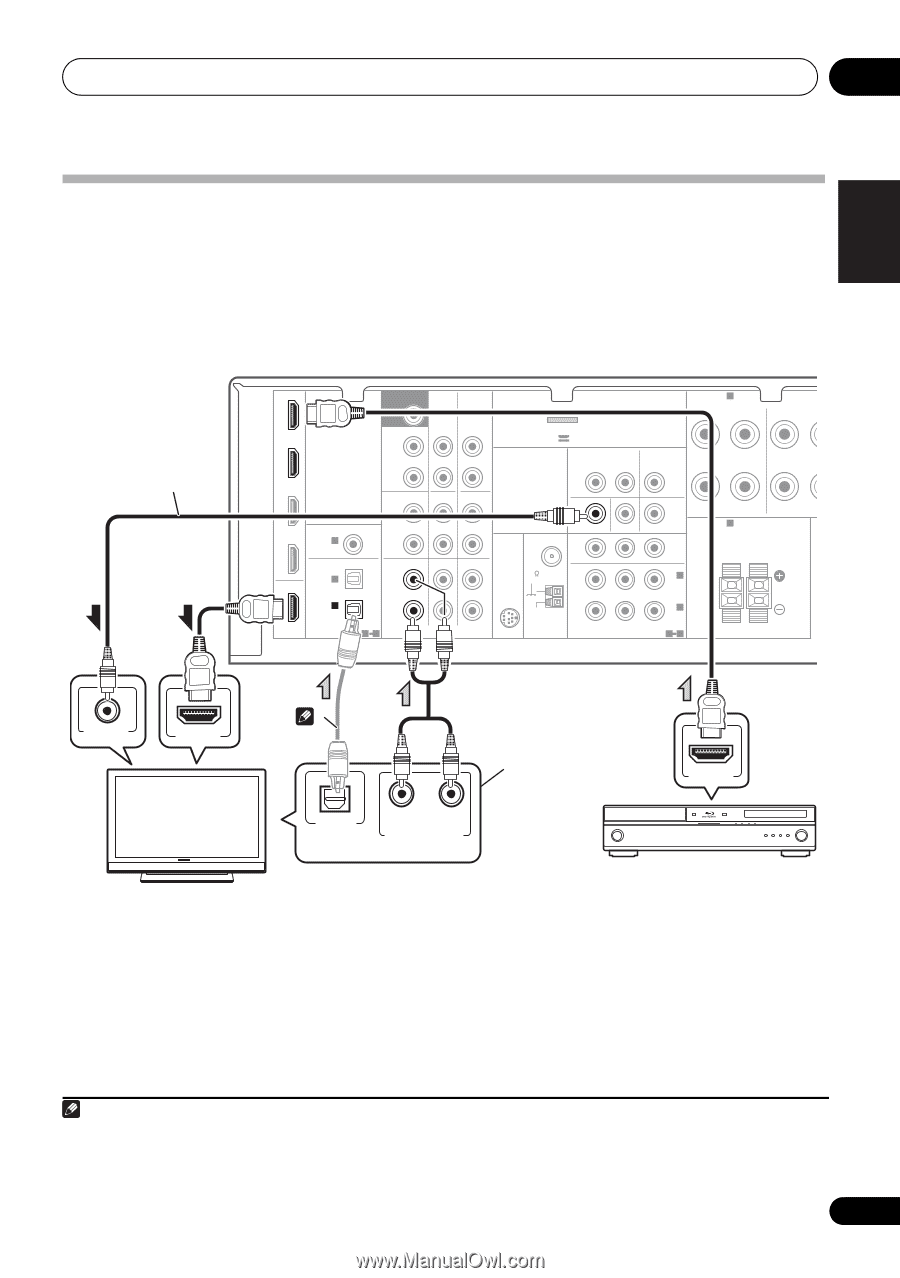
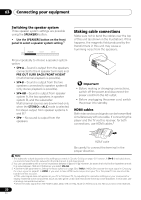
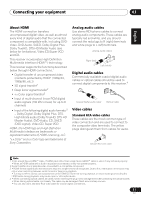
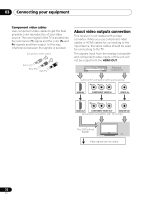
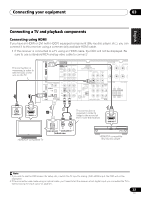
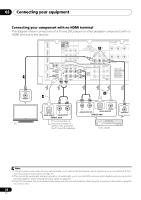
English Deutsch Français Italiano Nederlands Español Connecting your equipment 03 Connecting a TV and playback components Connecting using HDMI If you have an HDMI or DVI (with HDCP) equipped component (Blu-ray disc player, etc.), you can connect it to this receiver using a commercially available HDMI cable. • If the receiver is connected to a TV using an HDMI cable, the OSD will not be displayed. Be sure to use a standard RCA analog video cable to connect.12 This connection is necessary in order to see the OSD of the unit on the TV. IN BD DVD TV/SAT SUBWOOFER PRE OUT SURR BACK / FRONT HEIGHT L (Single) CD-R/TAPE DVR/VCR OUT R PRE OUT CD CD-R/TAPE DVR/VCR ADAPTER PORT (OUTPUT 5 V 100 mA MAX) VIDEO DVR/VCR OUT IN TV/SAT IN SPEAKERS A R FRONT L R SURROUN COAXIAL ASSIGNABLE DVR/VCR IN 1 (CD) OPTICAL IN 2 OUT IN 1 (CD-R/TAPE) HDMI ASSIGNABLE 12 L IN R TV/SAT DVD L IN R AUDIO IN MONITOR OUT DVD IN BD IN SPEAKERS B ANTENNA PR PB Y MONITOR OUT BD FM UNBAL 75 SIRIUS IN R IN 2 (DVD) IN AM LOOP COMPONENT VIDEO IN 1 (BD) ASSIGNABLE 12 Class 2 Wiring L 2 VIDEO IN HDMI IN This connection is required in order to listen to the sound of the TV over the receiver. HDMI OUT OPTICAL R L DIGITAL AUDIO OUT ANALOG AUDIO OUT Select one HDMI/DVI-compatible TV HDMI/DVI-compatible Blu-ray disc player Note 1 If you wish to see the OSD screen (for setup, etc.), switch the TV input to analog. (With HDMI input, the OSD will not be displayed.) 2 If the connection was made using an optical cable, you'll need to tell the receiver which digital input you connected the TV to (see Choosing the input signal on page 41). 23 En
-
 1
1 -
2
-
3
-
4
-
5
-
6
-
7
-
8
-
9
-
10
-
11
-
12
-
13
-
14
-
15
-
16
-
17
-
 18
18 -
 19
19 -
 20
20 -
 21
21 -
 22
22 -
 23
23 -
 24
24 -
 25
25 -
 26
26 -
 27
27 -
 28
28 -
29
-
30
-
31
-
32
-
33
-
34
-
35
-
36
-
37
-
38
-
39
-
40
-
41
-
42
-
43
-
44
-
45
-
46
-
47
-
48
-
49
-
50
-
51
-
52
-
53
-
54
-
55
-
56
-
57
-
58
-
59
-
60
-
61
-
62
-
63
-
64
-
65
-
66
-
67
-
68
-
69
-
70
-
71
-
72
-
73
-
74
-
75
-
76
-
77
-
78
-
79
-
80
-
81
-
82
-
83
-
84
-
85
-
86
-
87
-
88
-
89
-
90
-
91
-
92
-
93
-
94
-
95
-
96
-
97
-
98
-
99
-
100
-
101
-
102
-
103
-
104
-
105
-
106
-
107
-
108
-
109
-
110
-
111
-
112
-
113
-
114
-
115
-
116
-
117
-
118
-
119
-
120
-
121
-
122
-
123
-
124
-
125
-
126
-
127
-
128
-
129
-
130
-
131
-
132
-
133
-
134
-
135
-
136
-
137
-
138
-
139
-
140
-
141
-
142
-
143
-
144
-
145
-
146
-
147
-
148
-
149
-
150
-
151
-
152
-
153
-
154
-
155
-
156
-
157
-
158
-
159
-
160
-
161
-
162
-
163
-
164
-
165
-
166
-
167
-
168
-
169
-
170
-
171
-
172
-
173
-
174
-
175
-
176
-
177
-
178
-
179
-
180
-
181
-
182
-
183
-
184
-
185
-
186
-
187
-
188
-
189
-
190
-
191
-
192
-
193
-
194
-
195
-
196
-
197
-
198
-
199
-
200
-
201
-
202
-
203
-
204
-
205
-
206
-
207
-
208
-
209
-
210
-
211
-
212
-
213
-
214
-
215
-
216
-
217
-
218
-
219
-
220
-
221
-
222
-
223
-
224
-
225
-
226
-
227
-
228
 |
 |