Pioneer VSX-822-K Owner's Manual
Pioneer VSX-822-K Manual
 |
View all Pioneer VSX-822-K manuals
Add to My Manuals
Save this manual to your list of manuals |
Pioneer VSX-822-K manual content summary:
- Pioneer VSX-822-K | Owner's Manual - Page 1
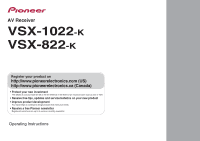
AV Receiver VSX-1022-K VSX-822-K Register your product on http://www.pioneerelectronics.com (US) http://www.pioneerelectronics.ca (Canada) • Protect your new investment The details of your purchase will be on file for reference in the event of an insurance claim such as loss or theft. • Receive free - Pioneer VSX-822-K | Owner's Manual - Page 2
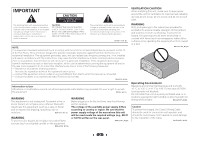
and maintenance (servicing) instructions in the literature , which can be determined by turning the equipment off and on, the relocate the receiving antenna. - Increase the separation between the equipment and receiver. - should be used for connection with speaker, and should be routed away from hazards - Pioneer VSX-822-K | Owner's Manual - Page 3
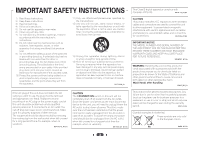
in accordance with the manufacturer's instructions. 8) Do not install . 14) Refer all servicing to qualified service personnel. Servicing is required when the dropped. D3-7-13-69_En CAUTION The STANDBY/ON switch on this unit will not 3a_A1_En IMPORTANT NOTICE THE MODEL NUMBER AND SERIAL NUMBER - Pioneer VSX-822-K | Owner's Manual - Page 4
front height speakers (In case of VSX-822 12 Switching the speaker terminal 14 Making cable connections 14 HDMI cables 14 About HDMI 14 Analog audio cables 15 Digital audio cables 15 Video cables 15 About the video converter (VSX-1022 only 16 About video outputs connection (VSX-822 only 16 - Pioneer VSX-822-K | Owner's Manual - Page 5
Code List 55 10 Additional information Troubleshooting 59 General 59 NETWORK feature 60 HDMI 61 Important information regarding the HDMI connection 61 About iPod/iPhone/iPad 62 About FLAC 62 About messages displayed when using network functions 63 Resetting the main unit 63 Cleaning the - Pioneer VSX-822-K | Owner's Manual - Page 6
you've set the video input on your TV to this receiver. Check the manual that came with the TV if you don't know how to do this. 4 The Speaker System setting (VSX-1022 only) (page 49) (Specify either using the surround back or front height speaker.) The Pre Out Setting (VSX-822 only) (page 50 - Pioneer VSX-822-K | Owner's Manual - Page 7
23)). 3 Receiver control buttons SPEAKERS - See Switching the speaker terminal on page 14. DIMMER - Dims or brightens the display. The brightness can be controlled in four steps. DISPLAY - Switches the display of this unit. The listening mode, sound volume, Speaker System (VSX-1022)/Pre Out (VSX-822 - Pioneer VSX-822-K | Owner's Manual - Page 8
iPod or USB mass storage device as an audio source (page 21). 15 SOUND RETRIEVER AIR When the button is pressed, the input switches to ADAPTER and the listening mode is automatically set to S.R AIR (page 31). 16 iPod iPhone iPad DIRECT CONTROL Change the receiver's input to the iPod and enable iPod - Pioneer VSX-822-K | Owner's Manual - Page 9
by pressing SLEEP once. 2 RECEIVER Switches the receiver between standby and on. 3 RECEIVER Switches the remote to control the receiver (used to select the white commands above the number buttons (MIDNIGHT, etc)). Also use this button to set up surround sound (page 46) or Audio parameters (page 36 - Pioneer VSX-822-K | Owner's Manual - Page 10
folder (page 40). 14 VOLUME +/- Use to set the listening volume. 15 MUTE Mutes/unmutes the sound. 16 DISP Switches the display of this unit. The listening mode, sound volume, Speaker System (VSX-1022)/Pre Out (VSX-822) setting or input name can be checked by selecting an input source. • The - Pioneer VSX-822-K | Owner's Manual - Page 11
at the same time. In this case, sound will be output from either the front height speaker or the surround back speaker depending on which one was selected in the Speaker System setting (see The Speaker System setting (VSX-1022 only) on page 49). • VSX-822 only: To connect the surround back or front - Pioneer VSX-822-K | Owner's Manual - Page 12
shocks such as earthquakes. Connecting the speakers The receiver will work with just two stereo speakers (the front speakers in the diagram) but using at least three speakers is recommended, and a complete setup is best for surround sound. Make sure you connect the speaker on the right to the right - Pioneer VSX-822-K | Owner's Manual - Page 13
ENCEINTE D'IMPEDANCE DE 6 -16 . 6 -16 . CENTER SPEAKERS Class 2 Wiring FRONT HEIGHT SELECTABLE SEE INSTRUCTION MANUAL SELECTABLE VOIR LE MODE D'EMPLOI R L HDMI OUT IN LAN (10/100) DVD SAT/CBL PREOUT BSDUBWGOAMOE FERDVR/BDR VIDEO PRE OUT SUB WOOFER ADAPTER PORT COAXIAL ASSIGNABLE IN - Pioneer VSX-822-K | Owner's Manual - Page 14
even when headphones are connected for VSX-1022. Important • Before making or changing connections, switch off the power and disconnect the power cord from the AC outlet. • Before unplugging the power cord, switch the power into standby. HDMI cables Both video and sound signals can be transmitted - Pioneer VSX-822-K | Owner's Manual - Page 15
and are used to connect to the composite video terminals. The yellow plugs distinguish them from cables for audio. Yellow VIDEO Component video cables (VSX-1022 only) Use component video cables to get the best possible color reproduction of your video source. The color signal of the TV is - Pioneer VSX-822-K | Owner's Manual - Page 16
intellectual property rights of Rovi Corporation. Reverse engineering and disassembly are prohibited. About video outputs connection (VSX-822 only) This receiver is not loaded with a video converter. When you use HDMI cables for connecting to the input device, the same cables should be used for - Pioneer VSX-822-K | Owner's Manual - Page 17
cables (as shown). - If the TV supports the HDMI Audio Return Channel function, the sound of the TV can be input to the receiver via the HDMI terminal, so there is no need to connect an audio cable. In this case, set ARC at HDMI Setup to ON (see HDMI Setup on page 52). Note • In order to listen - Pioneer VSX-822-K | Owner's Manual - Page 18
) VIDEO MONITOR MONITOR OUT OUT SAT/CBL IN AUDIO DVD IN VSX-1022 IN 1 (DVD) ASSIGNABLE Y PB PR DVD COMPONENT VIDDEVO D IN SAT/CBL SAT/CBL IN ANTENNA A R FRONT L AM LOOP CENTER L IN R ANALOG IN 1 (CD) ASSIGNABLE FM UNBAL 75 ANALOG IN1 (CD) CAUTION: ATTENTION: SPEAKER IMPEDANCE - Pioneer VSX-822-K | Owner's Manual - Page 19
(VSX-1022 only) This diagram shows connections of a TV (with HDMI input) and DVD player (or other playback component with no HDMI output) to the receiver. • The following connection/setting is required to listen to the sound of the TV over this receiver. - If the TV does not support the HDMI Audio - Pioneer VSX-822-K | Owner's Manual - Page 20
MONITOR SAT/CBL DVD OUT IN IN VIDEO L IN R DVD SAT/CBL ANALOG IN 1 (CD) ASSIGNABLE FM UNBAL 75 AUDIO Class 2 Wiring VSX-822 SPEAKERS Bluetooth® ADAPTER Connecting to the network through LAN interface By connecting this receiver to the network via the LAN terminal, you can listen - Pioneer VSX-822-K | Owner's Manual - Page 21
. to 20 ft.) 21 HDMI iPod iPhone iPad BAND CONTROL TUNER EDIT ON / OFF TUNE PRESET TO SURROUND/ ALC/ REAM DIRECT STANDARD SURR ADVANCED SURROUND SOUND iPod iPhone iPad RETRIEVER AIR DIRECT CONTROL ENTER MCACC SETUP MIC VIDEO 5 V 2.1 A iPod iPhone USB iPad MASTER VOLUME iPod cable - Pioneer VSX-822-K | Owner's Manual - Page 22
. • This receiver does not support a USB hub. • For instructions on playing the USB device, see Playing a USB device on page 28. HDMI iPod iPhone iPad BAND TUNER EDIT CONTROL TUNE ON/OFF PRESET TO SURROUND/ ALC/ REAM DIRECT STANDARD SURR ADVANCED SURROUND SOUND iPod iPhone iPad RETRIEVER - Pioneer VSX-822-K | Owner's Manual - Page 23
Chapter 3 Basic Setup Canceling the demo display • VSX-822 only: If you connected either the surround back speaker or the front height speaker, make sure that the Pre The display on the front panel shows various information (demo displays) when the receiver is not operating. You can turn off the - Pioneer VSX-822-K | Owner's Manual - Page 24
Assign 4 . Speaker System 5 . Video Parameter 6 . HDMI Setup 7 . Auto Power Down 8 . Network Standby 9 . FL Demo Mode Home Menu 1 . Auto MCACC 2 . Manual SP Setup 3 . Input Assign 4 . Pre Out Setting 5 . HDMI Setup 6 . Auto Power Down 7 . Network Standby 8 . FL Demo Mode VSX-1022 VSX-822 • Mic - Pioneer VSX-822-K | Owner's Manual - Page 25
listening mode if you want multichannel surround sound. 5 Use VOLUME +/- to adjust the volume level. Turn down the volume of your TV so that all sound is coming from the speakers connected to this receiver. Selecting the audio input signal The audio input signal can be selected for each - Pioneer VSX-822-K | Owner's Manual - Page 26
to the instruction manual supplied with your DVD player. Tip • In order to enjoy the picture and/or sound from devices connected to each terminal, select the input by doing the following. Video/Audio (HDMI) DVD SAT/CBL BD GAME DVR/BDR VIDEO NETWORK Audio DVD SAT/CBL CD TV RECEIVER SIGNAL SEL - Pioneer VSX-822-K | Owner's Manual - Page 27
may be restricted for some models. The receiver is not compatible with the iPod shuffle. • This receiver has been developed and tested for the software version of iPod/iPhone/iPad indicated on the website of Pioneer (http://pioneer.jp/homeav/support/ios/ na/). • Installing software versions - Pioneer VSX-822-K | Owner's Manual - Page 28
page 22. 2 Switch the TV input so that it connects to the receiver. • Switch the TV input to the input that connects this receiver to the TV through the corresponding HDMI cable. 3 Press iPod/USB on the remote control to switch the receiver to the iPod/USB input. When the display shows the names of - Pioneer VSX-822-K | Owner's Manual - Page 29
About playable file formats The USB function of this receiver supports the following file formats. Note that some file Audio Layer 3) .mp3a Sampling frequency Quantization bitrate Channel Bitrate VBR/CBR WAV (LPCM) 32 kHz, 44.1 kHz, 48 kHz 16 bit 2 ch 8 kbps to 320 kbps Supported/Supported - Pioneer VSX-822-K | Owner's Manual - Page 30
equipped with Bluetooth wireless technology: Digital music player + Bluetooth audio transmitter (sold commercially) Music data Bluetooth® ADAPTER This receiver Remote control operation Wireless music play When the Bluetooth ADAPTER (Pioneer Model No. AS-BT100 or AS-BT200) is connected to this - Pioneer VSX-822-K | Owner's Manual - Page 31
device. This receiver's remote control buttons receiver to ADAPTER input. 2 Press TOP MENU to select Bluetooth Setup. 3 Use / to select 'Air Jam', then press ENTER. 4 Use / to select 'Air Jam ON', then press ENTER. For more details on using Air Jam, access our website. http://pioneer.jp/support - Pioneer VSX-822-K | Owner's Manual - Page 32
receiver store the frequency for easy recall whenever you want to listen to that station. This saves the effort of manually tuning in each time. This unit can memorize up to 30 stations. RECEIVER SLEEP SOURCE INPUT AUDIO the number buttons on the remote control to recall the station preset. Naming - Pioneer VSX-822-K | Owner's Manual - Page 33
to see how the source is being processed. Listening in surround sound ALC/ STANDARD ALC/ STANDARD SURR Using this receiver, you can listen to any source in surround sound. However, the options available will depend on your speaker setup and the type of source you're listening to. • If the - Pioneer VSX-822-K | Owner's Manual - Page 34
Speaker System setting (VSX-1022 only) on page 49). • In case of VSX-822: Cannot be selected when the Pre Out is set to Surr. Back (see The Pre Out Setting (VSX-822 only) on page 50). f. The audio is heard with your surround settings and you can still use the Midnight, Loudness, Phase Control, Sound - Pioneer VSX-822-K | Owner's Manual - Page 35
11. • Depending on the positions of the speakers and the sound source, in some cases it may not be receiver into standby. 2 While holding down PRESET on the front panel, and hold the STANDBY/ON for about two seconds. UP MIX: OFF appears and the Up Mix function turns off. If you want to turn - Pioneer VSX-822-K | Owner's Manual - Page 36
is a problem. Setting HDMI (HDMI Audio) Specifies the routing of the HDMI audio signal out of this receiver (AMP) or through to a TV (THRU). When THRU is selected, no sound is output from this receiver. AMP THRU A.DLY (Auto Delay)g OFF This feature automatically corrects the audio- ON to-video - Pioneer VSX-822-K | Owner's Manual - Page 37
You shouldn't have any problems using this with most SACD discs, but if the sound distorts, it is best to switch the gain setting back to 0 dB. g. This feature is only available when the connected display supports the automatic audio/video synchronizing capability ('lip-sync') for HDMI. If you find - Pioneer VSX-822-K | Owner's Manual - Page 38
switch the remote control to the network operation mode.) *1: For more information, see the Apple website (http:// www.apple.com). *2: The receiver's power automatically turns on when Network Standby is set to ON (page 51). Note • A network environment is required to use AirPlay. • AirPlay provided - Pioneer VSX-822-K | Owner's Manual - Page 39
40. • Media server - See Playing back audio files stored on components on the network on page 40. • Favorites - See Playing back your favorite songs on page 40. Basic playback controls You can perform the following operations with the remote control of this receiver. Note that some buttons are not - Pioneer VSX-822-K | Owner's Manual - Page 40
internet radio service, gives people music they love anytime, anywhere, through personalized radio stations. Playing back audio files stored on components on the network This unit allows you to play music on media servers connected on an identical Local Area Network (LAN) as the receiver. This unit - Pioneer VSX-822-K | Owner's Manual - Page 41
functions (page 42). • Language - Language can be set the NETWORK function OSD screen (page 42). • Firmware Update - Use to update the receiver's software and check the version (page 42). • Factory Reset - Use to reset all network connection settings to their initial, factory-setting condition (page - Pioneer VSX-822-K | Owner's Manual - Page 42
device is a newer version. • Updating may reset the receiver's settings to the initial, factory-setting condition. Whether this is applicable to your receiver can be confirmed at our Pioneer website. 1 Select 'Firmware Update' from the Network Setup menu. The receiver checks whether the USB memory - Pioneer VSX-822-K | Owner's Manual - Page 43
. Please refer to the operating instructions for the software or device for more information. DLNA™, the DLNA Logo and DLNA CERTIFIED™ are trademarks, service marks, or certification marks of the Digital Living Network Alliance. Content playable over a network • Even when encoded in a compatible - Pioneer VSX-822-K | Owner's Manual - Page 44
provide secure delivery of audio and/or video content over an IP network to a PC or other playback device in such a way that the distributor can control how that content is used. The WMDRM-protected content can only be played back on a component supporting the WMDRM service. Windows Media Player 11 - Pioneer VSX-822-K | Owner's Manual - Page 45
About playable file formats The NETWORK feature of this receiver supports the following file formats. possible even with the file formats listed here. Music files Extension Stream MP3 (MPEG-1 Audio Layer 3) .mp3a Sampling frequency Quantization bitrate Channel Bitrate VBR/CBR WAV (LPCM) 32 - Pioneer VSX-822-K | Owner's Manual - Page 46
Assign 4 . Speaker System 5 . Video Parameter 6 . HDMI Setup 7 . Auto Power Down 8 . Network Standby 9 . FL Demo Mode Home Menu 1 . Auto MCACC 2 . Manual SP Setup 3 . Input Assign 4 . Pre Out Setting 5 . HDMI Setup 6 . Auto Power Down 7 . Network Standby 8 . FL Demo Mode VSX-1022 VSX-822 • Auto - Pioneer VSX-822-K | Owner's Manual - Page 47
Pre Out Setting is set to Surr. Back. - VSX-822 only: If you select one surround back speaker only, make sure that additional amplifier is hooked up to the PRE OUT L (Single) terminal. - VSX-1022 only: When using only one surround back speaker, connect it to the SURROUND BACK L (Single) terminals - Pioneer VSX-822-K | Owner's Manual - Page 48
the Manual SP Setup menu. Tip • You can change the channel levels at any time by press RECEIVER , then press CH SELECT and LEV +/- on the remote control. You can also press CH SELECT and use / to select the channel, and then use / to adjust the channel levels. Speaker Distance For good sound - Pioneer VSX-822-K | Owner's Manual - Page 49
Menu 1 . Auto MCACC 2 . Manual SP Setup 3 . Input Assign 4 . Speaker System 5 . Video Parameter 6 . HDMI Setup 7 . Auto Power Down 8 . Network Standby 9 . FL Demo Mode 4 . Speaker System SP System Surr. Back Return 2 Select the speaker system setting using Surr. Back - Sound is output from the - Pioneer VSX-822-K | Owner's Manual - Page 50
Setting' from the Home Menu. Home Menu 1 . Auto MCACC 2 . Manual SP Setup 3 . Input Assign 4 . Pre Out Setting 5 . HDMI Setup 6 . Auto Power Down 7 . Network Standby 8 . FL Demo Mode 4 . Pre Out Setting Pre Out Surr. Back Return 2 Select which speaker to connect to the PRE OUT SURR BACK/FRONT - Pioneer VSX-822-K | Owner's Manual - Page 51
Input Assign 4 . Speaker System 5 . Video Parameter 6 . HDMI Setup 7 . Auto Power Down 8 . Network Standby 9 . FL Demo Mode 8 . Network Standby Network Standby OFF VSX-1022 Return 2 Choose ON or OFF for the Network Standby. • ON - The AirPlay function can be used even when the receiver is in the - Pioneer VSX-822-K | Owner's Manual - Page 52
Select 'HDMI Setup' from the Home Menu. Home Menu 6 . HDMI Setup 1 . Auto MCACC 2 . Manual SP Setup 3 . Input Assign 4 . Speaker System 5 . Video Parameter 6 . HDMI Setup 7 . Auto Power Down 8 . Network Standby 9 . FL Demo Mode Control ON ARC [ OFF ] Standby Through [ --- ] VSX-1022 Return - Pioneer VSX-822-K | Owner's Manual - Page 53
other amps or an AV converter (such as an HDMI switch) can cause operational errors. • When the receiver's Control is turned ON, even if the receiver's power is in the standby mode, it is possible to output the audio and video signals from a player via HDMI to the TV without producing sound from - Pioneer VSX-822-K | Owner's Manual - Page 54
the manufacturer in the remote control will not work for the model that you are using. turned on directly by remote control. 4 Repeat steps 2 through 3 to try a different code, or to enter a code for another component you want to control. 5 When you're done, press RECEIVER . Clearing all the remote - Pioneer VSX-822-K | Owner's Manual - Page 55
standby and on. TV CONTROL Switches the TV input. (Not possible with all INPUT models remote control can control these components (BD, DVD, CD, DVR (BDR), VCR, CD-R) after entering the proper codes or teaching the receiver no problem controlling Pioneer 0004 Category Preset code Manufacturer 55 - Pioneer VSX-822-K | Owner's Manual - Page 56
preset codes for the BD, DVR (BDR, HDR). Pioneer 2014, 2197, 2256 Accurian 2092 Advent 2072 Aiwa 2012 Boston 2059 Broksonic 2066 California Audio Labs 2068 CambridgeSoundWorks 2065 CineVision 2087 2091 GE 2016, 2077, 2080 GFM 2043 Go Video 2087 Gradiente 2068 Greenhill 2080 Haier 2094 Harman/Kardon - Pioneer VSX-822-K | Owner's Manual - Page 57
2276 Toshiba 2274 VCR Pioneer 1053, 1108 ABS 1017 Adventura 1005 Aiwa 1005 Alienware 1017 American High 1004 Asha 1002 Audio Dynamics 1000 Audiovox 1003 1021, 1022, 1025 TMK 1002 Toshiba 1015, 1017, 1028 Totevision 1002, 1003 Touch 1017 UltimateTV 1031 Unitech 1002 Vector Research 1000 Video - Pioneer VSX-822-K | Owner's Manual - Page 58
, 5038, 5046, 5047 CD-R Pioneer 5001, 5053, 5071 Philips 5054 Yamaha 5055 Tuner Pioneer 5060 Laser Disc Player Pioneer 5002, 5003 Casette Deck Pioneer 5058, 5059 Digital Tape Pioneer 5057 MD Pioneer 5056 Network Audio Player Pioneer 5063 Game X-Box 2313 AV Receiver Pioneer 5062 58 Controlling the - Pioneer VSX-822-K | Owner's Manual - Page 59
receiver (see About video outputs connection (VSX-822 only) on page 16). VSX-1022 only: Check The Input Assign menu on page 49 to make sure you're assigned the correct input. The video input selected on the TV monitor is incorrect. Refer to the instruction manual supplied with the TV. VSX-1022 - Pioneer VSX-822-K | Owner's Manual - Page 60
component with Internet security software installed cannot be accessed. The audio component on the network which has been switched off is switched on. Switch on the audio component on the network before switching on this receiver. Playback does not start while 'Connecting Wired...' continues to - Pioneer VSX-822-K | Owner's Manual - Page 61
remote control to the NETWORK mode (page 43). HDMI No picture or sound. If the problem still persists when connecting your HDMI component directly to your monitor, please consult the component or monitor manual or contact the manufacturer for support. No picture. VSX-822 only: Video signals - Pioneer VSX-822-K | Owner's Manual - Page 62
the sound is muted on the display when using the HDMI connection, you must adjust the volume on the display every time you switch input sources. Configuration B (VSX-1022 only) Use component video cables to connect the video output of your HDMI-equipped component to the receiver's component video - Pioneer VSX-822-K | Owner's Manual - Page 63
the network. receiver has been reset to the factory default settings. Important • If the Control with HDMI function is set to ON, you may not be able to reset the unit. In this case, reset either by turning OFF the Control with HDMI function, or by putting the unit into standby mode by turning - Pioneer VSX-822-K | Owner's Manual - Page 64
9 oz) (VSX-1022) 8.9 kg (19 lb 10 oz) (VSX-822) Furnished Parts Microphone (for Auto MCACC setup 1 Remote control 1 Dry cell batteries (AAA size IEC R03 2 AM loop antenna 1 FM wire antenna 1 iPod cable 1 Warranty card 1 Quick start guide 1 Safety Brochure 1 These operating instructions (CD - Pioneer VSX-822-K | Owner's Manual - Page 65
service location, to purchase replacement parts, operating instructions, or accessories, please go to one of following URLs : Pour enregistrer votre produit, trouver le service 479-4411 PIONEER EUROPE NV Haven 1087, Keetberglaan 1, B-9120 Melsele, Belgium TEL: 03/570.05.11 PIONEER ELECTRONICS
-
 1
1 -
 2
2 -
 3
3 -
 4
4 -
 5
5 -
 6
6 -
 7
7 -
8
-
9
-
10
-
11
-
12
-
13
-
14
-
15
-
16
-
17
-
18
-
19
-
20
-
21
-
22
-
23
-
24
-
25
-
26
-
27
-
28
-
29
-
30
-
31
-
32
-
33
-
34
-
35
-
36
-
37
-
38
-
39
-
40
-
41
-
42
-
43
-
44
-
45
-
46
-
47
-
48
-
49
-
50
-
51
-
52
-
53
-
54
-
55
-
56
-
57
-
58
-
59
-
60
-
61
-
62
-
63
-
64
-
65
 |
 |
Register your product on
http://www.pioneerelectronics.ca (Canada)
•
Protect your new investment
The details of your purchase will be on file for reference in the event of an insurance claim such as loss or theft.
•
Improve product development
Your input helps us continue to design products that meet your needs.
•
Receive a free Pioneer newsletter
Registered customers can opt in to receive a monthly newsletter.
•
Receive free tips, updates and service bulletins on your new product
AV Receiver
VSX-1022
-K
VSX-822
-K
Operating Instructions