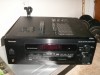
Pioneer VSX-D511 Owner's Manual
Pioneer VSX-D511 - Audio/Visual Receiver Manual
 |
UPC - 012562587714
View all Pioneer VSX-D511 manuals
Add to My Manuals
Save this manual to your list of manuals |
Pioneer VSX-D511 manual content summary:
- Pioneer VSX-D511 | Owner's Manual - Page 1
AUDIO/VIDEO MULTI-CHANNEL RECEIVER VSX-D411 VSX-D511 Operating Instructions - Pioneer VSX-D511 | Owner's Manual - Page 2
Thank you for buying this Pioneer product. Please read through these operating instructions so you will know how to operate your model properly. After you have finished reading the instructions, put them away in a safe place for future reference. IMPORTANT NOTICE H006AEn The serial number for - Pioneer VSX-D511 | Owner's Manual - Page 3
Manufactured under license from Dolby Laboratories. "Dolby", "Pro Logic II" and the double D symbol 2 are trademarks of Dolby Laboratorories. "DTS", "ES" and "DTS Digital Surround" are trademarks of Digital Theater Systems, Inc. - Pioneer VSX-D511 | Owner's Manual - Page 4
range of remote control unit 5 2 5 minute guide Introduction to home theater 6 Listening to Surround Sound 7 Using the Quick Setup 10 3 Connecting up Audio/Video cords 11 S-video cables (VSX-D511 only 11 Digital audio cords/Optical cables 11 Connecting digital components 12 Connecting - Pioneer VSX-D511 | Owner's Manual - Page 5
with governmental regulations or environmental public instruction's rules that apply in your country or area. Operating range of remote control unit The remote control may not work properly if: • There are obstacles between the remote control and the receiver's remote sensor. • Direct sunlight or - Pioneer VSX-D511 | Owner's Manual - Page 6
all of them being sent to different speakers in your system. This is what creates a surround sound effect and gives you the feeling of 'being there'. This receiver will automatically decode Dolby Digital, DTS, or Dolby Surround DVD-Video discs, according to your speaker setup. In most cases, you won - Pioneer VSX-D511 | Owner's Manual - Page 7
D 5.1CH REC INPUT CD-R IN / TAPE / MD ASSIGNABLE DIGITAL IN COAX OPT (DVD/LD) ¥ (TV/SAT) ¥ This receiver* VIDEO OUT STANDBY/ON 41 ¡¢ 0 7 8 Î 3 DVD PLAYER DVD player VIDEO IN TV IN Video cord MONITOR OUT SUB WOOFER PREOUT *The illustration shows the VSX-D511, but DVD connections - Pioneer VSX-D511 | Owner's Manual - Page 8
make sure the positive and negative (+/-) terminals on the receiver match those on the speakers. Use speakers with a nominal impedance of 8 Ω to 16 Ω. Front Speakers L R Center Speaker C Surround Speakers SL SR RL RL INPUT Powered subwoofer 8 En Be sure to complete all connections before - Pioneer VSX-D511 | Owner's Manual - Page 9
input on your TV to this receiver. Check the manual that came with the TV if you don't know how to do this. Also make sure that DVD/LD is showing in the receiver's display, indicating that the DVD input is selected. If it isn't, press DVD on the remote control to set the receiver to the DVD input - Pioneer VSX-D511 | Owner's Manual - Page 10
setup on pages 29 to 33. Use the front panel controls for the steps below. AUDIO/VIDEO MULTI-CHANNEL RECEIVER N∫m-Û.,, T LOUDNESS TONE QUICK SETUP MULTI JOG MULTI JOG ENTER INPUT SELECTOR MASTER VOLUME DOWN UP R 1 Press RECEIVER to turn the power on. The STANDBY indicator goes out - Pioneer VSX-D511 | Owner's Manual - Page 11
(standard video cords can also be used) or optical cables (not supplied) are used to connect digital components to this receiver. Be sure to insert completely. Digital audio coaxial cord (or standard video cord) Optical cable S-video cables (VSX-D511 only) Use S-video cables (not supplied) to get - Pioneer VSX-D511 | Owner's Manual - Page 12
with like (for example, the coaxial output from the component to the coaxial input on the receiver). This receiver has both a coaxial and an optical input for a total of two digital inputs. Connect your digital components as shown below. When connecting your equipment, always make sure the power - Pioneer VSX-D511 | Owner's Manual - Page 13
audio to a digital input (see page 12). It is also a good idea to hook up your digital components with analog audio connections (see page 12). For better quality video, you can hook up using the S-video jacks on the rear of the receiver instead of the regular video jacks (VSX-D511 only). Make sure - Pioneer VSX-D511 | Owner's Manual - Page 14
) OUTPUT The arrows indicate the direction of the signal. S-VIDEO INPUT VIDEO INPUT TV (monitor) The arrows indicate the direction of the signal. see Using external antennas, next page). Always make sure that the receiver is switched off and unplugged from the wall outlet before making or - Pioneer VSX-D511 | Owner's Manual - Page 15
Connecting up 03 AM loop antenna Assemble the antenna and connect to the receiver. Attach to a wall, etc. (if desired) and face in the direction that gives the best reception. Using external antennas To improve FM reception Connect an - Pioneer VSX-D511 | Owner's Manual - Page 16
the receiver match those on the speakers. Front Speakers L R Center Speaker C Surround Speakers SL SR Use speakers with a nominal impedance of 8 Ω to 16 Ω. RL RL Be sure to complete all other INPUT connections before connecting this unit to the AC power source. Powered subwoofer Speaker - Pioneer VSX-D511 | Owner's Manual - Page 17
Use good quality speaker wire to connect the speakers to the receiver. Hints on speaker placement Speakers are usually designed with a particular view of speaker set up Front Left Center Front Right Surround Left Subwoofer Surround Right If you choose to install the center speaker on top - Pioneer VSX-D511 | Owner's Manual - Page 18
your nearest Pioneer authorized service center or your dealer for a replacement. Operating other Pioneer components By connecting a control cord (optional), you can point the remote controls of other Pioneer components at the receiver's remote sensor. You can also use the remote control from this - Pioneer VSX-D511 | Owner's Manual - Page 19
RECEIVER N∫m-Û.,, STATION TUNING ADVANCED STANDARD SURROUND STEREO/ DIRECT SIGNAL SELECT MONITOR MIDNIGHT LOUDNESS TONE QUICK SETUP TUNER EDIT CLASS BAND MPX MULTI JOG LISTENING MODE INPUT using the tuner. 5 Remote sensor Receives the signals from the remote control. 9 TUNER EDIT ( - Pioneer VSX-D511 | Owner's Manual - Page 20
Press this button to access the bass and treble controls, which you can then adjust with the MULTI JOG/INPUT SELECTOR dial. 21 QUICK SETUP (page 10) 22 MASTER VOLUME Display 1 SIGNAL AUTO DIGITAL DIGITAL ANALOG DTS 2 3 45 678 9 DIGITAL ATT DIRECT MONITOR PROLOGIC MIDNIGHT STEREO TUNED ADV - Pioneer VSX-D511 | Owner's Manual - Page 21
Controls and displays 04 4 2 PRO LOGIC II When the Standard mode of the receiver is on, this lights to indicate Prologic II decoding. 5 ATT Lights when INPUT ATT is used to attenuate (reduce) the level of the input Surround) Lights when one of the Advanced Surround listening modes of the receiver - Pioneer VSX-D511 | Owner's Manual - Page 22
and displays Remote Control DVD/LD TV/SAT CD 1 2 MASTER VOLUME 3 4 ATT MUTE 5 TUNING STATION BAND CLASS MPX DISPLAY MENU TOP MENU 6 TUNER EDIT SETUP 7 ENTER DVD VER DVD CH SELECT AUDIO EFFECT SUB TITLE 1 3¡ 7 8 4¢ DVD CONTROL AV RECEIVER Î ADVANCED SURROUND (page 24 - Pioneer VSX-D511 | Owner's Manual - Page 23
receiver controls on the remote control. Also used when setting up the surround sound for the receiver. EFFECT +/- (page 26) Use to add or subtract the amount of effect in different sound modes or advanced listening modes. 15 DVD CONTROL buttons You can use these buttons to control a Pioneer DVD - Pioneer VSX-D511 | Owner's Manual - Page 24
speakers (and possibly your subwoofer depending on your speaker settings). Dolby Digital and DTS multi-channel sources are downmixed to stereo. In STEREO, the audio plays according to the surround setup settings and you can still use Midnight mode, Loudness mode and Tone Control functions. When you - Pioneer VSX-D511 | Owner's Manual - Page 25
(page 12) and set the signal input to DIGITAL. • Some DVD players don't output DTS signals. For more details, refer to the instruction manual supplied with your DVD player. • You can only select DIGITAL if the source you selected is assigned to a digital input. See page 32 for more on the - Pioneer VSX-D511 | Owner's Manual - Page 26
Dolby Pro Logic, Dolby Digital and DTS signal processing is done automatically corresponding to the input signal. • Press ADVANCED SURROUND repeatedly to cycle the sound options. Each press changes the display as follows: Movie Music Virtual SB* 5-Stereo Expanded *VSX-D511 only. Refer to page - Pioneer VSX-D511 | Owner's Manual - Page 27
automatically. 1 Turn on the power of the playback component. 2 Turn on the power of the receiver. 3 Select the source you want to playback. Use the INPUT SELECTOR buttons on the remote (or the MULTI JOG/INPUT SELECTOR dial on the front panel). 4 Start playback of the component you selected in step - Pioneer VSX-D511 | Owner's Manual - Page 28
LD if it is not already selected. Use the INPUT SELECTOR buttons on the remote (or the MULTI JOG/INPUT SELECTOR dial on the front panel). 2 Press can't use the SIGNAL SELECT, INPUT ATT, TONE, and MIDNIGHT/LOUDNESS buttons, as well as the Standard, Advanced Surround, and Stereo/Direct sound modes. - Pioneer VSX-D511 | Owner's Manual - Page 29
listening position to your surround speakers. ENTER RECEIVER Dynamic range control setting (page 32) digital input setting (page 32) Specify the component to be assigned to the coaxial digital input. 2 Press RECEIVER. 3 Use } or ] to choose the option you want to adjust. Optical digital input - Pioneer VSX-D511 | Owner's Manual - Page 30
bass is sent from the receiver to the speakers. In the display, F, C, and S refer to front, center, and surround speakers respectively. Speaker size is your setup. Choose the point at which you want the frequency routed to the subwoofer (or L speakers). We recommend setting this to 200 Hz if your S - Pioneer VSX-D511 | Owner's Manual - Page 31
200 Hz to the subwoofer (or L speakers). If all speakers (front, center, and surround) are set to L, the crossover frequency can't be set because there are no S speakers ( appears in the display). LFE attenuator setting • Default setting: 0 dB Dolby Digital and DTS audio sources include ultra - Pioneer VSX-D511 | Owner's Manual - Page 32
automatically changes to the digital input setting and DIGITAL shows in the display. Optical digital input setting • Default setting: TV Here you tell the receiver what component you have hooked up to the optical input jack. • Use ' or ' to select the optical digital input (DVD, TV, CD, CD-R, VCR - Pioneer VSX-D511 | Owner's Manual - Page 33
seperate levels for each surround mode. 1 Press STANDARD. 2 Press TEST TONE to output the test tone. The test tone is output in the following order (depending on the speaker setting): FL C FR SW SL SR • Test tone is only output in Standard modes. • Since the subwoofer transmits an ultra-low - Pioneer VSX-D511 | Owner's Manual - Page 34
how to do this. Manual tuning To change the frequency receiver into mono reception mode. This TUNER should improve the sound quality and allow you to enjoy the broadcast. TUNING BAND MPX 1 Press the TUNER button on the remote control to select the tuner. You can also use the MULTI JOG/INPUT - Pioneer VSX-D511 | Owner's Manual - Page 35
/ STANDARD SURROUND DIRECT SIGNAL SELECT MONITOR MIDNIGHT LOUDNESS TONE QUICK SETUP TUNER EDIT CLASS BAND MPX MULTI JOG LISTENING MODE INPUT ATT FL DIMMER MULTI JOG MULTI JOG ENTER INPUT SELECTOR MASTER VOLUME DOWN UP R 2 If you're using the remote control, press RECEIVER. 3 Press - Pioneer VSX-D511 | Owner's Manual - Page 36
to station presets (this page) for how to do this. 2 If you're using the remote control, press RECEIVER. 3 Press TUNER EDIT. The display shows ST. NAME, then a blinking cursor at the first character position. 4 Input the name you want. Names can be up to four characters long. • Use the MULTI JOG - Pioneer VSX-D511 | Owner's Manual - Page 37
connected to the receiver (such as on the receiver to do receiver's volume, balance, tone (bass, treble, loudness), and surround effects have no effect on the recorded signal. 1 Select the source you want to record. Use the INPUT SELECTOR buttons on the remote (or MULTI JOG/INPUT the instructions that - Pioneer VSX-D511 | Owner's Manual - Page 38
the other components and electrical appliances being used. If the trouble cannot be rectified even after exercising the checks listed below, ask your nearest Pioneer authorized service center or your dealer to carry out repair work. Problem The power does not turn on. Remedy • Connect the power - Pioneer VSX-D511 | Owner's Manual - Page 39
type of connections made. (refer to page 25). • Set the digital input settings correctly (refer to page 32). • Make digital connections (refer to page 12) and set the SIGNAL SELECT to DIGITAL (refer to page 25). • Refer to the instruction manual supplied with the DVD player. No sound is output or - Pioneer VSX-D511 | Owner's Manual - Page 40
more than 0.2 %** total harmonic distortion (front). Continuous Power Output Front 100 W per channel (1kHz, 1.0 %, 8 Ω) Center 100 W (1kHz, 1.0 %, 8 Ω) Surround 100 W per channel (1kHz, 1.0 %, 8 Ω) Input (Sensitivity/Impedance) CD, VCR/DVR, CD-R/TAPE/MD, DVD/LD, TV/SAT 200 mV/47 kΩ Frequency - Pioneer VSX-D511 | Owner's Manual - Page 41
2 Remote control 1 Operating instructions 1 Specifications and the design are subject to possible modifications without notice, due to improvements. * Measured pursuant to the Federal Trade Commission's Trade Regulation rule on Power Output Claims for Amplifiers - Pioneer VSX-D511 | Owner's Manual - Page 42
09 Additional information 42 En - Pioneer VSX-D511 | Owner's Manual - Page 43
Additional information 09 43 En - Pioneer VSX-D511 | Owner's Manual - Page 44
in the U.S.A. and you wish to locate the nearest Pioneer Authorized Independent Service Company, or if you wish to purchase replacement parts, operating instructions, service manuals, or accessories, please call the number shown below. 8 0 0 - 4 2 1 - 1 4 0 4 Please do not ship your product to
-
 1
1 -
 2
2 -
 3
3 -
 4
4 -
 5
5 -
 6
6 -
 7
7 -
8
-
9
-
10
-
11
-
12
-
13
-
14
-
15
-
16
-
17
-
18
-
19
-
20
-
21
-
22
-
23
-
24
-
25
-
26
-
27
-
28
-
29
-
30
-
31
-
32
-
33
-
34
-
35
-
36
-
37
-
38
-
39
-
40
-
41
-
42
-
43
-
44
 |
 |

AUDIO/VIDEO MULTI-CHANNEL
RECEIVER
VSX-D411
VSX-D511
Operating Instructions