Pioneer XDV-P90 Owner's Manual
Pioneer XDV-P90 - DVD Changer - External Manual
 |
View all Pioneer XDV-P90 manuals
Add to My Manuals
Save this manual to your list of manuals |
Pioneer XDV-P90 manual content summary:
- Pioneer XDV-P90 | Owner's Manual - Page 1
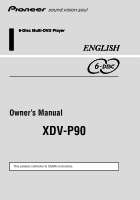
6-Disc Multi-DVD Player ENGLISH Owner's Manual XDV-P90 This product conforms to nCeEwMcAocrdorcdocloorlso.rs. - Pioneer XDV-P90 | Owner's Manual - Page 2
you listening for a lifetime. We Want You Listening For A Lifetime Used wisely, your new sound equipment will provide a lifetime of fun and manufacturer and the Electronic Industries Association's Consumer Electronics Group recommend you avoid prolonged exposure to excessive noise. This list - Pioneer XDV-P90 | Owner's Manual - Page 3
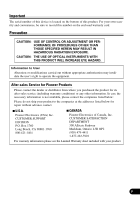
-sales service (including warranty conditions) or any other information. In case the necessary information is not available, please contact the companies listed below: Please do not ship your product to the companies at the addresses listed below for repair without advance contact. 7 U.S.A. Pioneer - Pioneer XDV-P90 | Owner's Manual - Page 4
- Changing the Mode Switch Setting - Condition Memory - Resetting the Microprocessor Key Finder 7 Using the Remote Controller 8 - Battery Discs Compatible with this Product 9 - Features of This Player - What the Marks on DVDs Indicate - Disc Organization Main Features of This Product 12 Care of - Pioneer XDV-P90 | Owner's Manual - Page 5
ON ITS Playback 54 Troubleshooting 55 If You Forget Your Code Number 59 Error Message 59 Language Code Chart 60 Terms 61 Installation 63 Connecting the Units 63 - Connecting the Power Cord - Connection Diagram Transportation of Multi-DVD Player ........ 71 Installation 72 - MODE Switch - Pioneer XDV-P90 | Owner's Manual - Page 6
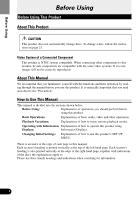
Before Using Before Using Before Using This Product About This Product CAUTION This product does not automatically change discs. To change a disc, follow the instructions on page 23. Video System of a Connected Component This product is NTSC system compatible. When connecting other components to - Pioneer XDV-P90 | Owner's Manual - Page 7
brake, the picture appears on the screen. When Using a Display connected to Rear Video Output This product's Rear video output is for connection of a display to enable passengers in the Rear seats to watch the DVD or Video CD. WARNING • NEVER install the display in a location that enables the Driver - Pioneer XDV-P90 | Owner's Manual - Page 8
Before Using Precaution • Keep this manual handy as a reference for operating procedures and precautions for the component you are using it with. After changing the setting, be sure to press the RESET button. (See page 6.) (1) When using this product with a Pioneer component featuring an IP-BUS - Pioneer XDV-P90 | Owner's Manual - Page 9
Using Condition Memory This function memorizes audio language, subtitle language and picture mode settings made during disc playback for up to 30 discs. Without any special operations, the final setting details during playback of a disc are memorized. The next time a disc RESET button. Use a pen tip - Pioneer XDV-P90 | Owner's Manual - Page 10
Using Key Finder The remote control (CD-R7) is sold separately. • You can also operate this product with the remote controller supplied with an AV receiver (e.g. AVH-P6400CD), but you cannot change discs. w !2 e !3 !4 r !5 q t y !6 !7 !8 u !9 i @0 o @1 !0 @2 @3 @4 !1 q Remote - Pioneer XDV-P90 | Owner's Manual - Page 11
only lithium battery "CR2025", 3 V. Precaution: • Remove the battery if the remote controller is not used for a month or longer. • If the event of battery leakage, wipe the remote controller completely clean and install a new bat- tery. WARNING: • Keep the lithium battery out of reach of children - Pioneer XDV-P90 | Owner's Manual - Page 12
Before Using Discs Compatible with this Product Features of This Player Compatible with DVD, Video CD and CD Formats DVD, Video CD and CD discs that display the logos shown below can be played back on this player. DVD VIDEO VIDEO CD CD The disc format logos shown above are found on disc - Pioneer XDV-P90 | Owner's Manual - Page 13
of DVD-Audio, DVD-R and CD-ROM discs is not possible. This player can only playback discs bearing the marks shown on page 9. • Use the optional 8 cm (3 in.) disc tray to play 8 cm (3 in.) discs. Never use a commercially available 8 cm (3 in.) adapter as this will damage the player. • DVDs that - Pioneer XDV-P90 | Owner's Manual - Page 14
Before Using Disc Organization DVD On DVD-Video discs, the contents are divided into titles which are in turn divided into chapters. With video material, a single work (movie etc.) usually corresponds to a single title, with different scenes corresponding to separate chapters. With karaoke discs, - Pioneer XDV-P90 | Owner's Manual - Page 15
viewing violent or adult oriented scenes. When using this product with a Pioneer Multi-Channel AV Master Unit, you can enjoy the atmosphere and excitement provided by DVD movie and music software featuring 5.1 channel recordings. 1 * Manufactured under license from Dolby Laboratories. "Dolby" and - Pioneer XDV-P90 | Owner's Manual - Page 16
or apply chemicals to discs. • Condensation may collect inside the player when using the heater in cold weather, interfering with playback. Turn it off for an hour or so and wipe damp discs with a soft cloth. • Road shocks may interrupt disc playback. • Be sure to use DVD compatible magazines and - Pioneer XDV-P90 | Owner's Manual - Page 17
tray. When Using 8 cm (3 in.) Discs Do not use an 8 cm (3 in.) disc adapter. If it is used, the player may fail. To load an 8 cm (3 in.) disc, you need a special 8 cm (3 in.) disc tray (Part No. CXB5931). Ask your Pioneer Service Center about it. 12 cm disc tray 8 cm disc tray 8 cm disc Black and - Pioneer XDV-P90 | Owner's Manual - Page 18
Before Using Loading the Magazine Load in the direction indicated by the arrow. 1 Slide the OPEN lever to the right. The front door opens. 2 Load the magazine in the direction indicated by the arrow. 3 Close the front door. 15 - Pioneer XDV-P90 | Owner's Manual - Page 19
lead to incorrect operation and damage to the player. • If the label on the magazine is coming off or wrinkled up, it may damage the eject mechanism, and in some cases, the magazine may not be ejected. Therefore, remove a damaged label completely before use. • Be sure the front door is closed except - Pioneer XDV-P90 | Owner's Manual - Page 20
the display image source to this product. For details, refer to the connected unit's manual. 2 Press the SOURCE button on the Head Unit. Press repeatedly until DVD is selected, and the disc starts playing. When Using the STAND ALONE Mode Operate after confirming the Operation mode switch is set to - Pioneer XDV-P90 | Owner's Manual - Page 21
remote sensor indicator goes out. VD Video CD CD Basic Operations When using a rear display in the IP-BUS Mode • Even if the source selected with the head unit is not DVD to DVD video display, the display shows that power to this product has been switched OFF. • When you eject a source disc (CD - Pioneer XDV-P90 | Owner's Manual - Page 22
, a menu is displayed. With DVDs 1 Use the joystick to select the desired MENU option. 2 Click the joystick. Playback starts from the selected menu option. 7 To Display the Menu You can display the menu by pressing the MENU button or TOP MENU button while a disc is playing. Pressing either of - Pioneer XDV-P90 | Owner's Manual - Page 23
the RETURN button while PBC playback. For details, refer to the instructions provided with the disc. Note: • When menu are two or more pages long, switch between displays. • To play a disc without using a menu (without PBC playback), when the disc is stopped press the appropriate number button to - Pioneer XDV-P90 | Owner's Manual - Page 24
select 3, press button 3. To select 10, press buttons 10 and 0 in order. To select 23, press buttons 10, 10 and 3 in order. Note: • With some discs, the prohibited mark " " may be displayed and operation may not be pos- sible. • With Video CD, Direct Search is not possible during PBC playback. 21 - Pioneer XDV-P90 | Owner's Manual - Page 25
Forward/Reverse Fast Forward 1 During play, continue pressing the FORWARD (¡) button. The fast forward mark ( ) is displayed while pressing the button and disc fast forward is performed. VD Video CD CD Basic Operations 2 Release the FORWARD (¡) button at the point you want to watch/listen - Pioneer XDV-P90 | Owner's Manual - Page 26
selected. Repeat the operation to select the desired disc. Note: • Empty disc trays are skipped during disc selection. • After a desired disc is selected, it automatically starts playing. Stopping Playback Press the STOP (7) button. Note: • When you stop DVD or Video CD playback (during PBC playback - Pioneer XDV-P90 | Owner's Manual - Page 27
Playback Variations Still, Frame-by-Frame and Slow Motion Playback Still Playback This lets you pause playback and view a still picture. Press the PLAY/PAUSE (6) button during playback. The still mark ( ) is displayed for 4 seconds and playback is paused letting you view a still image. VD Video CD - Pioneer XDV-P90 | Owner's Manual - Page 28
order: 1/16 Ô 1/8 Ô 1/4 Ô 1/2 Note: • There is no sound during Still, Frame-by-Frame or Slow Motion playback. • Depending on the disc and the playback location on the disc, the prohibited mark " " may be displayed indicating that Still, Frame-by-Frame and Slow Motion playback are not possible - Pioneer XDV-P90 | Owner's Manual - Page 29
the audio selection mark is displayed, you can also switch to a desired audio language number using the number buttons. • Display indications such as "Dolby D" and "5.1ch" indicate the audio system recorded on the DVD. Depending on the setting, playback may not be with the same audio system as that - Pioneer XDV-P90 | Owner's Manual - Page 30
's package indicates the number of recorded subti- tle languages. • With some DVDs, switching between subtitle languages may only be possible using a menu display. • You can also switch between subtitle languages using the SET UP MENU. For details, refer to "Setting the Subtitle" on page 41. • While - Pioneer XDV-P90 | Owner's Manual - Page 31
the bottom right of the screen. Switch angle selection mark display ON/OFF using the SET UP MENU. For details, refer to "Setting Angle Selection Mark : • This function only operates with DVDs featuring multi-angle recordings. • The " 3 " mark on a DVD's package indicates it features multi-angle - Pioneer XDV-P90 | Owner's Manual - Page 32
Information display 2 (e.g. DVD) Note: • For CDs there is no Display OFF setting. • You can perform disc switching as well as title, chapter and time settings with either the information display 1 or 2. This manual explains how to use the information display 2 to display all the discs loaded in the - Pioneer XDV-P90 | Owner's Manual - Page 33
Operating with Information Displays Operating with the Information Display 1 of a DVD This display lets you switch discs for playback, use the Search function to specify a title or chapter to search for a desired scene, use the Time Search function to specify a time to search for a desired scene, - Pioneer XDV-P90 | Owner's Manual - Page 34
1 Audio Subtitles Angle Note: • The number of switching options depends on how many options are recorded on the DVD. • You can switch Audio, Subtitle and Angle during playback using the respective buttons. For details, refer to "Playback Variations" on page 24. • You can also switch settings by - Pioneer XDV-P90 | Owner's Manual - Page 35
. When you select Title or Chapter, playback of that title or chapter only is repeated. Note: • When the Repeat play of a DVD disc is selected, play stops and depending on the disc a menu is displayed upon completion of play of an entire disc once through. Operating with Information Displays 32 - Pioneer XDV-P90 | Owner's Manual - Page 36
and some displays. Operating with the Information Display 1 of a Video CD This display lets you switch discs for playback, use the Search function to specify a track to search for desired scenes, use the Time Search function to specify a time to search for a desired scene, switch audio output, and - Pioneer XDV-P90 | Owner's Manual - Page 37
is displayed, click the joystick. This starts playback from the selected scene. Note: • Time Search is not possible while the disc is stopped. 7 Direct Search Even without using an information display you can start playback of a desired track. For details, see page 21. VD Video CD Operating with - Pioneer XDV-P90 | Owner's Manual - Page 38
. 2 Move the joystick up/down to switch to the desired setting. Repeat range This switches you to the selected setting. Disc Ô Track • When you select Disc, playback of the entire disc is repeated. When you select Track, playback of that track only is repeated. Note: • When the Repeat play of - Pioneer XDV-P90 | Owner's Manual - Page 39
playback, both Search and Time Search functions cannot be used. Switching Discs You can switch discs while confirming disc type. The selected disc is indicated by an arrow. 1 Move the joystick left/right to select the Disc Disc option. The Disc option is indicated in blue. 2 Move the joystick - Pioneer XDV-P90 | Owner's Manual - Page 40
Repeat play, and switch Random play and Scan play ON/OFF. • Displaying all the discs loaded in the magazine for disc selection is explained using the informa- tion display 2. Searching for a Desired Track You can use the Search function to specify a track to search for a desired track. 1 Move the - Pioneer XDV-P90 | Owner's Manual - Page 41
Setting Random Play Tracks of the CD you are currently listening to are played in a random order. 1 Move the joystick left/right to select the Random option. The Random option is indicated in blue. 2 Move the joystick up/down to switch to the desired setting. This switches you to the selected - Pioneer XDV-P90 | Owner's Manual - Page 42
2 of a CD The following explains how to switch discs with this display. With CDs, you can switch discs using either information display 1 or information display 2. Switching Discs You can switch discs while confirming disc type. The selected disc is indicated by an arrow. 1 Move the joystick left - Pioneer XDV-P90 | Owner's Manual - Page 43
Changing Initial Settings Calling up the SET UP MENU VD You can use this menu to change Audio, Subtitle, Parental Lock and other DVD settings. 1 Press the STOP (7) button. 2 Press the MENU button when the disc is stopped. The SET UP MENU is displayed. CD 3 Press the NEXT (¢) button. The second - Pioneer XDV-P90 | Owner's Manual - Page 44
Initial Settings Setting the Subtitle (SUBTITLE LANG.) You can set a desired subtitle language. If the selected subtitle language is recorded on the DVD, subtitles are displayed in that language. You can also switch subtitle and assist subtitle display ON/OFF. Setting Subtitles and Assist Subtitles - Pioneer XDV-P90 | Owner's Manual - Page 45
, languages specified on the disc are dis- played. • You can also switch the subtitle language during playback with the SUBTITLE button. (See page 27.) • Even if you use the SUBTITLE button to switch the subtitle language, this does not affect the settings here. • Pressing the RETURN button takes - Pioneer XDV-P90 | Owner's Manual - Page 46
, the language specified on the disc is output. • You can also switch the audio language during playback with the AUDIO button. (See page 26.) • Even if you use the AUDIO button to switch the audio language, this does not affect the settings here. • Pressing the RETURN button takes you back to the - Pioneer XDV-P90 | Owner's Manual - Page 47
, the language specified on the disc is dis- played. • Pressing the RETURN button takes you back to the previous display. • If you have selected "OTHERS", refer to "When You Select "OTHERS"" on page 42. Setting the Parental Lock (PARENTAL) Some DVDs let you use Parental Lock to restrict the viewing - Pioneer XDV-P90 | Owner's Manual - Page 48
that do not feature a recorded Parental Lock level, you cannot use Parental Lock. • With some discs, Parental Lock operates to skip certain scenes only, after which normal playback resumes. For details, refer to the disc's instructions. • Pressing the RETURN button takes you back to the previous - Pioneer XDV-P90 | Owner's Manual - Page 49
new Parental Lock level is set. Note: • Pressing the RETURN button takes you back to the previous display. 7 When Playing DVDs Enabling Parental Lock When you play a disc featuring Parental Lock, code number input indications may be displayed. If this happens and you do not input the correct code - Pioneer XDV-P90 | Owner's Manual - Page 50
of 4:3. Be sure to select the correct TV aspect for the display you use. 1 Move the joystick up/down to select the "TV ASPECT". "TV ASPECT disc package bears the " 16 : 9 LB " mark. (See page 10.) • Some discs do not enable changing of the TV aspect. For details, refer to the disc's instructions - Pioneer XDV-P90 | Owner's Manual - Page 51
may result in noise and damage to speakers so be sure to read the manuals of the connected components. 1 Move the joystick up/down to select the the LPCM setting, DTS audio is not output. • When using this product with a Pioneer Multi-Channel AV Master Unit with digital input (e.g. AVM-P9000R), select - Pioneer XDV-P90 | Owner's Manual - Page 52
the components you are using with this unit. Precaution: • If the setting is incorrect there will be no sound so be sure to read the manuals of the con- joystick. The selected audio output setting is set. Note: • With discs featuring 96 kHz recording, if you select the "96kHz" setting, audio is not - Pioneer XDV-P90 | Owner's Manual - Page 53
Setting Angle Selection Mark Display (ANGLE) VD With discs featuring multi-angle recordings, the angle selection mark is displayed at the bot- tom right of the screen during playback of scenes enabling multi-angle - Pioneer XDV-P90 | Owner's Manual - Page 54
use the supplied remote controller to perform some TV or display operations. To operate the TV or display, set the remote control operation mode switch to "TV". To operate this product, set the switch to "DVD Model A:AVD-W8000* D:AVX-P7000CD G:GEX-P6400TV B:AVX-7000 E:AVX-P7300DVD * Only when the - Pioneer XDV-P90 | Owner's Manual - Page 55
controller has two remote codes for DVD operation, "A" and "B". To operate this product, be sure to set the remote control code selection switch to "A". When using this product with other Pioneer DVD players, set the remote control code selection switch to "B" to use the remote controller only for - Pioneer XDV-P90 | Owner's Manual - Page 56
Pioneer Multi-Channel AV Master Unit (e.g. AVM-P9000R), refer to the AV Master Unit Owner's Manual. When connected to the "DEX-P9", refer to the Head Unit's Manual to MANU. 7 Function Mode Switching When using convenient functions other than those usually used, switch the mode and operate. 1 Press - Pioneer XDV-P90 | Owner's Manual - Page 57
. 2 Switch the head unit's source to this unit. For details, refer to the head unit's Owner's Manual. Precaution • You cannot switch the head unit's source with remote control for DVD player. • When you have switched power to this unit ON by pressing the POWER button, power to this unit remains - Pioneer XDV-P90 | Owner's Manual - Page 58
. Switch to the correct remote control mode. (See pages 7, 51 and 52.) Battery power is low. Load new battery. (See page 8.) Some operations are prohibited Check using another disc. with certain discs. The disc is dirty. Clean the disc. (See page 13.) The loaded disc is a type this unit - Pioneer XDV-P90 | Owner's Manual - Page 59
the appropriate setting for your display. (See page 47.) Rear display picture disappears. The source disc (CD or MD) being listened to with the head unit has been ejected. Before ejecting the disc, switch the source. This problem may occur when certain connection methods are used. Others 56 - Pioneer XDV-P90 | Owner's Manual - Page 60
. ings. You cannot switch among multiple languages if they aren't recorded on the disc. You can only switch between options indicated in the disc menu. Switch using the disc menu. No subtitles are displayed. The DVD playing does not fea- Subtitles are not displayed if ture subtitles. they are - Pioneer XDV-P90 | Owner's Manual - Page 61
ON. (See page 20.) Switch PBC OFF. (See page 20.) 7 Problems during Multi-Channel AV Master Unit connection Symptom There's no sound. Information display page 49.) Indications are not the Multi- Operate using this unit's inforChannel AV Master Unit's infor- mation display. (See page 29.) - Pioneer XDV-P90 | Owner's Manual - Page 62
Refer to the table below to identify the problem, then take the suggested corrective action. If the error persists, contact your dealer or your nearest PIONEER Service Center. Message (error number) Error-2 Error-5 Error-6 No Disc Thermal Protection DVD Player Door Open CANNOT BE PLAYED When this - Pioneer XDV-P90 | Owner's Manual - Page 63
Language Code Chart Others Language (code) Input code Language (code) Input code Language (code) Input code Japanese (ja) 1001 Hausa (ha) 0801 Romanian (ro) 1815 English (en) 0514 Hindi (hi) 0809 Kinyarwanda (rw) 1823 French (fr) 0618 Croatian (hr) 0818 Sanskrit (sa) 1901 - Pioneer XDV-P90 | Owner's Manual - Page 64
multi-channel audio from up to 6 independent sources. To enjoy discs featuring DTS audio recording, you must connect this unit's optical digital which is the signal recording system used for music CDs. Compared to music CDs, which feature 44.1 kHz/16-bit recordings, DVDs feature 48 kHz/16-bit - 96 - Pioneer XDV-P90 | Owner's Manual - Page 65
Video CDs (Version 2.0). Using menu displays provided by Video CDs with PBC lets you enjoy playback of simple interactive software and software with search functions. You can also enjoy viewing high- and standard-resolution still images. Region Number DVD players and DVD discs feature region numbers - Pioneer XDV-P90 | Owner's Manual - Page 66
beginning installation. • Refer to each product's manual for details on connecting the power amp and other units, then make connections correctly. • Secure the wiring with cable clamps or adhesive tape. To protect the wiring, wrap adhesive tape around them where they lie against metal parts. • Route - Pioneer XDV-P90 | Owner's Manual - Page 67
details, consult the vehicle Owner's Manual or dealer. Light green Used to detect the ON/OFF status of the parking brake. This lead must be connected to the power supply side of the parking brake switch. Power supply side Ground side Parking brake switch Installation - Pioneer XDV-P90 | Owner's Manual - Page 68
Installation Connection Diagram 7 When connecting the Multi-Channel AV Master Unit Multi-Channel AV Blue Optical cable (supplied with the MultiChannel AV Master Unit) 6 m (19 ft. 8 in.) Gray DVD control cable (supplied with the Multi-Channel AV Master Unit) IP-BUS cable (supplied ) RCA cable - Pioneer XDV-P90 | Owner's Manual - Page 69
with the display) AV system display (e.g. AVX-7300) (sold separately) Not used. Red Installation IP-BUS cable (supplied with the TV tuner) Multi-CD player (sold separately) Blue Black Blue Hide-away TV Tuner (e.g. GEX-P7000TV) (sold separately) RCA cable (sold separately) 20 pin cable Red - Pioneer XDV-P90 | Owner's Manual - Page 70
Installation 7 When connecting the Head Unit AV receiver/CD player with display (e.g. AVH-P6400CD) (sold separately) Blue Black AV-BUS cable (sold separately) IP-BUS cable (supplied with the TV tuner) Black Blue Hide-away TV Tuner (e.g. GEX-P6400TV) (sold separately) Blue Blue Black AV-BUS - Pioneer XDV-P90 | Owner's Manual - Page 71
This Product Installation Black Not used. Blue IP-BUS cable (supplied) 6 m (19 ft. 8 in.) Black 15 cm (5/8 in.) Yellow (FRONT VIDEO OUTPUT) Multi-CD player (sold separately) Conversion cable (supplied) 6 m (19 ft. 8 in.) 68 - Pioneer XDV-P90 | Owner's Manual - Page 72
Installation 7 When connecting the display with RCA input jacks IP-BUS STAND ALONE This Product Black Audio outputs Left (White) 15 cm (5/8 in.) Right (Red) Video output Yellow (FRONT VIDEO OUTPUT) 6 m (19 ft. 8 in.) Remote use a rear display, be sure to follow the warnings on the next page - Pioneer XDV-P90 | Owner's Manual - Page 73
7 When Using a Display connected Rear Video Output This product's Rear video output is for connection of a display to enable passengers in the Rear seats to watch the DVD or Video CD. WARNING • NEVER install the display in a location that enables the Driver to watch the DVD or Video CD while Driving - Pioneer XDV-P90 | Owner's Manual - Page 74
Installation Transportation of Multi-DVD Player A transport screw has been attached to the set in screw before mounting the set. The removed transport screw should be retained in the accessory bag for use the next time the set is transported. Seal After removing the transport screw, cover the hole - Pioneer XDV-P90 | Owner's Manual - Page 75
Note: • Before finally installing the unit, connect the wiring temporarily, making sure it is all connected up properly, and the unit and the system work properly. • Use only the parts included with the unit to ensure proper installation. The use of unauthorized parts can cause malfunctions - Pioneer XDV-P90 | Owner's Manual - Page 76
Installation Installing the DVD Player Unit 7 Mounting Horizontally Use the holes indicated with arrows. Tapping screw (6 × 16 mm) Screw (4 × 8 mm) 7 Mounting Vertically Mounting board Bracket Drill 4 to 4.5 mm diameter holes. Use the holes indicated with arrows. Tapping screw (6 × 16 mm) - Pioneer XDV-P90 | Owner's Manual - Page 77
7 Mounting Angle Only 0 or 90 degree installation is available. Top The player cannot be installed in this direction. The angle switching dial must be set on both sides of the player to the same position. Angle switching dial 2 steps 7 Angle Switching Dial Adjustment When the mounting angle is - Pioneer XDV-P90 | Owner's Manual - Page 78
. High tempera- tures may result in damage to the unit. • Install within the transmission range of the remote control signal. Stick the double-sided tape to the back of the remote sensor, and attach it to the center console. Remote sensor (supplied with the CD-R7) Double-sided tape (supplied with - Pioneer XDV-P90 | Owner's Manual - Page 79
Installation 76 - Pioneer XDV-P90 | Owner's Manual - Page 80
Appendix Index A Angle Angle selection mark Aspect ratio Assist subtitle Audio language C Chapter Code number Condition memory D Digital output Direct search DOLBY DIGITAL DTS F Fast forward Fast reverse Frame-by-frame I Information display L Language code chart Letter box Linear PCM (LPCM) M Menu - Pioneer XDV-P90 | Owner's Manual - Page 81
General System DVD-Video, Video CD, Compact disc audio system Usable discs .... DVD-Video, Video CD, Compact disc Signal format % (1 kHz) Output Level 1000 mV (1 kHz, 0 dB) Number of channels 2 (stereo) Player Dimensions 275 (W) × 88 (H) × 202 (D) mm [10-7/8 (W) × 3-1/2 (H) × 8 - Pioneer XDV-P90 | Owner's Manual - Page 82
- Pioneer XDV-P90 | Owner's Manual - Page 83
- Pioneer XDV-P90 | Owner's Manual - Page 84
Col. Del Valle Mexico, D.F. C.P. 03100 TEL: 55-5688-52-90 Published by Pioneer Corporation. Copyright © 2002 by Pioneer Corporation. All rights reserved. Publication de Pioneer Corporation. Copyright © 2002 Pioneer Corporation. Tous droits de reproduction et de traduction réservés.
-
 1
1 -
 2
2 -
 3
3 -
 4
4 -
 5
5 -
 6
6 -
 7
7 -
8
-
9
-
10
-
11
-
12
-
13
-
14
-
15
-
16
-
17
-
18
-
19
-
20
-
21
-
22
-
23
-
24
-
25
-
26
-
27
-
28
-
29
-
30
-
31
-
32
-
33
-
34
-
35
-
36
-
37
-
38
-
39
-
40
-
41
-
42
-
43
-
44
-
45
-
46
-
47
-
48
-
49
-
50
-
51
-
52
-
53
-
54
-
55
-
56
-
57
-
58
-
59
-
60
-
61
-
62
-
63
-
64
-
65
-
66
-
67
-
68
-
69
-
70
-
71
-
72
-
73
-
74
-
75
-
76
-
77
-
78
-
79
-
80
-
81
-
82
-
83
-
84
 |
 |

6-Disc Multi-DVD Player
Owner’s Manual
XDV-P90
This product conforms to new cord colors.
ENGLISH
6-Disc Multi-DVD Player
This product conforms to CEMA cord colors.
ENGLISH