Polaroid PD-G55H User Manual
Polaroid PD-G55H Manual
 |
View all Polaroid PD-G55H manuals
Add to My Manuals
Save this manual to your list of manuals |
Polaroid PD-G55H manual content summary:
- Polaroid PD-G55H | User Manual - Page 1
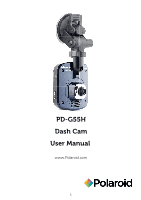
PD-G55H Dash Cam User Manual www.Polaroid.com - Polaroid PD-G55H | User Manual - Page 2
PD-G55H Dash Cam User Manual - Polaroid PD-G55H | User Manual - Page 3
Product Overview ...7 2 Getting Started ...8 2.1 Inserting the Memory Card ...8 2.2 Connecting to Power ...9 2.3 Powering the Dash Cam On / Off ...9 2.3.1 Auto Power On/Off ...9 2.3.2 Manual Power On/Off...9 2.4 Initial Settings...10 2.4.1 Set the Date and Time...10 2.5 Installing in Vehicles ...11 - Polaroid PD-G55H | User Manual - Page 4
every effort to ensure that this User Guide is accurate and complete. However, in accordance with the instructions, may cause harmful for help. This device complies with Part 15 of the FCC Rules. Operation equipment or your household waste disposal service. The recycling of materials will - Polaroid PD-G55H | User Manual - Page 5
void your product warranty. Never short-circuit the battery. Exposing the Dash Cam to open flames can cause explosion. Due to local laws and vehicles safety considerations, do not manually operate the device while driving. Polaroid is NOT responsible for the loss of any data/content during operation - Polaroid PD-G55H | User Manual - Page 6
up to 32GB (Class 6 or greater speed required for HD video recording) 1.2Package Contents The package contains the following items. If there are any missing or damaged items, contact your dealer immediately. Dash Cam Bracket User Manual Quick start guide USB cable with car adapter Software CD - Polaroid PD-G55H | User Manual - Page 7
1.3Product Overview No. Item 1 Bracket Socket 2 Wide Angle Lens 3 Speaker Lock Button 4 Power Button 5 Reset No. Item 6 Lock 7 USB Connector 8 Memory Card Slot 9 LED Panel 10 Scroll Stick (Arrow) * POWER Button: Press for 1 second during recording for Audio On / Off. Press - Polaroid PD-G55H | User Manual - Page 8
the Memory Card Insert the memory card with the gold contacts facing the back of the Dash Cam. Push the memory card until it clicks into place. (Use class 6 or above the micro SD cards for this Dash Cam; It is recommended to format the micro SD cards before the initial use, for format - Polaroid PD-G55H | User Manual - Page 9
is enabled, the recording will automatically start right after the Dash Cam powers on. Once the vehicle engine shuts down, the Dash Cam automatically saves the recording and turns off the power within 10 seconds. 2.3.2 Manual Power On/Off To manually turn on the power, press the POWER button. To - Polaroid PD-G55H | User Manual - Page 10
2.4 Initial Settings 2.4.1 Set the Date and Time To set the correct date and time, do the following: (For button positions refer to 1.3 Product Overview on Page 6) 1. Move the Arrow button to right and enter the menu. 2. Move the Arrow button up and down to select Date/Time and press the arrow - Polaroid PD-G55H | User Manual - Page 11
down the clamp to mount the car holder to the windshield. Make sure the base is securely locked in place. Warning: Do not install the device on a tinted window. Doing so may damage the tint film. When installed in recommended position (as in the picture), the Dash Cam can reach best performance in - Polaroid PD-G55H | User Manual - Page 12
2.5.2 Adjust the device position 1. Rotate the knob to swivel the device vertically. 2. Rotate the knob to swivel the device horizontally up to 360°. 3. Then tighten the knobs to make sure the device is securely locked in place. - Polaroid PD-G55H | User Manual - Page 13
operation. To set screen saver time, select Screen Saver under Setup Menu. To wake the screen during screen saver mode, simply press any key of Dash Cam. - Polaroid PD-G55H | User Manual - Page 14
CANNOT be restored. Default Setting Reset all options to the factory default settings. Version Showing firmware version Available option 1080FHD/720P HD/WVGA/VGA Off/3/510 Minute ON /OFF -1/3, -2/3, -1.0, -4/3, -5/3, -2.0, -1/3, +2.0, +5/3, +4/3, +1.0, +2/3, +1/3, +0.0, On/Off On/Off On/Off Off - Polaroid PD-G55H | User Manual - Page 15
up and the Automatic Record function is enabled, the Dash Cam automatically turns on and starts recording. Recording will automatically stop when the engine is switched off. Or press Arrow button to stop recording manually. Note: On some cars, the recording will continue when the engine is switched - Polaroid PD-G55H | User Manual - Page 16
4.1.4 The Recording Screen No. Item 1 Date and time 2 Resolution 3 Battery Guide icon 4 (Emergency) 5 WDR 6 Loop Recording 7 Audio Recording 8 GPS Tracker the video in one file until the recording is manually stopped. Wide Dynamic Range Loop Recording Time Audio Recording ON/OFF GPS signal - Polaroid PD-G55H | User Manual - Page 17
4.1.5 Taking Photos You can also use this Dash Cam to take photos of the current scene. From the standby screen, press the Lock button to become photo mode and press the Arrow button to - Polaroid PD-G55H | User Manual - Page 18
4.2.1 Deleting Files To delete file(s), do the following: 1. If recording is in progress, press Arrow button to stop recording. 2. Press the Lock button twice to enter the playback mode. 3. Move Arrow button up / down to select File move Arrow button right for MENU. 4. Move Arrow button up / down - Polaroid PD-G55H | User Manual - Page 19
4.3.1 GPS signal When GPS signal is flashing, the Dash Cam is connecting to the satellite and GPS location is not yet confirmed. When GPS signal stops flashing, GPS signal is steady and location is recorded into the video. 4.3.2 Installing the Software 1. Place the attached CD ROM into the CD - Polaroid PD-G55H | User Manual - Page 20
5 GPS Tracker Video Player - Polaroid PD-G55H | User Manual - Page 21
connected before starting the video playback 2. Video files (MOV) must be stored in the same folder before starting the playback. 3. The included Driving Recorder Player software is only for Windows computers. - Polaroid PD-G55H | User Manual - Page 22
Car Charger Description CMOS sensor APTINA AR0330 2304 x 1536 Supports Micro SDHC, up to 32GB class 6 or above 2.5" LED color TFT 960*240 Wide Angle Fixed Focus lens F2.4+/-5%mm 0.3M~∞ Resolution: Full HD 1920 x 1080 ,30fps HD Polaroid, Polaroid & Pixel, Polaroid Color Spectrum, and Polaroid - Polaroid PD-G55H | User Manual - Page 23
PD-G55H Dash Cam Manual de usuario - Polaroid PD-G55H | User Manual - Page 24
Tablero ...36 4.1 Grabar de videoss...36 4.1.1 Grabar vídeos mientras conduce ...36 4.1.2 Manual de grabación de vídeo ...36 4.1.3 grabación de Emergencia ...36 4.1.4 La pantalla ñal de GPS...40 4.3.2 Instalación del software...40 5 Localizador GPS Reproductor de vídeo...41 6 Especificaciones ...43 - Polaroid PD-G55H | User Manual - Page 25
Acerca de este Manual El contenido de este documento es para fines informativos y está sujeta a sido probado y cumple con los límites para un dispositivo digital de Clase B, de acuerdo con la Parte 15 de las Reglas de la FCC. Estos límites están diseńados para proporcionar una protección razonable - Polaroid PD-G55H | User Manual - Page 26
Notas sobre la instalación 1. Instale el dispositivo cerca del espejo retrovisor para obtener la mejor vista a campo abierto . NO instale el Cámara Tablero en un lugar que obstruya la vista de conducción necesario. 2. Asegúrese de que la lente está dentro del rango de barrido del limpiaparabrisas - Polaroid PD-G55H | User Manual - Page 27
Dash avanzada Cam usted. Este dispositivo está diseńado específicamente para vídeo en tiempo real y grabación de audio durante la conducción. 1.1 características cámara HD su distribuidor inmediatamente . Cámara Tablero soporte Manual del usuario Guía de inicio rápido Cable USB con adaptador para el - Polaroid PD-G55H | User Manual - Page 28
1.3Descripción del producto No. artículo 1 Socket soporte 2 Lente Gran Angular 3 Bloqueo Altavoz Botón 4 Botón de encendido 5 reajustar No. artículo 6 bloquear 7 Conector USB 8 Ranura para tarjeta de memoria 9 Panel LED 10 Scroll Stick ( Flecha ) * Botón POWER: Presione - Polaroid PD-G55H | User Manual - Page 29
2 Para Empezar 2.1Insertarde la tarjeta de memoria Inserte la tarjeta de memoria con los contactos dorados hacia la parte posterior de la Cámara Tablero . Empuje la tarjeta de memoria hasta que encaje en su lugar . ( Uso de clase 6 o superior de las tarjetas micro SD - Polaroid PD-G55H | User Manual - Page 30
. Una vez que el motor del vehículo se pone en marcha , la leva Dash se enciende automáticamente . nota: Por favor, tome nota si la temperatura ambiente llega y se apaga el poder dentro de los 10 segundos. 2.3.2 Poder Manual On / Off Para activar manualmente la alimentación, presione el botón POWER - Polaroid PD-G55H | User Manual - Page 31
2.4 Configuración inicial 2.4.1 Ajuste de fecha y tiempo Para ajustar la fecha y la hora correctas , haga lo siguiente : (Para botón de posiciones se refieren al inicio 1.3 Producto en la página 6 ) 1. Mueva el botón de flecha a la derecha y entrar en el menú . 2. Mueva el botón de flecha arriba y - Polaroid PD-G55H | User Manual - Page 32
2.5 Instalación en vehículos 2.5.1 Montar a Parabrisas 4. Fije el soporte al dispositivo. Deslice y empuje hasta que la conexión es firme . 2. Con la ventosa en posición horizontal, coloque la ventosa en el parabrisas. 3. Sostenga la base firmemente en el parabrisas y presione hacia abajo la - Polaroid PD-G55H | User Manual - Page 33
2.5.2 Ajuste la posición del dispositivo 1. Gire la perilla para girar el dispositivo en posición vertical. 2. Gire la perilla para girar el dispositivo en posición horizontal hasta 360 ° . 3. A continuación, apriete los mandos para asegurarse de que el dispositivo está bloqueado en su lugar. - Polaroid PD-G55H | User Manual - Page 34
3 Ajuste de la configuración 3.1Uso del menú Puede personalizar la grabación de vídeo y otros ajustes generales a través del menú en pantalla (OSD ) . 1. Si la grabación está en curso, pulse el botón de flecha para detener la grabación . 2. Mueva el botón de flecha derecha para entrar en el menú. 3. - Polaroid PD-G55H | User Manual - Page 35
opción de menú descripción resolución Ajuste la resolución de vídeo deseado . opción disponible 1080FHD/720P HD/WVGA/VGA grabación en bucle WDR 3 , 5, 10 Minutos High Dynamic Range presenta una calidad de imagen las opciones a los valores de fábrica. OK/Cancelar Mostrando versión de firmware - Polaroid PD-G55H | User Manual - Page 36
de las siguientes opciones : - Apagar manualmente la toma del encendedor si es posible .. - Retire el adaptador para el coche del encendedor de cigarrillos . 4.1.2 Manual de grabación de vídeo 1. Pulse el botón de flecha para iniciar la grabación . 2. Pulse el botón de flecha para detener la grabaci - Polaroid PD-G55H | User Manual - Page 37
4.1.4 La pantalla de grabación No. artículo 1 Fecha y hora 2 resolución 3 batería Icono de la Guía 4 ( Emergencia) 5 WDR 6 grabación en bucle 7 grabación de audio 8 perseguidor del GPS descripción Indica la fecha de grabación y la hora actuales . Indica la resolución de vídeo actual - Polaroid PD-G55H | User Manual - Page 38
4.1.5 Tomar las Gráficas de Fotos También puede utilizar este Cámara Tablero para tomar fotos de la escena actual. Desde la pantalla de espera , pulse el botón de bloqueo para convertirse en el modo de foto y pulse el botón de flecha para tomar una foto . Nota: Si la grabación está en curso, pulse - Polaroid PD-G55H | User Manual - Page 39
4.2.1 Eliminación de archivos Para eliminar el archivo ( s ) , haga lo siguiente : 1. Si la grabación está en curso, pulse el botón de flecha para detener la grabación . 2. Pulse el botón de bloqueo dos veces para entrar en el modo de reproducción. 3. Mueva el botón de flecha arriba / abajo para - Polaroid PD-G55H | User Manual - Page 40
. Cuando la seńal del GPS deja de parpadear , la seńal GPS es constante y la ubicación se registra en el vídeo. 4.3.2 Instalación del software 1. Coloque el CD-ROM adjunto en el reproductor de CD. 2. Si el CD no se ejecuta automáticamente , por favor, utilice el Administrador de archivos - Polaroid PD-G55H | User Manual - Page 41
5 Localizador GPS Reproductor de vídeo - Polaroid PD-G55H | User Manual - Page 42
á conectado antes de iniciar la reproducción de vídeo 2. Los archivos de vídeo ( MOV) deben almacenarse en la misma carpeta antes de iniciar la reproducción. 3. El software que conduce el registrador jugador incluido es sólo para equipos con Windows. - Polaroid PD-G55H | User Manual - Page 43
Angular foco fijo F2.4 lente +/- 5 % mm 0.3M~∞ Resolución: Full HD (1920 x 1080) , 30fps , HD (1280 x 720) , 60 / 30fps H.264 Resolución: 3M ( DC 12-24V , SALIDA : DC 5V 1A Polaroid , Polaroid y Pixel , Polaroid del espectro de color y Polaroid Classic Border Logo son marcas comerciales de PLR IP - Polaroid PD-G55H | User Manual - Page 44
PD-G55H Dash Cam Manuel d'utilisation - Polaroid PD-G55H | User Manual - Page 45
Table des matières A propos du présent guide...46 Déclaration de la FCC (Commission fédérale des carte mémoire ...50 2.2 Brancher au courant ...51 2.3 Connecter/déconnecter le Dash Cam au courant 51 2.3.1 Connexion/déconnexion automatique au courant 51 2.3.2 Connexion/déconnexion manuelle - Polaroid PD-G55H | User Manual - Page 46
les efforts pour assurer que ce guide d'utilisation soit exact et complet. Toutefois installation et utilisation ne conforment pas aux instructions, peut causer des interférences nuisibles aux le magasin oů vous avez acheté l'appareil ou votre service local de traitement des ordures ménagčres. Le - Polaroid PD-G55H | User Manual - Page 47
mettre la batterie en court-circuit. L'exposition de Dash Cam sur feu visible peut provoquer une explosion. Considérant les lois locales et les considérations de sécurité de véhicule, ne pas opérer manuellement l'appareil durant la conduite. Polaroid Tech Corp. n'est pas responsable de la perte - Polaroid PD-G55H | User Manual - Page 48
est nécessaire pour l'enregistrement de vidéo HD) 1.2 Liste de colisage Le paquet contient les éléments suivants. En cas de manquement ou endommagement quelconque, contactez immédiatement votre vendeur. Dash Cam Support Manuel d'utilisation Guide de démarrage rapide Câble USB avec adaptateur - Polaroid PD-G55H | User Manual - Page 49
1.3Panorama du produit No. Item 1 Prise pour le support 2 Objectif de grand angle 3 Touche de verrouillage de parleur 4 Bouton d'alimentation 5 Restitution No. Item 6 Verrou 7 USB connecteur 8 Slot pour carte mémoire 9 Écran LCD 10 Plateau - Polaroid PD-G55H | User Manual - Page 50
la carte de mémoire jusqu'ŕ ce qu'elle s'enclenche. (Utiliser des cartes Micro SD de classe 6 ou au-dessus pour ce Dash Cam ; Il est recommandé de formater les cartes micro SD avant la premičre utilisation, voir le 5.1.6 ŕ la page 18 pour le formatage.) Pour retirer la - Polaroid PD-G55H | User Manual - Page 51
alimenté automatiquement. Note : Il est ŕ noter que si la température de l'environnement atteint 115 ° F ou au-dessus, l'adaptateur de voiture peut encore alimenter Dash Cam, mais il ne charge peut-ętre pas la batterie. C'est une caractéristique inhérente de la batterie de lithium-polymčre et ne - Polaroid PD-G55H | User Manual - Page 52
2.4 Réglage initiale 2.4.1 Régler la date et l'heure Pour régler la date et l'heure, veuillez suivre les étapes suivantes : (Pour la position de bouton, voir le 1.3 - panorama de produit - ŕ la page 6) 1. Déplacer le bouton Flčche ŕ droite et entrer dans le menu. 2. Déplacer le bouton Flčche - Polaroid PD-G55H | User Manual - Page 53
brise et appuyer la pince pour monter le support de voiture au pare-brise. Assurer que la base est bien verrouillée en place. Caution : Ne pas installer l'appareil sur une vitre teintée. Sinon, vous risqueriez d'endommager le film de teinte. Quand le Dash Cam est installé dans une position recommand - Polaroid PD-G55H | User Manual - Page 54
2.5.2 Ajuster la position de l'appareil 1. Tourner la poignée pour que l'appareil soit vertical. 2. Tourner la poignée pour que l'appareil soit pivoté verticalement jusqu'ŕ 360°. 3. Puis serrer les boulons en assurant que l'appareil soit bien fixé en place. - Polaroid PD-G55H | User Manual - Page 55
de l'économiseur d'écran, sélectionner "l'économiseur d'écran" sous le menu de configuration. Pour réveiller l'écran depuis le mode d'économiseur, appuyer simplement sur une touche quelconque du Dash Cam. - Polaroid PD-G55H | User Manual - Page 56
Enregistrement avec la date Ajuster la sensibilité de Capteur gravitaire Options applicables 1080FHD/720P HD/WVGA/VGA Fermé/3/5/10 Minutes Ouvert/Fermé -1/3, -2/3, -1.0, -4/3, -5/3, -2.0, -1/3, aux réglages d'usine par défaut. Afficher la version firmware Ouvert/Fermé OK/Supprimé OK/Supprimé - Polaroid PD-G55H | User Manual - Page 57
des vidéos pendant la conduite Lorsque le moteur du véhicule démarre et la fonction d'enregistrement automatique est activée, le Dash Cam sera allumé automatiquement et commencera ŕ enregistrer. L'enregistrement sera arręté automatiquement lorsque le moteur est arręté. Ou appuyer sur le bouton - Polaroid PD-G55H | User Manual - Page 58
éo en temps réel. Indication de la puissance restante estimée de la batterie ou si elle est en train d'ętre chargée. Icône de guide 4 (urgence) WDR (Large plage 5 dynamique) Boucle 6 d'enregistrement Appuyer sur le bouton M pour enregistrer continuellement la vidéo dans le męme fichier jusqu'ŕ que - Polaroid PD-G55H | User Manual - Page 59
4.1.5 Prendre des Photos Vous pouvez également utiliser ce Dash Cam pour prendre des photos de la scčne actuelle. A partir de la veille de l'écran, appuyer sur le bouton de verrouillage ŕ entrer au mode photo - Polaroid PD-G55H | User Manual - Page 60
4.2.1 Suppression des fichiers Pour supprimer les fichiers, effectuer les étapes suivantes : 1. Si l'enregistrement est en cours, appuyer sur le bouton Flčche pour arręter l'enregistrement. 2. Appuyer deux fois sur le bouton de verrouillage pour entrer dans le mode de lecture. 3. Déplacer le bouton - Polaroid PD-G55H | User Manual - Page 61
Signal de GPS Lorsque le signal GPS clignote, le Dash Cam est alors en train de se connecter au satellite et 3. Appuyer sur NEXT (suivant) pour démarrer le processus d'installation en suivant les instructions affichées sur l'écran. Si le Gestionnaire de fichiers de Windows se montre ŕ nouveau, - Polaroid PD-G55H | User Manual - Page 62
5 Lecteur de vidéo du détecteur de GPS - Polaroid PD-G55H | User Manual - Page 63
No. Item 1 Lecteur de vidéo 2 Statistiques de capteur gravitaire 3 Infos de vidéo Doc 4 Vidéo en plein écran 5 Ouvrir le fichier 6 Capture d'infos de plan 7 Supprimer le fichier 8 Plan de GPS 9 Emplacement de GPS No. Item 10 Onglet de commutation 11 Infos de fichier de vidéo - Polaroid PD-G55H | User Manual - Page 64
APTINA AR0330 2304 x 1536 Support Micro SDHC, jusqu'ŕ 32GB angle de F2.4+/-5%mm 0.3M~∞ Résolution : Full HD 1920 x 1080 ,30fps HD (1280 x 720), 60 / 30fps H.264 24V, OUTPUT (sorti): DC 5V 1A Polaroid, Polaroid & Pixel, Polaroid Color Spectrum, et Polaroid classique Border Logo sont des marques de - Polaroid PD-G55H | User Manual - Page 65
- Polaroid PD-G55H | User Manual - Page 66
- Polaroid PD-G55H | User Manual - Page 67
- Polaroid PD-G55H | User Manual - Page 68
- Polaroid PD-G55H | User Manual - Page 69
D.28.02.15
-
 1
1 -
 2
2 -
 3
3 -
 4
4 -
 5
5 -
 6
6 -
 7
7 -
8
-
9
-
10
-
11
-
12
-
13
-
14
-
15
-
16
-
17
-
18
-
19
-
20
-
21
-
22
-
23
-
24
-
25
-
26
-
27
-
28
-
29
-
30
-
31
-
32
-
33
-
34
-
35
-
36
-
37
-
38
-
39
-
40
-
41
-
42
-
43
-
44
-
45
-
46
-
47
-
48
-
49
-
50
-
51
-
52
-
53
-
54
-
55
-
56
-
57
-
58
-
59
-
60
-
61
-
62
-
63
-
64
-
65
-
66
-
67
-
68
-
69
 |
 |
±
²±
PD-G55H
Dash Cam
User Manual
www.Polaroid.com