Polaroid PDC-5070BD User Guide - Page 68
Transferring Pictures and Video Clips - driver
 |
UPC - 654348933577
View all Polaroid PDC-5070BD manuals
Add to My Manuals
Save this manual to your list of manuals |
Page 68 highlights
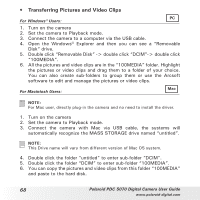
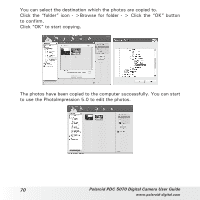
• Transferring Pictures and Video Clips PC For Windows® Users: 1. Turn on the camera 2. Set the camera to Playback mode. 3. Connect the camera to a computer via the USB cable. 4. Open the Windows® Explorer and then you can see a "Removable Disk" drive. 5. Double click "Removable Disk" -> double click "DCIM"-> double click "100MEDIA". 6. All the pictures and video clips are in the "100MEDIA" folder. Highlight the pictures or video clips and drag them to a folder of your choice. You can also create sub-folders to group them or use the Arcsoft software to edit and manage the pictures or video clips. Mac For Macintosh Users: NOTE: For Mac user, directly plug-in the camera and no need to install the driver. 1. Turn on the camera 2. Set the camera to Playback mode. 3. Connect the camera with Mac via USB cable, the systems will automatically recognize the MASS STORAGE drive named "untitled". NOTE: This Drive name will vary from different version of Mac OS system. 4. Double click the folder "untitled" to enter sub-folder "DCIM". 5. Double click the folder "DCIM" to enter sub-folder "100MEDIA". 6. You can copy the pictures and video clips from this folder "100MEDIA" and paste to the hard disk. 68 Polaroid PDC 5070 Digital Camera User Guide www.polaroid-digital.com
-
 1
1 -
2
-
3
-
4
-
5
-
6
-
7
-
8
-
9
-
10
-
11
-
12
-
13
-
14
-
15
-
16
-
17
-
18
-
19
-
20
-
21
-
22
-
23
-
24
-
25
-
26
-
27
-
28
-
29
-
30
-
31
-
32
-
33
-
34
-
35
-
36
-
37
-
38
-
39
-
40
-
41
-
42
-
43
-
44
-
45
-
46
-
47
-
48
-
49
-
50
-
51
-
52
-
53
-
54
-
55
-
56
-
57
-
58
-
59
-
60
-
61
-
62
-
 63
63 -
 64
64 -
 65
65 -
 66
66 -
 67
67 -
 68
68 -
 69
69 -
 70
70 -
 71
71 -
 72
72 -
 73
73 -
74
-
75
-
76
-
77
-
78
-
79
-
80
-
81
-
82
 |
 |