ProForm 475 E Elliptical English Manual - Page 8
Tip: Avoid pinching the Main Wire Harness
 |
View all ProForm 475 E Elliptical manuals
Add to My Manuals
Save this manual to your list of manuals |
Page 8 highlights
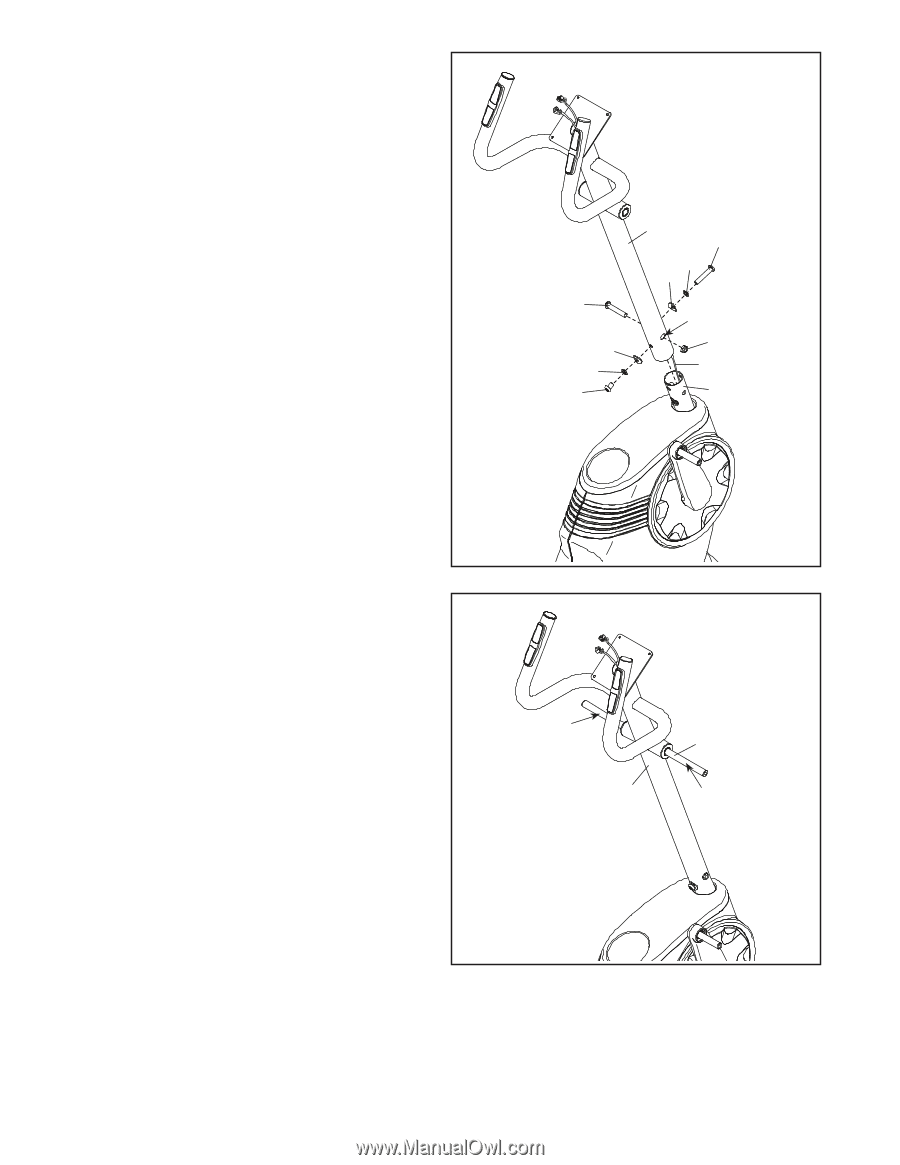
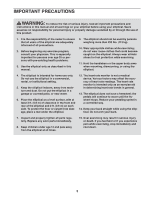
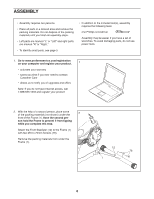
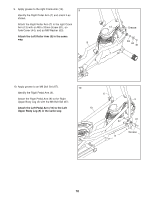
5. Tip: Avoid pinching the Main Wire Harness 5 (32). Slide the Upright (2) onto the Frame (1). Attach the Upright (2) with an M10 x 53mm Screw (73), an M10 x 20mm Screw (74), two M10 Split Washers (80), and two M10 Curved Washers (62) as shown; do not fully tighten the Screws yet. Finish attaching the Upright (2) with an M10 x 60mm Bolt (72) and an M10 Locknut (77); do not fully tighten the Screws yet. Make sure that the Locknut is in the hexagonal hole. Avoid pinching the Main Wire Harness (32) 72 62 80 74 2 73 80 62 Hexagonal Hole 77 32 1 6. Insert the Long Axle (18) into the Upright (2) and center it. 6 Using a plastic bag to keep your fingers clean, apply some of the included grease to both ends of the Long Axle (18). Grease 2 18 Grease 8
-
 1
1 -
2
-
 3
3 -
 4
4 -
 5
5 -
 6
6 -
 7
7 -
 8
8 -
 9
9 -
 10
10 -
 11
11 -
 12
12 -
 13
13 -
14
-
15
-
16
-
17
-
18
-
19
-
20
-
21
-
22
-
23
-
24
 |
 |