ProForm 475 E Elliptical English Manual - Page 9
Attach the Left Upper Body Arm 3 to
 |
View all ProForm 475 E Elliptical manuals
Add to My Manuals
Save this manual to your list of manuals |
Page 9 highlights
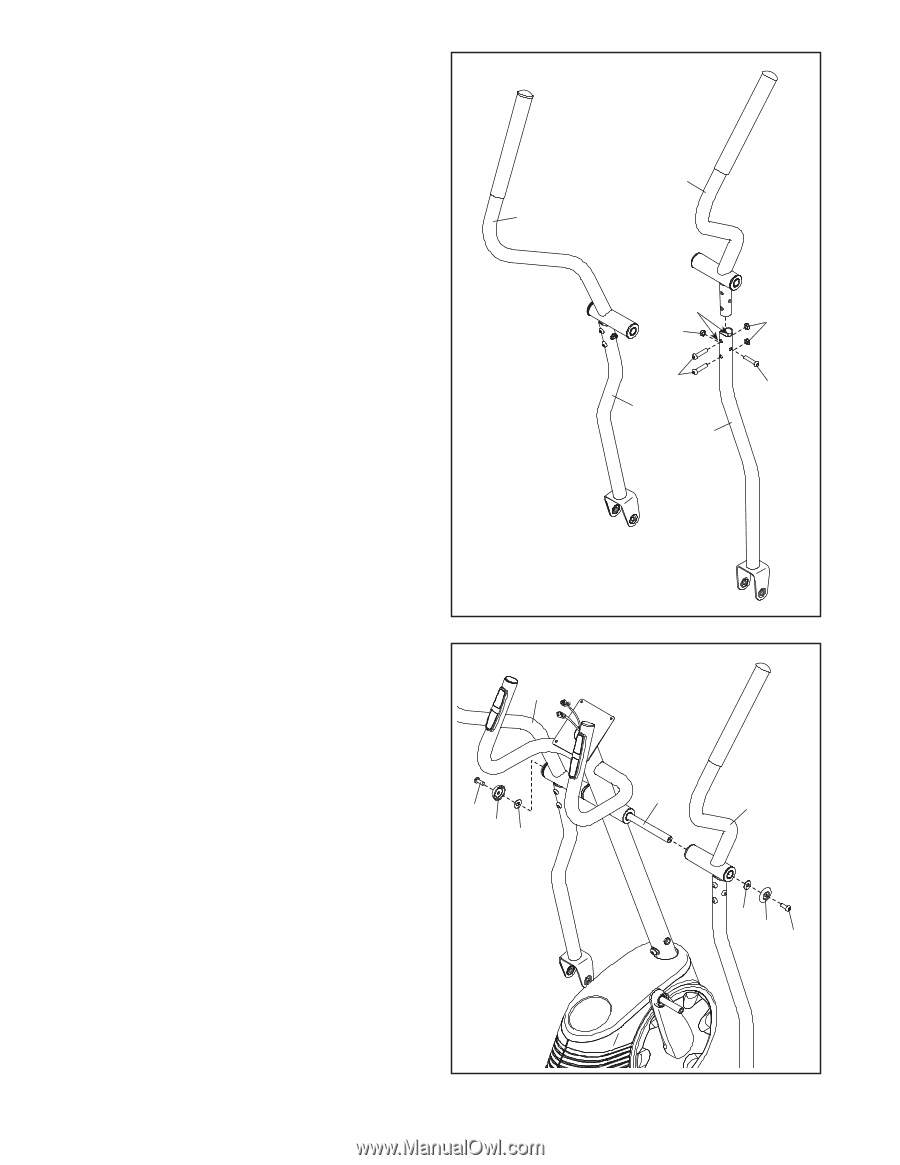
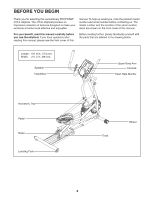
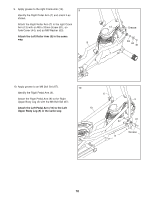
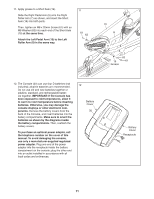
7. Identify the Right Upper Body Arm (4) and the 7 Right Upper Body Leg (5), and orient them as shown. Insert the Right Upper Body Arm (4) into the Right Upper Body Leg (5). Attach the Right Upper Body Arm with three M8 x 38mm Bolts (59) and three M8 Locknuts (60); make sure that the Locknuts are in the hexagonal holes. Do not fully tighten the Bolts yet. 3 Attach the Left Upper Body Arm (3) to the Left Upper Body Leg (6) in the same way. 4 Hex agonal Holes 60 60 59 59 6 5 8. Slide the Right Upper Body Arm (4) onto the right side of the Long Axle (18). Slide the Left Upper Body Arm (3) onto the left side of the Long Axle (18). Tighten an M8 x 20mm Screw (61) with an Axle Cover (44) and an M8 Washer (63) into each end of the Long Axle (18) at the same time. 8 3 61 44 63 18 4 63 44 61 9
-
 1
1 -
2
-
3
-
 4
4 -
 5
5 -
 6
6 -
 7
7 -
 8
8 -
 9
9 -
 10
10 -
 11
11 -
 12
12 -
 13
13 -
 14
14 -
15
-
16
-
17
-
18
-
19
-
20
-
21
-
22
-
23
-
24
 |
 |