ProForm 500 T Instruction Manual
ProForm 500 T Manual
 |
View all ProForm 500 T manuals
Add to My Manuals
Save this manual to your list of manuals |
ProForm 500 T manual content summary:
- ProForm 500 T | Instruction Manual - Page 1
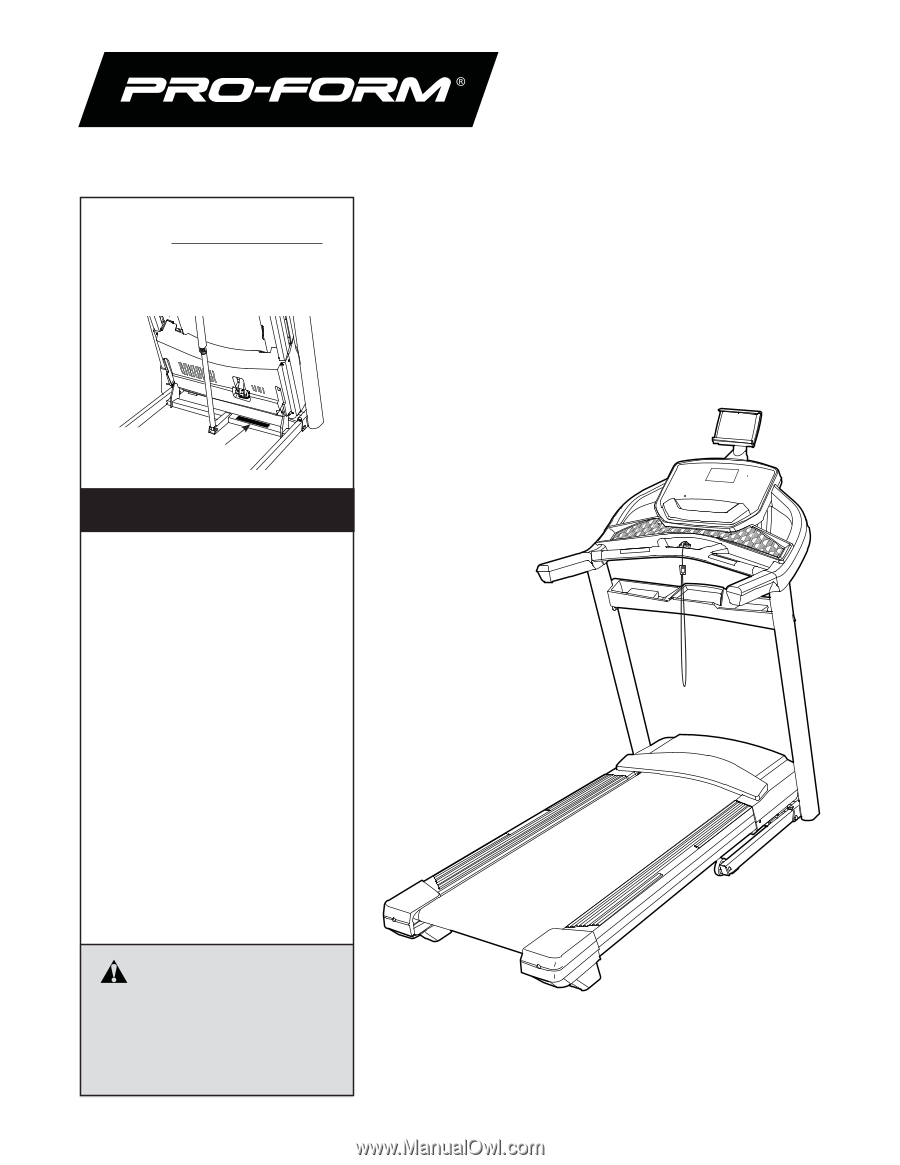
serial number in the space above for reference. Serial Number Decal CUSTOMER SERVICE UNITED KINGDOM Call: 0330 123 1045 From Ireland: 053 92 36102 Website precautions and instructions in this manual before using this equipment. Save this manual for future reference. 500 T USER'S MANUAL iconeurope. - ProForm 500 T | Instruction Manual - Page 2
IDENTIFICATION CHART 6 ASSEMBLY 7 HOW TO USE THE TREADMILL 18 HOW TO FOLD AND MOVE THE TREADMILL 27 MAINTENANCE AND TROUBLESHOOTING 28 EXERCISE GUIDELINES 31 PART LIST 34 EXPLODED DRAWING 36 ORDERING REPLACEMENT PARTS Back Cover RECYCLING INFORMATION Back Cover WARNING DECAL PLACEMENT This - ProForm 500 T | Instruction Manual - Page 3
all important precautions and instructions in this manual and all warnings on your treadmill before using your treadmill. ICON assumes no problems. 12. Wear appropriate exercise clothes while using the treadmill. Do not wear loose clothes that could become caught in the treadmill. Athletic support - ProForm 500 T | Instruction Manual - Page 4
before clean- ing the treadmill, and before performing the maintenance and adjustment procedures described in this manual. Never remove the motor hood unless instructed to do so by an authorized service representative. Servicing other than the procedures in this manual should be performed by - ProForm 500 T | Instruction Manual - Page 5
BEGIN Thank you for selecting the new PROFORM® 500T treadmill. The 500 T treadmill provides an impressive selection of features designed to make your workouts at home more effective and enjoyable. For your benefit, read this manual carefully before you use the treadmill. If you have questions after - ProForm 500 T | Instruction Manual - Page 6
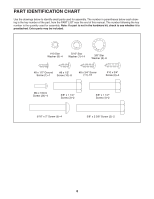
assembly. The number in parentheses below each drawing is the key number of the part, from the PART LIST near the end of this manual. The number following the key number is the quantity used for assembly. Note: If a part is not in the hardware kit, check to see whether it is preattached. Extra - ProForm 500 T | Instruction Manual - Page 7
one adjustable wrench To avoid damaging parts, do not use power tools. 1. To register your product and activate your warranty in the UK, go to iconsupport.eu. If 1 you do not have internet access, call Customer Service (see the front cover of this manual). To register your product and activate - ProForm 500 T | Instruction Manual - Page 8
2. Make sure that the power cord is unplugged. Remove the tie securing the Upright Wire (80) to the front of the Base (88). Next, identify the Right Upright (79). Have a second person hold the Right Upright near the Base (88). See the inset drawing. Tie the wire tie (A) in the Right Upright (79) - ProForm 500 T | Instruction Manual - Page 9
(2), a 3/8" x 1 1/4" 5 Screw (3), a 3/8" x 1 1/2" Screw (4), and three 3/8" Star Washers (6) as shown; do not fully tighten the Screws yet. Attach the Left Upright (not shown) as instructed in steps 4 and 5. Note: There are no wires on the left side. 80 2 E 79 88 2 6 88 6 3 79 4 6 9 - ProForm 500 T | Instruction Manual - Page 10
6. Remove and save the four indicated 5/16" x 3/4" Screws (13). 6 13 13 7. Attach a Handrail (72) to the Right Upright (79) with two 5/16" x 2" Screws (5) and two 5/16" 7 Star Washers (7); start both Screws, and then tighten them. Make sure not to pinch the Upright Wire (80). Then, remove - ProForm 500 T | Instruction Manual - Page 11
8. Attach the other Handrail (72) to the Left Upright (78) with two 5/16" x 2" Screws (5) and two 5/16" 8 Star Washers (7); start both Screws, and then tighten them. Then, remove and discard the two indicated screws (F). 5 7 F 72 78 9. Carefully slide the Upright Crossbar (77) between the - ProForm 500 T | Instruction Manual - Page 12
10. Set the Console Base (74) face down on a soft surface to avoid scratching the Console Base. 10 Remove and discard the two indicated screws (G). Then, remove the Pulse Crossbar (75). Next, identify the Left and Right Trays (85, 86). Attach the Trays to the Console Base (74) with 13 eight #8 - ProForm 500 T | Instruction Manual - Page 13
12. With the help of a second person, hold the console assembly (H) near the Handrails (72). Connect the ground wire (I) from the console assembly (H) to the Console Ground Wire (76) on the Pulse Crossbar (75). Next, insert the Upright Wire (80) through the two indicated looped ties (J). See the - ProForm 500 T | Instruction Manual - Page 14
14. Attach the Pulse Crossbar (75) to the console assembly (H) with four #8 x 3/4" Screws (11); 14 H start all four Screws, and then tighten them. Do not overtighten the Screws. Firmly tighten the four 5/16" x 3/4" Screws (13). 75 13 13 11 11 15. Set the Upright Tray (90) on the Upright - ProForm 500 T | Instruction Manual - Page 15
16. Set the Left Handrail Cover (70) on the left Handrail (72). Start two #8 x 3/4" Screws (11) into the left Handrail and the Left Handrail Cover. Next, slide the Left Handrail Cover forward against the console assembly (H) as shown. Then, tighten both Screws. Then, attach the Left Handrail Bottom - ProForm 500 T | Instruction Manual - Page 16
) from the Latch Crossbar (100). Next, orient the Latch Crossbar (100) as shown. Make sure that the "This side toward belt" sticker (L) is facing the treadmill. Attach the Latch Crossbar to the brackets (M) on the Frame (54) with the two 5/16" x 3/4" Screws (13) that you just removed and two 5/16 - ProForm 500 T | Instruction Manual - Page 17
other electronic device or object in the Tablet Holder. 21 Start First 24 26 P H 22. Make sure that all parts are properly tightened before you use the treadmill. If there are sheets of plastic on the treadmill decals, remove the plastic. To protect the floor or carpet, place a mat under the - ProForm 500 T | Instruction Manual - Page 18
the steps below to plug in the power cord. 1. Plug the indicated end of the power cord into the socket on the treadmill. Socket on Treadmill DANGER: Improper connection of the equipment-earthing conductor can result in an increased risk of electric shock. Check with a qualified electrician or - ProForm 500 T | Instruction Manual - Page 19
you use the manual mode, you can change the speed and incline of the treadmill with the touch the speed and incline of the treadmill as it guides you through an effective exercise session. /Met button on the console. For simplicity, all instructions in this section refer to kilometers. IMPORTANT: If - ProForm 500 T | Instruction Manual - Page 20
in the power cord (see page 18). Next, locate the power switch on the treadmill frame near the power cord. Press the power switch into the reset position. Reset If the manual mode is not selected, press the Manual button on the console. 3. Start the walking belt. To start the walking belt, press - ProForm 500 T | Instruction Manual - Page 21
the approximate intensity level of your exercise. • The workout intensity bar • The approximate number of calories you have burned • The incline level of the treadmill • The number of vertical meters you have climbed • The speed of the walking belt • Your heart rate (see step 6) • The matrix The - ProForm 500 T | Instruction Manual - Page 22
in a secure place. Then, press the power switch into the off position and unplug the power cord. IMPORTANT: If you do not do this, the treadmill's electrical components may wear prematurely. HOW TO USE AN ONBOARD WORKOUT 1. Insert the key into the console. See HOW TO TURN ON THE POWER on - ProForm 500 T | Instruction Manual - Page 23
of calories that you will burn during the workout. The actual number of calories that you burn will depend on various factors such as your weight. In addition, if you manually change the speed or incline of the treadmill during the workout, the number of calories you burn will be affected. 23 - ProForm 500 T | Instruction Manual - Page 24
compatible heart rate monitors. Note: Other BLUETOOTH connections are not supported. 1. Download and install the iFit-Smart Cardio Equipment app on console pairing number will appear in the display. Then, follow the instructions in the iFit-Smart Cardio Equipment app to connect your tablet to the - ProForm 500 T | Instruction Manual - Page 25
audio player. KEY CODE-This screen is meant for technicians. TOTAL TIME/DISTANCE-The screen will display the total number of hours that the treadmill has been used and the total number of miles (or kilometers) that the walking belt has moved. CONTRAST-Press the Incline increase and decrease - ProForm 500 T | Instruction Manual - Page 26
while you exercise, helping you to reach your personal fitness goals. To purchase a chest heart rate monitor, please see the front cover of this manual. Note: The console is compatible with all BLUETOOTH Smart heart rate monitors. HOW TO USE THE TABLET HOLDER IMPORTANT: The tablet holder (E) is - ProForm 500 T | Instruction Manual - Page 27
over an uneven surface. 2 3. Place one foot against a wheel (D), and carefully lower the treadmill. A HOW TO LOWER THE TREADMILL FOR USE 1. Push the upper end of the frame forward, and gently 1 B press the upper part of the storage latch with your foot at the same time. To protect the - ProForm 500 T | Instruction Manual - Page 28
exterior parts of the treadmill with a damp cloth and a small amount of mild soap. IMPORTANT: Do not spray liquids directly onto the treadmill. it. d. If the treadmill still will not run, please see the front cover of this manual. TROUBLESHOOTING Most treadmill problems can be solved by following - ProForm 500 T | Instruction Manual - Page 29
than 5 ft. (1.5 m). A c. Your treadmill features a walking belt coated with high-performance lubricant. IMPORTANT: Never apply silicone spray or other substances to the walking belt or the walking platform unless instructed to do so by an authorized service representative. Such substances may - ProForm 500 T | Instruction Manual - Page 30
1/2 of a turn. Be careful not to overtighten the walking belt. Then, plug in the power cord, insert the key, and walk on the treadmill for a few minutes. Repeat until the walking belt is centered. SYMPTOM: The tablet holder does not stay in place a. Rotate the tablet holder (C) until - ProForm 500 T | Instruction Manual - Page 31
for persons over age 35 or persons with pre-existing health problems. The heart rate monitor is not a medical device. Various to achieving results. You can use your heart rate as a guide to find the proper intensity level. The chart below shows recommended enjoyable part of your everyday life. 31 - ProForm 500 T | Instruction Manual - Page 32
SUGGESTED STRETCHES The correct form for several basic stretches is shown at the right. Move slowly as you stretch-never bounce. 1. Toe Touch Stretch Stand with your knees bent slightly and slowly bend forward from 1 your hips. Allow your back and shoulders to relax as you reach down toward - ProForm 500 T | Instruction Manual - Page 33
NOTES 33 - ProForm 500 T | Instruction Manual - Page 34
PART LIST Key No. Qty. 1 2 2 4 3 2 4 2 5 4 6 6 7 14 8 4 9 4 10 8 11 62 12 1 13 10 Rail Right Foot Rail Platform Cushion Caution Decal Rear Roller Walking Platform Walking Belt Belt Guide Front Roller/Pulley 3/8" Pin 9/32" Plastic Bushing Controller Plate Plastic Tie Model - ProForm 500 T | Instruction Manual - Page 35
16" Washer M4 x 15mm Screw Filter Reed Switch 106 1 107 1 108 1 * - Clamp Magnet Controller Clamp User's Manual Note: Specifications are subject to change without notice. For information about ordering replacement parts, see the back cover of this manual. *These parts are not illustrated. 35 - ProForm 500 T | Instruction Manual - Page 36
EXPLODED DRAWING A 40 33 41 29 25 19 36 15 42 103 105 11 17 106 48 102 101 22 108 49 30 38 25 47 107 27 27 104 29 36 40 45 33 18 7 13 43 29 44 91 18 19 29 19 89 23 19 89 46 89 89 92 89 89 18 29 89 19 7 54 13 39 89 25 15 34 27 27 27 17 48 36 47 18 29 19 - ProForm 500 T | Instruction Manual - Page 37
EXPLODED DRAWING B Model No. PETL78718.1 R0918A 11 11 11 35 11 35 11 35 11 57 11 58 62 59 60 20 32 36 61 63 21 64 36 36 36 32 60 59 11 11 11 11 65 11 67 68 11 69 11 62 66 11 11 37 - ProForm 500 T | Instruction Manual - Page 38
EXPLODED DRAWING C Model No. PETL78718.1 R0918A 70 7 72 11 9 1 76 8 5 75 7 13 11 90 11 11 11 11 9 8 71 11 14 37 82 11 7 13 7 13 78 2 3 6 87 77 13 7 13 11 7 16 12 60 6 82 7 11 11 11 6 4 83 81 11 80 5 72 7 13 80 79 60 16 82 4 6 81 84 11 95 36 36 95 82 37 - ProForm 500 T | Instruction Manual - Page 39
EXPLODED DRAWING D Model No. PETL78718.1 R0918A 26 85 10 10 31 74 10 24 10 11 86 10 10 11 11 11 11 97 11 11 96 11 73 28 28 28 28 28 28 39 - ProForm 500 T | Instruction Manual - Page 40
) • the name of the product (see the front cover of this manual) • the key number and description of the replacement part(s) (see the PART LIST and the EXPLODED DRAWING near the end of this manual) RECYCLING INFORMATION This electronic product must not be disposed of in municipal waste. To preserve
-
 1
1 -
 2
2 -
 3
3 -
 4
4 -
 5
5 -
 6
6 -
 7
7 -
8
-
9
-
10
-
11
-
12
-
13
-
14
-
15
-
16
-
17
-
18
-
19
-
20
-
21
-
22
-
23
-
24
-
25
-
26
-
27
-
28
-
29
-
30
-
31
-
32
-
33
-
34
-
35
-
36
-
37
-
38
-
39
-
40
 |
 |
USER’S MANUAL
Model No.PETL78718.1
S
Serial No.
Write the serial number in the space
above for reference.
CAUTION
Read all precautions and
instructions in this manual before
using this equipment. Save this
manual for future reference.
Serial Number
Decal
iconeurope.com
CUSTOMER SERVICE
UNITED KINGDOM
Call:
0330 123 1045
From Ireland:
053 92 36102
Website:
iconsupport.eu
E-mail:
Write:
ICON Health & Fitness, Ltd.
Unit 4, Westgate Court
Silkwood Park
OSSETT
WF5 9TT
UNITED KINGDOM
AUSTRALIA
Call:
1800 993 770
E-mail:
Write:
ICON Health & Fitness
PO Box 635
WINSTON HILLS NSW 2153
AUSTRALIA
500
T