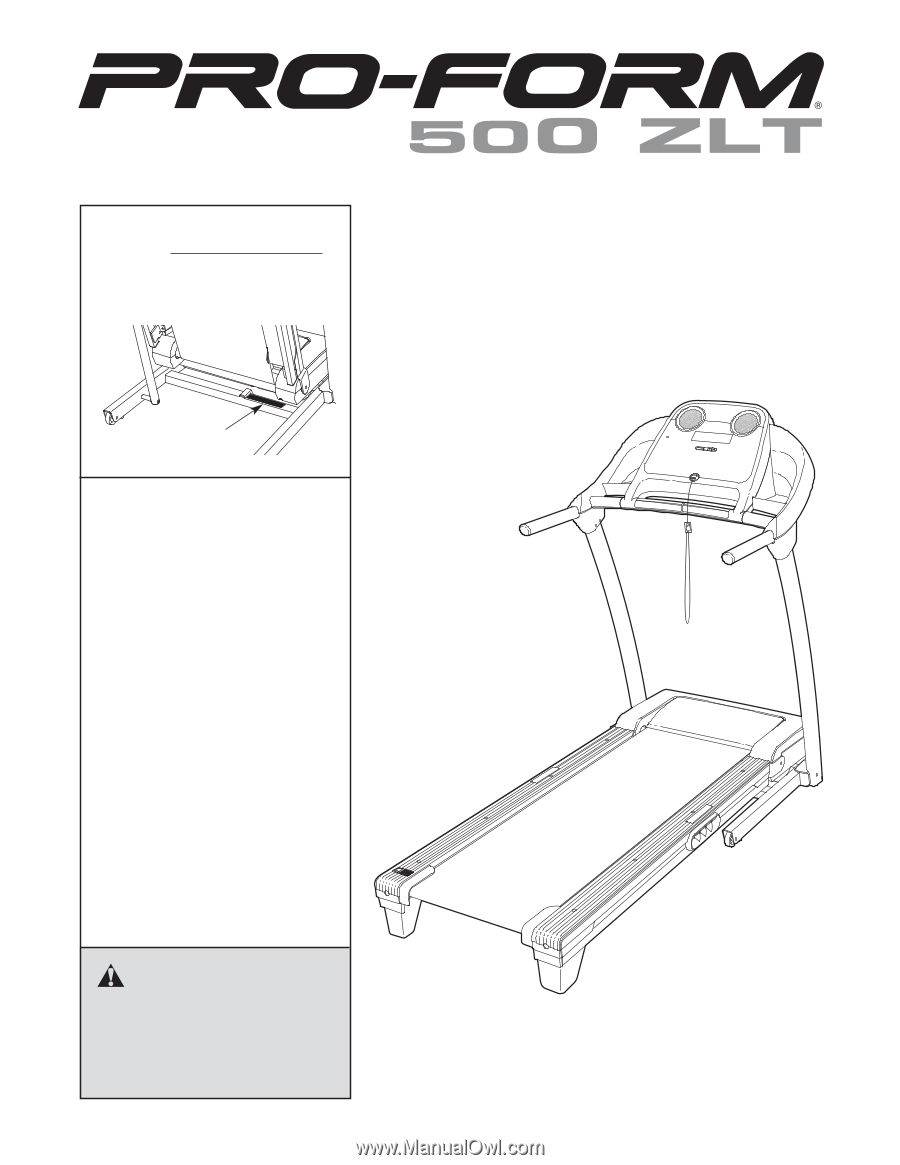
ProForm 500 Zlt Treadmill English Manual
ProForm 500 Zlt Treadmill Manual
 |
View all ProForm 500 Zlt Treadmill manuals
Add to My Manuals
Save this manual to your list of manuals |
ProForm 500 Zlt Treadmill manual content summary:
- ProForm 500 Zlt Treadmill | English Manual - Page 1
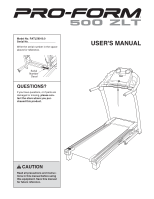
in the space above for reference. Serial Number Decal QUESTIONS? If you have questions, or if parts are damaged or missing, please contact the store where you purchased this product. USER'S MANUAL CAUTION Read all precautions and instructions in this manual before using this equipment. Save this - ProForm 500 Zlt Treadmill | English Manual - Page 2
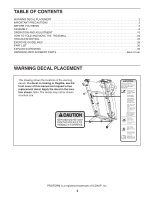
FOLD AND MOVE THE TREADMILL 24 TROUBLESHOOTING 25 EXERCISE GUIDELINES 28 PART LIST 30 EXPLODED DRAWING 32 ORDERING REPLACEMENT PARTS cover of this manual and request a free replacement decal. Apply the decal in the location shown. Note: The decals may not be shown at actual size. PROFORM is a - ProForm 500 Zlt Treadmill | English Manual - Page 3
loose clothes that could become caught in the treadmill. Athletic support clothes are recommended for both men and women. Always wear athletic shoes; never use the treadmill with bare feet, wearing only stockings, or in sandals. 17. The heart rate monitor is not a medical device. Various factors - ProForm 500 Zlt Treadmill | English Manual - Page 4
procedures described in this manual. Never remove the motor hood un- less instructed to do so by an authorized ser- vice representative. Servicing other than the procedures in this manual should be performed by an authorized service representative only. 24. This treadmill is intended for home - ProForm 500 Zlt Treadmill | English Manual - Page 5
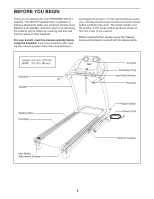
YOU BEGIN Thank you for selecting the new PROFORM® 500 ZLT treadmill. The 500 ZLT treadmill offers a selection of features designed to make your workouts at home more effective and enjoyable. And when youʼre not exercising, the treadmill can be folded up, requiring less than half the floor space - ProForm 500 Zlt Treadmill | English Manual - Page 6
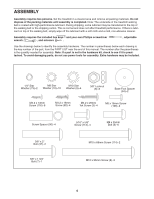
walking belt or the shipping carton. This is normal and does not affect treadmill performance. If there is lubricant on top of the walking belt, simply the part, from the PART LIST near the end of this manual. The number after the parentheses is the quantity needed for assembly. Note: If a part is - ProForm 500 Zlt Treadmill | English Manual - Page 7
the Bolts for steps 3 and 6. A 95 19 31 2. With the help of a second person, carefully tip the treadmill onto its left side. Partially fold the Frame (56) so that the treadmill is more stable; do not fully fold the Frame yet. Cut the shipping tie securing the Upright Wire (88) to the Base (95 - ProForm 500 Zlt Treadmill | English Manual - Page 8
3. Attach a Wheel (97) with the M10 Nut (19), and 3 the M10 x 50mm Bolt (31) that you removed in step 1. Do not overtighten the Nut; the Wheel must turn freely. Press a Base Cap (87) into the Base (95). 87 31 95 97 19 4. Identify the Right Upright (89) and the Right Upright Spacer (91), - ProForm 500 Zlt Treadmill | English Manual - Page 9
Screws yet. 89 8 114 9 88 91 90 6. With the help of a second person, carefully tip the treadmill onto its right side. Partially fold the Frame (56) so that the treadmill is more stable; do not fully fold the Frame yet. Attach a Wheel (97) with the M10 Nut (19), and the M10 x 50mm Bolt (31 - ProForm 500 Zlt Treadmill | English Manual - Page 10
of the Screws touch the Left Upright; do not fully tighten the Screws yet. 90 86 95 With the help of a second person, tip the treadmill so that the Base (95) is flat on the floor. 8 85 8. Identify the Left and Right Upright Covers (109, 110), which are marked "Left" and - ProForm 500 Zlt Treadmill | English Manual - Page 11
9. Set the console assembly face down on a soft surface to avoid scratching the console. Loosen the four #8 x 1" Screws (107). Carefully pivot the Console Frame (111) to the position shown. Do not pivot the Console Frame too far or you will break the ground wire. Identify the Left and Right - ProForm 500 Zlt Treadmill | English Manual - Page 12
11. Have a second person hold the console assembly near the Right Upright (89). Connect the Upright Wire (88) to the console wire. See the inset drawing. The connectors should slide together easily and snap into place. If they do not, turn one connector and try again. IF YOU DO NOT CONNECT THE - ProForm 500 Zlt Treadmill | English Manual - Page 13
Large Barrel 60 95 6 37 15. Make sure that all parts are properly tightened before you use the treadmill. If there are sheets of plastic on the treadmill decals, remove the plastic. To protect the floor or carpet, place a mat under the treadmill. Keep the included hex keys in a secure place; one - ProForm 500 Zlt Treadmill | English Manual - Page 14
(see page 23), follow the steps below to install the receiver included with the heart rate monitor. 1. Make sure that the power cord is unplugged. Remove the five M4 x 19mm Screws (35) and 1 the two M4 x 45mm Screws (2) from the back - ProForm 500 Zlt Treadmill | English Manual - Page 15
must be replaced with a manufacturer-recommended power cord. 1. Plug the indicated end of the power cord into the socket on the treadmill. Socket on Treadmill DANGER: Improper connection of the equipment-earthing conductor can result in an increased risk of electric shock. Check with a qualified - ProForm 500 Zlt Treadmill | English Manual - Page 16
of the treadmill as it guides you through an effective exercise session. The console also features the iFit interactive workout system. The iFit system accepts iFit cards with workouts that help you achieve specific fitness goals. For example, lose unwanted pounds with the 8-week Weight Loss workout - ProForm 500 Zlt Treadmill | English Manual - Page 17
IMPORTANT: The console features a display demo mode, designed to be used if the treadmill is displayed in manual mode will be selected. If a preset workout has been selected, remove the key and then reinsert it. 3. Enter your weight if desired. For the most accurate calorie count, enter your weight - ProForm 500 Zlt Treadmill | English Manual - Page 18
treadmill each time the incline level changes. Note: When a performance workout or an iFit workout is selected, the lower left display will show the time remaining in the workout also shows your heart rate when you use the handgrip heart rate monitor or the optional chest heart rate monitor (see step - ProForm 500 Zlt Treadmill | English Manual - Page 19
or two dashes will appear, and then your heart rate will be shown. For the most accurate heart rate reading, continue to hold the contacts for about 15 incline of the treadmill to the lowest setting. The incline must be at the lowest setting or you may damage the treadmill when you fold it to the - ProForm 500 Zlt Treadmill | English Manual - Page 20
of the workout will scroll across the display. 3. Enter your weight if desired. For the most accurate calorie count, enter your weight into the workout, you can manually override the setting by pressing the Speed or Incline buttons; however, when the next segment of the workout begins, the treadmill - ProForm 500 Zlt Treadmill | English Manual - Page 21
button until the desired time is selected. 5. Start the workout. See step 4 on page 20. 6. Follow your progress with the displays. See step 6 on page 18. 7. Measure your heart rate if desired. See step 7 on page 19. 3. Enter your weight if desired. For the most accurate calorie count, enter your - ProForm 500 Zlt Treadmill | English Manual - Page 22
after you press the button, the treadmill will automatically adjust to the first speed and incline settings of the workout. Hold the handrails and begin walking. During the workout, the voice of a personal trainer will guide you through the workout. The iFit workout will function in the same way as - ProForm 500 Zlt Treadmill | English Manual - Page 23
-free operation as it tracks your heart rate during your workouts. To purchase the optional chest heart rate monitor, please contact the store where you purchased this product. The console features a display demo mode, designed to be used if the treadmill is displayed in a store. While the demo - ProForm 500 Zlt Treadmill | English Manual - Page 24
arrow below. CAUTION: Do not hold the frame by the plastic foot rails. Bend your legs and keep your back straight. HOW TO MOVE THE TREADMILL Before moving the treadmill, fold it as described at the left. CAUTION: Make sure that the latch knob is locked in the storage position. Moving the - ProForm 500 Zlt Treadmill | English Manual - Page 25
TROUBLESHOOTING Most treadmill problems can be solved by following the simple steps below. Find the symptom that applies, and follow the steps listed. If further assistance is needed, see the front cover of this manual console features a display demo mode, designed to be used if the treadmill is - ProForm 500 Zlt Treadmill | English Manual - Page 26
system. Idler Roller Screws c. Your treadmill features a walking belt coated with high-performance lubricant. IMPORTANT: Never apply silicone spray or other substances to the walking belt or the walking platform unless instructed to do so by an authorized service representative. Such substances may - ProForm 500 Zlt Treadmill | English Manual - Page 27
screw counterclockwise 1/2 of a turn. Be careful not to overtighten the walking belt. Then, plug in the power cord, insert the key, and run the treadmill for a few minutes. Repeat until the walking belt is centered. b. If the walking belt slips when walked on, first remove the key and UNPLUG THE - ProForm 500 Zlt Treadmill | English Manual - Page 28
problems. The heart rate monitor is not a medical device. Various factors may affect the accuracy of heart rate readings. The heart rate rate as a guide to find the proper intensity level. The chart below shows recommended heart rates rate is near the highest number in your training zone. WORKOUT - ProForm 500 Zlt Treadmill | English Manual - Page 29
SUGGESTED STRETCHES The correct form for several basic stretches is shown at the right. Move slowly as you stretch-never bounce. 1. Toe Touch Stretch Stand with your knees bent slightly and slowly bend forward from 1 your hips. Allow your back and shoulders to relax as you reach down toward - ProForm 500 Zlt Treadmill | English Manual - Page 30
PART LIST Model No. PATL59910.0 R0611A Key No. Qty. 1 9 2 2 3 4 4 2 5 6 6 6 7 1 8 2 9 4 10 10 11 7 /Clip 6 mm Hex Key 4 mm Hex Key 5 mm Hex Key Hex Key Left Foot Rail Warning Decal Platform Cushion Belt Guide Frame Cap Key No. Qty. 51 1 52 1 53 1 54 1 55 1 56 1 57 2 58 1 59 - ProForm 500 Zlt Treadmill | English Manual - Page 31
x 68mm Screw M8 Flange Nut M4.2 x 13mm Screw Motor Bushing Motor Isolator Receptacle Indian Power Cord Userʼs Manual Note: Specifications are subject to change without notice. For information about ordering replacement parts, see the back cover of this manual. *These parts are not illustrated. 31 - ProForm 500 Zlt Treadmill | English Manual - Page 32
EXPLODED DRAWING A 29 17 46 29 48 29 1 47 16 4 57 64 26 28 36 27 4 16 63 65 64 26 1 27 28 29 49 32 18 15 50 115 51 53 54 55 52 15 57 36 29 48 56 29 32 29 1 58 60 18 50 115 29 49 6 17 37 32 Model No. PATL59910.0 R0611A 42 43 44 45 62 1 6 7 - ProForm 500 Zlt Treadmill | English Manual - Page 33
EXPLODED DRAWING B 67 68 Model No. PATL59910.0 R0611A 12 13 12 13 12 13 117 30 70 1 71 72 19 20 79 74 76 118 25 75 24 69 33 33 77 21 78 19 72 24 11 80 39 22 11 11 40 11 81 11 119 83 120 11 84 33 - ProForm 500 Zlt Treadmill | English Manual - Page 34
EXPLODED DRAWING C Model No. PATL59910.0 R0611A 109 82 10 5 10 113 82 110 88 85 113 10 5 114 8 96 31 19 97 9 33 90 93 87 86 6 23 92 3 6 88 94 92 95 3 61 37 19 97 94 31 92 3 10 89 23 6 87 92 91 93 3 9 114 8 90 34 - ProForm 500 Zlt Treadmill | English Manual - Page 35
EXPLODED DRAWING D Model No. PATL59910.0 R0611A 112 116 116 116 104 35 116 2 103 102 33 35 35 59 100 35 41 35 2 35 66 35 10 5 99 34 73 98 108 105 14 38 35 116 106 116 116 116 111 107 66 107 101 98 10 34 73 5 108 35 - ProForm 500 Zlt Treadmill | English Manual - Page 36
the product (see the front cover of this manual) • the name of the product (see the front cover of this manual) • the key number and description of the replacement part(s) (see the PART LIST and the EXPLODED DRAWING near the end of this manual) Part No. 311039 R0611A Printed in China © 2011 ICON
-
 1
1 -
 2
2 -
 3
3 -
 4
4 -
 5
5 -
 6
6 -
 7
7 -
8
-
9
-
10
-
11
-
12
-
13
-
14
-
15
-
16
-
17
-
18
-
19
-
20
-
21
-
22
-
23
-
24
-
25
-
26
-
27
-
28
-
29
-
30
-
31
-
32
-
33
-
34
-
35
-
36
 |
 |
Serial
Number
Decal
Model No. PATL59910.0
Serial No.
Write the serial number in the space
above for reference.
CAUTION
Read all precautions and instruc-
tions in this manual before using
this equipment. Save this manual
for future reference.
QUESTIONS?
If you have questions, or if parts are
damaged or missing,
please con-
tact the store where you pur-
chased this product.
USER'S MANUAL