ProForm 725 Xt User Manual
ProForm 725 Xt Manual
 |
View all ProForm 725 Xt manuals
Add to My Manuals
Save this manual to your list of manuals |
ProForm 725 Xt manual content summary:
- ProForm 725 Xt | User Manual - Page 1
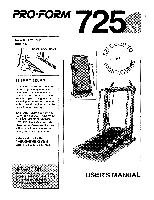
PRO•FORM® 7 12 toga fr Model No. PFTL20560 Serial No. Serial Number Decal O 0 QUESTIONS? As a manufacturer, we are committed to providing complete Mon.-Fri., 6 a.m.-6 p.m. MST NS-ED # Qcs F B 9- 3 44, trds, AUTIO aw..440i!Pf.e..9..1.1 :11.10#45 th mneanuaallffor'future reference USER'S MANUAL - ProForm 725 Xt | User Manual - Page 2
PRO•FORM® "72 TABLE OF CONTENTS IMPORTANT PRECAUTIONS BEFORE YOU BEGIN ASSEMBLY OPERATION AND ADJUSTMENT HOW TO FOLD AND MOVE THE TREADMILL TROUBLE-SHOOTING CONDITIONING GUIDELINES ORDERING REPLACEMENT PARTS LIMITED WARRANTY 3 4 5 7 11 12 14 Back Cover Back Cover Note: An EXPLODED DRAWING and a - ProForm 725 Xt | User Manual - Page 3
when using the treadmill; do not wear loose clothing that 22. Always unplug the power cord before performing the maintenance and adjustment procedures described In this manual. Never remove the motor hood unless instructed to do so by an authorized service representative. Servicing other than the - ProForm 725 Xt | User Manual - Page 4
(see the front cover of this manual for the location). For your benefit, read this manual carefully before using the treadmill. If you have additional questions, please call our Customer Service Department toll-free Before reading further, please review the drawing below and familiarize yourself - ProForm 725 Xt | User Manual - Page 5
the 7/32" Allen Wrench (56), tighten the Crossbar Bolts (2) in the ends of the Console Crossbar (17). 4. Next, the treadmill should be raised to the storage position. Hold the treadmill with your hands in the locations shown at the right. To decrease the possibility of injury, bend your legs and - ProForm 725 Xt | User Manual - Page 6
Pin 6. See the upper inset drawing. Attach a Base Pad (73) to the bottom of the Stabilizer Plate (88) in the indicated location. Stand behind the treadmill. Hold the Right Crossbar Bracket (51) and the Left Crossbar Bracket (not shown). Place one foot on the base in the indicated location. Tip the - ProForm 725 Xt | User Manual - Page 7
the walking plat- grounded in accordance with all local codes and form. They will deteriorate the walking belt and ordinances. cause excessive permanent ground such as a properly grounded outlet box cover. Your treadmill, like any other type of sophisticated electronic equipment, can be - ProForm 725 Xt | User Manual - Page 8
The treadmill console features a manual mode and six preset workout programs. In the manual mode, the speed of the walking belt can be changed with the electronic speed control. When one of the workout programs is selected, the console will automatically control the speed as it guides - ProForm 725 Xt | User Manual - Page 9
mode. The MANUAL mode can also be selected by repeatedly pressing the SELECT MODE button. If you want to select one of the six preset programs, press the CID C SELECT MODE button. The red PRO- "'SELECT a.,,P MODE GRAM A indicator will light. To select PROGRAM B, C, D, E, or F, re- peatedly - ProForm 725 Xt | User Manual - Page 10
down one of the incline .0 buttons until the desired incline is reached. A V INCLINE HOW TO USE THE UPPER BODY ARMS As you exercise on the treadmill, you can either hold the handrails or use the upper body arms. The upper body arms are designed to exercise your arms, shoulders, and back - ProForm 725 Xt | User Manual - Page 11
the power cord. Caution: You must be able to safely lift 45 pounds (20 kg) in order to raise, lower, or move the treadmill. 1. Hold the treadmill, with your hands in the locations shown at the right. To decrease the possibility of injury, bend your legs and keep your back straight. As - ProForm 725 Xt | User Manual - Page 12
legs and keep your back straight. TROUBLE-SHOOTING Most treadmill problems can be solved by following the steps below. Find the symptom that applies, and follow the steps listed. If further assistance is needed, please call our Customer Service - ProForm 725 Xt | User Manual - Page 13
still slows when walked on, please call our Customer Service Department, toll-free. 4. SYMPTOM: THE WALKING BELT the power cord, insert the key and run the treadmill for a few minutes. Repeat until the walking belt SQUEAKS DURING USE a. Correcting this problem requires a small amount of white - ProForm 725 Xt | User Manual - Page 14
diVidbalsover.the.age of 35 IndlifidOalS with pre-existing health problems .1. Training Zone (Beats/Min.) Age Unconditioned 20 138 help you to plan your ex- 55 ercise program. Remember-these are general guide- lines. For more detailed information about exercise, 60 obtain a reputable book - ProForm 725 Xt | User Manual - Page 15
flexibility of your muscles and will help to prevent post-exercise problems. Exercise Frequency To maintain or improve your condition, complete three and enjoyable part of your everyday life. SUGGESTED STRETCHES The correct form for several basic stretches is shown in the drawings below. Move - ProForm 725 Xt | User Manual - Page 16
• The NAME OF THE PRODUCT (PROFORM® 725xt treadmill). • The SERIAL NUMBER OF THE PRODUCT (see the front cover of this manual). • The KEY NUMBER OF THE improper or abnormal usage or repairs not provided by an ICON authorized service center, to products used for commercial or rental purposes, or to - ProForm 725 Xt | User Manual - Page 17
REMOVE THIS EXPLODED DRAWING AND PART LIST FROM THE MANUAL Save this EXPLODED DRAWING and PART LIST for future reference. N.-2) D ° irtr tOi ,•7t1 O X Note: Specifications are subject to change without notice. For information about ordering - ProForm 725 Xt | User Manual - Page 18
PFTL20560 EXPLODED DRAWING Model H . 24 23 2 \\ 9 13 68 10 11 7 15 7 12 R0296A 25 81 27 28 29 \26 34 35 36 37 38 21 20 19* 18 40 44 42 •, 90 117 89 98 77 69 27 67 ° 85 81 33 45 11B 78 66 61 60 62 63 3 ► 72 65 //' 101 7 g4 ell< N/ 55 57 93 /- /25 110 86 89 103 - ProForm 725 Xt | User Manual - Page 19
Screw Safety Cover Hairpin Cotter Pin Frame Base Shock Isolator Belt Guide Stabilizer Plate Roller Guard Front Roller/Pulley Walking Platform Walking Belt Female 8" Green Wire, Ring/Female 4" Black Wire, 2 Female User's Manual * Includes all parts shown in the box # These parts are not illustrated
-
 1
1 -
 2
2 -
 3
3 -
 4
4 -
 5
5 -
 6
6 -
 7
7 -
8
-
9
-
10
-
11
-
12
-
13
-
14
-
15
-
16
-
17
-
18
-
19
 |
 |

PRO•FORM®
7
1
2
Model
No.
PFTL20560
Serial
No.
Serial
Number
Decal
O
0
QUESTIONS?
As
a
manufacturer,
we
are
com-
mitted
to
providing
complete
customer
satisfaction.
If
you
have
questions,
or
find
that
there
are
missing
or
damaged
parts,
we
will
guarantee
you
complete
satisfaction
through
direct
assis-
tance
from
our
factory.
TO
AVOID
UNNECESSARY
DE-
LAYS,
PLEASE
CALL
DIRECT
TO
OUR
TOLL
-FREE
CUSTOMER
HOT
LINE.
The
trained
techni-
cians
on
our
Customer
Hot
Line
will
provide
immediate
assis-
tance,
free
of
charge
to
you.
CUSTOMER
HOT
LINE:
1-800-999-3756
Mon.
—Fri.,
6
a.m.-6
p.m.
MST
AUTIO
aw..440i!Pf.e.91
.....
1
:
1
1.10#45
th
manual
f
nenual
for'future
future
reference
44
,
trds,
NS
-ED
#
Qcs
toga
fr
F
B
9
-
3
USER'S
MANUAL