ProForm Cr610 English Manual
ProForm Cr610 Manual
 |
View all ProForm Cr610 manuals
Add to My Manuals
Save this manual to your list of manuals |
ProForm Cr610 manual content summary:
- ProForm Cr610 | English Manual - Page 1
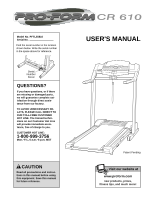
HOT LINE: 1-800-999-3756 Mon.-Fri., 6 a.m.-6 p.m. MST CAUTION Read all precautions and instructions in this manual before using this equipment. Save this manual for future reference. USER'S MANUAL Patent Pending Visit our website at www.proform.com new products, prizes, fitness tips, and much more! - ProForm Cr610 | English Manual - Page 2
BEFORE YOU BEGIN 5 ASSEMBLY 6 OPERATION AND ADJUSTMENT 9 HOW TO FOLD AND MOVE THE TREADMILL 15 TROUBLE-SHOOTING 17 CONDITIONING GUIDELINES 19 PART LIST 22 ORDERING REPLACEMENT PARTS Back Cover LIMITED WARRANTY Back Cover Note: An EXPLODED DRAWING is attached in the center of this manual. 2 - ProForm Cr610 | English Manual - Page 3
a surge suppressor, see your local PROFORM dealer or call 1-800-9993756 and order part number 146148. 12. Keep the power cord and the surge suppressor away from heated surfaces. 13. Never move the walking belt while the power is turned off. Do not operate the treadmill if the power cord or plug is - ProForm Cr610 | English Manual - Page 4
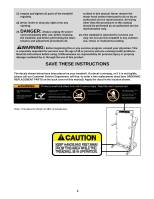
SAVE THESE INSTRUCTIONS The decals shown below have been placed on your treadmill. If a decal is missing, or if it is not legible, please call our Customer Service Department, toll-free, to order a free replacement decal (see ORDERING REPLACEMENT PARTS on the back cover of this manual). Apply the - ProForm Cr610 | English Manual - Page 5
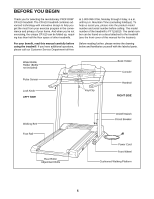
yourself with the labeled parts. Water Bottle Holder (Bottle not included) Pulse Sensor Lock Knob LEFT SIDE Key/Clip Book Holder Console Handrail RIGHT SIDE Walking Belt Foot Rail Rear Roller Adjustment Bolts On/Off Switch Circuit Breaker Power Cord Front Wheel Cushioned Walking Platform 5 - ProForm Cr610 | English Manual - Page 6
. Note: The underside of the treadmill walking belt is coated with high-performance lubricant. wheel as you tip the Uprights. Make sure that the Extension Legs (103) remain in the Uprights. Attach each Extension Leg (103) with two Screws (101) and a Base Pad (119) as shown. Note: One replacement - ProForm Cr610 | English Manual - Page 7
). It may be helpful to apply soapy water to the Handrail Extension (85). 4 Cutout 110 Post 76 85 76 82 76 5. Make sure that the front edge of the Left Foam Grip (110) is under the Console Base (87) as shown. Tighten a 5 Small Screw (76) into the side of the Left - ProForm Cr610 | English Manual - Page 8
the latch pin engages the Catch. 56 9 101 Latch Pin 7. Make sure that all parts are tightened before you use the treadmill. Keep the included allen wrench in a secure place. The allen wrench is used to adjust the walking belt (see page 18). To protect the floor or carpet from damage, place a mat - ProForm Cr610 | English Manual - Page 9
WALKING BELT Your treadmill features a walking belt coated with PERFORMANT LUBETM, a high-performance lubricant. IMPORTANT: Never apply silicone spray or other substances to the walking belt or the walking , see your local PROFORM dealer or call 1-800-999-3756 and order part number 146148. Use - ProForm Cr610 | English Manual - Page 10
CAUTION: Before operating the console, read the following precautions. • Do not stand on the walking belt when turning on the power. • Always wear the clip (see the drawing above) while operating the treadmill. • Adjust the speed in small increments in order to avoid sudden jumps in speed. • To - ProForm Cr610 | English Manual - Page 11
manual mode. 3 Press the START button or the SPEED v button to start the walking belt. A moment after the button is pressed, the walking belt will use the treadmill, inspect the alignment of the walking belt, and align the walking belt if necessary (see page 18). To stop the walking belt, press the - ProForm Cr610 | English Manual - Page 12
onto the foot rails, press the STOP button, and adjust the incline of the treadmill to the lowest level. The incline must be at the lowest level when the treadmill is raised to the storage position or the treadmill will be damaged. Next, remove the key from the console and put the key - ProForm Cr610 | English Manual - Page 13
walking belt will then slow to a stop. If the speed or incline setting for the current segment is too high or too low, you can manually is completed, remove the key. When the program is completed, make sure that the treadmill is at the lowest incline level. Next, remove the key from the console and - ProForm Cr610 | English Manual - Page 14
that the treadmill has been operated and the total number of miles that the walking belt has moved. WEIGHTS Optional hand weights let you include upperbody exercise in your workouts. The hand weights fit into convenience holders in the console. To purchase the hand weights, see your local PROFORM - ProForm Cr610 | English Manual - Page 15
into the catch. 1. Hold the handrails as shown and place one foot against a wheel. 2. Tilt the treadmill back until it rolls freely on the wheels. Carefully move the treadmill to the desired location. Never move the treadmill without tipping it back. To reduce the risk of injury, use extreme caution - ProForm Cr610 | English Manual - Page 16
down until the frame is past the pin. Slowly release the latch knob. 2. Hold the treadmill firmly with both hands, and lower the treadmill to the floor. Do not drop the treadmill frame 2 to the floor. CAUTION: To decrease the possibility of injury, bend your legs and keep your back straight - ProForm Cr610 | English Manual - Page 17
in the on position. c Tripped Reset Tripped d On Position Reset PROBLEM: The power turns off during use SOLUTION: a. Check the circuit breaker located on the treadmill frame near the power cord (see c. above). If the circuit breaker has tripped, wait for five minutes and then press the switch - ProForm Cr610 | English Manual - Page 18
insert the key and run the treadmill for a few minutes. Repeat until the walking belt is properly tightened. b 3"-4" Rear Roller Adjustment Bolts c. If the walking belt still slows when walked on, call our Customer Service Department, toll-free. PROBLEM: The walking belt is off-center or slips - ProForm Cr610 | English Manual - Page 19
using your heart rate as a guide. The chart below shows recommended heart should include the following three parts: A Warm-up-Start each and will help prevent post-exercise problems. To measure your heart rate during adjust the speed and incline of the treadmill. Fat Burning To burn fat effectively, - ProForm Cr610 | English Manual - Page 20
SUGGESTED STRETCHES The correct form for several basic stretches is shown at the right. Move hands against a wall. Keep your back leg straight and your back foot flat on the floor. Bend your front leg, lean forward and move your hips toward the wall. Hold for 15 counts, then relax. Repeat 3 - ProForm Cr610 | English Manual - Page 21
NOTES 21 - ProForm Cr610 | English Manual - Page 22
Roller Adj. Bolt Motor Latch Decal Platform Screw Frame Guide Screw Catch Walking Platform 8" Cable Tie Frame Guide Motor Tension Bolt Foot Rail Insert Small Screw Console Ground Washer Long Screw Front Isolator Motor Star Washer Upright Incline Base Pivot Bolt Incline Disk Handrail Extension Wheel - ProForm Cr610 | English Manual - Page 23
Wire, M/F 8" Blue Wire, 2F 4" Blue Wire, 2F 4" Black Wire, 2F 4" Green Wire, F/Ring 8" Green Wire, 2 Ring 7" Green Wire, M/Ring 4" Red Wire, M/F User's Manual # These parts are not illustrated * Includes all parts shown in the box **For information about the optional chest pulse sensor and hand - ProForm Cr610 | English Manual - Page 24
47 67 63 11 64 62 59 61 60 47 72 69 54 62 53 SAVE THE EXPLODED DRAWING FOR FUTURE REFERENCE. To identify the parts shown on this exploded drawing, refer to the PART LIST on page 22 of the USER'S MANUAL. R0801A EXPLODED DRAWING-Model No. PFTL55810 - ProForm Cr610 | English Manual - Page 25
97 95 101 86 101 83 104 97 101 116 46 89 46 46 46 46 101 16 16 111 94 101 R0801A EXPLODED DRAWING-Model No. PFTL55810 - ProForm Cr610 | English Manual - Page 26
to give the following information: • The MODEL NUMBER OF THE PRODUCT (PFTL55810) • The NAME OF THE PRODUCT (PROFORM® CR 610 treadmill) • The SERIAL NUMBER OF THE PRODUCT (see the front cover of this manual) • The KEY NUMBER AND DESCRIPTION OF THE PART(S) (see the EXPLODED DRAWING attached in the
-
 1
1 -
 2
2 -
 3
3 -
 4
4 -
 5
5 -
 6
6 -
 7
7 -
8
-
9
-
10
-
11
-
12
-
13
-
14
-
15
-
16
-
17
-
18
-
19
-
20
-
21
-
22
-
23
-
24
-
25
-
26
 |
 |
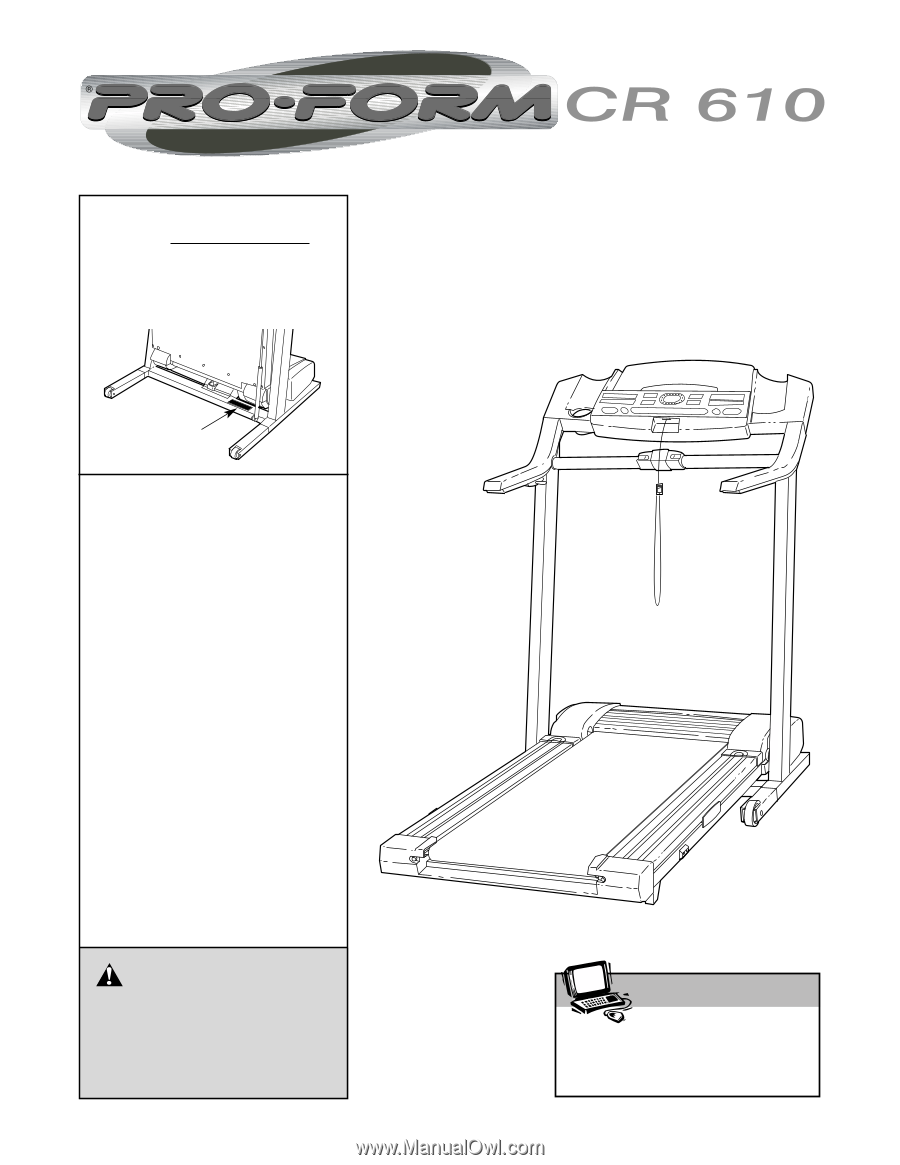
USER'S MANUAL
Visit our website at
www.proform.com
new products, prizes,
fitness tips, and much more!
Patent Pending
CAUTION
Read all precautions and instruc-
tions in this manual before using
this equipment. Save this manual
for future reference.
Model No. PFTL55810
Serial No.
QUESTIONS?
If you have questions, or if there
are missing or damaged parts,
we will guarantee complete sat-
isfaction through direct assis-
tance from our factory.
TO AVOID UNNECESSARY DE-
LAYS, PLEASE CALL DIRECT TO
OUR TOLL-FREE CUSTOMER
HOT LINE. The trained techni-
cians on our Customer Hot Line
will provide immediate assis-
tance, free of charge to you.
CUSTOMER HOT LINE:
1-800-999-3756
Mon.–Fri., 6 a.m.–6 p.m. MST
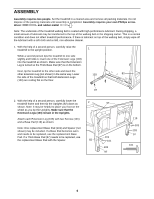
Serial
Number
Decal
Find the serial number in the location
shown below. Write the serial number
in the space above for reference.