ProForm Crosswalk 325x English Manual
ProForm Crosswalk 325x Manual
 |
View all ProForm Crosswalk 325x manuals
Add to My Manuals
Save this manual to your list of manuals |
ProForm Crosswalk 325x manual content summary:
- ProForm Crosswalk 325x | English Manual - Page 1
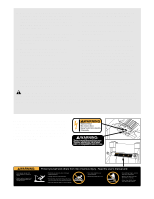
Serial No. Serial Number Decal USER'S MANUAL SEARS, ROEBUCK AND CO. HOFFMAN ESTATES, IL 60179 CAUTION Read all precautions and instructions in this manual before using this equipment. Save this manual for future reference. Visit our website at www.proform.com new products, prizes, fitness tips - ProForm Crosswalk 325x | English Manual - Page 2
TREADMILL 11 TROUBLESHOOTING 13 CONDITIONING GUIDELINES 15 ORDERING REPLACEMENT PARTS Back Cover FULL 90 DAY WARRANTY Back Cover Note: An EXPLODED DRAWING and a PART LIST are attached in the center of this manual control system of the treadmill. If the control system is damaged, the walking belt - ProForm Crosswalk 325x | English Manual - Page 3
the use of this product. SAVE THESE INSTRUCTIONS The decals shown have been placed on your treadmill. If a decal is missing, or if it is not legible, please call our toll-free HELPLINE to order a free replacement decal (see the front cover of this manual). Apply the decal in the location shown - ProForm Crosswalk 325x | English Manual - Page 4
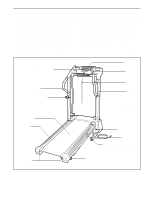
benefit, read this manual carefully before using the treadmill. If you have additional questions, Before reading further, please review the drawing below and familiarize yourself with the labeled parts. Water Bottle Holder (Bottle not included) Handrail Storage Latch Walking Belt Foot Rail BACK - ProForm Crosswalk 325x | English Manual - Page 5
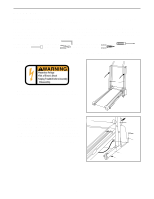
The underside of the treadmill walking belt is coated with high- parts during assembly, use the PART IDENTIFICATION CHART in the center of this manual. 1. Make sure that the power cord is unplugged. 1 11 With the help of a second person, carefully raise the Uprights (11) until the treadmill - ProForm Crosswalk 325x | English Manual - Page 6
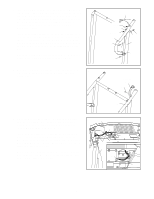
3. Identify the Right Handrail (47), which has a large hole in the left side. Feed the Wire Harness (21) through the bot- 3 tom of the bracket and out of the large hole in the left side. (Note: It may be helpful to use needlenose pliers to pull the Wire Harness out of the large hole.) Press a - ProForm Crosswalk 325x | English Manual - Page 7
the Lock Knob onto the Lock Pin. Lift the treadmill frame (see HOW TO FOLD THE TREADMILL FOR STORAGE on page 11), but do not latch 13 11 14 107 108 110 8. Make sure that all parts are properly tightened before you use the treadmill. Note: Extra hardware may be included. Keep the included allen - ProForm Crosswalk 325x | English Manual - Page 8
treadmill (see drawing 1 at the right). To purchase a surge suppressor, see your local SEARS dealer or call 1-800-366-7278 and order part could result in damage to the control system of the treadmill. If the control system is damaged, the walking belt may change speed or stop unexpectedly, - ProForm Crosswalk 325x | English Manual - Page 9
Key Clip Pulse Sensor CAUTION: Before operating the console, read the following precautions. • Do not stand on the walking belt when turning on the power. • Always wear the clip (see the drawing above) while operating the treadmill For simplicity, all instructions in this section refer to miles. 9 - ProForm Crosswalk 325x | English Manual - Page 10
is used, inspect the alignment of the walking belt, and align it if necessary (see page 14). 3 Change the incline of the treadmill as desired. To change the incline of the treadmill, press either of the Incline buttons until the desired incline level is reached. 4 Follow your progress with the - ProForm Crosswalk 325x | English Manual - Page 11
arms. To exercise your arms, shoulders, and back for a total body workout, move the upper body arms forward and back as you walk on the treadmill. To vary the intensity of your upper body exercise, the resistance of the upper body arms can be adjusted. To increase the resistance, turn the - ProForm Crosswalk 325x | English Manual - Page 12
down until the frame is past the latch pin. Slowly release the latch knob. 2. Hold the treadmill firmly with both hands, and lower the treadmill to the floor. Do not drop the treadmill frame to the floor. To decrease the possibility of injury, bend your legs and keep your back straight. Base - ProForm Crosswalk 325x | English Manual - Page 13
it, wait for five minutes, and then plug it back in. c. Remove the key from the console. Reinsert the key fully into the console. d. If the treadmill still will not run, please call our toll-free HELPLINE. PROBLEM: The displays of the console do not function properly SOLUTION: a. Remove the - ProForm Crosswalk 325x | English Manual - Page 14
key and run the treadmill for a few minutes. Repeat until the walking belt is properly tightened. b 2"-3" Rear Roller Adjustment Bolts c. If the walking belt still slows when walked on, please call our toll-free HELPLINE. PROBLEM: The walking belt all parts in the order shown at the right. 120 113 - ProForm Crosswalk 325x | English Manual - Page 15
heart rate as a guide. The chart below shows problems. To measure your heart rate during exercise, use the pulse sensor. If your heart rate is too high or too low, adjust the speed and incline of the treadmill key to success is to make exercise a regular and enjoyable part of your everyday life. 15 - ProForm Crosswalk 325x | English Manual - Page 16
: • you need help assembling or operating the PROFORM CROSSWALK 325x treadmill • a part is missing • or you need to schedule repair service call our toll-free HELPLINE 1-800-736-6879 Monday-Saturday, 7 am-7 pm Central Time (excluding holidays) REPLACEMENT PARTS If parts become worn and need to be - ProForm Crosswalk 325x | English Manual - Page 17
PART IDENTIFICATION CHART Remove this chart and use it to identify small parts during assembly. Save this chart and the EXPLODED DRAWING/PART LIST for future reference. 3/4" Screw (13)-10 1/2" Silver Screw (97)-2 Silver Ground Screw (104)-1 1" Bolt (8)-6 Extension Leg Screw (9)-2 Washer (39)-4 - ProForm Crosswalk 325x | English Manual - Page 18
Latch Frame Spacer 8" Cable Tie Motor Nut Pulley/Flywheel/Fan Motor Motor/Pulley/Flywheel/Fan Wire Harness Belt Guide Screw Motor Hood Hood Shield Screw Controller Motor Swivel Bolt Motor Tension Nut Motor Star Washer Motor Tension Washer Motor Tension Bolt Incline Stop Bracket Belly Pan Screw - ProForm Crosswalk 325x | English Manual - Page 19
112 113 46 90 13 4 92 121 119 42 120 118 101 57 76 116 115 117 57 5 86 31 32 48 97 13 71 49 65 22 66 93 75 38 38 6 84 77 3 52 74 85 39 83 39 83 79 73 80 48 7 82 59 79 25 8 10 13 39 81 96 95 98 48 15 38 2 13 1 35 103* 106 41 8 39 14 13 109 110 94 45 44 33 43 50
-
 1
1 -
 2
2 -
 3
3 -
 4
4 -
 5
5 -
 6
6 -
 7
7 -
8
-
9
-
10
-
11
-
12
-
13
-
14
-
15
-
16
-
17
-
18
-
19
 |
 |
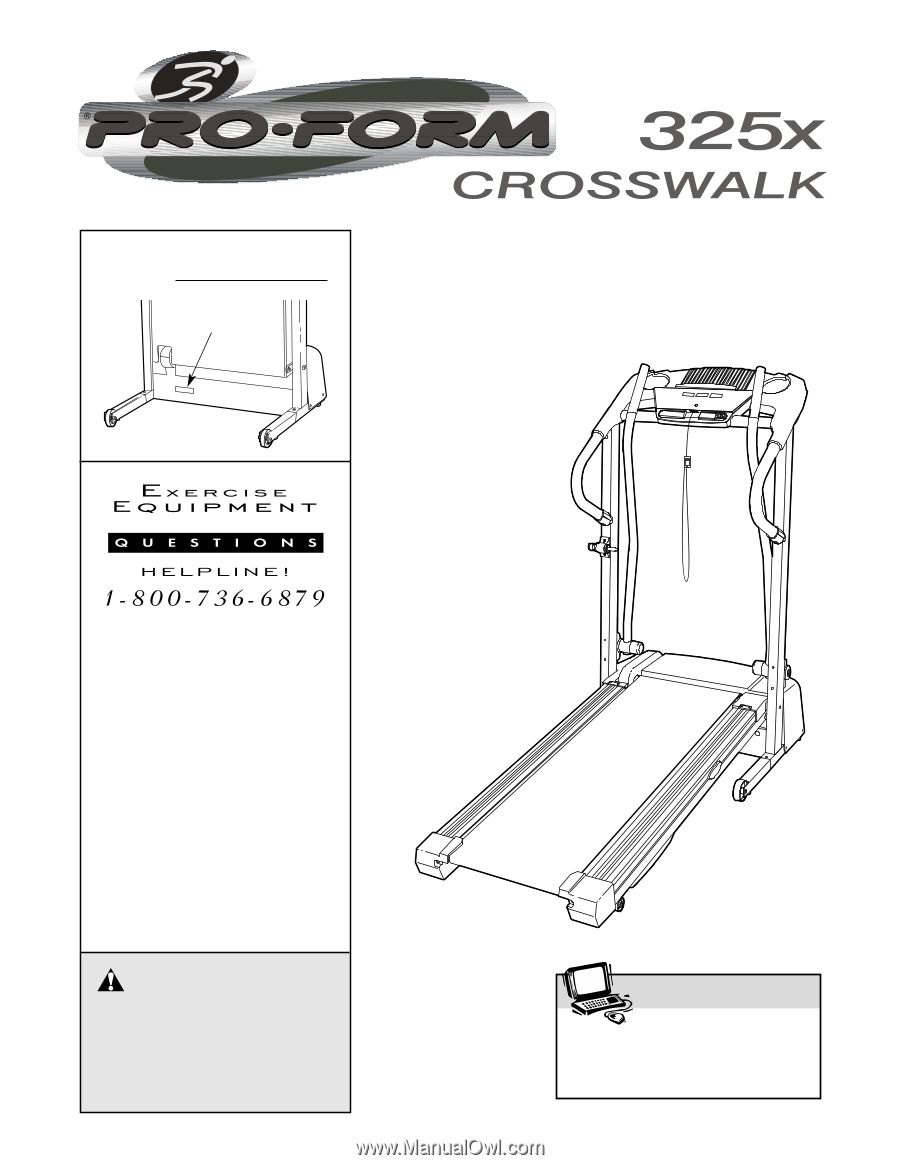
Serial Number
Decal
USER'S MANUAL
Model No. 831.293230
Serial No.
CAUTION
Read all precautions and instruc-
tions in this manual before using
this equipment. Save this manual
for future reference.
Visit our website at
www.proform.com
new products, prizes,
fitness tips, and much more!
SEARS, ROEBUCK AND CO.
HOFFMAN ESTATES, IL 60179