ProForm Crosswalk 390 Treadmill English Manual
ProForm Crosswalk 390 Treadmill Manual
 |
View all ProForm Crosswalk 390 Treadmill manuals
Add to My Manuals
Save this manual to your list of manuals |
ProForm Crosswalk 390 Treadmill manual content summary:
- ProForm Crosswalk 390 Treadmill | English Manual - Page 1
the space above for future reference. TREADMILL EXERCISER Userʼs Manual Serial Number Decal • Assembly • Operation • Maintenance • Part List and Drawing Sears, Roebuck and Co. Hoffman Estates, IL 60179 CAUTION Read all precautions and instructions in this manual before using this equipment. Save - ProForm Crosswalk 390 Treadmill | English Manual - Page 2
DECAL PLACEMENT 2 IMPORTANT PRECAUTIONS 3 BEFORE YOU BEGIN 5 ASSEMBLY 6 OPERATION AND ADJUSTMENT 11 HOW TO FOLD AND MOVE THE TREADMILL 17 TROUBLESHOOTING 18 EXERCISE GUIDELINES 21 PART LIST 22 EXPLODED DRAWING 24 ORDERING REPLACEMENT PARTS Back Cover 90 DAY FULL WARRANTY Back Cover - ProForm Crosswalk 390 Treadmill | English Manual - Page 3
of this product. 1. Before beginning any exercise program, consult your physician. This is especially important for persons over age 35 or persons with pre-existing health problems. 2. It is the responsibility of the owner to ensure that all users of this treadmill are adequately informed of all - ProForm Crosswalk 390 Treadmill | English Manual - Page 4
procedures described in this manual. Never remove the motor hood un- less instructed to do so by an authorized ser- vice representative. Servicing other than the procedures in this manual should be performed by an authorized service representative only. 26. This treadmill is intended for in - ProForm Crosswalk 390 Treadmill | English Manual - Page 5
Thank you for selecting the revolutionary PROFORM® CROSSWALK 390 treadmill. The CROSSWALK 390 treadmill offers an impressive array of features designed to make your workouts at home more enjoyable and effective. And when youʼre not exercising, the unique treadmill can be folded up, requiring less - ProForm Crosswalk 390 Treadmill | English Manual - Page 6
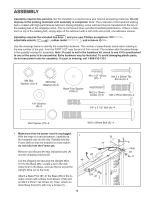
belt or the shipping carton. This is normal and does not affect treadmill performance. If there is lubricant on top of the walking belt, simply key number of the part, from the PART LIST near the end of this manual. The number after the parentheses is the quantity needed for assembly. Note: If a part - ProForm Crosswalk 390 Treadmill | English Manual - Page 7
2. Remove the M10 Nut (33), the M10 x 50mm Bolt 2 (27), and the shipping bracket (C) from the Base (85). Attach a Wheel (86) with the Bolt and the Nut that you just removed. Do not overtighten the Nut; the Wheel must turn freely. Discard 82 the shipping bracket. Press a Base Cap (82) into - ProForm Crosswalk 390 Treadmill | English Manual - Page 8
against the Base (85). Partially tighten the M10 x 96mm Bolts (5); do not fully tighten the Bolts yet. With the help of a second person, tip the treadmill so that the Base (85) is flat on the floor. 6 5 8 79 79 82 85 73 83 7. Set the Console (87) face down on a soft surface - ProForm Crosswalk 390 Treadmill | English Manual - Page 9
Right Handrail (90) and Left Handrail (not shown). Press the Cage Nuts (38) back into place if necessary. Have a second person hold the console assembly near the Right Upright (78). Connect the Upright Wire (77) to the console wire. See the inset drawing. The connectors should slide together easily - ProForm Crosswalk 390 Treadmill | English Manual - Page 10
Insert with a rubber mallet. Locate the Latch Pin Assembly (72). Remove the knob from the pin. Make Crosswalk Arm (not shown) in the same way. 73 9 4 87 71 8 12. Make sure that all parts are properly tightened before you use the treadmill. If there are sheets of clear plastic on the treadmill - ProForm Crosswalk 390 Treadmill | English Manual - Page 11
treadmill (see drawing 1 at the right). To purchase a surge suppressor, see your local Sears store or call the telephone number on the back cover of this manual and order part The surge suppressor must have a UL suppressed voltage rating of 400 volts or less and a minimum surge dissipation - ProForm Crosswalk 390 Treadmill | English Manual - Page 12
workouts, three of these use the crosswalk arms. Each workout automatically controls the speed and incline of the treadmill as it guides you through an effective exercise session. To turn on the power, see page 13. To use the manual simplicity, all instructions in this section refer to miles. 12 - ProForm Crosswalk 390 Treadmill | English Manual - Page 13
the key is inserted, the manual mode will be selected. If a preset workout has been selected, remove the key and begin to move at 1 mph. As you exercise, change the speed of the walking belt as desired incline of the treadmill as desired. To change the incline of the treadmill, press the Incline - ProForm Crosswalk 390 Treadmill | English Manual - Page 14
be shown. For the most accurate heart rate reading, continue to hold the contacts for about 15 seconds. 7. When you are finished exercising, remove the key from the console. Step onto the foot rails, press the Stop button, and adjust the incline of the treadmill to the lowest setting. The incline - ProForm Crosswalk 390 Treadmill | English Manual - Page 15
the workout begins, the treadmill will automatically adjust to the speed and incline settings for the next segment. 5. Follow your progress with the displays. See step 5 on page 14. 6. Measure your heart rate if desired. See step 6 on page 14. 7. When you are finished exercising, remove the key from - ProForm Crosswalk 390 Treadmill | English Manual - Page 16
the key into the console and then release the Stop button. When the information mode is selected, the following information will be shown: As you walk on the treadmill, you can hold the handrails or use the crosswalk arms. To exercise your arms, shoulders, and back for a total body workout, move - ProForm Crosswalk 390 Treadmill | English Manual - Page 17
HOW TO FOLD AND MOVE THE TREADMILL HOW TO FOLD THE TREADMILL FOR STORAGE 1 Before folding the treadmill, adjust the incline to the lowest position. If you do not do this, you may damage the treadmill when you fold it. Remove the key and unplug the power cord. CAUTION: You must be able to safely - ProForm Crosswalk 390 Treadmill | English Manual - Page 18
TROUBLESHOOTING Most treadmill problems can be solved by following the steps below. Find the symptom that applies, and follow the steps listed. If further assistance is needed, please see the back cover of this manual. PROBLEM: The power does not turn on SOLUTION: a. Make sure that the power cord - ProForm Crosswalk 390 Treadmill | English Manual - Page 19
treadmill for a few minutes to check for a correct View speed reading. PROBLEM: The incline of the treadmill does not change correctly SOLUTION: a. With the key belt centered. Then, plug in the power cord, insert the key, and run the treadmill for a few minutes. Repeat until the walking belt is - ProForm Crosswalk 390 Treadmill | English Manual - Page 20
key, and carefully walk on the treadmill for a few minutes. Repeat until the walking belt is prop- erly tightened. PROBLEM: The crosswalk arms squeak during use SOLUTION: a. (Note: Correcting this problem Cone (B). Then, reattach all parts in the order shown at the right. 76 B F EA C G D 20 - ProForm Crosswalk 390 Treadmill | English Manual - Page 21
post-exercise problems. EXERCISE FREQUENCY To maintain or improve your condition, complete three workouts each week, with at least one day of rest between workouts. After a few months of regular exercise, you may complete up to five workouts each week, if desired. Remember, the key to success - ProForm Crosswalk 390 Treadmill | English Manual - Page 22
R1109A To locate the parts listed below, see the EXPLODED DRAWING near the end of this manual. Key No. Qty. 1 Key Power Cord Controller Grommet Reset/Off Circuit Breaker Belly Pan Latch Insert Left Crosswalk Arm Latch Pin Assembly Left Upright #10 x 3/4" Screw Crosswalk Arm Insert Right Crosswalk - ProForm Crosswalk 390 Treadmill | English Manual - Page 23
1 Description Hex Key Lift Frame/Base Ground Wire Frame Cap Base Foot Spacer 4 mm Hex Key M8 Locknut Motor Tension Washer Key No. Qty. Manual Note: Specifications are subject to change without notice. For information about ordering replacement parts, see the back cover of this manual. If a part - ProForm Crosswalk 390 Treadmill | English Manual - Page 24
24 23 23 23 23 39 40 16 14 42 103 35 41 28 1 49 15 22 59 50 17 106 30 29 15 22 100 51 105 64 1 34 101 50 17 29 30 52 45 46 48 59 106 23 40 1 23 1 43 14 28 23 47 44 16 103 35 23 41 R1109A EXPLODED DRAWING A-Model No. 831.24823.0 - ProForm Crosswalk 390 Treadmill | English Manual - Page 25
EXPLODED DRAWING B-Model No. 831.24823.0 13 53 37 13 37 13 37 R1109A 54 1 55 56 107 25 32 32 60 7 25 24 61 33 31 21 57 22 26 108 18 31 3 62 63 98 58 31 99 11 11 33 12 19 11 56 66 65 67 11 22 68 11 69 25 - ProForm Crosswalk 390 Treadmill | English Manual - Page 26
EXPLODED DRAWING C-Model No. 831.24823.0 R1109A 97 10 6 6 71 70 97 10 72 73 74 9 4 102 27 5 8 22 79 84 8 96 75 83 81 2 85 104 33 81 86 2 33 86 27 76 77 6 10 10 6 82 36 20 4 20 78 9 36 82 96 8 75 77 74 8 81 80 84 2 104 81 2 8 5 79 26 - ProForm Crosswalk 390 Treadmill | English Manual - Page 27
EXPLODED DRAWING D-Model No. 831.24823.0 87 R1109A 88 12 12 12 12 12 12 12 91 12 1 22 92 1 89 91 1 38 90 91 93 1 38 12 92 91 1 94 95 27 - ProForm Crosswalk 390 Treadmill | English Manual - Page 28
HOGAR® (1-888-784-6427) ® Registered Trademark / TM Trademark / SM Service Mark of Sears Brands, LLC ® Marca Registrada / TM Marca de Fábrica / SM Marca de Servicio de Sears Brands, LLC 90 DAY FULL WARRANTY If this Sears Treadmill Exerciser fails due to a defect in material or workmanship within 90
-
 1
1 -
 2
2 -
 3
3 -
 4
4 -
 5
5 -
 6
6 -
 7
7 -
8
-
9
-
10
-
11
-
12
-
13
-
14
-
15
-
16
-
17
-
18
-
19
-
20
-
21
-
22
-
23
-
24
-
25
-
26
-
27
-
28
 |
 |
Serial
Number
Decal
Model No. 831.24823.0
Serial No.
Write the serial number in the space
above for future reference.
CAUTION
Read all precautions and instruc-
tions in this manual before using
this equipment. Save this manual
for future reference.
TREADMILL EXERCISER
Userʼs Manual
• Assembly
• Operation
• Maintenance
• Part List and Drawing
Sears, Roebuck and Co.
Hoffman Estates, IL 60179