ProForm Xp 542e English Manual
ProForm Xp 542e Manual
 |
View all ProForm Xp 542e manuals
Add to My Manuals
Save this manual to your list of manuals |
ProForm Xp 542e manual content summary:
- ProForm Xp 542e | English Manual - Page 1
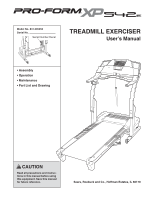
No. 831.295250 Serial No. Serial Number Decal TREADMILL EXERCISER User's Manual • Assembly • Operation • Maintenance • Part List and Drawing CAUTION Read all precautions and instructions in this manual before using this equipment. Save this manual for future reference. Sears, Roebuck and Co - ProForm Xp 542e | English Manual - Page 2
BEFORE YOU BEGIN 4 ASSEMBLY 5 OPERATION AND ADJUSTMENT 8 HOW TO FOLD AND MOVE THE TREADMILL 21 TROUBLESHOOTING 22 CONDITIONING GUIDELINES 24 PART LIST 26 PART IDENTIFICATION CHART 27 ORDERING REPLACEMENT PARTS Back Cover FULL 90 DAY WARRANTY Back Cover Note: An EXPLODED DRAWING is attached - ProForm Xp 542e | English Manual - Page 3
procedures described in this manual. Never remove the motor hood un- less instructed to do so by an authorized ser- vice representative. Servicing other than the procedures in this manual should be performed by an authorized service representative only. 26. This treadmill is intended for in - ProForm Xp 542e | English Manual - Page 4
read this manual carefully before using the treadmill. If you have questions after read- Before reading further, please review the drawing below and familiarize yourself with the labeled parts. Fan Accessory Tray Handrail Storage Latch Upright Console Pulse Sensor Key/Clip Walking Belt Foot Rail - ProForm Xp 542e | English Manual - Page 5
is completed. Note: The underside of the treadmill walking belt is coated with high-performance lubricant. During shipping parts, use the PART IDENTIFICATION CHART on page 27. Note: If a part is not in the parts bag, check to see if it has been preassembled. If a part is missing, call toll-free - ProForm Xp 542e | English Manual - Page 6
3. Attach the Latch Assembly (82) to the Left Upright (84) with the two Latch Screws (46); start both Latch 3 Screws before tightening either of them. Note: The Latch Screws may be preattached to the Left Upright. 82 46 84 4. See step 6 and locate the four Upright Bolts (86). Loosen the - ProForm Xp 542e | English Manual - Page 7
13 74 79 45 97 86 8. Make sure that all parts are properly tightened before you use the treadmill. Note: Extra hardware may be included. Keep the included allen wrenches in a secure place. The large allen wrench is used to adjust the walking belt (see page 23). To protect the floor or carpet - ProForm Xp 542e | English Manual - Page 8
ADJUSTMENT THE PRE-LUBRICATED WALKING BELT Your treadmill features a walking belt coated with highperformance lubricant. IMPORTANT: Never apply silicone spray or other substances to the walking belt or the walking platform. Such substances will deteriorate the walking belt and cause excessive wear - ProForm Xp 542e | English Manual - Page 9
. Key Clip FEATURES OF THE CONSOLE The treadmill console offers an impressive array of features designed to help you get the most from your workouts. When the manual mode of the console is selected, the speed and incline of the treadmill can be changed with the touch of a button. As you exercise - ProForm Xp 542e | English Manual - Page 10
. When the key is in- serted, the manual mode will Track be selected. If a program has been selected, reselect the manual mode by pressing the Programs button repeatedly until a track appears in the lower part of the display. 3 Start the walking belt. To start the walking belt, press the - ProForm Xp 542e | English Manual - Page 11
, remove the key. Note: For simplicity, all instructions in this section refer to miles. walking belt is stopped, the fan will automatically turn off. 8 When you are finished exercising, remove the key. Step onto the foot rails, press the Stop button, and adjust the incline of the treadmill - ProForm Xp 542e | English Manual - Page 12
key of the matrix in the lower part of the display. (The incline belt will then slow to a stop. If the speed or incline setting for the current segment is too high or too low, you can manually walking belt will begin to move at 1 mph. When the next segment of the program begins, the treadmill - ProForm Xp 542e | English Manual - Page 13
exercising, remove the key from the console. When the program has ended, make sure that the incline of the treadmill is at the lowest setting. Next, remove the key in the matrix in the lower part of the display. If more the walking belt will begin to move. Hold the handrails and begin walking. Refer - ProForm Xp 542e | English Manual - Page 14
will last. The matrix in the lower part of the display will show the first seven flashing Current Segment column, and the treadmill will automatically adjust to the second column and the last segment ends. The walking belt will then slow to a stop. If exercising, remove the key from the console. 14 - ProForm Xp 542e | English Manual - Page 15
, or computer. See pages 15 and 16 for connecting instructions. To use iFIT.com programs directly from our Web site, the treadmill must be connected to your computer. See page 16 for connecting instructions. To use iFIT.com video programs, the treadmill must be connected to your VCR. See page 17 for - ProForm Xp 542e | English Manual - Page 16
HOW TO CONNECT YOUR HOME STEREO Note: If your stereo has an unused LINE OUT jack, see instruction A below. If the LINE OUT jack is being used, see instruction B. A. Plug one end of a long 1/8" to RCA stereo audio cable (available at electronics stores) into the input jack on the console. Plug the - ProForm Xp 542e | English Manual - Page 17
Play button is pressed, your personal trainer will begin guiding you through your workout. Simply follow your personal trainer's instructions. Note: If the time is flashing in the display, press the Start button or the Speed + button on the console. The treadmill will not respond to an MP3, CD, or - ProForm Xp 542e | English Manual - Page 18
walking belt will stop. Note: To use another MP3, CD, or video program, press the Stop button or remove the key and go to step 1 on page 17. Note: If the speed and/or incline of the treadmill console. • See the instructions at the bottom of you are finished exercising, remove the key from the console. - ProForm Xp 542e | English Manual - Page 19
details. To use programs from our Web site, the treadmill must be connected to your home computer. See HOW TO CONNECT YOUR COMPUTER on page 16. In addition, you must have an internet connection and an internet service provider. A list of specific system requirements is found on our Web site. Follow - ProForm Xp 542e | English Manual - Page 20
features an information mode that keeps track of the total number of hours that the treadmill has been operated and the total number of miles that the walking belt sensor, call toll-free 1-888533-1333. To select the information mode, hold down the Stop button while inserting the key into the console - ProForm Xp 542e | English Manual - Page 21
damaged. Next, unplug the power cord. CAUTION: You must be able to safely lift 45 pounds (20 kg) to raise, lower, or move the treadmill. 1. Hold the treadmill with your hands in the locations shown at the right. To decrease the possibility of injury, bend your legs and keep your back straight - ProForm Xp 542e | English Manual - Page 22
TROUBLESHOOTING Most treadmill problems can be solved by following the simple steps below. Find the symptom that applies, and follow the steps listed. If further assistance is needed, call toll-free 1-800-4-MY-HOME® (1-800-469-4663). PROBLEM: The power does not turn on SOLUTION: a. Make sure that - ProForm Xp 542e | English Manual - Page 23
View PROBLEM: The walking belt slows when walked on SOLUTION: a. Use only a single-outlet surge suppressor that meets all of the specifications described on page 8. b. If the walking belt is overtightened, treadmill performance may decrease and the walking belt may become damaged. Remove the key - ProForm Xp 542e | English Manual - Page 24
be found by using your heart rate as a guide. The chart below shows recommended heart rates for fat burning and aerobic exercise. begin to use stored fat calories for energy. If your goal is to burn fat, adjust the speed and incline of the treadmill until your heart rate is near the lowest - ProForm Xp 542e | English Manual - Page 25
SUGGESTED STRETCHES The correct form for several basic stretches is shown at the right. Move slowly as you stretch-never bounce. 1. Toe Touch Stretch Stand with your knees bent slightly and slowly bend forward from 1 your hips. Allow your back and shoulders to relax as you reach down toward - ProForm Xp 542e | English Manual - Page 26
R1004B To locate the parts listed below, see the EXPLODED DRAWING attached in the center of this manual. Key No. Qty. Description Key No. Qty. Description Bracket Bolt 12 2 Isolator Bolt 13 1 Walking Platform 14 2 Belt Guide 15 4 Belt Guide Screw 16 2 Walking Platform Screw (Rear) 17 2 Frame Pivot - ProForm Xp 542e | English Manual - Page 27
Screw/Choke Screw 104 1 Key Clip 105 2 Fan Screw 106 1 Fan 107 1 Console 108 44 Screw 109 1 Left Tray 110 1 Console Support 111 1 Right Tray 1 User's Manual *Includes all parts shown in the box #These parts are not illustrated If a part is missing, call toll-free 1-888-533-1333. PART IDENTIFICATION - ProForm Xp 542e | English Manual - Page 28
2 4 30 29 39 114 32* 3 28 27 61 1 2 69 16 35 39 62 45 66 52 65 64 2 9 78 5 6 10 42 7 11 8 14 11 15 12 13 68 2 67 2 63 16 39 45 62 35 60 52 59 69 31 25 23 22 24 26 33 17 21 19 20 18 72 118 98 37 115 73 2 4 3 102 38 20 36 41 39 38 21 20 20 42 - ProForm Xp 542e | English Manual - Page 29
82 46 74 108 108 103 108 71 81 75 77 76 77 108 108 101 76 80 108 79 108 85 84 87 45 86 88 87 79 89* 90 91 40 92 99 20 40 94 45 108 106 108 86 88 85 100 107 25 20 87 99 40 87 97 89* 20 91 92 90 94 20 25 75 100 103 99 40 40 99 40 109 108 108 104 112 108 108 111 108 - ProForm Xp 542e | English Manual - Page 30
, if failure occurs due to defect in material or workmanship in this Sears Treadmill Exerciser, contact the nearest Sears Service Center throughout the United States and Sears will repair or replace the Treadmill Exerciser, free of charge. The drive motor is warranted for ten (10) years from the
-
 1
1 -
 2
2 -
 3
3 -
 4
4 -
 5
5 -
 6
6 -
 7
7 -
8
-
9
-
10
-
11
-
12
-
13
-
14
-
15
-
16
-
17
-
18
-
19
-
20
-
21
-
22
-
23
-
24
-
25
-
26
-
27
-
28
-
29
-
30
 |
 |

Serial Number Decal
Model No. 831.295250
Serial No.
CAUTION
Read all precautions and instruc-
tions in this manual before using
this equipment. Save this manual
for future reference.
Sears, Roebuck and Co., Hoffman Estates, IL 60179
TREADMILL EXERCISER
User’s Manual
• Assembly
• Operation
• Maintenance
• Part List and Drawing