Pyle PHTCM48 User Manual
Pyle PHTCM48 Manual
 |
View all Pyle PHTCM48 manuals
Add to My Manuals
Save this manual to your list of manuals |
Pyle PHTCM48 manual content summary:
- Pyle PHTCM48 | User Manual - Page 1
- Pyle PHTCM48 | User Manual - Page 2
7.3 Testing the Camera Coverage Area 13 7.4 Secure Your Camera 14 7.5 Battery Status Reading 14 8 Viewing the Images and Movies on a Computer 15 9. Glossary ...15 10. Troubleshooting/FAQ 16 1 - Pyle PHTCM48 | User Manual - Page 3
and rugged construction. New Features: - 5 to 30 seconds video with audio - New Text LCD - PIR Sensitivity Adjustor - MMS/GPRS Compatible - GPS Location - Time lapse function - Manually Set Camera Working Time Period (For example, you can let the camera work from 7:35 PM to 5:25 AM the next Day) for - Pyle PHTCM48 | User Manual - Page 4
2.Digital Scout Camera Specifications Product Name Digital Scout Camera Model Number ST042 Image Sensor Type 1/2.5 Inch CMOS Effective Pixels 5.0 Megapixels Lens Aperture F2.0 for night time / F3.0 for day time Camera Lens Sight Angle 55 Degrees Trigger Speed <1.0Second Number of IR LEDs 21 LEDs IR - Pyle PHTCM48 | User Manual - Page 5
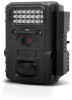
3.Parts Identification 4 - Pyle PHTCM48 | User Manual - Page 6
4.Packing Contents Model Night vision camera Digital Scouting Camera • User Manual • USB cable • Mounting Kit 5.Battery and SD Card Installation Night vision camera Digital Scouting Camera is designed to operate using 2 x 4*AA Cell Batteries. We recommend - Pyle PHTCM48 | User Manual - Page 7
Memory Your Night vision camera Digital Scouting Camera has a memory card slot and can accept SD cards with a max capacity of 32GB (SD card sold separately). Inserting SD card Make sure camera is in the OFF position whenever adding or removing memory. • Insert SD memory card in to the SD Card Slot - Pyle PHTCM48 | User Manual - Page 8
Basic Setting 1 2 3 4 5 Menu Items Items DATE TIME DELAY FORMAT MODE Options YYYY MM/DD HH:MM MM:SS FORMAT SD CARD 1P,3P and Movie 5M(HI), 3M(LO) for Photo 5 ~ 30s for Video Advance Setting Items 6 STATUS 7 DUTY Options PIR, TL or PIR+TL TL: 1m~24H (Time Interval) HH:MM (Start Time) ~ HH: - Pyle PHTCM48 | User Manual - Page 9
a) Turn on the camera b) Press "UP" and "DOWN" to Select "DATE" menu c) Press "OK" to confirm d) Press "UP" and "DOWN" to select year number e) Press "OK" to confirm and then it will come to set Month "MM", Press "UP" and "DOWN" to select. f) Press "OK" to confirm and then it will come to set Date " - Pyle PHTCM48 | User Manual - Page 10
a) Turn on the camera b) Press "UP" and "DOWN" to Select "DELAY" menu c) Press "OK" to confirm d) Press "UP" and "DOWN" to select minute "MM". e) Press "OK" to confirm and then it will come to set seconds "SS", Press "UP" and "DOWN" to select. f) Press "OK" to confirm g) Press "Setup" to QUIT or - Pyle PHTCM48 | User Manual - Page 11
f) Then it will show corresponding options for 1P 3P or Movie g) If you select 1P or 3P, the camera will ask you to set the photo resolution HI (5M) or LO(3M) h) If you select Movie, the camera will ask you to set the video length from 5s ~ 30s. i) Press OK to confirm j) Press "Setup" to QUIT or - Pyle PHTCM48 | User Manual - Page 12
day. 6.3 GSM Setting (After transmitting adaptor is connected) ▲ For how to connect and set the transmitting adaptor, please read the S2G00 User Manual. MMS/GPRS functions are compatible on this camera. If the user selects these functions, the camera display will show the following: Transmitting - Pyle PHTCM48 | User Manual - Page 13
a) Insert the strap through the strap slots on the rear housing. b) Wrap the strap around the mounting surface. Secure the strap and tighten the buckle in order to secure the camera. ▲ In order to obtain proper weather resistance, please make sure that both door latches are securely locked in place. - Pyle PHTCM48 | User Manual - Page 14
in the night and go into sleep mode. The camera will operate in the day but will sleep in the night, because the power cannot support IR flash. c) If the system voltage is less then 3.9v, the battery indicator will flash 10 times and then turn off the camera. You need - Pyle PHTCM48 | User Manual - Page 15
to trip sensor to assure detection of live animals. Time-Lapse: Time lapse the camera to take pictures during a certain time interval by manually pre-setting. This helps the hunter or wildlife freely observer monitor the field. Camera Delay: Time elapsed between photos while events are sensed - Pyle PHTCM48 | User Manual - Page 16
during that time. Based on our new advanced power system, this camera can support 30 pictures /day for one year surveillance. Multiple: Refers to set triggering 3P: Three continuous images captured per PIR triggering 10. Troubleshooting/FAQ Battery life is shorter than expected Battery life - Pyle PHTCM48 | User Manual - Page 17
side of its slot inside the camera. Still Photo and/or Video Quality Problems Night photos or videos appear too dark a. Try using a set of is seen on a consistent basis, then the sensor may need servicing. Please contact customer service. Short video clips-not recording to the length set a. - Pyle PHTCM48 | User Manual - Page 18
PIR Sensor LED Flashes/Doesn't Flash When the camera is in the "Setup" mode, the PIR Indicator LED on the front of the camera will flash when it senses motion. This is for setup purposes only and will help the user aim the camera. During use, the LED will not flash when the camera takes an
-
 1
1 -
 2
2 -
 3
3 -
 4
4 -
 5
5 -
 6
6 -
 7
7 -
8
-
9
-
10
-
11
-
12
-
13
-
14
-
15
-
16
-
17
-
18
 |
 |
