Pyle PLCD6MRKT Owners Manual
Pyle PLCD6MRKT Manual
 |
View all Pyle PLCD6MRKT manuals
Add to My Manuals
Save this manual to your list of manuals |
Pyle PLCD6MRKT manual content summary:
- Pyle PLCD6MRKT | Owners Manual - Page 1
PLCD6MRKT OWNER'S MANUAL Mobile Audio System PLL Synthesizer Stereo Radio CD/MP3/WMA Player Automatic Memory Storing Full Detachable Panel Preset Equalization Electronic Shockproof (ESP) Function USB Interface SD Interface www.pyleaudio.com 1 - Pyle PLCD6MRKT | Owners Manual - Page 2
3 Take out screw before installation ......... 3 DIN Front-Mount (Method A 3 Installing the unit 3 Removing the unit 4 DIN Rear-Mount (Method B 5 Using the detachable front panel ...... 6 Wiring SD operation 13 Disc notes 13 Remote control 15 Specification 16 Trouble shooting 17 2 - Pyle PLCD6MRKT | Owners Manual - Page 3
Notes: Choose the mounting location where the unit will not interfere with the normal driving function of the driver. Before finally installing the unit, connect the wiring temporarily and make sure it is all connected up properly and the unit and the system work properly. Use only - Pyle PLCD6MRKT | Owners Manual - Page 4
metal strap to a solid metal part of the vehicle under the dashboard. This strap also helps ensure proper electrical grounding of the unit. Note to install the short threading terminal of the mounting bolt to the back of the unit and the other long threading terminal to the dashboard. Spring Washer - Pyle PLCD6MRKT | Owners Manual - Page 5
each side. Note: the outer trim ring, sleeve and the metal strap are not used for method B installation. DIN REAR-MOUNT (Method B) If your vehicle is a Nissan, Toyota, follow these mounting instructions. Use the screw holes marked T (Toyota), N (Nissan) located on both sides of the unit to fasten - Pyle PLCD6MRKT | Owners Manual - Page 6
into the case. Precautions when handling 1. Do not drop the front panel. 2. Do not put pressure on the display or control buttons when removing or installing the front panel. 3. Do not touch the contacts on the front panel or on the main unit body. It may result in poor electrical contact - Pyle PLCD6MRKT | Owners Manual - Page 7
WIRING CONNECTION ISO CONNECTION 7 - Pyle PLCD6MRKT | Owners Manual - Page 8
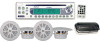
OPERATION LOCATION OF KEYS 1. 2. (release button) 3. LOC 4.MON 5. disc slot 6. LCD 7.EQ 8.8/ 9.9/ 10. (eject button) 11. USB interface 12. AUX IN 13.0 DSP 14. AS/PS/SCH 15.7/MODE 16.6 DIR+ 17.5 DIR18. 4 RDM 19. 3 RPT 20. 2 INT 21.1 22. BAND/LOUD 23. SEL/VOL 24. MUTE 25.IR 26. SD interface 27. - Pyle PLCD6MRKT | Owners Manual - Page 9
OPERATION SWITCHING ON/OFF THE UNIT Long Press button (1) to turn on the unit. When the unit is on. Press and hold button (1) for 2 seconds to turn the unit off. FACEPLATE RELEASE Press release button (2) to detach the removable faceplate. SOUND ADJUSTMENT Press SEL button (23) shortly to select the - Pyle PLCD6MRKT | Owners Manual - Page 10
OPERATION following reasons: - Initial installation of the unit when all wiring is completed. - All the TRACKS shortly to activate automatic seek function. Press for several seconds until "MANUAL" appears on the display, the manual tuning mode is selected. If both buttons have not been pressed for - Pyle PLCD6MRKT | Owners Manual - Page 11
OPERATION Repeat all the tracks. player. Press it again to resume play. PLAYING ALL TRACKS IN RANDOM Press RDM button (18) to play all tracks on CD in random order. Press again to cancel the function. EJECTING A DISC PREVIEWING ALL TRACKS Press INT button (20) to play first several seconds - Pyle PLCD6MRKT | Owners Manual - Page 12
playing the MP3/WMA files in the device, the operation is the same with the MP3 operation described above. Note: The main unit can only support the standard USB-memory disc which is 12 - Pyle PLCD6MRKT | Owners Manual - Page 13
48,64,96, Stereo Layer 3 128,192,256, (44.1kHz) 320 Windows 64,96,128,192 Stereo Media Audio (44.1kHz) The USB solution can support: 1. Folder: 500 max. 2. File: 999 max. 3. Depth of folder: 8 layers 4. Size: 2 GB CAUTION When there are important files in the USB device, do not connect - Pyle PLCD6MRKT | Owners Manual - Page 14
OPERATION 2. The unit cannot play a CD-R and CD-RW that is not finalized. (Please refer to the manual of your CD-R/CD-RW recorder or CD-R/CD-RW software for more information on finalization process). 3. Depending on the recording status, conditions of the - Pyle PLCD6MRKT | Owners Manual - Page 15
REMOTECONTROLHANDSET(OPTIONAL) FUNCTION KEY & CONTROL 1. POWER 2. 7/MODE 3. TUNE/SKIP (8) 4. BND(LOU/ENT) 5. SCN 6. PAU 7. SHF 8. DISC/DIR▼ 9. VOL▲ 10. SEL 11. TUNE/SKIP (9) 12. VOL ▼ 13. DSP(0) 14. RPT 15. AS/PS(D-AUD) 16. LOC 17. DISC/DIR▲ Power ON/OFF Button Mode Botton(S,T,U,7,For MP3/WMA - Pyle PLCD6MRKT | Owners Manual - Page 16
SPECIFICATION GENERAL Power Supply Requirements Chassis Dimensions Tone Controls - Bass (at 100 Hz) - Treble (at 10 kHz) Maximum Output Power - Version V Current Drain - Version V CD PLAYER Signal to Noise Ratio Channel Separation Frequency Response RADIO Frequency Coverage IF Sensitivity (S/N=30dB) - Pyle PLCD6MRKT | Owners Manual - Page 17
TROUBLE SHOOTING Before going through the checklist, check wiring connection. If any of the problems persist after checklist has been made, consult your nearest service properly connected. The installation angle is more than Check wiring connection. Adjust the installation angle less than 30 degree
-
 1
1 -
 2
2 -
 3
3 -
 4
4 -
 5
5 -
 6
6 -
 7
7 -
8
-
9
-
10
-
11
-
12
-
13
-
14
-
15
-
16
-
17
 |
 |

1
PLCD6MRKT
OWNER’S MANUAL
Mobile Audio System
PLL Synthesizer Stereo Radio
CD/MP3/WMA Player
Automatic Memory Storing
Full Detachable Panel
Preset Equalization
Electronic Shockproof (ESP) Function
USB Interface
SD Interface
www.pyleaudio.com