Pyle PRJ3D99TU PRJ3D99TU Manual 1 - Page 36
Optimizing, Optimizing the, the image, image
 |
View all Pyle PRJ3D99TU manuals
Add to My Manuals
Save this manual to your list of manuals |
Page 36 highlights
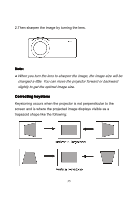
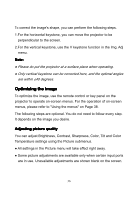
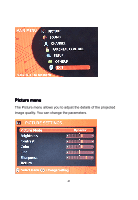
To correct the image's shape, you can perform the following steps. 1.For the horizontal keystone, you can move the projector to be perpendicular to the screen. 2.For the vertical keystone, use the V keystone function in the Img. Adj menu. Note: ● Please do put the projector at a surface place when operating. ● Only vertical keystone can be corrected here, and the optimal angles are within ±40 degrees. Optimizing the image To optimize the image, use the remote control or key panel on the projector to operate on-screen menus. For the operation of on-screen menus, please refer to "Using the menus" on Page 38. The following steps are optional. You do not need to follow every step. It depends on the image you desire. Adjusting picture quality You can adjust Brightness, Contrast, Sharpness, Color, Tilt and Color Temperature settings using the Picture submenus. ● All settings in the Picture menu will take effect right away. ● Some picture adjustments are available only when certain input ports are in use. Unavailable adjustments are shown blank on the screen. 36
-
 1
1 -
2
-
3
-
4
-
5
-
6
-
7
-
8
-
9
-
10
-
11
-
12
-
13
-
14
-
15
-
16
-
17
-
18
-
19
-
20
-
21
-
22
-
23
-
24
-
25
-
26
-
27
-
28
-
29
-
30
-
 31
31 -
 32
32 -
 33
33 -
 34
34 -
 35
35 -
 36
36 -
 37
37 -
 38
38 -
 39
39 -
 40
40 -
 41
41 -
42
-
43
-
44
-
45
-
46
-
47
-
48
-
49
-
50
 |
 |