RCA 25424RE1 User Guide - Page 11
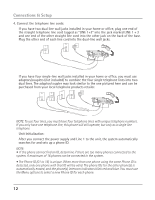
Installing the Phone - wall mount
 |
UPC - 044319703023
View all RCA 25424RE1 manuals
Add to My Manuals
Save this manual to your list of manuals |
Page 11 highlights
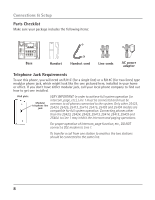
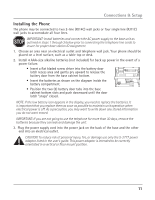
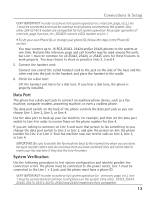
Connections & Setup Installing the Phone The phone may be connected to two 2-line (RJ14C) wall jacks or four single line (RJ11C) wall jacks to accomodate all four lines. IMPORTANT: Install batteries and connect the AC power supply to the base unit as outlined in steps 1 through 3 below prior to connecting the telephone line cords to insure for proper base station ID assignment. 1. Choose an area near an electrical outlet and telephone wall jack. Your phone should be placed on a level surface, such as a table top or desk. 2. Install 4 AAA-size alkaline batteries (not included) for back up power in the event of a power failure. • Insert a flat bladed screw driver into the battery door latch recess area and gently pry upward to release the battery door from the base cabinet bottom. • Insert the batteries as shown on the diagram inside the battery compartment. • Position the two (2) battery door tabs into the base cabinet bottom slots and push downward until the door latch "snaps" closed. NOTE: If the low battery icon appears in the display, you need to replace the batteries. It is important that you replace them as soon as possible to maintain unit operation when electrical power is off. As a precaution, you may want to write down any stored information you do not want erased. IMPORTANT: If you are not going to use the telephone for more than 30 days, remove the batteries because they can leak and damage the unit. 3. Plug the power supply cord into the power jack on the back of the base and the other end into an electrical outlet. CAUTION: To reduce risk of personal injury, fire, or damage use only the 5-2777 power adaptor listed in the user's guide. This power adaptor is intended to be correctly orientated in a vertical or floor mount position. 11
-
 1
1 -
2
-
3
-
4
-
5
-
 6
6 -
 7
7 -
 8
8 -
 9
9 -
 10
10 -
 11
11 -
 12
12 -
 13
13 -
 14
14 -
 15
15 -
 16
16 -
17
-
18
-
19
-
20
-
21
-
22
-
23
-
24
-
25
-
26
-
27
-
28
-
29
-
30
-
31
-
32
-
33
-
34
-
35
-
36
-
37
-
38
-
39
-
40
-
41
-
42
-
43
-
44
 |
 |