RCA ANT751 Owner/User Manual: ANT751
RCA ANT751 - Outdoor Antenna Optimized Manual
 |
UPC - 044476064524
View all RCA ANT751 manuals
Add to My Manuals
Save this manual to your list of manuals |
RCA ANT751 manual content summary:
- RCA ANT751 | Owner/User Manual: ANT751 - Page 1
ANT751 Outdoor Antenna User's Guide BEFORE YOU START!!! Please read the IMPORTANT SAFETY INFORMATION sheet included in this package. Step 1: Unpack Remove the antenna and the hardware bag from package. Make sure the following parts are in the package: • Antenna • Mounting pipe and foot • - RCA ANT751 | Owner/User Manual: ANT751 - Page 2
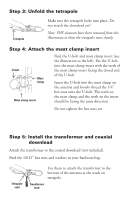
into place. Do not attach the downlead yet! Note: VHF elements have been removed from this illustration to show the tetrapoles should be facing the same direction. Do not tighten the hex nuts yet. Step 5: Install the transformer and coaxial downlead Attach the transformer to the coaxial downlead ( - RCA ANT751 | Owner/User Manual: ANT751 - Page 3
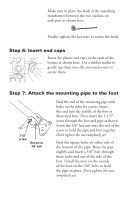
into the antenna booms to secure them. Step 7: Attach the mounting pipe to the foot 2 1/2" screw Hex nut on 5/8" bolt Find the end of the mounting pipe with bolt through these holes and out of the side of the foot. Install the nuts on the outside of the foot on the 5/8" bolts to hold the - RCA ANT751 | Owner/User Manual: ANT751 - Page 4
to the ground (plumb) Step 9: Attach the antenna to the mast IMPORTANT: Before you attach the antenna to your mast, visit www.antennaweb.org to see the locations of your local broadcast towers. This information is crucial in pointing your antenna correctly. Loosen the nuts on the mounting clamp - RCA ANT751 | Owner/User Manual: ANT751 - Page 5
not apply to you. This Warranty gives you specific legal rights and you may also have other rights which vary from state/province to state/province. U.S.A.: Audiovox Electronics Corporation, 150 Marcus Blvd., Hauppauge, NY 11788 CANADA: Audiovox Return Center, c/o Genco, 6685 Kennedy Road, Unit - RCA ANT751 | Owner/User Manual: ANT751 - Page 6
ANT751 Antena exterior Guía del Usuario ¡¡¡ANTES DE COMENZAR!!! Lea la hoja de INFORMACIÓN IMPORTANTE DE SEGURIDAD incluida en este empaque. Paso 1: Desempaque Extraiga la antena y - RCA ANT751 | Owner/User Manual: ANT751 - Page 7
tetrapolos con mayor claridad, en esta ilustración no se incluyen los elementos VHF. Paso 4: Fije el inserto de la abrazadera del mástil Perno en el inserto de la abrazadera del mástil (vea la ilustración a la izquierda). Instale el perno en U en el inserto de la abrazadera del mástil de manera - RCA ANT751 | Owner/User Manual: ANT751 - Page 8
inferior del tubo. Eleve un poco el tubo e inserte el perno de 5/8 pulg. a través de estos orificios hasta que salgan por el extremo del pie. Instale las tuercas en el lado exterior del pie en los pernos de 5/8 pulg. para sujetar el tubo en su posición. No apriete las tuercas completamente - RCA ANT751 | Owner/User Manual: ANT751 - Page 9
Paso 8: Monte el pie y el tubo Asegure el pie en su ubicación permanente. Ajuste el extremo del tubo de manera que quede perpendicular al suelo. Apriete las tuercas hexagonales para sujetar el tubo en su posición. El extremo del tubo debe quedar perpendicular al suelo (a plomo) Paso 9: Fije la - RCA ANT751 | Owner/User Manual: ANT751 - Page 10
Garantía Limitada de 12 Meses Audiovox Electronics Corporation (la "Compañia") le garantiza a usted, el , puede disfrutar además de otros derechos. U.S.A.: Audiovox Electronics Corporation, 150 Marcus Blvd., Hauppauge, NY 11788 CANADÁ: Audiovox Return Center, c/o Genco, 6685 Kennedy Road, Unit
-
 1
1 -
 2
2 -
 3
3 -
 4
4 -
 5
5 -
 6
6 -
 7
7 -
8
-
9
-
10
 |
 |
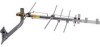
ANT751
Outdoor Antenna
User’s Guide
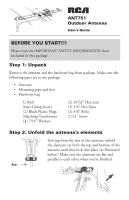
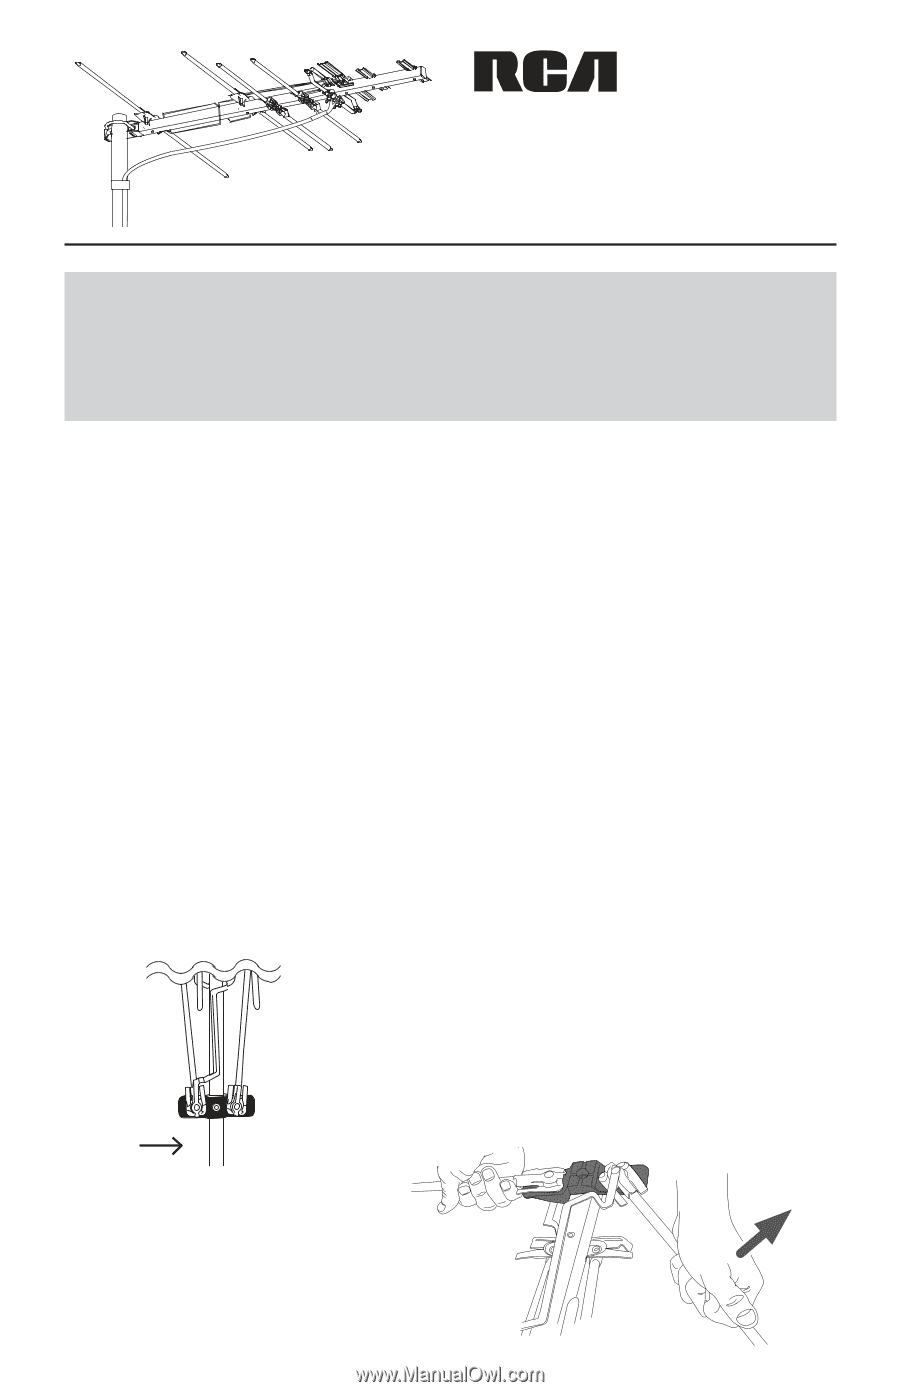
Step 1: Unpack
Remove the antenna and the hardware bag from package. Make sure the
following parts are in the package:
•
Antenna
•
Mounting pipe and foot
•
Hardware bag
U-Bolt
(2) 10/32” Hex nuts
Mast Clamp Insert
(5) 1/4” Hex Nuts
(2) Black Plastic Plugs
(2) 5/8” Bolts
Matching Transformer
2 1/2” Screw
(4) 7/16” Washers
Starting from the rear of the antenna, unfold
the elements on both the top and bottom of the
antenna until they lock into place (as illustrated
below). Make sure the elements are flat and
parallel to each other when you’ve finished.
BEFORE YOU START!!!
Please read the IMPORTANT SAFETY INFORMATION sheet
included in this package.
Step 2: Unfold the antenna’s elements
Rear