RCA CC6151 User Guide - Page 55
Menu., Time.
 |
UPC - 034909720455
View all RCA CC6151 manuals
Add to My Manuals
Save this manual to your list of manuals |
Page 55 highlights
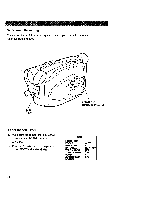
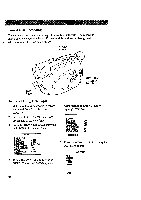
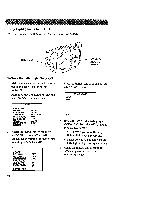
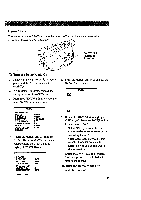
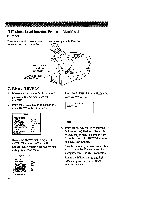
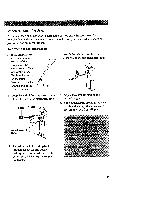
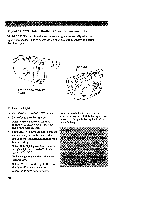
Time-Lapse Recording (continued) 6. Rotate the MENU dial to highlight the desired time between recordings (15S, 30S, 1 MIN, or 5 MIN). • Select 15S to delay the recording for 15 seconds. • Select 30S to delay the recording for 30 seconds. • Select 1MIN to delay the recording for one minute. • Select 5MIN to delay the recording for five minutes. • Select OFF if you do not want the camcorder to delay recording. 7. Press the MENU dial in to display the second MENU. Rotate the MENU dial to highlight REC TIME. • Select 1/4S to record for 1/4 second. • Select 1/2S to record for 1/2 second. • Select 1S to record for one second. • Select 5S to record for five seconds. • Select OFF if you do not want to record for a selected amount of time. 10. Press the MENU dial twice to exit the menus. and the amount of recording time and _ and the amount of interval time between recordings appear in the viewfinder. INT. TIME TALLY LAMP CHARACTER JLIP ID NO. DEMO MODE • MENU END •, !p OFF OlaF" ON 07 OFF 8. Press the MENU dial in to display the REC TIME menu. OFF 1/4S 1/2S 1S l REC TIME EXIT 9. Rotate the MENU dial to highlight the amount of time you want the oamcorder to record. 11. Press the thumb trigger to start recording. Note: The camcorder starts and stops recording the selected amount of time. The tally light flashes with the flash speed increasing five seconds before recording begins. 12. To stop recording, place the camcorder in record-pause, and set the REC TIME and INT. TIME in the second MENU to OFF. Note: Fade does not operate during animation or time-lapse recording. ' ''_ : 53
-
 1
1 -
2
-
3
-
4
-
5
-
6
-
7
-
8
-
9
-
10
-
11
-
12
-
13
-
14
-
15
-
16
-
17
-
18
-
19
-
20
-
21
-
22
-
23
-
24
-
25
-
26
-
27
-
28
-
29
-
30
-
31
-
32
-
33
-
34
-
35
-
36
-
37
-
38
-
39
-
40
-
41
-
42
-
43
-
44
-
45
-
46
-
47
-
48
-
49
-
 50
50 -
 51
51 -
 52
52 -
 53
53 -
 54
54 -
 55
55 -
 56
56 -
 57
57 -
 58
58 -
 59
59 -
 60
60 -
61
-
62
-
63
-
64
-
65
-
66
-
67
-
68
-
69
-
70
-
71
-
72
-
73
-
74
-
75
-
76
-
77
-
78
-
79
-
80
-
81
-
82
-
83
-
84
-
85
-
86
-
87
-
88
-
89
-
90
-
91
-
92
 |
 |
