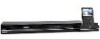
RCA DRC300i DRC300i Product Manual
RCA DRC300i Manual
 |
UPC - 034909720509
View all RCA DRC300i manuals
Add to My Manuals
Save this manual to your list of manuals |
RCA DRC300i manual content summary:
- RCA DRC300i | DRC300i Product Manual - Page 1
PLAYING A DISC This user manual explains the basic instructions for operating this unit. Some DVDs are produced in a manner that allows specific or limited operation during playback. Therefore, this unit may not respond to all operating commands. THIS IS NOT A DEFECT. Please refer to the - RCA DRC300i | DRC300i Product Manual - Page 2
type. troubleshooting guide SYMPTOM No power. The remote control does remote control to change output signals as below: 480p (progressive) 720p (progressive) 1080I (interlace) 1080p (progressive) Notes: • Refer to your owner's manual to the connected TV as well. • When you connect the DVD player
-
 1
1 -
 2
2
 |
 |

Playing a Disc
1. Press the
STANDBY / ON
button to turn on
the unit.
See CUSTOMIZING THE FUNCTION
SETTINGS before proceeding to step 2.
2. Press the
OPEN/CLOSE
button to open
the disc tray.
3. Place a disc onto the disc tray with the
label side up.
4. Press the
OPEN/CLOSE
button to close
the disc tray. It takes a short while for your
unit to load the disc. After loading, for most
DVDs, the unit will automatically take you
main menu or start playing.
5. If the unit does not automatically start
playing the DVD, press the
PLAY
button.
Pausing Playback (Still Mode)
Press the
PAUSE
button on the remote. To
resume normal playback, press the
PLAY
button.
Each time you press the
PAUSE
button, the
picture advances one frame.
Stopping Playback
•
Press the
STOP
button at the location
where you want to interrupt playback. To
resume playback at the position where
the disc was stopped, press the
PLAY
button.
•
If you press the
STOP
button twice, the
unit’s memory will be cleared and pressing
the
PLAY
button will reset the disc to
the beginning.
Fast Forward / Fast Reverse
1. Press the
SEARCH
or
SEARCH
button
when a disc is playing. Each time
you press the
SEARCH
or
SEARCH
button, the playback speed changes in
the following sequence:
2. Press the
PLAY
button when you
reach the desired point to resume normal
playback.
Notes:
•
The unit mutes sound and subtitles during
reverse and forward scan of DVDs.
•
The
fast
playback
speed
may
differ
depending on the disc.
Skipping to a Different Chapter/Title
•
Press the
PREV
button to go back to
current or previous chapters/tracks.
•
Press the
NEXT
button to advance
chapters/tracks.
•
For audio CDs, use the number buttons on
the remote control to jump immediately to
the desired track number.
Slow-motion Play
1. Press the
SLOW
button on the remote in
play mode.
•
Each time the
SLOW
button is pressed, the
speed of slow-motion playback changes in
the following sequence:
SF 1/2
SF 1/3
SF 1/4
SF 1/5
PLAY
SF 1/7
SF 1/6
2. Press the
PLAY
button to return to
normal playback speed.
Audio Selection
On some DVDs, the sound is recorded in two
or more formats. Follow the directions below
to select the preferred language and sound
system.
1. While a disc is playing, press the
AUDIO
button to show the current audio format
number. e.g.
2. Press the
AUDIO
button repeatedly to
select the desired audio format.
Notes:
•
If only one audio format is recorded on the
DVD, the number does not change.
•
Some DVDs allow you to change audio
selections only via the disc menu. If this
is the case, press the MENU button and
choose the appropriate language on the
disc menu.
•
You can select different audio channels
(Stereo, Mono L, Mono R or Mix Mono)
on an Audio CD by pressing the
AUDIO
button repeatedly.
Subtitle Selection
1. While a DVD is playing, press the
SUBTITLE
button to display the current
language
setting,
as
shown
in
the
example.
2. Press the
SUBTITLE
button repeatedly to
select the desired subtitle language.
Notes:
•
Some DVDs are set to display subtitles
automatically, and you cannot turn them
off even if you set the subtitle function to
off.
•
During some scenes, the subtitles may not
appear immediately after you select your
desired scene.
•
The number of subtitle languages recorded
differs depending on the disc. If only one
language is recorded, the language does
not change.
•
This function can only be used for discs
on which subtitles have been recorded in
multiple languages.
•
Some DVDs allow you to change subtitles
only via the disc menu. If this is the case,
press the MENU button and choose the
appropriate subtitle on the disc menu.
Angle Selection
Some DVDs contain scenes which have been
shot from a number of different angles. For
these discs, the same scene can be viewed
from each of these different angles.
1. While you are playing a DVD with different
angles recorded, press the
ANGLE
button
to view the number of current angles
available.
2. Press the
ANGLE
button repeatedly to
change the scene to the next recorded
angle. e.g.
•
After approx. two seconds, playback will
continue from the new angle you selected.
•
If no button is pressed within 10 seconds,
playback continues without changing the
current angle.
Notes:
•
This function can only be used for discs
on which scenes shot from multiple angles
have been recorded.
•
If only one angle is recorded, “
: 1/1
” is
displayed.
You can play a specific title or chapter
repeatedly. (Title repeat, chapter repeat, A-B
repeat)
Repeating a chapter
You can play the same chapter repeatedly.
1. While the disc is playing, press the
REPEAT
DISC
button until the
REP:
[ CHAPTER ]
indicator displays on the screen. The
current chapter is played repeatedly.
Repeating a title
You can play the same title repeatedly.
2. While
the
disc
is
playing,
press
the
REPEAT
DISC
button
until
the
REP:
[ TITLE ]
indicator displays on
the screen. The current title is played
repeatedly.
To resume normal playback
3. While
the
disc
is
playing,
press
the
REPEAT
DISC
button
until
the
REP:
[ OFF ]
indicator displays on the
screen.
You can play a single track and whole disc
repeatedly.
Repeating a single track
You can play the same track repeatedly.
1. While
the
disc
is
playing,
press
the
REPEAT
DISC
button
until
the
REP:
[ REP 1 ]
indicator displays on
the screen. The current track is played
repeatedly.
Repeating a whole disc
2. While
the
disc
is
playing,
press
the
REPEAT
DISC
button
until
the
REP:
[ REP ALL ]
indicator displays
on the screen. The whole disc is played
repeatedly.
To resume normal playback
3. Press the
REPEAT DISC
button until the
REP:
[ OFF ]
indicator displays on the
screen.
You can play a specific section repeatedly.
Repeating a specific section
1. While the disc is playing, press the
REPEAT A-B
button at the beginning of
the section (
REPEAT A-
is displayed) you
want to play repeatedly.
2. Press the
REPEAT A-B
button again at
the end of the section (
REPEAT A-B
is
displayed).
3. The unit will immediately begin replaying
your selection.
To resume normal playback
4. While the disc is playing, press the
REPEAT A-B
button until the
A-B CANCEL
indicator displays on the screen.
Notes:
•
Some discs may not permit A-B repeat
operation.
•
A-B repeat can only be used within the
same title. If the start and end of the
section to be repeated are in different titles,
A-B repeat is cancelled.
•
You can specify a segment only within the
current title or track.
•
The A-B repeat function does not operate
in scenes where different camera angles
are recorded.
•
Press
REPEAT DISC
button to select a
repeat playback mode (a single repeat or
all songs repeat). Press again repeatedly
to cancel this repeat playback.
4. Press the
RETURN
button to go back to
the previous menu.
Playing Photos
1. In iPod Home menu, use the
/
button
to select Photos and press the
OK
button.
“Navigate your iPod Photo Library directly
from your iPod” will appear on the screen.
2. Use the
/
button to navigate the iPod
menu lists and select a photo, press the
OK
button to begin playback. (You may
also use the control wheel and keys on
your iPod to operate it.)
•
Press the
PAUSE
button to pause, press
the
PLAY
button to resume .
•
Press the
/
button to skip to the
previous / next photo.
3. Press the
RETURN
button to go back to
the previous menu.
Using a iPod Touch to view the photo
1. In iPod Home menu, use the
/
button
to select Photos and press the
OK
button.
“Navigate your iPod Photo Library directly
from your iPod” will appear on the screen.
2. Touch the “Photos”selection on iPod panel,
and then select the photo your prefer.
3. Touch the “
” to confirm the photo.
4. Touch the “ Yes ” to activate iPod’s video
output. The photo will appear on the
screen.
5. Press
RETURN
button to end the photo
viewing and go back to the previous
menu.
Using a iPod Classic / iPod Nano to
view the photo
1. In iPod Home menu, use the
/
button
to select Photos and press the
OK
button.
“Navigate your iPod Photo Library directly
from your iPod” will appear on the screen.
2. Press the
/
button to select “Photos”,
and then press the
OK
button to confirm.
3. Use the
button to select a photo,
press the
OK
button to begin playback.
4. Press
OK
button twice to activate photo
showing to TV screen.
5. Press
RETURN
button to end the photo
viewing and go back to the previous
menu.
Note :
Make sure video
out is activated in
the setting of iPod
Classic
or
iPod
Nano.
Playing Videos
1. In iPod Home menu, use the
/
button
to select Videos and press the
OK
button.
2. Use the
/
button to select from Movies,
Music Videos, TV Shows, Video Podcasts
or Rentals, press the
OK
button to enter.
(“Navigate your iPod Video Library directly
from your iPod” will appear on the screen if
your are using an iPod touch.)
3. Use the
/
button to navigate the iPod
menu lists and select a video, press the
OK
button to begin playback. (You may
also use the control wheel and keys on
your iPod to operate it.)
•
Press the
PAUSE
button to pause, press
the
PLAY
button to resume.
•
Press the
/
button to skip to the
previous / next movie.
•
Press the
/
button to begin fast
reverse/forward, press the
PLAY
button
to resume normal playback.
4. Press the
RETURN
button to go back to
the previous menu.
Note : Make sure TV Out in iPod is set to ON
when you are playing the video.
Settings
1. In iPod Home menu, use the
/
button
to select Settings and press the
OK
button.
2. Use the
/
button to select from Shuffle,
Repeat or Lanuage. Press the
OK
button
to enter the settings.
3. Use the
/
button to a setting, press the
OK
button to confirm.
4. Press the
RETURN
button to go back to
the previous menu.
•
Shuffle : Select from Shuffle Off, Shuffle
Songs and Shuffle Albums.
•
Repeat : Select from Repeat Off, Repeat
One and Repeat All.
•
Language : Select OSD language.
WARNING
: Due to the i-Pod limitation, not
all functions of some i-Pod models can be
controlled via the remote control.
If the above screen appears, you may need
to control the iPod Library directly from your
iPod.
PLAYING A DISC
This
user
manual
explains
the
basic
instructions for operating this unit. Some
DVDs are produced in a manner that allows
specific or limited operation during playback.
Therefore, this unit may not respond to all
operating commands.
THIS IS NOT A
DEFECT.
Please refer to the instructions
accompanying the specific DVD in question
for more information about the options
available on that DVD.
may appear on the screen during
operation.
It means that the desired operation
is not permitted by the unit or disc.
There are four options in the main setup
menu: System Setup, Language Setup, Audio
Setup and Video Setup.
In DVD mode, press
SETUP
to bring up the
main menu. Select one of the menu icons
across the top of the screen using the
or
buttons. The menu’s options are displayed on
the left side of the screen. Press the
,
,
or
buttons to move to the option’s choices
on the right.
Then press
OK
to select. Press
SETUP
or
RETURN
if you want to exit.
SYSTEM SETUP
1. Press the
SETUP
button in DVD mode.
2. Select System Setup in the main menu
using the
,
,
or
buttons.
3. Select a menu option using the
or
buttons and press
OK
button.
HD OUTPUT
This lets you select the resolution output
according
to
the
connected
TV.
The
Composite Video Out (YELLOW jack) will be
kept in standard resolution for all HD OUTPUT
settings.
•
Supported HD JPEG mode: 480p, 720p,
1080I and 1080p.
VIDEO
Only available when HD OUTPUT is 480p.
INTERLACE-YUV :
•
Select if you are connecting the player
with Component Video outputs to a non-
Progressive Scan TV.
P-SCAN YPBPR :
•
Select if you are connecting the player with
Component Video outputs to a Progressive
Scan TV.
S-VIDEO :
•
Select if you are connecting the player with
S-VIDEO output to a TV with S-VIDEO
input.
TV TYPE
Depending
on the format of the DVD, you can
choose the picture format (aspect ratio) best
suited to the format of your TV screen:
4:3 PS (Pan Scan)
•
When
wide-screen
video is played, this
mode clips the right
and
left
sides
of
the image so that it
can be viewed on a
conventional screen.
•
Some
wide-screen
DVDs that do not
permit
Pan
Scan
mode playback are
automatically played
in
letterbox
mode
(black bands top and
bottom).
4:3 LB (Letter Box)
•
When
wide-screen
video
is
played
in this mode on a
conventional screen,
black bands appear
at the top and bottom
of the screen.
16:9 (Wide screen)
•
This is the correct mode for playing wide-
screen videos on a wide-screen.
Notes :
•
The displayable picture size is preset on the
DVD disc. Therefore the playback picture
of some DVD discs may not conform to the
picture size you select.
•
When you play DVD discs recorded in the
4:3 aspect ratio, the playback picture will
always appears in the 4:3 aspect ratio
regardless of the TV TYPE setting.
DEFAULT
It takes 3-5 seconds to reset the unit to the
factory default.
LANGUAGE SETUP
1. Press the
SETUP
button in DVD mode.
2. Use
button to select Language Setup.
3. Use
,
,
or
button to select a
language, then press the
OK
button.
The screen will change to your selected
language immediately.
3. To exit the SETUP MENU and return to
the normal screen, press the
RETURN
or
SETUP
button.
Notes:
•
Some DVDs may not play in the audio
language selected. A prior language may
be programmed on the disc.
•
Some DVDs may be set to display subtitles
in a language other than the one you
selected. A prior subtitle language may be
programmed on the disc.
•
Some DVDs allow you to change subtitle
selections only via the disc menu. If this
is the case, press the
MENU
button and
choose the appropriate subtitle language
from the selection on the disc menu.
•
Some DVDs may not include your pre-
selected language. In this case, the DVD
player automatically displays disc menus
consistent with the disc’s initial language
setting.
AUDIO SETUP
1. Press the
SETUP
button in DVD mode.
2. Select Audio Setup in the main menu using
the
or
buttons.
3. Select a menu option using the
,
,
or
buttons and press
OK
button.
AUDIO OUT
Select the output sound format corresponding
to your system connection. When making
connection to a TV or stereo system via the
analog audio jacks, select PCM or RAW.
RAW: Does not have a Dolby Digital Decode.
PCM: Select when connected to a 2 channel
digital stereo amplifier.
•
If apply HDMI connection to TV, make sure
to select PCM, audio signal passing to TV
via HDMI cable.
VIDEO SETUP
1. Press the
SETUP
button in DVD mode.
2. Select Video Setup in the main menu using
the
or
buttons.
3. Select
Brightness,
Contrast,
Hue,
Saturation or Sharpness using the
or
buttons, hightlight your selections and
press
OK
button.
PLAYING PICTURE FILE DISC
PROGRAMMABLE MEMORY
Locating a specific chapter / track
If you know the chapter / track number you
want to play,
you can locate a specifc chapter
/ track by directly selecting a chapter / track
number.
1. Press the
GOTO
button to search your
desired chapter / track.
2. Press
or
button to highlight a chapter /
track and press the corresponding number
button(s) for the chapter you want.
3. Press the
OK
button to confirm. The unit
will start playback about 3 seconds later.
Locating a specific title
If a DVD disc contains title numbers, you can
locate a specific title by directly selecting a
title number.
1. In stop mode, press the
GOTO
button.
2. Press
or
button to highlight a specific
field and press the corresponding number
button(s) for the title you want.
3. Press the
OK
button to confirm. The unit
will start playback about 3 seconds later.
Locating a specific time
You can move to a specific location by
entering
its
corresponding
time
(hours,
minutes, seconds)
1. Press the
GOTO
button.
2. Press
or
button to highlight time.
3. Press the corresponding number buttons
for the setting point you want.
4. Press the
OK
button to confirm. The unit
will start playback about 3 seconds later.
Notes :
•
Some
discs
may
not
respond
to
this
process.
•
Some
scenes
may
not
be
located
as
precisely as you specified.
•
This
method
for
accessing
specific
locations is available only within the current
title of the DVD disc.
REPEAT PLAYBACK
The two types of programmed playback provided by this unit are title/chapter programmed
playback and track programmed playback.
Title / Chapter programmed playback
1. Press the
MEMORY
button.
2. Enter the title numbers in
. Use
button to move the
highlight to chapter and enter the chapter numbers in
.
3. Use
,
,
or
button to move to the other field.
4. Repeat steps 2 to 3.
5. Press the
PLAY
button to start the programmed
playback.
Note: If you press the
STOP
button twice, the programmed
selection will be cleared.
Track programmed playback
1. Press the
MEMORY
button.
2. Enter the track numbers in
.
3. Use
,
,
or
button to other field.
4. Repeat steps 2 to 3.
5. Press the
PLAY
button to start the programmed playback.
This unit can play picture files recorded on
CD-R and CD-RW discs.
Playing a Picture File Disc
1. Open the disc door.
2. Place a picture file disc onto the tray with
label side up.
3. Close the disc door.
4. The unit will load the disc and automatically
display the contents of the disc on the
screen, while playing the beginning of the
first picture file. These files will then be
played back one by one.
5. Press
or
button to select a picture file
to view.
6. Press the
,
,
or
CURSOR button
to view and select the files that you want to
view, then press the
OK
button to confirm
the selected file.
NOTE:
•
You can press the
PAUSE
button to
interrupt playback, and press the
PLAY
button to resume playback.
•
You can use the
GOTO
function or use the
numbered buttons to enter the number of a
picture file to quickly select the image.
•
Press the
ANGLE
button on the remote control
to rotate the picture orientation by 90°.
Folders
Files within the
current folder
LOCATING A DESIRED SECTION
iPod Dock Adapter
Before connecting your iPod, you need to
install the appropriate iPod Dock Adapter
(supplied with the iPod) in the dock of the
unit.
Installing the iPod Dock Adapter
1. Push to open the iPod docking door.
2. Place your iPod Dock Adapter into the
dock until it sits firmly in place.
Removing the iPod Dock Adapter
1. Remove the iPod Dock Adapter as
shown.
2. Replace it with another one you need.
IMPORTANT:
Before docking your iPod.
MAKE SURE your
iPod has the latest FIRMWARE.
Connecting your iPod
Warning:
To prevent damage to the unit and/
or your iPod, connect or remove your iPod
when the unit is powered off or the unit is not
in the iPod mode.
1. Ensure the appropriate iPod Dock adapter
that was supplied with your iPod is
installed.
2. Insert your iPod into the connector in the
dock.
3. Press the
SOURCE
button to select the
iPod mode. Your iPod will be connected
automatically, and iPod Home menu
appears.
Note:
•
Your iPod will be charged automatically
(until fully charged) once it is connected,
no matter whether the unit is in iPod mode
or not.
•
Make sure the software of iPod is the
latest.
Playing Music
1. In iPod Home menu, use the
/
button
to select Music and press the
OK
button.
2. Use the
/
button to select from
Playlists, Artists, Albums, Songs, Genres
or Composers. Press the
OK
button to
enter.
3. Use the
/
button to navigate the iPod
menu lists and select songs, press the
OK
button to begin playback. (You may also
use the control wheel and keys on your
iPod to operate it.)
•
Press the
PAUSE
button to pause, press
the
PLAY
button to resume.
•
Press the
/
button to skip to the
previous / next song.
•
Press the
/
button to begin fast
reverse/forward, press the
PLAY
button
to resume normal playback.
Docking System for iPod
Welcom
Home
Music
Photos
Videos
Settings
Please Navigate directly on your iPod
OR
Press The
[CLEAR]
Key
to go back to main menu
Docking System for iPod
Welcom
Home
Music
Photos
Videos
Settings
Docking System for iPod
Welcom
Home
Music
Photos
Videos
Settings
Docking System for iPod
Welcom
Home
Music
Photos
Videos
Settings
CUSTOMIZING THE FUNCTION SETTINGS
OSD LANGUAGE
AUDIO LANG
SUBTITLE LANG
MENU LANG
AUDIO OUT
BRIGHTNESS
CONTRAST
HUE
SATURATION
SHARPNESS
HD OUTPUT
VIDEO
TV TYPE
DEFAULT
Zooming into an image
While a disc is playing, press the
ZOOM
button to enlarge the image in several levels.
•
While an image is zoomed, you can use the
,
,
or
CURSOR button
to shift the view
and display the part you want.
•
To return to normal view, press the
ZOOM
button until the “
ZOOM: OFF
” shows. The screen
will return to normal.
•
When you reach the edge of the image, the display will not shift anymore in that direction.
Step 2
Step 3
Step 4
Step 2
Step 3
Step 4
Display Function
While the disc is playing, press the
DISPLAY
button on the remote control repeatedly to display
information on operation status.
e.g.
Specifications and external appearance are
subject to change without notice.
Printed in China
811-300I91W011
PAN SCAN
LETTER BOX
WIDE SCREEN
Cut off when a wide-
screen video image is
played.
-
T
C
-
T
02:01:22
00:30:15
00:12:03
Chapter Remaining time
Total time
Title Elapsed time
Elapsed Time:
Elapsed time from the beginning of the
chapter/title which is currently playing.
Remaining Time:
Remaining time of the chapter/title which is
currently playing.
iPod is a trademark of Apple Computer, Inc.,
registered in the U.S. and other countries.
6
7
8
9
10
PLAY
FORWARD x2
FORWARD x4
FORWARD x8
FORWARD x20
PLAY
BACKWARD x2
BACKWARD x4
BACKWARD x8
BACKWARD x20
or
iPod Dock Adapter
iPod FEATURES
DRC300i IB ENG REV1.indd
1
7/14/2008
9:51:19 AM