RCA EZ5000R Owner/User Manual - Page 25
Connecting to external devices, Viewing videos on TV, Recording videos to VHS tape or DVD - manual
 |
UPC - 044476069543
View all RCA EZ5000R manuals
Add to My Manuals
Save this manual to your list of manuals |
Page 25 highlights
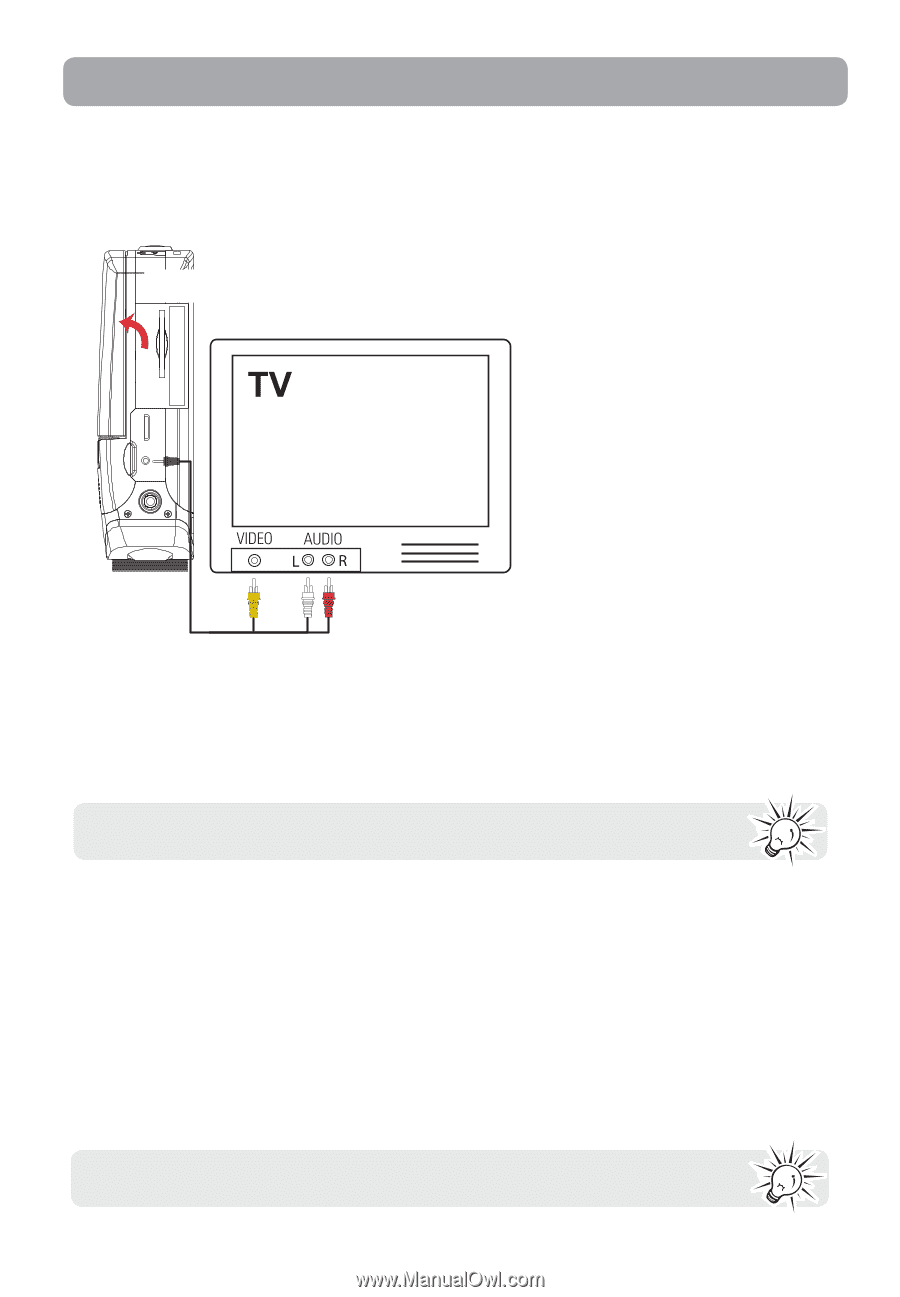
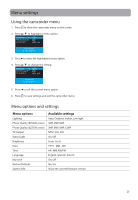
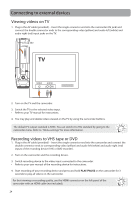
Connecting to external devices Viewing videos on TV 1. Plug in the AV cable (provided) - Insert the single connector end into the camcorder (AV jack) and connect the double connector ends to the corresponding video (yellow) and audio left (white) and audio right (red) input jacks on the TV. Lift up the cover 2. Turn on the TV and the camcorder. 3. Switch the TV to the selected video input. • Refer to your TV manual for instructions. 4. You may play and delete videos viewed on the TV by using the camcorder buttons. The default TV output standard is NTSC. You can switch it to PAL standard by going to the camcorder menu. Refer to "Menu settings" for more information. Recording videos to VHS tape or DVD 1. Plug in the AV cable (provided) - Insert the single connector end into the camcorder and connect the double connector ends to corresponding video (yellow) and audio left (white) and audio right (red) inputs of the recording device (VHS or DVD recorder). 2. Turn on the camcorder and the recording device. 3. Switch recording device to the video input connected to the camcorder. • Refer to your user manual of the recording device for instructions. 4. Start recording of your recording device and press and hold PLAY/PAUSE on the camcorder for 3 seconds to play all videos on the camcorder. For best viewing or recording quality, use the HDMI connector on the left panel of the camcorder with an HDMI cable (not included). 24
-
 1
1 -
2
-
3
-
4
-
5
-
6
-
7
-
8
-
9
-
10
-
11
-
12
-
13
-
14
-
15
-
16
-
17
-
18
-
19
-
 20
20 -
 21
21 -
 22
22 -
 23
23 -
 24
24 -
 25
25 -
 26
26 -
 27
27 -
 28
28 -
 29
29 -
 30
30 -
31
-
32
-
33
 |
 |