RCA HD50LPW165 User Guide & Warranty - Page 77
Steps 7 and 8, Step 6
 |
View all RCA HD50LPW165 manuals
Add to My Manuals
Save this manual to your list of manuals |
Page 77 highlights
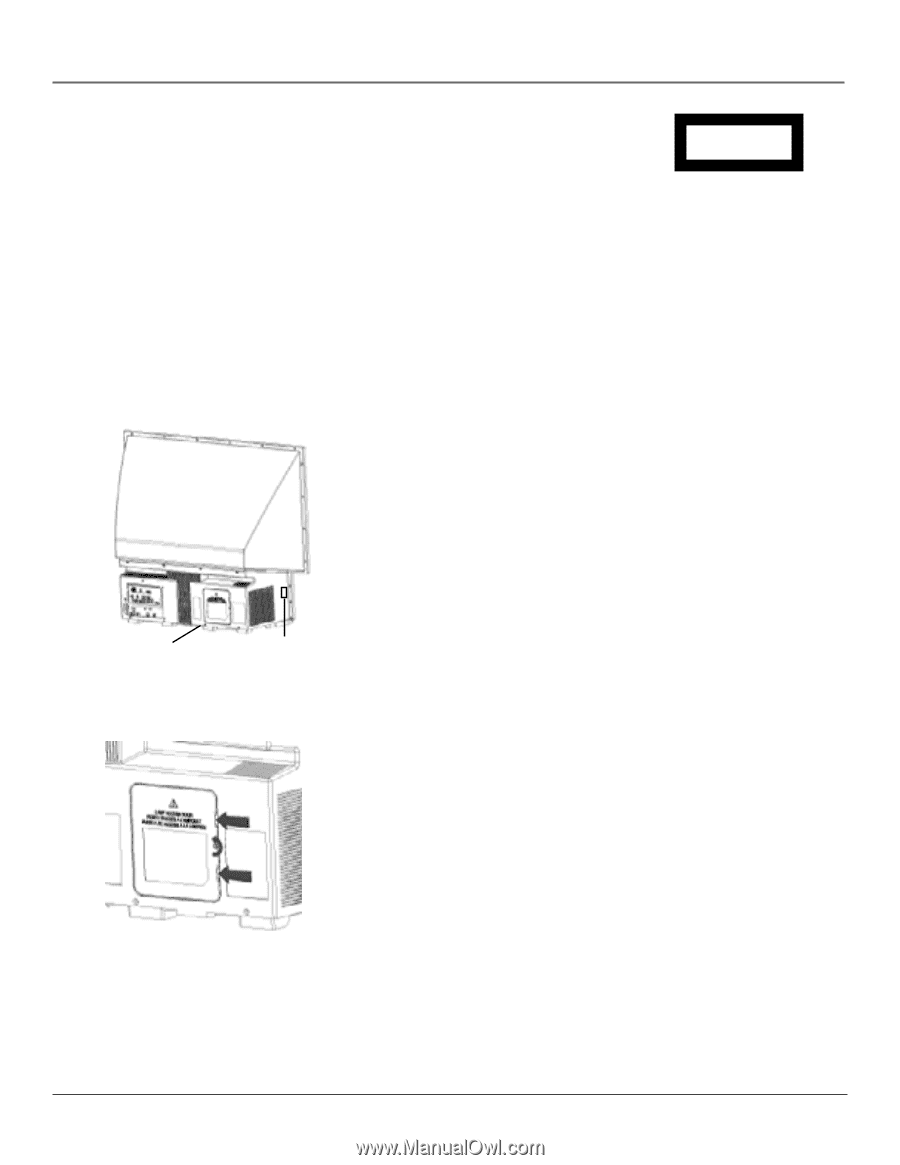
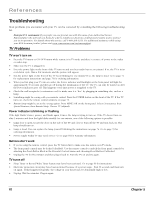
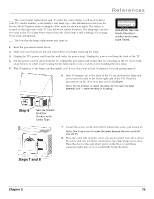
References ___ The correct lamp replacement unit. To order the correct lamp, you'll need to know your TV's model number, serial number, and lamp type-this information is listed on the Service Model Number sticker (example of the sticker is shown at right). The sticker is located on the right side of the TV (see below for sticker location). The lamp type can also be found in the TV's Lamp Power menu (but only if the lamp is still working). Go to page 67 for more information. ___ The box that the lamp replacement unit came in. Service Model Number Numéro de Modéle-Service HDLP50XXXXXX 000000000 X SERIAL SERIE LAMP EXAMPLE: Service Model Number sticker with lamp type listed. 1. Read the precautions listed above. 2. Make sure your hands are dry and clean before you begin replacing the lamp. 3. Unplug the TV's power cord from the wall outlet (or power strip). Unplug the power cord from the back of the TV. 4. Put the power cord far away from the TV. Taking this precaution will ensure that no one plugs in the TV if you walk away from it, or when you're waiting for the lamp unit to cool, or when you're installing the new lamp. 5. Wait 30 minutes so the lamp can thoroughly cool. If you don't wait at least 30 minutes, you risk getting injured! 6. After 30 minutes, go to the back of the TV set and find the lamp-unit access door (located in the lower right side of the TV). Read the precautions on the door (you may need a flashlight). Note: Do not attempt to repair the lamp. Do not open the lamp assembly unit - leave the lamp in its casing. Step 6 Service Model Number Sticker with Lamp Type 7. Loosen the screw on the door (don't remove the screw, just loosen it). Note: Don't use a coin to loosen the screw because the coin could fall into the TV. 8. Press the catch tabs near the screw you just loosened (one tab is above the screw and one is below), and remove the entire lamp access door. Place the door to the side (don't put it on the floor or anywhere someone might step on it or accidentally break the tabs). Steps 7 and 8 Chapter 5 75
-
 1
1 -
2
-
3
-
4
-
5
-
6
-
7
-
8
-
9
-
10
-
11
-
12
-
13
-
14
-
15
-
16
-
17
-
18
-
19
-
20
-
21
-
22
-
23
-
24
-
25
-
26
-
27
-
28
-
29
-
30
-
31
-
32
-
33
-
34
-
35
-
36
-
37
-
38
-
39
-
40
-
41
-
42
-
43
-
44
-
45
-
46
-
47
-
48
-
49
-
50
-
51
-
52
-
53
-
54
-
55
-
56
-
57
-
58
-
59
-
60
-
61
-
62
-
63
-
64
-
65
-
66
-
67
-
68
-
69
-
70
-
71
-
 72
72 -
 73
73 -
 74
74 -
 75
75 -
 76
76 -
 77
77 -
 78
78 -
 79
79 -
 80
80 -
 81
81 -
 82
82 -
83
-
84
-
85
-
86
-
87
-
88
-
89
-
90
-
91
-
92
-
93
-
94
-
95
-
96
 |
 |