RCA L32HD35D User Guide & Warranty - Page 22
Selecting the color, temperature, Setting the picture size - adjust display
 |
UPC - 846042701624
View all RCA L32HD35D manuals
Add to My Manuals
Save this manual to your list of manuals |
Page 22 highlights
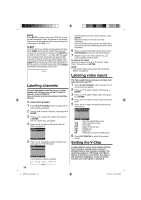
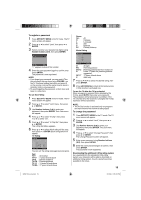
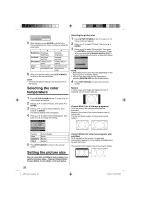
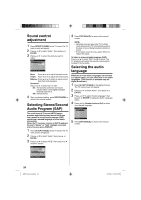
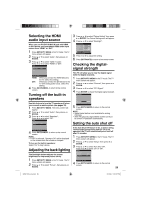
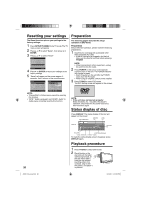
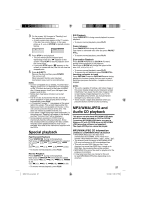
Brightness:25 5 After adjusting, press ENTER to return to the Picture Setting menu. Then continue to adjust the other items. ◀ Brightness decrease brightness Contrast decrease contrast Sharpness makes picture softer Color be pale color Tint be reddish color ▶ increase brightness increase contrast makes picture clearer be brilliant color be greenish color 6 After your desired setting, press EXIT/CANCEL to return to the normal screen. NOTE: • The Contrast default setting is set to maximum at the factory. Selecting the color temperature Selecting the picture size 1 Press SETUP/TV MENU in the TV mode. The TV menu screen will appear. 2 Press ▲ or ▼ to select "Picture", then press ▶ or ENTER. 3 Press ▲ or ▼ to select "Picture Size", then press ▶ or ENTER to display Picture Size menu. Press ▲/▼ or corresponding Number buttons (0-4) to select the desired picture size, as described below. Picture Size 0.Natural 1.Cinema Wide1 2.Cinema Wide2 3.Cinema Wide3 4.Full [0-4]:Select NOTE: • Selectable picture sizes may vary depending on the input source or broadcast signal. • Picture Size menu also can be displayed by pressing SCREEN SIZE on the remote control. 4 Press EXIT/CANCEL to return to the normal screen. Natural In some cases, this image will display the size of standard 4:3 with a black side bar. 1 Press SETUP/TV MENU in the TV mode. The TV menu screen will appear. 2 Press ▲ or ▼ to select "Picture", then press ▶ or ENTER. 3 Press ▲ or ▼ to select "Picture Setting", then press ▶ or ENTER. The Picture Setting menu will appear. 4 Press ▲ or ▼ to select "Color Temperature", then press ◀ or ▶ to change the setting. Picture Setting Brightness 25 Contrast 50 Sharpness 25 Color 25 Tint 0 Color Temperature Backlight 15 Cool : Select : Adjust Setting Picture Quality Cool Bluish Standard Neutral Warm Reddish 5 Press EXIT/CANCEL to return to the normal screen. Cinema Wide1 (for 4:3 format programs) To fill the screen, the right and left edges are extended, however; the center of the picture remains near its former ratio. The top and bottom edges of the picture may be hidden. Cinema Wide2 (for letter box programs with subtitles) To fill the width of the screen, it is extended horizontally. However; it is only slightly extended at the top and the bottom. The top and bottom edges of the picture may be hidden. Setting the picture size You can view 480i and 480p format programs in a variety of picture sizes- Natural, Cinema Wide1, Cinema Wide2, Cinema Wide 3, Full and Native. 22 52K0101A_eng.indd 22 3/12/09 3:10:56 PM
-
 1
1 -
2
-
3
-
4
-
5
-
6
-
7
-
8
-
9
-
10
-
11
-
12
-
13
-
14
-
15
-
16
-
 17
17 -
 18
18 -
 19
19 -
 20
20 -
 21
21 -
 22
22 -
 23
23 -
 24
24 -
 25
25 -
 26
26 -
 27
27 -
28
-
29
-
30
-
31
-
32
-
33
-
34
-
35
-
36
-
37
-
38
-
39
-
40
-
41
-
42
-
43
-
44
-
45
-
46
-
47
-
48
 |
 |