RCA L32HD35D User Guide & Warranty - Page 23
Film mode, Picture control, adjustment in the PC mode - resolution
 |
UPC - 846042701624
View all RCA L32HD35D manuals
Add to My Manuals
Save this manual to your list of manuals |
Page 23 highlights
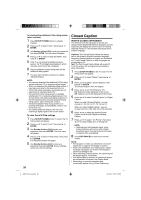
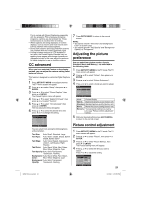
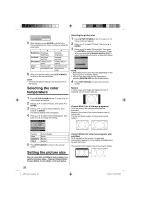
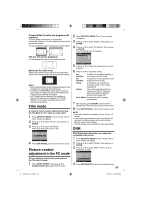
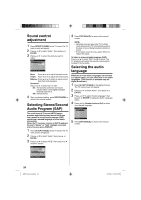
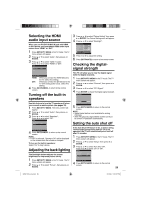
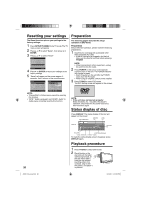
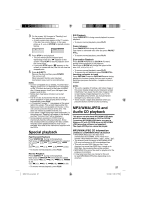
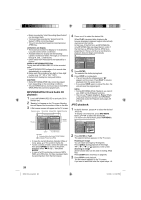
Cinema Wide3 (for letter box programs with subtitles) To fill the width of the screen, it is extended horizontally. However; it is only slightly extended at the top and the bottom. The top and bottom edges of the picture may be hidden. A B C D E F G A B C D E F G Full (for 16:9 source programs) Full will display the picture at the maximum size. 2 Press SETUP/TV MENU. The TV menu screen will appear. 3 Press ▲ or ▼ to select "Picture", then press ▶ or ENTER. 4 Press ▲ or ▼ to select "PC Setting", then press ▶ or ENTER. The PC Setting menu will appear. PC Setting Hor Position Ver Position Clock Phase Auto adjust 25 25 0 25 >> Native (for PC mode only) Detects the resolution of the signal of the image and it will be shown on the screen with same amount of pixels. NOTE: • Some High Definition and/or Digital broadcasts may not allow you to change the picture size. • In HDMI or COMPONENT mode with a scanning rate of 720p or 1080i, only the Cinema Wide2 and Full picture size feature is available. • In PC Mode, only the Natural, Full and Native picture size features are available. In PC Mode (WXGA), only the Full and Native picture size features are available. Film mode A smoother motion may be obtained by setting the Film Mode to "On" when you view a DVD. 1 Press SETUP/TV MENU in the TV mode. The TV menu screen will appear. 2 Press ▲ or ▼ to select "Picture", then press ▶ or ENTER. 3 Press ▲ or ▼ to select "Film Mode". Press ◀ or ▶ to select "On" or "Off". Picture Picture Setting Picture Preference Picture Size Film Mode PC Setting DNR >> Sports >> On >> On : Select : Adjust 4 Press EXIT/CANCEL to return to the normal screen. Picture control adjustment in the PC mode You can adjust to optimize the performance of the TV in the PC mode. 1 Press INPUT SELECT, then press ▲/▼ or Number button (6) to select the PC mode. : Select : Adjust ENTER:Set 5 Press ▲ or ▼ to select the desired item you want to adjust. 6 Press ◀ or ▶ to adjust the setting. Hor To adjust the horizontal position of Position: the image on the PC mode. Ver To adjust the vertical position of the Position: image on the PC mode. Clock: To minimize any vertical bars or stripes visible on the screen background. Phase: This must be adjusted after the frequency of the PC mode has been set to 60Hz to optimize picture quality (page 39). Auto Adjust: To adjust the all PC settings automatically 7 After adjusting, press ENTER to return to the PC Setting menu. Then continue to adjust the other items. 8 Press EXIT/CANCEL to return to the normal screen. NOTE: • Auto Adjust feature is available only for 16:9 or 4:3 format. • If no buttons are pressed for more than approx. 60 seconds, the Menu-screen will return to normal Monitor-screen automatically. • The PC settings are not effective for other input modes. DNR DNR (Digital Noise Reduction) can reduce the roughness of the picture. 1 Press SETUP/TV MENU in the TV mode. The TV menu screen will appear. 2 Press ▲ or ▼ to select "Picture", then press ▶ or ENTER. 3 Press ▲ or ▼ to select "DNR". Press ◀ or ▶ to select "On" or "Off". Picture Picture Setting Picture Preference Picture Size Film Mode PC Setting DNR >> Sports >> On >> On : Select : Adjust 4 Press EXIT/CANCEL to return to the normal screen. 23 52K0101A_eng.indd 23 3/12/09 3:10:56 PM
-
 1
1 -
2
-
3
-
4
-
5
-
6
-
7
-
8
-
9
-
10
-
11
-
12
-
13
-
14
-
15
-
16
-
17
-
 18
18 -
 19
19 -
 20
20 -
 21
21 -
 22
22 -
 23
23 -
 24
24 -
 25
25 -
 26
26 -
 27
27 -
 28
28 -
29
-
30
-
31
-
32
-
33
-
34
-
35
-
36
-
37
-
38
-
39
-
40
-
41
-
42
-
43
-
44
-
45
-
46
-
47
-
48
 |
 |