RCA R61WH76 User Manual
RCA R61WH76 Manual
 |
View all RCA R61WH76 manuals
Add to My Manuals
Save this manual to your list of manuals |
RCA R61WH76 manual content summary:
- RCA R61WH76 | User Manual - Page 1
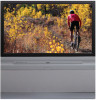
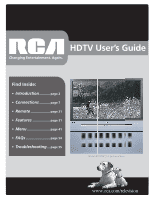
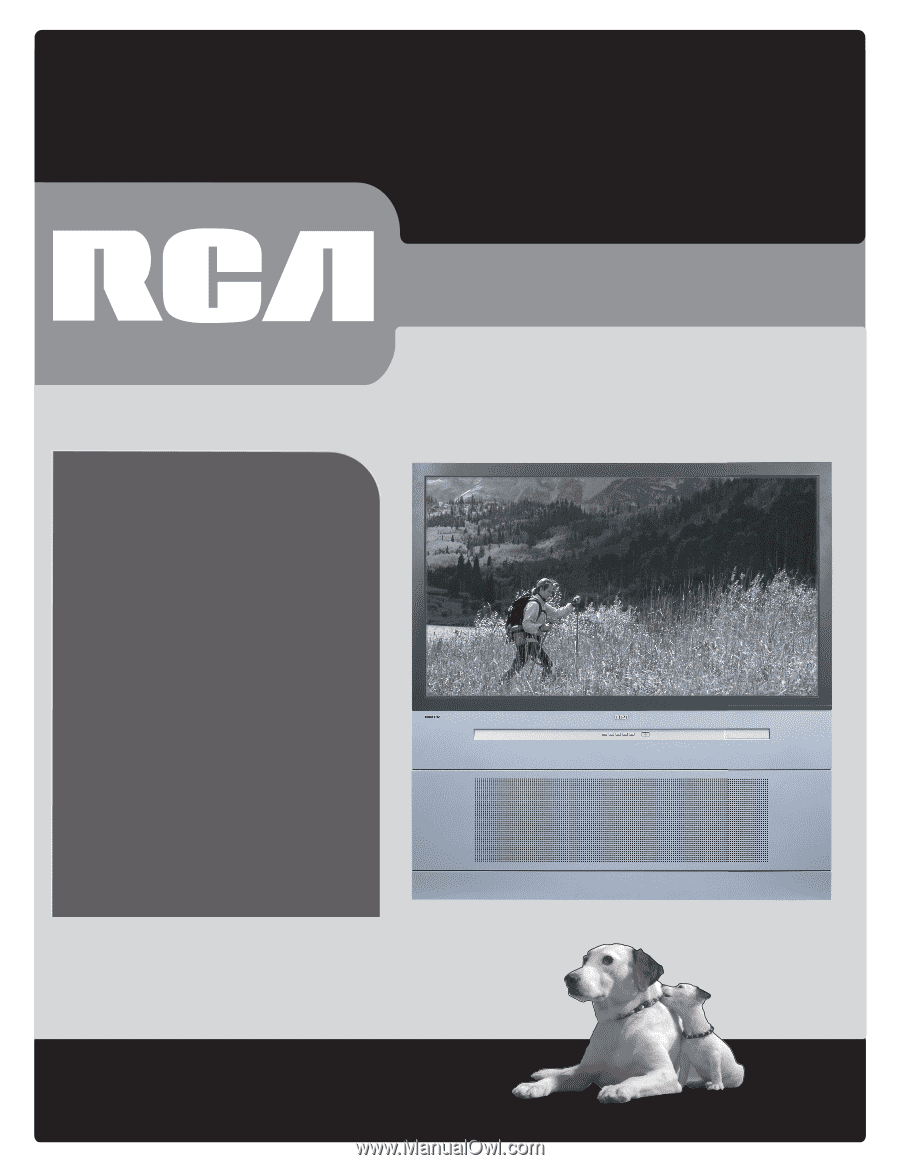
HDTV User's Guide Changing Entertainment. Again. Find Inside: • Introduction............page 2 • Connections............page 7 • Remote page 21 • Features page 31 • Menu page 41 • FAQs page 54 • Troubleshooting....page 55 Model R52WH73 is pictured here. www.rca.rccoma./cteolemvision - RCA R61WH76 | User Manual - Page 2
may also be registered at www.rca.com/television. Registering this product allows us to contact you if needed. Product Information Keep your sales receipt to obtain warranty parts and service and for proof of purchase. Attach it here and record the serial and model numbers in case you need them - RCA R61WH76 | User Manual - Page 3
's instructions. Code and in Canada, Part 1 of the Canadian Electrical Code SERVICE GROUNDING ELECTRODE SYSTEM (NEC ART 250, PART H) To assure adequate ventilation for this product, maintain a spacing of 4 inches from the top and sides of the TV receiver and 2 inches from the rear of the TV - RCA R61WH76 | User Manual - Page 4
this RCA High Definition Television (HDTV). Your purchase decision represents an investment in a new generation of technology-HDTV. Even though this is a technologically advanced HDTV, it is the most user-friendly of its kind-with on-screen instructions that guide you through all of the TV - RCA R61WH76 | User Manual - Page 5
is 20 inches wide is about 15 inches tall). When the standards were being developed for television broadcasting in 1941 by the NTSC (the National Television Standards Committee), it made sense to adopt the 4:3 aspect ratio the film industry was using at that time. As TVs dropped in price and people - RCA R61WH76 | User Manual - Page 6
the Film Mode option turned on, the intelligent detail-a process commonly referred to as reverse 3:2 pulldown. DVI-HDTV Input Lets you connect a device with a DVI (Digital supports the overlay of high-resolution graphics needed by some electronic program guide navigation and other interactive services - RCA R61WH76 | User Manual - Page 7
Safety Instructions 1 Introduction...2 The best of both worlds 2 What makes HDTV better 2 Other Key Features of owning an RCA HDTV 3 Chapter 1: Connections & Setup 7 Things to Consider Before You Connect 8 Choose Your Connection 9 TV + DVD + VCR...10 TV + Satellite Receiver + VCR 12 TV + DVI - RCA R61WH76 | User Manual - Page 8
Front Panel Block...40 Chapter 4: Using the TV's Menu System 41 Sound Menu...42 Picture Menu...44 Channel Guide Menu...46 Time Menu...47 Parental Control Menu...47 Setup Menu...48 Chapter 5: Other Information 53 FAQs (Frequently Asked Questions 54 Troubleshooting...55 Care and Cleaning...58 FCC - RCA R61WH76 | User Manual - Page 9
Overview: • Things to Consider Before You Connect • Choose Your Connection • Connection Instructions • Plug in the TV • Put Batteries in the Remote • Use the Remote Control to Complete the Initial Setup • Turn on the TV • Complete the Initial Setup • Explanation of Jacks • Front Panel Buttons and - RCA R61WH76 | User Manual - Page 10
before you plug any of their power cords into the wall outlet. • Turn off the TV and/or device before you connect or disconnect any cables. • Make TV The pictures below show the cables needed for the connections represented in this book. The next two pages explain the inputs and outputs your HDTV - RCA R61WH76 | User Manual - Page 11
is best for you. Proceed to the appropriate page and connect your HDTV. Devices Cables Needed Video Connections POWER VOL - VOL + CH MENU CH DVD VCR TV Coaxial Audio/video Component video Connection Title Go to... TV + DVD + VCR pages 10-11 POWER VOL - VOL + CH MENU CH - RCA R61WH76 | User Manual - Page 12
Connections & Setup POWER VOL + VOL - CH MENU CH DVD TV Y PB PR DVD PLAYER AUDIO OUT L R S-VIDEO OFF-AIR ANTENNA 4 1B 1A ANTENNA DIGITAL INPUT HDTV DVI-HDTV L R COMPONENT INPUTS CMP1 CMP2 Y Y COMPOSITE INPUTS S-VIDEO V L /MONO R VID1 ANTENNA/ CABLE ANALOG INPUT - RCA R61WH76 | User Manual - Page 13
have an S-Video jack, connect the player to the VID1 S-VIDEO jack on the TV using an S-Video cable. If your DVD player does not have an S-Video signal to this input. • To review other connections, go to the next page. • If you are done connecting devices to your TV, go to page 16 to complete the - RCA R61WH76 | User Manual - Page 14
Connections & Setup POWER Satellite TV VOL - VOL + CH MENU CH S-VIDEO VIDEO L AUDIO R SATELLITE RECEIVER OFF-AIR ANTENNA 4 3C 3B 3A ANTENNA DIGITAL INPUT HDTV DVI-HDTV L R COMPONENT INPUTS CMP1 CMP2 Y Y COMPOSITE INPUTS S-VIDEO V L /MONO R VID1 ANTENNA/ CABLE ANALOG - RCA R61WH76 | User Manual - Page 15
(instead of the video cable in step B) to the S-VIDEO jack on the TV and to the S-VIDEO output jack on the satellite receiver. 4. Connect the coaxial signal to this input. • To review other connections, go to the next page. • If you are done connecting devices to your TV, go to page 18 to complete - RCA R61WH76 | User Manual - Page 16
the FIXED outputs on the HDTV, use the VARIABLE inputs for your A/V Receiver. • Fixed provides fixed-level audio output from the TV. This audio output is controlled by the volume controls on the TV and TV remote control. • If you are done connecting devices to your TV, go to page 18 to complete the - RCA R61WH76 | User Manual - Page 17
CABLE REVERSE PLAY FORWARD Turn on the TV Press TV on the remote, or press the Power button on the TV's front panel. Note: Pressing the TV button turns on the TV and puts the remote into TV mode. "TV mode" means that the buttons on the remote control operate the TV's functions. RECORD STOP PAUSE - RCA R61WH76 | User Manual - Page 18
the setup menus manually, press MENU and choose SETUP. English Français Español Complete the Initial Setup The menu system in your TV allows the TV's features to work properly. The first time you turn on your TV, the setup screens appear. Set the Menu Language The first part of the setup allows - RCA R61WH76 | User Manual - Page 19
Lists and Labels The List & Labels part of the setup lets you edit press the ANT•CABLE button on your remote. 2. Press the down arrow to HDTV, causing the color in your HDTV to be out of alignment. The colors adjust by starting auto convergence. IMPORTANT: Auto convergence works best once the HDTV - RCA R61WH76 | User Manual - Page 20
to connect devices to your TV. ANTENNA/ CABLE ANALOG INPUT standard-definition video output from your TV. You can use this video output Provides fixed-level audio output from the TV. You can use these audio outputs TV and remote control. • SUBWOOFER Provides lower bass audio frequencies from the TV - RCA R61WH76 | User Manual - Page 21
because the color part of the picture is separated from the black and white part of the -HDTV Input Lets you connect a device with a DVI output. Important: The DVI-HDTV supports the overlay of highresolution graphics needed by some electronic program guide navigation and other interactive services - RCA R61WH76 | User Manual - Page 22
VOL 3 Decreases the volume. In the menu system, acts like left arrow button on the remote control and adjusts menu controls. VOL 4 Increases the volume. In the menu system, acts like right arrow button on the remote control and adjusts menu controls. POWER Turns the TV on and off. 20 Chapter 1 - RCA R61WH76 | User Manual - Page 23
on the Remote Control • Programming the Remote to Operate Other Devices • How To Use the Remote After You've Programmed It • Volume Punchthrough Feature • Using the INPUT Button • Remote Code List Graphics contained within this publication are for representation only. www.rca.rccoma./cteolemvision - RCA R61WH76 | User Manual - Page 24
remote in DVD mode. If Auto Tuning is enabled, pressing the DVD button turns on the TV and tunes to the corresponding Video Input Channel for RCA the DVI-HDTV, CMP1, or CMP2 inputs in progressive scan (480p) or HDTV (1080i) the previous channel. GUIDE Displays the Channel Guide menu. INFO Displays - RCA R61WH76 | User Manual - Page 25
connected to your audio system, follow the instructions in the Volume Punchthrough Feature section on page 26. ON•OFF SAT•CABLE AUX DVD TV GO BACK VOL CH MUTE GUIDE Device Buttons INFO FORMAT Chapter 2 MENU SUB CH CLEAR Programming the Remote to Operate Other Devices The universal - RCA R61WH76 | User Manual - Page 26
control or if the device has many codes, you might want to try the manual code search first. The codes in the code list at the end of this chapter are programmable for any of these device buttons (SAT•CABLE, AUX or DVD) on the TV's remote. Using Direct Entry 1. Turn on the device you want to control - RCA R61WH76 | User Manual - Page 27
; then use the right arrow button to go forward through the codes again. When all codes have been searched, the device button flashes 3 times, then the remote exits manual code search and returns to normal operation. Using Automatic Code Search 1. Turn on the device you want to control. 2. On your - RCA R61WH76 | User Manual - Page 28
you've successfully set up the Volume Punchthrough feature, whenever the TV remote is in DVD mode (press the DVD button) and you want to adjust the volume, you only have to press the VOL +, VOL- or MUTE buttons. Follow the instructions below to set up Volume Punchthrough. IMPORTANT: First, you must - RCA R61WH76 | User Manual - Page 29
GUIDE FORMAT MENU INFO SUB CH CLEAR INPUT ANT•CABLE REVERSE PLAY FORWARD RECORD STOP PAUSE INPUT button Using the Remote Remote Code List The codes below are programmable for any of these device buttons (SAT•CABLE, AUX or DVD) on the TV's remote. Audio Codes 868 875 878 879 RCA .... 717 726 - RCA R61WH76 | User Manual - Page 30
Using the Remote Control REALISTIC QUASAR 716 RADIO SHACK ....... 668 699 706 750 786 868 874 876 RCA 661 667 703 723 750 795 844 873 874 876 REALISTIC 661 667 YAMAHA 665 712 713 724 846 ZENITH 676 730 759 784 850 DVD codes DVD ADVENT 922 AFREEY 417 AIWA 414 AKAI 395 435 AMES 431 AMW - RCA R61WH76 | User Manual - Page 31
Using the Remote Control SAMSUNG 407 454 455 942 555 556 HUGHES NETWORK 621 580 RCA 653 PHILIPS 621 PROSCAN 653 SAMSUNG 583 SONY 657 659 ULTIMATE TV 653 659 ZENITH 656 Home Theatre in a Box Where the code is listed as [### ###] the TRAK 608 STS 568 570 571 SUPER GUIDE 609 Chapter 2 29 - RCA R61WH76 | User Manual - Page 32
Remote Control SYLVANIA 581 TOSHIBA 641 632 638 629 630 607 572 624 625 631 ULTIMATE TV 653 659 UNIDEN 633 573 611 UNITED 597 VIDEO CIPHER II 574 WEB TV 612 585 ZENITH .......... 617 634 656 595 646 562 574 587 635 VCR Codes Where codes 300 337 RADIX 245 RANDEX 245 RCA ...... [225] 245 [308] - RCA R61WH76 | User Manual - Page 33
Chapter 3: Using the TV's Features Chapter Overview: • Channel Banner • Digital and Analog Channels • Autotuning • Parental Controls and V-Chip Graphics contained within this publication are for representation only. www.rca.rccoma./cteolemvision 31 - RCA R61WH76 | User Manual - Page 34
appear when you press the TV or INFO button on the remote. What you see depends on On the digital input, shows that Closed Captioning is turned on. On the analog input, shows that Closed label. Note: Channel labels for digital channels are part of the signal sent by the broadcaster, so you cannot - RCA R61WH76 | User Manual - Page 35
to change channels when the remote's in TV mode. ON•OFF SAT•CABLE AUX DVD TV GO BACK VOL CH MUTE Your remote's device buttons GUIDE INFO FORMAT SUB CH MENU Chapter 3 CLEAR Autotuning The autotuning feature works with RCA devices to automatically tune the TV to the correct channel - RCA R61WH76 | User Manual - Page 36
to the ANTENNA DIGITAL INPUT or the ANTENNA/CABLE ANALOG INPUT jack on the back of the TV, and you want the TV to tune to channel 3 when you press the corresponding button on the remote. Reminder: make sure the device's Channel 3/4 switch is set to channel 3. VID1 or VID2 (Video Input) The - RCA R61WH76 | User Manual - Page 37
entering a password. By default, the software inside your TV is turned "off." For instructions to turn on V-Chip, go to page 40. Note: Parental V-Chip TV Rating. 3. Once you get to the V-Chip TV rating limit screen, use the arrow buttons and OK on your remote to change the status of a TV program - RCA R61WH76 | User Manual - Page 38
and associated content. The View ( ) settings are coded in green, and the Block ( ) settings are coded in red. Age-Based Rating TV-MA TV-14 TV-PG TV-G TV-Y7 TV-Y USA Description and Content Themes for Age-Based Ratings Mature Audience Only. Specifically designed to be viewed by adults and may be - RCA R61WH76 | User Manual - Page 39
dialogue L Adult language S Sexual situations V Violence FV Fantasy Violence Tip To change all V-Chip movie or TV ratings to View, press the 0 number button. Blocking Specific Content Themes You can block programs based on their content. (Content is represented by the D, L, S, V and - RCA R61WH76 | User Manual - Page 40
TV-14 (L) language changes to (V) View. Higher rated content themes, such as that for TV-MA language, do not change. Canada V-Chip Ratings Canadian TV V-Chip supports and societal issues in a specifically for children, it is understood younger viewers may be part may see on television. Any realistic - RCA R61WH76 | User Manual - Page 41
Using the TV's Features Rating 18 ans + 16 ans + 13 ans + 8 ans + G Canadian French V- only way to resolve conflict or encourage children to imitate dangerous acts which they may see on television. Any realistic depictions of violence will be infrequent, discreet, of low intensity and will show the - RCA R61WH76 | User Manual - Page 42
this option lets you block (disable) or unblock (enable) the TV's front panel. The remote still tunes to any channel. When using this as a Parental Control method, remove access to any remote that is capable of operating the television while you have the front panel blocked. Don't forget to lock - RCA R61WH76 | User Manual - Page 43
Chapter 4: Using the TV's Menu System Chapter Overview: • Sound Menu • Picture Menu • Channel Guide Menu • Time Menu • Parental Control Menu • Setup Menu Graphics contained within this publication are for representation only. www.rca.rccoma./cteolemvision 41 - RCA R61WH76 | User Manual - Page 44
access the Sound menu, press MENU on the remote, and then select Sound from the main menu. Depending on the kind of signal you're watching, the Sound menu will have different items available for you to adjust: • If you're watching the TV on the ANTENNA/CABLE ANALOG INPUT (look for an - RCA R61WH76 | User Manual - Page 45
digital channels until you turn the TV off. If the language you choose here is not being broadcast with a program, then the TV will play the default program material. Eliminates the need to constantly adjust the volume. Dynamic bass Enhances your TV's low-frequency response. The options are Off - RCA R61WH76 | User Manual - Page 46
formats abruptly during normal TV viewing, switch the Autoformat feature off. Advanced picture settings Contrast expand You can adjust the contrast of the box checked), enhances the picture specifically for still frames (for example, if you're watching a slide show on your HDTV, or if you've paused - RCA R61WH76 | User Manual - Page 47
environment. You can set a different picture preset for each input (including one for your regular TV channels). Black Level Adjusts the brightness of the picture. Color Adjusts the richness of the color. Contrast Adjusts the difference between the light and dark areas of the picture. Sharpness - RCA R61WH76 | User Manual - Page 48
TV's Menu System Channel Guide Menu The Channel Guide lets you view the entire list of channel numbers and labels. Press the GUIDE button to bring up the Channel Guide menu. There are two different kinds of channel guides-the one you see depends on the input jack used. Channel Guide Channel Guide - RCA R61WH76 | User Manual - Page 49
long you want the TV to stay on when it turns on. Channel number Lets you select a specific channel the TV tunes to when the wake up timer is set. To change from digital to analog channels (or vice versa), highlight Channel number and press the ANT•CABLE button on your remote. Daily Lets you - RCA R61WH76 | User Manual - Page 50
Convergence ... Setup Menu The Setup menu lets you configure the TV to fit its surroundings and your preferences. To access the Setup menu, press MENU on the remote term power outages (usually less than two to three minutes). The TV will turn back on at the same volume and channel as before the - RCA R61WH76 | User Manual - Page 51
Service 1... Custom... ... Press < or > key to select the closed caption setting. Using the TV's available on all channels at all times-only for specific programs encoded with closed-captioning information. When a setting does not effect the DVI-HDTV input. Off No captioning information displayed - RCA R61WH76 | User Manual - Page 52
Using the TV's Menu System CC Dig. CC Style Go back Closed Caption Setting Analog CC Type Digital CC Type Digital CC Preset Digital CC Style On... CC1... Service 1... Custom... ... Press < or > key to select the closed caption setting. Go back Closed Caption Size Closed Caption Font Closed - RCA R61WH76 | User Manual - Page 53
to the correct input channel when you press a device button (SAT•CABLE, AUX or DVD) on the remote. Go to Chapter 3 for details about the Autotuning feature. Convergence The Auto convergence feature automatically adjusts the TV's tubes (this may take several minutes, after which you can make fine - RCA R61WH76 | User Manual - Page 54
This page left blank intentionally. - RCA R61WH76 | User Manual - Page 55
Chapter 5: Other Information Chapter Overview: • FAQs • Troubleshooting • Care and Cleaning • FCC Information • Limited Warranty Graphics contained within this publication are for representation only. www.rca.rccoma./cteolemvision 53 - RCA R61WH76 | User Manual - Page 56
do I control other devices I've connected to the TV? Because your TV came with a universal remote, you can program your remote to the button corresponding with the device you have connected to your TV. Go to page 24 for information on programming your remote. Why are there black bars on my screen - RCA R61WH76 | User Manual - Page 57
consulting the following troubleshooting list. TV Problems TV won't turn on • Press the TV button. • Make sure the TV is plugged in. • Check the wall receptacle (or extension cord) to make sure it is "live" by plugging in something else. • Something might be wrong with your remote control. Press the - RCA R61WH76 | User Manual - Page 58
TV/VCR button on the VCR is in the correct mode (press the TV adjusting volume louder • Check to make sure volume isn't limited by the maximum volume feature. Go to page 48 for more instructions. Picture not moving • You have activated the Freeze feature by pressing FREEZE or OK on the remote TV, - RCA R61WH76 | User Manual - Page 59
Then plug the TV back in, turn on the TV, and see if the problem is fixed. If the problem remains, then please visit www.rca.com/television for updated FAQs or contact RCA Customer Support at the support number provided in your Warranty under How To Get Service. How Do I Replace My Remote? • If you - RCA R61WH76 | User Manual - Page 60
can cause them to be permanently imprinted on the picture tube (or projection TV picture tubes). ALSO, some network/program logos, phone numbers, etc. harmful interference to radio or television reception, which can be determined by turning the equipment off and on, the user is encouraged to try to - RCA R61WH76 | User Manual - Page 61
• Acts of nature, such as but not limited to lightning damage. How you get service: • Call 1-877-RCA-HDTV and have your unit's date of purchase and model/serial number ready. • A representative will troubleshoot your problem over the phone. • If the representative determines that you should receive - RCA R61WH76 | User Manual - Page 62
ANY WAY INCREASE THE SCOPE OF THIS WARRANTY. • REPAIR OR REPLACEMENT AS PROVIDED UNDER THIS WARRANTY IS THE not apply to you. • This warranty gives you specific legal rights, and you also may have other rights that dealer for warranty information. Service calls which do not involve defective materials or - RCA R61WH76 | User Manual - Page 63
43 mode 43 presets 43 settings 42 type 42 Sound logic 43 Stereo 32, 42, 56 Subwoofer 18, 42 T Time 32, 47 Tint 45 Transport buttons 23 Troubleshooting 55, 56 TruScan 4 TV button 23 TV problems 55 TV remote codes 27 U Unrated programs 40 US V-Chip ratings 35, 36, 40 V V-Chip 35, 36 Canadian ratings - RCA R61WH76 | User Manual - Page 64
the RCA website at www.rca.com/television Please do not send any products to the Indianapolis address listed in this manual or on the carton. This will only add delays in service for your product. TTE Technology, Inc. 101 West 103rd Street Indianapolis, IN 46290 ©2006 TTE Technology, Inc. RCA and
-
 1
1 -
 2
2 -
 3
3 -
 4
4 -
 5
5 -
 6
6 -
 7
7 -
8
-
9
-
10
-
11
-
12
-
13
-
14
-
15
-
16
-
17
-
18
-
19
-
20
-
21
-
22
-
23
-
24
-
25
-
26
-
27
-
28
-
29
-
30
-
31
-
32
-
33
-
34
-
35
-
36
-
37
-
38
-
39
-
40
-
41
-
42
-
43
-
44
-
45
-
46
-
47
-
48
-
49
-
50
-
51
-
52
-
53
-
54
-
55
-
56
-
57
-
58
-
59
-
60
-
61
-
62
-
63
-
64
 |
 |
rca.com
Model R52WH73 is pictured here.
www.rca.com/television
HDTV User’s Guide
Changing Entertainment. Again.
Find Inside:
•
Introduction
...........
page 2
•
Connections
...........
page 7
•
Remote
....................
page 21
•
Features
..................
page 31
•
Menu
........................
page 41
•
FAQs
.........................
page 54
•
Troubleshooting
...
page 55