Ricoh 1160L User Guide - Page 143
print quality problem, solving, paper jam, clear
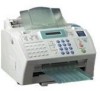 |
View all Ricoh 1160L manuals
Add to My Manuals
Save this manual to your list of manuals |
Page 143 highlights
L load, document 2.9 load, paper in the automatic input tray 1.13, 3.7 in the manual input tray 3.9 location, choosing 1.9 M manual input tray loading paper 3.9 paper source setting 3.14 memory clearing 4.1 searching 2.24 monitoring status 2.32 multiple pages on one sheet, print 3.18 N network, setting 3.28 notifying toner low 4.3 number and name, setting 1.19 O one-touch dialing 2.20 one-touch label plate 2.22 OPC drum, cleaning 4.2 overlay, using 3.24 P paper in automatic input tray 1.13, 3.7 in the manual input tray 3.9 selecting 1.15, 3.7 setting 3.2, 3.14 paper jam, clear 5.1 document 5.1 inside the machine 5.3 output area 5.2 paper input tray 5.2 tips avoiding paper jams 5.4 paper size, setting 3.14 paper source, setting 3.14 paper type, setting 3.14 parallel, connection 1.12 parts, identifying 1.4 pause, inserting 2.20 phone line, connection 1.11 polling reception 2.30 transmission 2.29 poster, printing 3.21 power, plugging 1.13 print media see paper print quality problem, solving 5.11 print quality, setting 3.15 print resolution 3.15 printer driver see driver printing problem, solving 5.9 printing cancel 3.16 cleaning page 4.2 document 4.9 general problems, solving 5.9 help 3.17 in network environment 3.28 several pages per sheet 3.18 quality problems, solving 5.11 reports 2.33 A.14 Appendix
-
 1
1 -
2
-
3
-
4
-
5
-
6
-
7
-
8
-
9
-
10
-
11
-
12
-
13
-
14
-
15
-
16
-
17
-
18
-
19
-
20
-
21
-
22
-
23
-
24
-
25
-
26
-
27
-
28
-
29
-
30
-
31
-
32
-
33
-
34
-
35
-
36
-
37
-
38
-
39
-
40
-
41
-
42
-
43
-
44
-
45
-
46
-
47
-
48
-
49
-
50
-
51
-
52
-
53
-
54
-
55
-
56
-
57
-
58
-
59
-
60
-
61
-
62
-
63
-
64
-
65
-
66
-
67
-
68
-
69
-
70
-
71
-
72
-
73
-
74
-
75
-
76
-
77
-
78
-
79
-
80
-
81
-
82
-
83
-
84
-
85
-
86
-
87
-
88
-
89
-
90
-
91
-
92
-
93
-
94
-
95
-
96
-
97
-
98
-
99
-
100
-
101
-
102
-
103
-
104
-
105
-
106
-
107
-
108
-
109
-
110
-
111
-
112
-
113
-
114
-
115
-
116
-
117
-
118
-
119
-
120
-
121
-
122
-
123
-
124
-
125
-
126
-
127
-
128
-
129
-
130
-
131
-
132
-
133
-
134
-
135
-
136
-
137
-
 138
138 -
 139
139 -
 140
140 -
 141
141 -
 142
142 -
 143
143 -
 144
144 -
 145
145
 |
 |