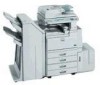
Ricoh 3035 General Settings Guide
Ricoh 3035 - Aficio B/W Laser Manual
 |
View all Ricoh 3035 manuals
Add to My Manuals
Save this manual to your list of manuals |
Ricoh 3035 manual content summary:
- Ricoh 3035 | General Settings Guide - Page 1
Operations 3 Document Server 4 User Tools (System Settings) 5 Registering Addresses and Users for Facsimile/Scanner Functions 6 Troubleshooting 7 Remarks 8 Entering Text 9 Specifications Read this manual carefully before you use this machine and keep it handy for future reference. For safe and - Ricoh 3035 | General Settings Guide - Page 2
3035 • Type 2: 8045/DSm745/LD245/Aficio 3045 Certain types might not be available in some countries. For details, please contact your local dealer. Two kinds of size notation are employed in this manual. With this machine refer to the inch version. For good copy quality, the supplier recommends that - Ricoh 3035 | General Settings Guide - Page 3
Settings (such as Tray Paper Settings), Document Server functions, and troubleshooting. Refer to this manual for Address Book procedures such as registering fax numbers, e-mail addresses, and user codes. ❖ Security Reference This manual is for administrators of this machine. It describes security - Ricoh 3035 | General Settings Guide - Page 4
Reference (PDF file - CD-ROM1) Describes operations, functions, and troubleshooting for the machine's scanner function. ❖ Manuals for DeskTopBinder Lite DeskTopBinder Lite is a utility included on the CD-ROM labeled "Scanner Driver and Document Management Utility". • DeskTopBinder Lite Setup Guide - Ricoh 3035 | General Settings Guide - Page 5
to a computer. See Scanner Reference. GCKONN2J • You can store files scanned by this machine, or files sent from other fax machine or computers, into the machine's hard disk. You can print and fax stored files as required. You can also change print settings and print multiple documents (Document - Ricoh 3035 | General Settings Guide - Page 6
can store received fax messages on the machine's hard disk, instead of printing them onto paper. You can use DeskTopBinder Professional or Web Image Monitor to check, print, delete, retrieve, or download documents using your computer (Storing received documents). See Facsimile Reference - Ricoh 3035 | General Settings Guide - Page 7
scan file by Scan to Folder). See Scanner Reference. AHT006S • You can protect documents from unauthorized access and stop them from being copied without permission. See Security Reference. • You can control the use of the machine, as well as prevent machine settings from being changed without - Ricoh 3035 | General Settings Guide - Page 8
as to check on paper quantities, or misfeeds, etc. See Network Guide. • You can use Web Image Monitor to make network settings. See Network Guide. • You can also use Web Image Monitor to register and manage items such as user codes, fax numbers, email addresses, and folders in the Address Book. See - Ricoh 3035 | General Settings Guide - Page 9
and Reception iv Fax Transmission and Reception Through the Internet iv Using the Scanner in a Network Environment v Administrating the Machine/Protecting Documents (Security Functions v Monitoring the Machine Via Computer vi Preventing an Unauthorized Copy vi Notice ...1 Copyrights - Ricoh 3035 | General Settings Guide - Page 10
(System Settings 54 Changing Default Settings 54 Quitting User Tools 54 Settings You Can Change with User Tools 55 General Features ...55 Tray Paper Settings 58 Timer Settings ...62 Administrator Tools 64 5. Registering Addresses and Users for Facsimile/Scanner Functions Address Book...71 - Ricoh 3035 | General Settings Guide - Page 11
Tray (optional 121 D Adding Toner 124 Removing Toner 125 Inserting Toner 126 x Clearing Misfeeds 127 Changing the Paper Size 136 Changing the Paper Size of the Paper Tray 136 d Adding Staples 139 1000-Sheet Finisher 139 2 Tray Finisher ...140 Booklet Finisher ...142 Removing Jammed Staples - Ricoh 3035 | General Settings Guide - Page 12
to Enter Text 162 9. Specifications Main unit ...163 Options ...167 1000-Sheet Finisher 167 2 Tray Finisher ...168 Punch Kit...169 Booklet Finisher ...170 Bridge Unit ...171 Internal Tray 2 (1 bin tray 171 Large Capacity Tray 172 Paper Tray Unit ...173 Copy Paper ...174 Recommended Paper Sizes - Ricoh 3035 | General Settings Guide - Page 13
located or operating in conjunc- tion with any other antenna or transmitter. B This equipment complies with FCC RF radiation exposure limits set forth for an uncontrolled environment. End users must follow the specific operating instructions undesired operation. Warning Changes or modifications not - Ricoh 3035 | General Settings Guide - Page 14
certification/registration number only signifies that the Industry Canada technical specifications were met. To prevent radio interference to the licensed service, this device is intended to be operated indoors and away from windows to provide maximum shielding. Equipment (or its transmit antenna - Ricoh 3035 | General Settings Guide - Page 15
susceptible de compromettre le fonctionnement du dispositif. IEEE 802.11b Interface Unit Type H: Ce dispositif est conforme á la norme CNR-210 d' ont été respectées. Pour empêcher que cet appareil cause du brouillage au service faisant l'objet d'une licence, il doit être utilisé á l'intérieur et - Ricoh 3035 | General Settings Guide - Page 16
®, Windows® and Windows NT® are registered trademarks of Microsoft Corporation in the United States and/or other countries. Acrobat® is a registered trademark of Adobe Systems Incorporated. The Bluetooth® word mark and logos are owned by the Bluetooth SIG, Inc. and any use of such marks by Ricoh - Ricoh 3035 | General Settings Guide - Page 17
support to the software of the product including the expat, and the product manufacturer makes the initial developer permission notice shall be included in all copies or substantial portions of the Software. users to use this product: This product contains NetBSD operating system: For the most part - Ricoh 3035 | General Settings Guide - Page 18
code must retain the above copyright notice, this list developed by The NetBSD Foundation, Inc. and its contributors. D Neither the name of The NetBSD Foundation nor the names of its contributors may be used to endorse or promote products derived from this software without specific OR SERVICES; LOSS - Ricoh 3035 | General Settings Guide - Page 19
is licensed by the product manufacturer under separate agreement(s). d) The source code of the modified code of the Sablotron 0.82 is available at: http://support-download.com/services/device/sablot/notice082.html e) The source code of the Sablotron software is available at: http://www.gingerall.com - Ricoh 3035 | General Settings Guide - Page 20
A Redistributions of source code must retain the above copyright notice, this list of conditions and the fax: (412) 268-7395 [email protected] D Redistributions of any form whatsoever must retain the following acknowledgment: "This product includes software developed by Computing Services - Ricoh 3035 | General Settings Guide - Page 21
or implied warranty of any kind. These notices must be retained in any copies of any part of this documentation and/or software. MD5 Copyright (C) 1991-2, RSA Data Security, Inc. Created 1991. All rights reserved. License to copy and use this software is granted provided that it is identified as the - Ricoh 3035 | General Settings Guide - Page 22
by this machine can be downloaded from the following website: http://support-download.com/services/scbs RSA BSAFE® • This product includes RSA BSAFE® cryptographic or security protocol software from RSA Security Inc. • RSA and BSAFE are registered trademarks of RSA Security Inc. in the United States - Ricoh 3035 | General Settings Guide - Page 23
How to Read This Manual Symbols The following set of symbols is used in this manual. R WARNING: This symbol indicates a potentially hazardous situation that might result in death or serious injury when you misuse the machine without following the instructions under this symbol. Be sure to read the - Ricoh 3035 | General Settings Guide - Page 24
, do not remove any covers or screws other than those specified in this manual. • Turn off the power and disconnect the power plug (by pulling the plug, not the cable) if any of the following occurs: • You spill something into the machine. • You suspect that your machine needs service or repair - Ricoh 3035 | General Settings Guide - Page 25
the power plug from the wall outlet, always pull the plug (not the cable). • Do not allow paper clips, staples, or other small metallic objects to fall inside the machine. • Keep toner (used or unused) and toner containers out of reach of children. • For environmental reasons, do not dispose of the - Ricoh 3035 | General Settings Guide - Page 26
Positions of RWARNING and RCAUTION labels This machine has labels for RWARNING and RCAUTION at the positions shown below. For safety, please follow the instructions and handle the machine as indicated. 14 ZKZH010E - Ricoh 3035 | General Settings Guide - Page 27
consumption when it is not operated for a fixed time (standard setting time: 1 minute). This is called "Off mode" on a single function copying machine, and "Sleep mode" on a multiple function machine equipped with optional facsimile and printing functions. • Off mode: Same as the condition when the - Ricoh 3035 | General Settings Guide - Page 28
or the machine resets automatically. Reference To change the settings of the Duplex Priority mode, see "Duplex Mode Priority"in "General Features 2/4", Copy Reference. Specifications Low-power Mode, Off Mode Low-power mode, Sleep mode Copier only Type 1 Type 2 Power consumption 1.2 W Default - Ricoh 3035 | General Settings Guide - Page 29
Machine Types This machine comes in two models which vary in copy speed. To ascertain which model you have, see the inside front cover. Copy speed Type 1 35 copies/minute (A4K, 81/2" × 11"K) Type 2 45 copies/minute (A4K, 81/2" × 11"K) 17 - Ricoh 3035 | General Settings Guide - Page 30
18 - Ricoh 3035 | General Settings Guide - Page 31
paper is delivered to internal tray 2 (1 bin tray). If internal tray 2 has not been installed, the indicator does not light. See p.21 "External Options". 10. Duplex unit (unit for two-sided copies) Allows you to print on both sides of a piece paper in copier and printer function. 11. Front cover - Ricoh 3035 | General Settings Guide - Page 32
Started 12. Paper tray (upper: Tray 1, lower: Tray 2) Load paper here. 13. Paper tray unit (optional ) 1 1. Bypass tray Use when copying onto OHP transparencies, objects near them or leaning things against them. If the machine overheats, a fault might occur. 20 - Ricoh 3035 | General Settings Guide - Page 33
of two paper trays. 5. Bridge unit Relays copies to the finisher. AHU015S 6. 2 Tray finisher Sorts, stacks, and staples copies. You can also punch copies. (The Punch function is optional.) *1: Finisher shift tray 1 *2: Finisher shift tray 2 7. Booklet finisher Sorts, stacks, and staples copies. The - Ricoh 3035 | General Settings Guide - Page 34
Internal Options A Fax unit 1 Allows you to use the facsimile function. B Printer/Scanner unit Allows you to use the printer and scanner functions. C User account enhance unit Allows you to increase memory for storing user codes. D File format converter Allows you to download documents - Ricoh 3035 | General Settings Guide - Page 35
"Accessing User Tools (System Settings)". • Counter Press to check or print the counter value. See p.159 "Counter". 4. Display panel Displays operation status, error messages, and function menus. 5. {Check Modes} key Press to check settings. 6. {Program} key (copier/facsimi- le/scanner mode) Press - Ricoh 3035 | General Settings Guide - Page 36
} key (copier/scanner mode) Press to make interrupt copies during 17. {Start Manual RX} key, {On Hook Di- al} key, {Pause/Redial} key, and {Tone} key copying or scanning. See "Interrupt 1 Copy", Copy Reference. 10. Main power indicator and On indicator Reference Facsimile Reference - Ricoh 3035 | General Settings Guide - Page 37
panel. Note ❒ The following display is of a machine with the optional 2 Tray finisher and LCT installed. The copying screen is displayed as default after power on. Common key operations The following keys entered values but does not change the settings. Returns to the previous display. 25 - Ricoh 3035 | General Settings Guide - Page 38
User Administrator about your login user name and login password. For details of the from using the machine, always log off when you have finished using the machine. A Press {User Tools / Counter}. various types of user authentica- tion, consult the respective admin- istrators. ❒ When User Code - Ricoh 3035 | General Settings Guide - Page 39
the 1 control panel) Press to activate the machine. When the machine has finished warming up, you can make copies. A Make sure the power cord is firm- go off. When this is done, machine power is completely off. When the fax unit (optional) is in- stalled, fax files in memory may be lost if - Ricoh 3035 | General Settings Guide - Page 40
Note ❒ If the power does not come on when the operation switch is pressed, check the main power switch is on. If it is off, turn it on. Turning before pulling out the power plug. Not doing this may result in damage to the hard disk or memory. A Make sure the On indicator is not lit. B Open the - Ricoh 3035 | General Settings Guide - Page 41
. See "Turning Off the Main Power/In the Event of Power Failure", Facsimile Reference . ❒ You can change the amount of time the machine waits before switching to Energy Saver mode after copying has finished or the last operation is performed. See p.62 "Panel Off Timer". ❒ The On - Ricoh 3035 | General Settings Guide - Page 42
User Tools/Counter/Inquiry screen is displayed • When fixed warm-up is in progress • When the facsimile, printer, or other functions are active • When operations were suspended during printing • When the On-hook dialing function is in use • When a recipient is being registered in the address list - Ricoh 3035 | General Settings Guide - Page 43
Operations Changing Modes Note ❒ You cannot switch modes in any of the following situations: • When scanning in a fax message for transmission • During immediate transmission • When accessing User Tools • During interrupt copying • During On hook dialing for fax transmission • While scanning an - Ricoh 3035 | General Settings Guide - Page 44
Combined Function Operations ❒ The copying screen is displayed as default after power on. You can change this default setting. See p.55 "Function Priority". 2 AHU017S -System Reset The machine returns automatically to its initial condition when the job is finished, after a certain period of time has - Ricoh 3035 | General Settings Guide - Page 45
fax data. • While printing print data, you can make operations for copying. Note ❒ See p.56 "Print Priority" for setting function priority. As default, [Display Mode] is set to first priority. ❒ When the optional 1000-sheet finisher, 2 Tray finisher or booklet finisher is installed on the machine - Ricoh 3035 | General Settings Guide - Page 46
Scanning using the Network TWAIN Scanner Scanning an Original for Memory Transmission Transmission Combined Function Operations Function you want to select Copier Facsimile Printer Scanner Reception Interrupt Copying Print 2 Using the control panel Printing Scanning Stapling Printing - Ricoh 3035 | General Settings Guide - Page 47
Immediate Transmission Memory Reception Reception Printing Received Data Printer Scanner Data Reception Printing Print Stapling Using the control panel Scanning using the Network TWAIN Scanner Scanning Using the control panel Document Server Scanning a Document to Store in Document - Ricoh 3035 | General Settings Guide - Page 48
1000-sheet finisher installed, that is printing with the stapling operation on paper larger than A4 size, starts the subsequent job (for which the finisher shift tray is specified as the output tray) only after the current print job finishes. ❒ While printing is in progress, scanning using another - Ricoh 3035 | General Settings Guide - Page 49
the List of Stored Files", Scanner Reference . *3 You can send stored documents from scanner mode. See "Sending Stored Files by Email or Scan to Folder, or Delivering", Scanner Reference. Note ❒ The following table shows the capacity of the Document Server. Copier Printer Scanner Facsimile - Ricoh 3035 | General Settings Guide - Page 50
6. A lock icon appears next to each password-protected file. The icons below show the functions active when the documents were stored in the Document Server. Mode Icon Copier Facsimile Printer Scanner -- Note ❒ Depending on the settings of security functions, not all the stored documents may - Ricoh 3035 | General Settings Guide - Page 51
be accessed if its password is entered. When a password is set for the documents, appears next to the documents. Note ❒ Enter a four-to eight-digit password. Reference To store documents without using Document Server functions, see the manuals for those modes. ❒ By default, data stored in the - Ricoh 3035 | General Settings Guide - Page 52
[Scan Original]. C Enter a file name, user name, or password if necessary. Note ❒ If you do not enter a file name, one is automatically assigned. Reference p.41 "To register or change the user name" p.41 "To change the file name" p.42 "To set or change the password" Reference For details, see Copy - Ricoh 3035 | General Settings Guide - Page 53
in the Address Book A Enter a new user name, and then press [OK]. When using a registered user name in the Address Book A Select a registered user name from the list, and then press [OK]. Reference p.161 "Entering Text" To change the file name A Press [Scan Original]. The Scan Original display - Ricoh 3035 | General Settings Guide - Page 54
the document list. B Select the document with the user name, file name, or password you Reference 3 p.161 "Entering Text" want to change. To set or change the password A Press [Scan Original]. The Scan Original display appears. B Press [Password]. Note ❒ If a password is already set for the - Ricoh 3035 | General Settings Guide - Page 55
the dis- on your computer, you can search played list, and then press [OK]. for and rearrange documents us- ing your computer. Note Reference Manuals for DeskTopBinder Professional/Lite or Help ❒ To specify an unregistered user name, follow the procedure below. D To specify an unregistered - Ricoh 3035 | General Settings Guide - Page 56
Image Monitor. For details about how to start the Web Image Monitor, see Network Guide. 3 A Select a document you want to print. Note ❒ If a password is already set for the document, enter that password, and then press [OK]. B Press [Detail]. Detailed information about the document appears. Note - Ricoh 3035 | General Settings Guide - Page 57
Copy Reference. ❖ Binding format • Two-sided Copy Top to Top • Two-sided Copy Top to Bottom • Booklet • Magazine 3 ❖ Cover handling • Cover/Slip sheet • Edit/Stamp ❖ Finish • Sort • Stack • Staple • Punch (optional) ❒ If you print more than one set using the Sort function, you can check - Ricoh 3035 | General Settings Guide - Page 58
[Change Quantity]. C Enter a new number of copies us- ing the number keys. D Press the {#} key. E Press [Continue]. Printing restarts. 46 Note ❒ If a password is already set for the document, enter that password, and then press [OK]. ❒ You can search for the document using [Search by User Name - Ricoh 3035 | General Settings Guide - Page 59
display to check its content. If more than one document is selected, the first page of each is printed. A Select the document. Note ❒ If a password is already set for the document, enter that password, and then press [OK]. ❒ You can search for the document using [Search by User Name] or [Search - Ricoh 3035 | General Settings Guide - Page 60
cancel the print job. C Press [Delete File]. Downloading Stored Documents Note ❒ File format converter is required when downloading documents stored in copier or printer mode. 3 D Press [Delete] to delete the docu- ment. A Start Web browser. B Enter "http:// (IP address of this machine) /" in - Ricoh 3035 | General Settings Guide - Page 61
"Tray Paper Settings", p.62 "Timer Settings", and p.64 "Administrator Tools".) Items Default General Features Warm Up Notice On Copy Count Display Up Output: Document Server Internal Tray 1 Tray Paper Settings Paper Tray Priority: Copier Tray 1 Front Cover Sheet Tray Off Slip Sheet Tray - Ricoh 3035 | General Settings Guide - Page 62
Document Server 3 50 - Ricoh 3035 | General Settings Guide - Page 63
(Parallel Connection)", Printer Reference. ❖ General Features (See p.55 "General Features".) Panel Tone Warm Up Notice Copy Count Display Function Priority Print Priority Function Reset Timer Output: Copier Output: Document Server Output: Facsimile Output: Printer Prepare Stapling Default On On - Ricoh 3035 | General Settings Guide - Page 64
User Tools (System Settings) ❖ Tray Paper Settings (See p.58 "Tray Paper Settings".) Paper Tray Priority: Copier Paper Tray Priority: Facsimile Paper Tray Priority: Printer Tray Paper Size: Tray 1 Tray Paper Size: Tray 2 Tray Paper Size: Tray 3 Tray Paper Size: Tray 4 Paper Type: Bypass - Ricoh 3035 | General Settings Guide - Page 65
(See p.64 "Administrator Tools".) Default User Authentication Management Off Administrator Authentication Management Off Program / Change Administrator -- Key Counter Management -- Extended Security -- Display/Print Counter -- Display/Clear/Print Counter per User -- 4 Address Book - Ricoh 3035 | General Settings Guide - Page 66
section is for Administrators in charge of this machine. D Change settings by following in- structions on the display panel, User Tools allow you to change or set and then press [OK]. defaults. Note Note ❒ Operations for system settings dif- ❒ To cancel changes made to settings and return to - Ricoh 3035 | General Settings Guide - Page 67
Settings You Can Change with User Tools Settings You Can Change with User Tools Reference To access User Tools, see p.54 "Accessing User Tools (System Settings)". General Features ❖ Panel Tone The beeper (key tone) sounds when a key is pressed. Note ❒ Default: On 4 ❖ Warm Up Notice (copier/ - Ricoh 3035 | General Settings Guide - Page 68
. Reference p.33 "Multi-Access" Note ❒ Default: Display Mode ❒ When [Interleave] is selected, the current print job will be interrupted after a maximum of five sheets. ❒ When the optional internal tray 2, 1000-sheet finisher, 2 Tray finisher or booklet finisher is installed on the machine - Ricoh 3035 | General Settings Guide - Page 69
Settings You Can Change with User Tools ❖ Output: Copier (copier) You can specify a tray to which documents are delivered. 4 AHU006S 1. Finisher Upper Tray 2. Finisher Shift Tray 3. Finisher Shift Tray 1 4. Finisher Shift Tray 2 5. Finisher Upper Tray 6. Finisher Shift Tray 7. Internal Tray 1 8. - Ricoh 3035 | General Settings Guide - Page 70
delivered. Note ❒ Default: Internal Tray 1 ❒ The output trays set on the printer driver have priority over the output tray specified above. ❒ For details about output trays, see p.57 "Output: Copier (copier)". ❖ Prepare Stapling When the booklet finisher is installed, perform a stapling test (five - Ricoh 3035 | General Settings Guide - Page 71
paper size was not detected. Note 4 ❒ Default: • Tray 1: A4K, 81/2" × 11"K • Tray 2: A3L, 11" × 17"L • Tray 3: A4L, 81/2" × 11"L • Tray 4: A4L, 81/2" × 14"L ❒ The paper guide for the optional LCT is fixed for A4K, 81/2" × 11"Ksize paper. Contact your service representative if you need to - Ricoh 3035 | General Settings Guide - Page 72
print function use this information to automatically select the paper tray. • The paper types you can set are as follows: • recycled paper, special paper, color paper, letterhead, preprinted paper, prepunched paper, bond paper, cardstock Note ❒ Default: • Paper Type: No Display • Copying Method - Ricoh 3035 | General Settings Guide - Page 73
Selected] is selected, slip sheet tray settings only appear when the cover function or slip sheet function is selected. Reference "Slip Sheets", Copy Reference ❖ Printer Bypass Paper Size You can specify the size of the paper in the bypass tray when printing data from the computer. • The paper - Ricoh 3035 | General Settings Guide - Page 74
just been turned on and functions other than copier function are still in the process of starting up. ❖ Panel Off Timer Set the amount of time the machine waits before switching the panel off after copying has finished or performing the last operation. Note ❒ Default: 1 minute(s) ❒ The time can be - Ricoh 3035 | General Settings Guide - Page 75
to elapse before the scanner function resets. Note ❒ If [Off] is selected, the machine will not automatically switch to the user code entry screen. ❒ Default: On, 60 seconds ❒ The time can be set from 10 to 999 seconds, using the number keys. ❖ Set Date Set the date for the copier's internal clock - Ricoh 3035 | General Settings Guide - Page 76
used by the administrator. To change these settings, contact the administrator. We recommend specifying Administrator Authentication before making Administrator Tools settings. See Security Reference. ❖ User Authentication Management • User Code Authentication Using User Code Authentication, you - Ricoh 3035 | General Settings Guide - Page 77
security functions, see Security Reference. ❖ Display/Print Counter Allows you to view and print the number of prints. • Display/Print Counter Displays the number of prints for each function (Total, Copier, Facsimile, Printer, A3/DLT, Duplex, and Staple). • Print Counter List Prints out a list - Ricoh 3035 | General Settings Guide - Page 78
Tools (System Settings) Note ❒ To print a list for each user, see p.78 "Printing the Counter for Each User Code". ❖ Address Book Management You can add, change or delete information registered in the Address Book. For details, see p.71 "Address Book". • [Program / Change] You can register and - Ricoh 3035 | General Settings Guide - Page 79
same page, but you cannot move items to another page. For example, you cannot move an item from "PLANNING" ([OPQ]) to "DAILY" ([CD]). A Press the {User Tools/Counter} key. B Press [System Settings]. C Press [Administrator Tools], and then press [TNext]. D Press [Address Book: Change Order]. 67 - Ricoh 3035 | General Settings Guide - Page 80
the Address Book. • Print in Title 1 Order Prints the Address Book in Title 1 order. • Print in Title 2 Order Prints the Address Book in Title 2 order. • Print in Title 3 Order Prints the Address Book in Title 3 order. • Print Group Dial List Prints the group Address Book. A Select the print format - Ricoh 3035 | General Settings Guide - Page 81
Edit Title You can edit the title to easily find a user. A Press the {User Tools/Counter} key. B Press [System Settings]. C Press [Administrator Tools], and then press [TNext]. D Press [Address Book: Edit Title]. E Press the title key you want to change. 4 F Enter the new name, and then press [OK - Ricoh 3035 | General Settings Guide - Page 82
❒ Default: On ❖ Firmware Version You can check the version of the software installed in this machine. ❖ Network Security Level For details about this function, consult your administrator. ❖ Delete All Logs For details about this function, consult your administrator. ❖ Transfer Log Setting For - Ricoh 3035 | General Settings Guide - Page 83
in the Address Book: ❖ Name You can register the name of the user and the key display. This is the basic information required for managing user of the machine. ❖ Authentication Information You can register user codes in order to restrict particular functions to certain users, and to check their use - Ricoh 3035 | General Settings Guide - Page 84
and select the protocol. • Fax Destination • NCP ❖ Protection You can set protection codes to stop sender's name from being used or folders from being accessed without authorization. • IP-Fax Destination 5 ❖ E-mail You can register e-mail destinations in the Address Book. ❖ Add to Group You - Ricoh 3035 | General Settings Guide - Page 85
sending ard messages are printed on the fax files using the scanner function to a message when it is received at the shared folder. other end. To share the folder using Windows, By registering IP-Fax destinations in select the SMB protocol. the Address Book, you can specify a destination - Ricoh 3035 | General Settings Guide - Page 86
the number keys. Reference p.161 "Entering Text" 5 B Press [System Settings]. H Press the key for the classification you want to use under Select Ti- tle. C Press [Administrator Tools], and then press [TNext]. D Press [Address Book Management]. E Press [New Program]. F Press [Change] on the - Ricoh 3035 | General Settings Guide - Page 87
name, user code, fax number, folder name, Press the {User Tools/Counter} key. e-mail address, or IP-Fax destination. B Press [System Settings]. C Press [Administrator Tools], and then To change the name or key press [TNext]. display D Press [Address Book Management]. A Press [Change] on - Ricoh 3035 | General Settings Guide - Page 88
of copies scanned using the scanner function is counted for each user code. This allows you to check each user's usage. ❒ To automatically register the printer driver user code, select [PC Control] for the printer in User Code Authentication. To use the user C Press [Administrator Tools], and - Ricoh 3035 | General Settings Guide - Page 89
} key. Changing a User Code Note ❒ Even if you change a user code, the counter value will not be cleared. A Press the {User Tools/Counter} key. B Press [System Settings]. C Press [Administrator Tools], and then press [TNext]. D Press [Address Book Management]. E Select the user whose user code you - Ricoh 3035 | General Settings Guide - Page 90
from the Address Book entirely, see p.75 "Deleting a Registered Name". E Select [Print Counter], [Transmission Counter] or [Scanner Counter]. Counters for individual function usage under each user code appear. A Press the {User Tools/Counter} key. B Press [System Settings]. Printing the Counter - Ricoh 3035 | General Settings Guide - Page 91
from [Print Coun- per User]. E Press [Print Counter List] under All Users. ter], [Transmission Counter], and [Scanner Counter]. 5 D Press [OK]. To clear the number of prints for all user codes A Press [Clear] under All Users. Note ❒ Enter the user code, and then press [#] if the user code is - Ricoh 3035 | General Settings Guide - Page 92
from the other fax machines which support Polling Reception. See "SEP Code", Facsimile Reference . • Line If the optional extra G3 interface unit is installed, you can select the line type per destination. • Fax header You can select to print a fax header on fax messages the other - Ricoh 3035 | General Settings Guide - Page 93
Code", Facsimile Reference . • Select Protocol 5 Select the protocol for the IP- Fax transmission. Registering a Fax Destination A Press the {User Tools/Counter} key. B Press [System Settings]. C Press [Administrator Tools], and then press [TNext]. D Press [Address Book - Ricoh 3035 | General Settings Guide - Page 94
Registering Addresses and Users for Facsimile/Scanner Functions Note ❒ If you press , you can search by the registered name, user code, fax number, folder name, e-mail address, or IP-Fax destination. ❒ To register the name, key display, and title, see p.74 "Registering Names". F Press [Fax Dest.]. - Ricoh 3035 | General Settings Guide - Page 95
on the fax message when it is received at the other end. Destination A Press the {User Tools/Counter} key. B Press [System Settings]. A Press [Change] under Label Insertion. B Select [On]. C Press [Change] under Line 2. C Press [Administrator Tools], and then press [TNext]. D Press [Address Book - Ricoh 3035 | General Settings Guide - Page 96
Registering Addresses and Users for Facsimile/Scanner Functions 5 84 To change the line A Press [Select Line]. To change the fax header A Press [Change] under Fax Header. B Select the new fax header, and then press [OK]. B Select the line. C Press [OK]. To change the SUB Code A Press [Adv. - Ricoh 3035 | General Settings Guide - Page 97
Press [System Settings]. C by the registered name, user code, fax number, folder name, Press [Administrator Tools], and then 5 e-mail address, or IP-Fax desti- press [TNext]. nation. ❒ To delete the name, key display, and title, see p.75 "Deleting a D Press [Address Book Management]. E Select - Ricoh 3035 | General Settings Guide - Page 98
B Press [System Settings]. B Press [Change] under TX SUB Code. C Press [Administrator Tools], and then press [TNext]. D C Enter a SUB Code using the number keys, and then press Press [Address Book Management]. [OK]. E Select the name whose IP-Fax D To enter a password, press destination you - Ricoh 3035 | General Settings Guide - Page 99
to check the settings in the fax function before deleting any destinations. ❒ To delete a name entirely, see p.75 "Deleting a Registered Name". A Press the {User Tools/Counter} key. B Press [System Settings]. C Press [Administrator Tools], and then press [TNext]. D Press [Address Book Management - Ricoh 3035 | General Settings Guide - Page 100
Protection Code". C Press [Administrator Tools], and then press [TNext]. Note ❒ You can select an e-mail address from an LDAP server, and then register it in the Address Book. "Sending Scan File by E-mail", Scanner Reference. ❒ You can set the machine to send a Transmission Result Report by email - Ricoh 3035 | General Settings Guide - Page 101
internet fax, specify whether or not to use " Send via SMTP Server". J Press [Exit]. Changing a Registered E-mail Destination A Press the {User Tools/Counter} key. B Press [System Settings]. C Press [Administrator Tools], and then press [TNext]. 5 D Press [Address Book Management]. E Select - Ricoh 3035 | General Settings Guide - Page 102
[Administrator Tools], and then press [TNext]. D Press [Address Book Management]. E Select the name whose e-mail ad- dress you want to delete. Press the name key, or enter the registered number using the number keys. Note ❒ If you press , you can search by the registered name, user code, fax number - Ricoh 3035 | General Settings Guide - Page 103
FTP, or NCP. If you change protocol after finishing your settings, all previous entries are cleared. Reference For details about network settings, see "Setting Up the Machine on a Network", Network Guide. For details about Scan to Folder, see "Sending Scan Files by Scan to Folder" Scanner Reference - Ricoh 3035 | General Settings Guide - Page 104
specified in Default User Name / Password (Send) of File Transfer settings applies. For details, see "Connecting and Setting Up", Network Guide. ❒ If User Authentication is speci- 5 fied, contact your administra- tor. H Press [Change] under Login User Name. I Enter the login user name, and - Ricoh 3035 | General Settings Guide - Page 105
access the folder. E Enter the user's password, and then press [OK]. The Browse Network display reappears. Changing a registered folder A Press the {User Tools/Counter} key. B Press [System Settings]. C Press [Administrator Tools], and then press [TNext]. D Press [Address Book Management]. E Select - Ricoh 3035 | General Settings Guide - Page 106
Registering Addresses and Users for Facsimile/Scanner Functions F Press [Folder]. G Select the items you want to change. To change the protocol A Press [FTP] or [NCP]. Note ❒ If the connection test fails, check the settings, and then try again. J Press [OK]. K Press [Exit]. L Press the {User Tools - Ricoh 3035 | General Settings Guide - Page 107
speci- fied in Default User Name / Password (Send) of File Trans- fer settings applies. For details, see "Connecting and Setting 5 Up", Network Guide. ❒ If User Authentication is specified, contact your administrator. H Press [Change] under Login User Name. I Enter the login user name, and - Ricoh 3035 | General Settings Guide - Page 108
[Administrator Tools], and then press [TNext]. D Press [Address Book Management]. E Select the name whose folder you want to change. Press the name key, or enter the registered number using the number keys Note ❒ If you press , you can search for a user by the registered name, user code, fax number - Ricoh 3035 | General Settings Guide - Page 109
Test] to check the path is set correctly. I Press [Exit]. Note ❒ To delete a name entirely, see p.75 "Deleting a Registered Name". A Press the {User Tools/Counter} key. B Press [System Settings]. C Press [Administrator Tools], and then press [TNext]. D Press [Address Book Management]. E Select - Ricoh 3035 | General Settings Guide - Page 110
you have specified in Default User Name / Password (Send) of File Transfer settings applies. For details, see "Connecting and Setting Up", Network Guide. ❒ If User Authentication is specified, contact your administrator. H Press [Change] under Login User Name. I Enter the login user name, and then - Ricoh 3035 | General Settings Guide - Page 111
manually or locate the folder by browsing the network. Reference p.99 "To locate the folder manually" p.99 "Using Browse Network to locate the folder" To locate the folder manually A Press [Change] under Path. B Enter the path where the folder is located. Registering Folders Note ❒ If you set - Ricoh 3035 | General Settings Guide - Page 112
S Press the {User Tools / Counter} key. Changing a registered folder A Press the{User Tools/Counter}key. B Press [System Settings]. C Press [Administrator Tools], and then press [TNext]. D Press [Address Book Management]. E Select the user of the registered folder you want to change. Press the name - Ricoh 3035 | General Settings Guide - Page 113
delete a name entirely, see p.75 "Deleting a Registered Name". A Press the{User Tools/Counter}key. B Press [System Settings]. C Press [Administrator Tools], and then press [TNext]. D Press [Address Book Management]. E Select a user of the folder you want to delete. Press the name key, or enter the - Ricoh 3035 | General Settings Guide - Page 114
the title key under Select Ti- Protection Code". tle, if necessary. Registering a New Group A Press the {User Tools/Counter} key. B Press [System Settings]. C Press [Administrator Tools], and then press [TNext]. D Press [Address Book: Program / Change / Delete Group]. E Press [New Program]. Note - Ricoh 3035 | General Settings Guide - Page 115
Names Registered 5 in Groups You can check the names or groups registered in each group. A Press the {User Tools/Counter} key. B Press [System Settings]. C Press [Administrator Tools], and then press [TNext]. D Press [Address Book: Program / Change / Delete Group]. E Select the group where - Ricoh 3035 | General Settings Guide - Page 116
. B Press [System Settings]. A Press the {User Tools/Counter} key. C Press [Administrator Tools], and then B Press [System Settings]. press [TNext]. C Press [Administrator Tools], and then press [TNext]. D Press [Address Book: Program / Change / Delete Group]. D Press [Address Book Management - Ricoh 3035 | General Settings Guide - Page 117
a Group to Another Group You can add a group to another group. A Press the {User Tools/Counter} key. B Press [System Settings]. C Press [Administrator Tools], and then press [TNext]. D Press [Address Book: Program / Change / Delete Group]. E Select the group that you want to put into another group - Ricoh 3035 | General Settings Guide - Page 118
Registering Addresses and Users for Facsimile/Scanner Functions G Select the group that you want to delete from. H Press [OK]. The group key is deselected and 5 the group is deleted from it. 106 - Ricoh 3035 | General Settings Guide - Page 119
, user code, fax number, folder name, e-mail address, or IP-Fax destination Code To a Single User 5 A Press the {User Tools/Counter} key. G Press [Destination] or [Sender] un- der Use Name as. B Press [System Settings]. C Press [Administrator Tools], and then press [TNext]. D Press [Address Book - Ricoh 3035 | General Settings Guide - Page 120
L Press the {User Tools/Counter} key. Press the {User Tools/Counter} key. 5 Registering a Protection Code To a Group User A Press the {User Tools/Counter} key. B Press [System Settings]. C Press [Administrator Tools], and then press [TNext]. D Press [Address Book: Program / Change / Delete Group - Ricoh 3035 | General Settings Guide - Page 121
a Transfer Station/Receiving Station A Press the {User Tools/Counter} key. 5 B Press [System Settings]. C Press [Administrator Tools], and then press [TNext]. D Press [Address Book: Program / Change / Delete Transfer Request]. E Press [New Program]. F Set the Transfer Request's infor- mation. To - Ricoh 3035 | General Settings Guide - Page 122
Registering Addresses and Users for Facsimile/Scanner Functions Reference p.161 "Entering Text" To select the list of items in the selected title. ❒ You can select [Freq.] and one more page for each title. G Press [Fax Dest.]. H Enter the items. See step G on p.81 "Registering a Fax Destination - Ricoh 3035 | General Settings Guide - Page 123
a Registered Transfer Station/Receiving Station A Press the {User Tools/Counter} key. B Press [System Settings]. C Press [Administrator Tools], and then press [TNext]. D Press [Address Book: Program / Change / Delete Transfer Request]. E Select the name whose Transfer Station/Receiving Station - Ricoh 3035 | General Settings Guide - Page 124
User Tools/Counter} key. B Press [System Settings]. C Press [Administrator Tools], and then press [TNext]. 5 D Press [Address Book: Program / Change ❒ If you press , you can search by the group name, fax number, e-mail address, or IP-Fax destination. ❒ To delete the name, key display, and title, - Ricoh 3035 | General Settings Guide - Page 125
in the Address Book, you can register a login user name and login password to be used when accessing an SMTP server. Reference To use an SMTP server, you need to program it beforehand. For details, see "SMTP Server Settings", Network Guide. Note ❒ To register a name in the Address Book, see p.74 - Ricoh 3035 | General Settings Guide - Page 126
for Facsimile/Scanner Functions M Press [OK]. Note ❒ To change the SMTP Authenti- cation settings, repeat steps H to M. LDAP Authentication For each user registered in the Address Book, you can register a login user name and login password to be used when accessing an LDAP server. Reference To - Ricoh 3035 | General Settings Guide - Page 127
M Press [OK]. Note ❒ To change the LDAP Authenti- cation settings, repeat steps H to M. Registering Authentication 5 115 - Ricoh 3035 | General Settings Guide - Page 128
Registering Addresses and Users for Facsimile/Scanner Functions 5 116 - Ricoh 3035 | General Settings Guide - Page 129
6. Troubleshooting If Your Machine Does Not Operate As You Want The following chart gives explanations of common problems and messages. If other messages appear, follow the instructions displayed. Note ❒ If you cannot make copies as you want because of paper type, paper size or paper capacity - Ricoh 3035 | General Settings Guide - Page 130
again. The user code entry display returns. When printing under the copier or printer function, press {Energy Saver} only after printing has finished. Authentication has failed. The entered login user Inquire the user administrator for name or login password is the correct login user name and - Ricoh 3035 | General Settings Guide - Page 131
print in duplex You cannot use paper in For duplex printing, select Tray 1-4 mode. the bypass tray for duplex in copier mode or with the printer printing. driver. [1 Sided Copy] is selected for Select [2 Sided Copy] for Paper Type: Paper Type: Tray 1-4. Tray 1-4. See p.60 "Paper Type: Tray - Ricoh 3035 | General Settings Guide - Page 132
Sample Print, Locked Print, Hold Print, or Stored Print. You want to check print quality before making Check print quality by printing out only the a large print run. first set using the {Sample Copy} key. "Original is being scanned by another function." appears. The copier or scanner function - Ricoh 3035 | General Settings Guide - Page 133
B Loading Paper B Loading Paper Reference For paper types and sizes, see p.174 "Copy Paper". Loading Paper into Paper Trays Note ❒ You can change the paper size, see p.136 "Changing the Paper Size". A Pull the paper tray out slowly un- til it stops. ❒ Make sure the paper stack is flush against - Ricoh 3035 | General Settings Guide - Page 134
Troubleshooting Note ❒ Make sure no paper sheet is in- volved in the paper feeding side of the LCT. Remove the sheet, if any. C Load paper into the tray along the edge on the left. ZDSO050J Note 6 ❒ The tray contains up to 1,500 sheets. Important ❒ Make sure the paper stack is flush against - Ricoh 3035 | General Settings Guide - Page 135
, depending on how the originals and paper are placed. Select [Yes] in Letterhead Setting under Copier/Document Server Features, and then place the original and paper as shown below (see Copy Reference). When printing with the printer function, placing orientation is the same. 6 GLTHD01E 123 - Ricoh 3035 | General Settings Guide - Page 136
off the operation switch. If you do, settings will be lost. ❒ Always add toner when the machine instructs you. ❒ Do not repeatedly install and remove toner bottles. This will result in toner leakage. ❒ Do not shake the removed toner bottle. Remaining toner might scatter. Note ❒ You can make about - Ricoh 3035 | General Settings Guide - Page 137
Removing Toner Removing Toner ZHWT060E ZHWT070E ZHWT080E • 1: Open the front cover of the machine. • 2: Raise the toner holder lever. • 3: Push the green lever, and then gently pull out the holder. • 4: Press the toner bottle back to raise its top, and then gently pull it out. 6 125 - Ricoh 3035 | General Settings Guide - Page 138
Troubleshooting Inserting Toner ZHWT010E ZHWT020E 6 ZHWT030E ZHWT040E ZHWT050E • 1: Hold the new bottle horizontally and shake it from side to side five or six times. Note ❒ Do not remove the black cap before shaking. • 2: Remove the black cap. Note ❒ Do not remove the inner cap. • 3: Put the toner - Ricoh 3035 | General Settings Guide - Page 139
x Clearing Misfeeds R CAUTION: • The fusing section of this machine might be very hot. Caution should be tak- en when removing misfed paper. Important ❒ When clearing misfeeds, do not turn off the operation switch. If you do, your copy settings will be lost. ❒ To prevent misfeeds, do not leave - Ricoh 3035 | General Settings Guide - Page 140
Troubleshooting 6 128 - Ricoh 3035 | General Settings Guide - Page 141
x Clearing Misfeeds 6 AHU013S 129 - Ricoh 3035 | General Settings Guide - Page 142
Troubleshooting 6 130 - Ricoh 3035 | General Settings Guide - Page 143
x Clearing Misfeeds 6 ZHVX020J 131 - Ricoh 3035 | General Settings Guide - Page 144
Troubleshooting 6 132 - Ricoh 3035 | General Settings Guide - Page 145
x Clearing Misfeeds 6 ZHVX030J 133 - Ricoh 3035 | General Settings Guide - Page 146
Troubleshooting 6 134 - Ricoh 3035 | General Settings Guide - Page 147
x Clearing Misfeeds 6 ZCAJ030E 135 - Ricoh 3035 | General Settings Guide - Page 148
to change the paper size set in the LCT, contact your service representative. Reference For details about paper sizes and types, see p.174 "Copy Paper". HWY010E D While pressing the release lever, adjust the side fences. 6 Changing the Paper Size of the Paper Tray A Make sure the paper tray is - Ricoh 3035 | General Settings Guide - Page 149
size selector to the p mark. B Press the {User Tools/Counter} key. C Press [System Settings]. D Press [Tray Paper Settings]. E Press [Tray Paper Size: ][Tray 1], [Tray Paper Size: ][Tray 2], [Tray Paper Size: ][Tray 3] or [Tray Paper Size: ][Tray 4]. F Select the required size, and then press [OK - Ricoh 3035 | General Settings Guide - Page 150
Troubleshooting Reference p.59 "Tray Paper Size: Tray 1-4" J Gently push the paper tray in un- til it stops. K Check the paper size shown on the display panel. 6 138 - Ricoh 3035 | General Settings Guide - Page 151
if you use a staple cartridge other than that recommended. Reference For details about the type of finisher, see p.21 "External Options". 1000-Sheet Finisher ZGJS801E ZGJS802E ZGJS803E ZGJS804E • 1: Open the front cover of the finisher, and then pull out the staple unit. 6 • 2: Hold the green - Ricoh 3035 | General Settings Guide - Page 152
Troubleshooting ZGJS805E ZGJS806E ZGJS807E 6 ZGJS808E 2 Tray Finisher ZCAJ031E 140 ZCAJ040E • 6: Align the arrows on the new refill with those on the cartridge, and then push in the refill until it clicks. • 7: Gently push down the upper unit into the cartridge. • 8: Pull out the ribbon. • 9: - Ricoh 3035 | General Settings Guide - Page 153
ZCAJ080E ZCAJ090E ZCAJ100E d Adding Staples • 3: Hold both sides of the cartridge. • 4: Pull up the upper unit of the cartridge. • 5: then push in the refill until it clicks. 6 • 7: Gently push down the upper unit into the cartridge. • 8: Pull out the ribbon. • 9: Hold the green lever while - Ricoh 3035 | General Settings Guide - Page 154
Troubleshooting Booklet Finisher 6 ZBQP020E ZBQP030E ZBQP040E ZBQP050E ZBQP060E • 1: Open the front cover of the finisher. • 2: Pull lever R6 down, and then pull out the cartridge while lifting the cartridge. • 3: Take out the empty refill in the arrow direction. • 4: Set the new refill. • 5: - Ricoh 3035 | General Settings Guide - Page 155
staples or removed jammed staples. If you do not do this, copies may not be stapled and misfeeds may occur. Reference p.58 "Prepare Stapling" A Press the {User Tools/Counter} key. B Press [System Settings]. C Press [Prepare Stapling ]on the menu of General Features 2/2. D Press [OK]. The machine - Ricoh 3035 | General Settings Guide - Page 156
Troubleshooting Removing Jammed Staples Note ❒ Curled paper may cause staples to jam. To avoid this, turn copy paper over in the tray. If there is no improvement, change to stiffer copy paper. ❒ When the booklet finisher is installed, after removing jammed staples, staples will not be ejected the - Ricoh 3035 | General Settings Guide - Page 157
ZGJS815E ZGJS864E 2 Tray Finisher ZCAJ031E ZCAJ040E ZCAJ110E ZCAJ120E Removing Jammed Staples • 5: Pull down the cartridge's face plate until it clicks. • 6: Hold the green lever while pushing in the cartridge until it clicks. • 7: Push back the staple unit, and then close the front cover of the - Ricoh 3035 | General Settings Guide - Page 158
the front cover of the finisher. • 1: Open the front cover of the finisher. • 2: Pull lever R6 down, and then pull out the cartridge while lifting the cartridge. • 3: Pull down the cartridge's knob. • 4: Take out all staples slid from the cartridge. • 5: Set the cartridge's knob back into place - Ricoh 3035 | General Settings Guide - Page 159
the cartridge. • 9: Bring the staple unit back into place, and then close the front bottom cover of the finisher. Reference Initialize the staple unit for the saddle stitch function after removing jammed staples. See p.143 "Using "Prepare Stapling "in User Tools to initialize the staple unit". 147 - Ricoh 3035 | General Settings Guide - Page 160
Troubleshooting y Removing Punch Waste Note ❒ While "Punch Receptacle Full" is displayed, you cannot use the Punch function. A Open the front cover of the 2 Tray finisher. Note ❒ If you do not, "Punch Recepta- cle Full" is still displayed. D Close the front cover of the 2 Tray finisher. "Punch - Ricoh 3035 | General Settings Guide - Page 161
This stamp cartridge is used for facsimile and scanner functions. ❒ Use the cartridge specified for this machine. ❒ Do not add ink to the cartridge the ADF unit. C Pull out the old stamp cartridge. ZDPH080J D Insert the new stamp cartridge. Insert the cartridge until the metal parts are no longer - Ricoh 3035 | General Settings Guide - Page 162
Troubleshooting 6 150 - Ricoh 3035 | General Settings Guide - Page 163
inside as a result of rapid temperature change. • Do not open the covers of the machine when it is in operation. If you do, misfeeds might occur. • Do not move the machine when the power is on. • If you operate the machine improperly or a machine failure occurs, settings might be lost. Be sure to - Ricoh 3035 | General Settings Guide - Page 164
thoroughly with soap and water. • If toner gets on your clothing, wash with cold water. Hot water will set the toner into the fabric and may make removing the stain impossible. Important ❒ Faults may occur if you use toner other than the recommended type. Reference To add toner, see p.124 "D Adding - Ricoh 3035 | General Settings Guide - Page 165
Toner Toner Storage When storing toner, the following precautions should always be followed: • Store toner containers in a cool, dry place free from direct sunlight. • Store on a flat surface. Used Toner Note ❒ Toner cannot be re-used. 7 153 - Ricoh 3035 | General Settings Guide - Page 166
changes can cause condensation to form inside the machine.) • Locations close to machines generating ammonia, such as a diazo copy machine. • Places where the machine you move the 7 continuous air turnover. machine. While moving the ma- • Temperature: Locations exposed to direct sunlight or other sources - Ricoh 3035 | General Settings Guide - Page 167
Where to Put Your Machine ❒ Do not carry the machine, by holding the scanner assembly. Keep the machine level and carry it carefully, taking care not to jolt or tip it. Rough handling may cause a malfunction or damage the hard disk or memory, resulting in loss of stored files. ❒ Do not take off the - Ricoh 3035 | General Settings Guide - Page 168
in this manual. Other parts should only be cleaned Clean 1 and 2. by your service representative. Changing the Photoconductor 7 Cleaning the Exposure Glass Unit (PCU) Only use the photoconductor unit made specifically for this machine. Follow the procedure below to change the unit. Clean 1 and - Ricoh 3035 | General Settings Guide - Page 169
Note ❒ If the copy quality is still not satisfactory after replacing the photoconductor unit, contact your service representative. Maintaining Your Machine 7 157 - Ricoh 3035 | General Settings Guide - Page 170
prints out. • Toner • Staple • Staple (Center) C Press [Exit]. D Press [Exit]. • TX Stamp Name ❖ Machine Maintenance/Repair • Telephone No. 7 • Serial No. of Machine ❖ Sales Representative Changing the Language You can change the language used on the display. English is set as default - Ricoh 3035 | General Settings Guide - Page 171
Counter Displaying the Total Counter You can display the total counter value used for all functions. A Press the {User Tools/Counter} key. B Press [Counter]. C To print a counter list, press [Print Counter List]. D Press the {Start} key. A counter list prints out. Counter 7 159 - Ricoh 3035 | General Settings Guide - Page 172
Remarks 7 160 - Ricoh 3035 | General Settings Guide - Page 173
8. Entering Text Entering Text This section describes how to enter characters. When you enter a character, it appears at the position of the cursor. If there is a character already at the cursor position, the entered character appears before that. Available Characters • Alphabetic characters - Ricoh 3035 | General Settings Guide - Page 174
Entering Text How to Enter Text Entering letters A Press [Shift] to switch between uppercase and lowercase. B Press the letters you want to enter. Deleting characters A Press [Backspace] or [Delete All] to delete characters. 8 162 - Ricoh 3035 | General Settings Guide - Page 175
9. Specifications Main unit ❖ Configuration: Desktop ❖ Photosensitivity type: OPC drum ❖ Original scanning: One-dimensional solid scanning system through CCD ❖ Copy process: Dry electrostatic transfer system ❖ Development: Dry two-component magnetic brush development system ❖ Fusing: Heating roll - Ricoh 3035 | General Settings Guide - Page 176
Specifications ❖ Copy paper size: • Trays: A3L - A5L, 11" × 17"L - 51/2" × 81/2"L • Bypass: A3L - A6L, 11" × 17"L - 51/2" × 81/2"L • Bypass (custom size): Vertical: 100 - 297 mm, 4 - 11.7 in Horizontal: 148 - 600 mm, 5.9 - 23.6 in • Duplex: A3L - A5L, 11" × 17"L - 51/2" × 81/2"L (except A5K, 51/2" - Ricoh 3035 | General Settings Guide - Page 177
From 25 to 400% in increments of 1%. ❖ Maximum continuous copy run: 999 sheets ❖ Paper capacity: • Tray 1, 2: 550 sheets (72 g/m2, 19 lb.) • Bypass tray: 50 sheets (72 g/m2, 19 lb.) ❖ Power consumption: • Main unit only Warm-up Stand-by During printing Maximum Type 1 1.37 kW 165 W 670 W 1.37 kW - Ricoh 3035 | General Settings Guide - Page 178
Specifications • Complete system *1 Warm-up Stand-by During printing Maximum Type 1 1.4 kW 200 W 755 W 1.4 kW Type 2 1.4 kW 210 W 900 W 1.4 kW *1 The complete system consists of the main unit, ADF, internal tray 2, paper tray unit, bridge unit, 2 tray finisher, LCT, fax unit and printer/scanner - Ricoh 3035 | General Settings Guide - Page 179
Options Options 1000-Sheet Finisher Finisher Upper Tray: ❖ Paper size: A3L, B4 JISL, A4KL, B5 JISKL, A5KL, B6 JISL, A6L, 12" × 18"L, 11" × 17"L, 81/2" × 14"L, 101/2" × 71/4"KL, 81/2" × 13"L, 81/2" × 11" - Ricoh 3035 | General Settings Guide - Page 180
Specifications ❖ Power consumption: Less than 50 W (power is supplied from the main unit) ❖ Dimensions (W × D × H): 520 × 520 × 790 mm, 20.5 × 20.5 × 31.1 in (including trays) ❖ Weight: Approx. 25 kg, 55.2 lb. 2 Tray Finisher Finisher Shift Tray KL) (80 g/m2, 20 lb.) Staple: • 1,500 sheets (A4K, 81 - Ricoh 3035 | General Settings Guide - Page 181
64 - 90 g/m2, 17 - 24 lb. ❖ Staple position: • 1 staple - 3 positions • 2 staples - 1 position ❖ Power consumption: Less than 50 W (power is supplied from the main unit) ❖ Dimensions (W × D × H): 520 × 520 × 790 mm, 20.5 × 20.5 × 31.1 in (including trays) ❖ Weight: Approx. 25 kg, 55.2 lb. Punch Kit - Ricoh 3035 | General Settings Guide - Page 182
Specifications Note ❒ Specifications are subject to change without notice. Booklet Finisher Finisher Upper Tray: ❖ Paper size: A3L, B4 JISL, A4KL, B5 JISKL, A5KL, B6 JISL, A6L, 11" × 17"L, 11" × 15"L, 81/2" × 14"L, 81/2" × 11"KL, 51/2" × 81/2"L ❖ Paper weight: - Ricoh 3035 | General Settings Guide - Page 183
: 25 sets 6-10 sheets: 15 sets 11-15 sheets: 10 sets • Folding: Center folding • Paper weight: Plain paper: 64 - 80 g/m2, 17 - 20 lb. Cover sheet (one sheet): 64 - 128 g/m2, 17 - 34 lb. • Position: 1 position ❖ Power consumption: Less than 55 W (power is supplied from the main unit) ❖ Dimensions - Ricoh 3035 | General Settings Guide - Page 184
: Less than 15 W (power is supplied from the main unit) ❖ Dimensions (W × D × H): 470 × 565 × 140 mm, 18.5 × 22.2 × 5.5 in ❖ Weight: Approx. 4 kg, 8.8 lb. Note ❒ Specifications are subject to change without notice. Large Capacity Tray ❖ Paper size: A4K, 81/2" × 11"K ❖ Paper weight: 60 - 105 - Ricoh 3035 | General Settings Guide - Page 185
power consumption: Less than 50 W (power is supplied from the main unit) ❖ Paper capacity: 550 sheets (72 g/m2, 19 lb.) × 2 trays ❖ Dimensions (W × D × H): 540 × 650 × 270 mm, 21.3 × 25.6 × 10.6 in ❖ Weight: Approx. 25 kg, 55.2 lb. Note ❒ Specifications are subject to change without notice. 9 173 - Ricoh 3035 | General Settings Guide - Page 186
Specifications Copy Paper Recommended Paper Sizes and Types The following limitations apply to each tray: Tray type Paper type and Metric version weight Inch version Paper capacity Tray 1, 2 Paper tray unit (optional) Tray 1, 2: 64-105 g/m2 (17-28 lb.) Paper tray unit: 60-105 g/m2 (16-28 lb.) - Ricoh 3035 | General Settings Guide - Page 187
) *5 *6 (16-28 lb.) A4K, 81/2" × 11"K 1500 sheets *1 See p.137 "To adjust the paper size to a size not indicated on the paper size selector" *2 When copying onto custom size paper, you need to specify vertical and horizontal dimensions. See "Copying from the Bypass Tray", Copy Reference. 175 - Ricoh 3035 | General Settings Guide - Page 188
. See "Copying from the Bypass Tray", Copy Reference. *5 When loading paper, make sure the top of the stack is not higher than the limit mark of the paper tray. *6 The paper guide is immovable. If you want to change the size of paper placed in this tray, contact your service representative - Ricoh 3035 | General Settings Guide - Page 189
printers • Thermal fax paper • Art paper • Aluminum foil • Carbon paper • Conductive paper • Colored OHP transparencies • Paper with perforated lines • Hemmed-edge paper ❒ Do not use paper designed for inkjet printers, as these may stick to the fusing unit and cause a misfeed. ❒ Do not use copy - Ricoh 3035 | General Settings Guide - Page 190
Specifications Paper Storage Note ❒ When storing paper, the following precautions should always be followed: • Do not store paper where it will be exposed to direct sunlight. • - Ricoh 3035 | General Settings Guide - Page 191
Tray finisher, 21, 168 A Adding a Group to Another Group, 105 Adding staples, 139 Adding toner, 124 Address Book change order, 67 edit title, 69 Program / Change / Delete Group, 67 program/change/delete transfer request, 67 select title, 69 Address book, 71 Address Book Management, 66 Administrator - Ricoh 3035 | General Settings Guide - Page 192
unit, 21 Paper type bypass tray, 59 LCT, 60 tray 1-4, 60 Power connection, 155 Prepare stapling, 58 Print Address Book, 68 counter, 65 counter per user, 65 Printer Bypass Paper Size, 61 Printing the Counter for each user code, 78 Print Priority, 56 Program / Change Administrator, 64 Program / Change - Ricoh 3035 | General Settings Guide - Page 193
booklet finisher, 170 bridge unit, 171 internal tray 2 (1 bin tray), 171 Large Capacity Tray (LCT), 172 main unit, 163 paper tray unit, 173 punch kit, 169 Staples adding, 139 removing jammed staples, 144 Start key, 24 System Reset, 32 T Toner, 152 adding, 124 storage, 153 To register an FTP folder - Ricoh 3035 | General Settings Guide - Page 194
MEMO 182 EN USA B198-6507 - Ricoh 3035 | General Settings Guide - Page 195
In accordance with IEC 60417, this machine uses the following symbols for the main power switch: a means POWER ON. c means STAND BY. Copyright © 2005 - Ricoh 3035 | General Settings Guide - Page 196
Type for 8035/DSm735/LD235/Aficio 3035 Type for 8045/DSm745/LD245/Aficio 3045 Printed in China EN USA B198-6507 B1986507 Operating Instructions General Settings Guide
-
 1
1 -
 2
2 -
 3
3 -
 4
4 -
 5
5 -
 6
6 -
 7
7 -
8
-
9
-
10
-
11
-
12
-
13
-
14
-
15
-
16
-
17
-
18
-
19
-
20
-
21
-
22
-
23
-
24
-
25
-
26
-
27
-
28
-
29
-
30
-
31
-
32
-
33
-
34
-
35
-
36
-
37
-
38
-
39
-
40
-
41
-
42
-
43
-
44
-
45
-
46
-
47
-
48
-
49
-
50
-
51
-
52
-
53
-
54
-
55
-
56
-
57
-
58
-
59
-
60
-
61
-
62
-
63
-
64
-
65
-
66
-
67
-
68
-
69
-
70
-
71
-
72
-
73
-
74
-
75
-
76
-
77
-
78
-
79
-
80
-
81
-
82
-
83
-
84
-
85
-
86
-
87
-
88
-
89
-
90
-
91
-
92
-
93
-
94
-
95
-
96
-
97
-
98
-
99
-
100
-
101
-
102
-
103
-
104
-
105
-
106
-
107
-
108
-
109
-
110
-
111
-
112
-
113
-
114
-
115
-
116
-
117
-
118
-
119
-
120
-
121
-
122
-
123
-
124
-
125
-
126
-
127
-
128
-
129
-
130
-
131
-
132
-
133
-
134
-
135
-
136
-
137
-
138
-
139
-
140
-
141
-
142
-
143
-
144
-
145
-
146
-
147
-
148
-
149
-
150
-
151
-
152
-
153
-
154
-
155
-
156
-
157
-
158
-
159
-
160
-
161
-
162
-
163
-
164
-
165
-
166
-
167
-
168
-
169
-
170
-
171
-
172
-
173
-
174
-
175
-
176
-
177
-
178
-
179
-
180
-
181
-
182
-
183
-
184
-
185
-
186
-
187
-
188
-
189
-
190
-
191
-
192
-
193
-
194
-
195
-
196
 |
 |

Operating Instructions
General Settings Guide
Read this manual carefully before you use this machine and keep it handy for future reference. For safe and correct use, be sure to read the
Safety Information in this manual before using the machine.
Getting Started
Combined Function Operations
Document Server
User Tools (System Settings)
Registering Addresses and Users for Facsimile/Scanner Functions
Troubleshooting
Remarks
Entering Text
Specifications
1
2
3
4
5
6
7
8
9