Ricoh Aficio MP 2000 Facsimile Reference
Ricoh Aficio MP 2000 Manual
 |
View all Ricoh Aficio MP 2000 manuals
Add to My Manuals
Save this manual to your list of manuals |
Ricoh Aficio MP 2000 manual content summary:
- Ricoh Aficio MP 2000 | Facsimile Reference - Page 1
FAX Option Type 2000 Operating Instructions Facsimile Reference 1 Transmission 2 Send Settings 3 Reception 4 Changing/Confirming Communication Information 5 Fax via Computer 6 Appendix Read this manual carefully before you use this machine and keep it handy for future reference. For safe and correct - Ricoh Aficio MP 2000 | Facsimile Reference - Page 2
Introduction This manual contains detailed instructions and notes on the operation and use of this machine. For your safety and benefit, read this manual carefully before using the machine. Keep this manual in a handy place for quick reference. Important Contents of this manual are subject to change - Ricoh Aficio MP 2000 | Facsimile Reference - Page 3
, and user codes. Also refer to this manual for explanations on how to connect the machine. ❖ Troubleshooting Provides a guide to solving common problems, and explains how to replace paper, toner, and other consumables. ❖ Security Reference This manual is for administrators of the machine. It - Ricoh Aficio MP 2000 | Facsimile Reference - Page 4
network environment, and use the software provided. This manual covers all models, and includes descriptions of functions and settings that might not be available on this machine. Images, illustrations, and information about operating systems that are supported might also differ slightly from those - Ricoh Aficio MP 2000 | Facsimile Reference - Page 5
for This Machine i NOTICE ...1 Important Safety Instructions 4 Caution ...4 How to Read This Manual 5 Symbols ...5 Names of Major Options 5 Names of Major Functions 5 Reading the Display 6 Reading the Display Panel and Using Keys 7 Function List ...9 1. Transmission Transmission Modes 13 - Ricoh Aficio MP 2000 | Facsimile Reference - Page 6
IP-Fax Destination 77 Search by LDAP Server 79 On Hook Dial ...83 Manual Dial ...85 Memory Storage Report 86 Canceling a Transmission 87 Before the Original Codes for Transmission 106 Setting a Password 108 Setting SEP Codes for Reception 109 Entering a Password 111 SEP Code RX Reserve Report - Ricoh Aficio MP 2000 | Facsimile Reference - Page 7
118 Substitute Reception 119 Receiving documents unconditionally 119 Receiving documents according to parameter-specified settings 120 Reception Modes 121 Manual Reception 121 Auto Reception...121 Switching the Reception Mode 122 Receiving Internet Fax Documents 123 Auto E-mail Reception 123 - Ricoh Aficio MP 2000 | Facsimile Reference - Page 8
Fax Documents from Computers 157 Before Use ...158 Using the Software 158 LAN-Fax Driver...159 Address Book ...159 LAN-Fax Cover Sheet Editor 160 Auto Run program 160 Installing Individual Applications 161 Setting LAN-Fax Driver Properties 162 Setting print properties 162 Making settings for - Ricoh Aficio MP 2000 | Facsimile Reference - Page 9
6. Appendix Programming Frequently Used Functions to User Function Keys 181 Optional Equipment 182 Handset ...182 Specifications...183 Specifications Required for the Internet Fax Destination Machines 185 Maximum Values 186 INDEX...187 vii - Ricoh Aficio MP 2000 | Facsimile Reference - Page 10
viii - Ricoh Aficio MP 2000 | Facsimile Reference - Page 11
be connected to a compatible modular jack that is also compliant. See installation instructions for detail. D The REN is used to determine the number of service. G If trouble is experienced with this equipment, for repair or warranty information, please contact RICOH CORP. CUSTOMER SUPPORT DEPT - Ricoh Aficio MP 2000 | Facsimile Reference - Page 12
to provide reasonable protection against harmful interference in a residential installation. This equipment generates, uses and can radiate radio frequency energy and, if not installed and used in accordance with the instructions, may cause harmful interference to radio communications. However - Ricoh Aficio MP 2000 | Facsimile Reference - Page 13
machines, to send any message unless such message clearly contains in a margin at the top or bottom chapter of the operating instructions to enter the business identification complies with Canadian ICES-003. ❖ Remarque concernant les utilisateurs au Canada ❖ Avertissement: Cet appareil numérique de - Ricoh Aficio MP 2000 | Facsimile Reference - Page 14
manual. Do not dis- pose of batteries in a fire. They may explode. Check with local codes for possible special disposal instructions. Save these instructions . • Utiliser seulement le cordon d'alimentation et le type de piles indiqués dans ce manual. Ne pas jeter les piles dans le feu: elles peuvent - Ricoh Aficio MP 2000 | Facsimile Reference - Page 15
explanations. Indicates supplementary explanations of the machine's functions, and instructions on resolving user errors. This symbol is located at Options Major options of this machine are referred to as follows in this manual: • Auto Document Feeder → ADF • Auto Document Feeder capable of scanning - Ricoh Aficio MP 2000 | Facsimile Reference - Page 16
return to the standby screen manually, do one of the following: • If Clear Modes} key. • If you are in User Tools mode, press the {User Tools/Counter} key. Reference "System Settings", General Settings Guide "Fax Features", General Settings Guide "Registering Addresses and Users for Facsimile/Scanner - Ricoh Aficio MP 2000 | Facsimile Reference - Page 17
standby display • When the instruction "Press [ ]" appears in this manual, press the left selection key. • When the instruction "Press [Tone]" appears in this manual, press the middle selection key. • When the instruction "Press [TX Mode]" appears in this manual, press the right selection key - Ricoh Aficio MP 2000 | Facsimile Reference - Page 18
destination. 5. Selectable items Note ❒ The display will differ depending on installed optional units. ❒ You can change Internet Fax setting under E-mail the Address Book" "Fax Features", General Settings Guide "Registering Addresses and Users for Facsimile/Scanner Functions", General Settings - Ricoh Aficio MP 2000 | Facsimile Reference - Page 19
. Click the {User Tools/Counter} key to display the Fax Features menu. For details about the settings, see "Fax Features", General Settings Guide. ❖ General Settings/Adjust Function name Adjust Sound Volume Program Fax Information On Hook Release Time Set User Function Key Description Adjust the - Ricoh Aficio MP 2000 | Facsimile Reference - Page 20
user name. Register, change, or delete the gateway used for transmission to IP-Fax. Register to use the gateway without using the gatekeeper/SIP server. 10 - Ricoh Aficio MP 2000 | Facsimile Reference - Page 21
G3 Analog Line before you connect the machine to a standard G3 analog line. If your machine has a problem, a service representative can perform various diagnostic tasks over the telephone line from the service station to try to find out what is wrong with your machine. Using Menu Protect, you can - Ricoh Aficio MP 2000 | Facsimile Reference - Page 22
12 - Ricoh Aficio MP 2000 | Facsimile Reference - Page 23
to check the destination you are sending to. When using this type of transmission, the original is not stored in memory. You can only specify one address. 13 - Ricoh Aficio MP 2000 | Facsimile Reference - Page 24
. Important ❒ To select IP-Fax destinations or Internet Fax destinations, the optional printer/scanner unit must be installed. The display differs depending on whether or not the optional printer/scanner unit is installed. ❖ When sending over a fax line Press [ ] to display in the destination - Ricoh Aficio MP 2000 | Facsimile Reference - Page 25
Functions" p.28 "Internet Fax Functions" "Fax Features", General Settings Guide Memory Transmission Memory transmission mode has standard fax, Internet Fax and IP does not delete stored documents. See "Troubleshooting When Using the Facsimile Function", Troubleshooting. ❒ If memory is full (0% - Ricoh Aficio MP 2000 | Facsimile Reference - Page 26
key, specify a destination. To specify a destination using a Quick Dial key, see "Using the Quick Dial Keys". If you make a mistake, press the {Clear/Stop} key, and then enter the correct number. E When sending the same original to several destinations (broadcasting), press [Add Dest] to specify the - Ricoh Aficio MP 2000 | Facsimile Reference - Page 27
a destination using the Quick Dial key" p.59 "Specifying a group of destinations using the Quick Dial key" p.62 "Redial" p.186 "Maximum Values" "Fax Features", General Settings Guide "Troubleshooting When Using the Facsimile Function - Ricoh Aficio MP 2000 | Facsimile Reference - Page 28
Transmission Sending multiple originals using the exposure glass (Memory Transmission) Follow these steps to send multiple originals using the exposure glass. 1 A Make sure that Memory Trans. indicator lights. B Place the first page of the original face down on the exposure glass. C Specify a - Ricoh Aficio MP 2000 | Facsimile Reference - Page 29
is not enough free memory left. ❒ If you use this function, the Memory Storage Report will not be printed. ❒ If the {Clear/Stop} key is of originals is not automatically printed. Reference "Fax Features", General Settings Guide Automatic Redial If a fax document could not be sent because the line - Ricoh Aficio MP 2000 | Facsimile Reference - Page 30
(switch 17, bit 2) in the Fax Features menu. Reference p.139 "Printing a List of Files in Memory (Print TX Standby File List)" "Fax Features", General Settings Guide 20 - Ricoh Aficio MP 2000 | Facsimile Reference - Page 31
an original If you run out of memory while storing an original (free space reaches 0%), the "Memory is full. Scanning will be stopped and this case, contact your service representative. ECM (Error Correction Mode) If part of a transmission fails because of a line problem, the lost data is - Ricoh Aficio MP 2000 | Facsimile Reference - Page 32
Dial key, specify a destination. To specify a destination using a Quick Dial key, see "Using the Quick Dial Keys". If you make a mistake, press the {Clear/Stop} key, and then enter the correct number. E Press the {Start} key. The machine dials a destination. Note ❒ Documents are not stored in memory - Ricoh Aficio MP 2000 | Facsimile Reference - Page 33
glass. C Specify a destination. D Make the scan settings you require. E Press the {Start} key. F Place the next original on the exposure glass within 10 seconds after the ma- chine has finished scanning the first original. G Repeat steps D to F for all originals. H Place the last original, and - Ricoh Aficio MP 2000 | Facsimile Reference - Page 34
Transmission IP-Fax Functions The IP-Fax function sends or receives documents between two facsimiles direct- 1 ly via a TCP/IP network. This function has the following advantages and is suitable for communication within the same LAN: • Reducing communication costs • Communicating between IP- - Ricoh Aficio MP 2000 | Facsimile Reference - Page 35
-Fax Functions 1 ALT001S Important ❒ To use IP-Fax functions, the optional printer/scanner unit must be installed. ❒ To use IP-Fax functions, this machine must be connected to a this machine cannot be used with IPv6. Note ❒ IP-Fax supported by this machine is ITU-T Recommendation T.38 compliant. 25 - Ricoh Aficio MP 2000 | Facsimile Reference - Page 36
Guide "Fax Features", General Settings Guide Terminology The following are words you should know when using IP-Fax: ❖ H.323 A multimedia communication protocol that sends or receives files via one creating, modifying, and terminating sessions with one or more participants. ❖ Gatekeeper (VoIP - Ricoh Aficio MP 2000 | Facsimile Reference - Page 37
the Facsimile Function", Troubleshooting. Reference "Troubleshooting When Using the Facsimile Function", Troubleshooting Functions Not Available for IP-Fax Transmission You can use the following functions with standard fax transmission, but not IPFax transmission: • On hook dial • Manual dial 27 - Ricoh Aficio MP 2000 | Facsimile Reference - Page 38
e-mail address. You can also print or forward received e-mail messages. ALT002S Important ❒ To use Internet Fax functions, the optional printer/scanner unit must be installed. ❒ To use Internet Fax functions, this machine must be connected to a LAN and set up correctly under Internet Fax Settings - Ricoh Aficio MP 2000 | Facsimile Reference - Page 39
Internet Fax Functions Note ❒ The Internet Fax function supported by this machine is compliant with ITUT Recommendation T.37 Checking the Transmission Result (TX File Status)" "Connecting the Machine", General Settings Guide "System Settings", General Settings Guide "Fax Features", General Settings - Ricoh Aficio MP 2000 | Facsimile Reference - Page 40
telephone network for confidential communications. • Voice communication is not supported over a LAN. • Internet Fax delivery might be delayed Operation switch does not delete stored documents. See "Troubleshooting When Using the Facsimile Function", Troubleshooting. • You may not be able to send - Ricoh Aficio MP 2000 | Facsimile Reference - Page 41
Faxing. 1 • Immediate Transmission • Transmission by SUB Code • On Hook Dial • Manual Dial • JBIG Transmission • ECM (Error Correction Mode) Functions Not Available for E-mail Reception The following functions are supported with standard fax reception, but not with Internet Faxing. • Memory - Ricoh Aficio MP 2000 | Facsimile Reference - Page 42
's reception capability, you can set it manually. ❖ Requesting a Reception Notice When the receiver's machine supports T.37 full mode and is programmed as may have a different reception capability, transmission is done one by one in the specified transmission order. Reference p.99 "Requesting - Ricoh Aficio MP 2000 | Facsimile Reference - Page 43
Placing Originals Placing Originals Place the original either on the exposure glass or in the optional ADF or ARDF. For details about how to place originals, see the following: 1 • Placing originals on the exposure glass "Placing Originals on the Exposure Glass", Copy Reference • Placing - Ricoh Aficio MP 2000 | Facsimile Reference - Page 44
longer than 800 mm (32") must be sent by memory transmission (immediate transmission may not be possible). ❒ If an original jams, press the {Clear/Stop} key, and then carefully remove the original. ❒ Make sure that all ink, correcting fluid etc., has completely dried before placing your original - Ricoh Aficio MP 2000 | Facsimile Reference - Page 45
42 "Detecting Blank Sheet" "System Settings", General Settings Guide "Placing Originals", Copy Reference Acceptable Original Sizes Where original to A3 (297 × 420 mm), 1 ---- 11" × 17" (279 × 432 mm) ADF or ARDF, one-sided document A5 to A3 L (up to 1200 mm long) 81/2" × 51/2" to 11" × 17"L - Ricoh Aficio MP 2000 | Facsimile Reference - Page 46
Transmission Paper Size and Scanned Area Important 1 ❒ If you place an original larger than A3, 11"×17" on the exposure glass, only an A3, 11"×17" area is scanned. ❖ Exposure Glass ❖ ADF or ARDF ALT010S ❖ Maximum scan area The following shows the maximum scan area: • Memory Transmission: 297 - Ricoh Aficio MP 2000 | Facsimile Reference - Page 47
place an original in the ADF or ARDF, an original wider than about 264 mm (10.4") is scanned as A3, 11"×17" size. An original narrower than about 230 mm 81/2"×11" or 81/2"×14" size, and an original narrower than about 264 mm (10.4") is scanned as B4 JIS. Originals up to 1200 mm (47.2") in length can - Ricoh Aficio MP 2000 | Facsimile Reference - Page 48
Transmission If the Machine Cannot Detect the Size of Your Original If the machine cannot detect the original size, the "Cannot detect original 1 size. Place original again, then press Start key." message appears. If this happens, do the following: A Press [Exit]. The previous display returns. - Ricoh Aficio MP 2000 | Facsimile Reference - Page 49
contain areas of solid print • originals that have solid print around their edges • originals with glossy surfaces • bound originals of more than 10 mm (0.3") in thickness, such as books. The following paper sizes are automatically detected in facsimile mode. ❖ Metric Version Size Location of - Ricoh Aficio MP 2000 | Facsimile Reference - Page 50
ADF or ARDF. ❒ This function must be registered to a User Function key in advance. It is reg- istered to the User Function key {F3} by default. A Place the original, and then select the scan settings you require. B Press the User Function key {F3} to light the indicator. ARX024S 40 To cancel - Ricoh Aficio MP 2000 | Facsimile Reference - Page 51
even if stamping is performed. ❒ You cannot turn the Stamp function on or off while an original is being scanned. Reference "Fax Features", General Settings Guide "Adding Paper and Replacing Toner", Troubleshooting 41 - Ricoh Aficio MP 2000 | Facsimile Reference - Page 52
pages. This function notifies you if an original is placed wrong side down on the scanner. When this happens, a message appears for a few seconds. The message differs cancel scanning if a blank sheet is detected, press the {Clear/Stop} key. Reference "Fax Features", General Settings Guide 42 - Ricoh Aficio MP 2000 | Facsimile Reference - Page 53
the document with the 1 best possible image quality. ❖ Original Type: Text, Photo ❖ Resolution: Standard, Detail, Fine ❖ Image Density (Contrast): Manual Image Density (five levels) Original Type To optimize image clarity, select the appropriate original type. The following settings for - Ricoh Aficio MP 2000 | Facsimile Reference - Page 54
Transmission Reference p.45 "Image Density (Contrast)" 1 JBIG Transmission If you use JBIG (Joint Bi-level Image experts Group) compression, you can send originals scanned using Photo faster than with other compression methods. Important ❒ This function is not available with the Internet Fax - Ricoh Aficio MP 2000 | Facsimile Reference - Page 55
check the resolution at which you actually sent by printing the Journal. 1 ❒ The machine supports reception at both Standard and Detail resolution. ❒ When using Internet Fax transmission, documents are the density from five density level. ARX027S Each key press moves the indicator one place. 45 - Ricoh Aficio MP 2000 | Facsimile Reference - Page 56
the next page that you checked on the exposure glass. C Select the image density, resolution, and original type. You have about 60 seconds (10 seconds for Immediate Transmission) to select density, resolution, and original type. The time remaining is shown on the display. Adjust the settings for - Ricoh Aficio MP 2000 | Facsimile Reference - Page 57
be specified. 1 Note ❒ The display shows the percentage of free memory space for storing originals. Since fax numbers, IP-Fax destinations Dial key, see "Using the Quick Dial Keys". If you make a mistake, press the {Clear/Stop} key, and then enter again. C Press the {Start} key. The machine starts - Ricoh Aficio MP 2000 | Facsimile Reference - Page 58
list. Entering a tone This function allows a machine connected to a pulse dialing line to send tonal signals (for example if you want to use a special service on a tone dialing line). When you press [Tone], the machine dials the number using tonal signals. This section explains how to use the tone - Ricoh Aficio MP 2000 | Facsimile Reference - Page 59
want to cancel a transmission, press the {Clear/Stop} key, and then remove the originals. After transmission, the standby display appears. Note ❒ Certain services may be unavailable even when using the Tone Important ❒ To use IP-Fax functions, the optional printer/scanner unit must be installed. 49 - Ricoh Aficio MP 2000 | Facsimile Reference - Page 60
server, select . When using a SIP server, select . 1 B Press [Manual]. To specify a destination using a Quick Dial key, see "Using the Quick then press the {OK} key. If you enter an incorrect character, press the {Clear/Stop} key. Then, re-enter the characters correctly. To change the IP-Fax - Ricoh Aficio MP 2000 | Facsimile Reference - Page 61
indicator lights and transmission starts. Note ❒ Depending on security settings, [Manual] may not appear, and you may be unable to enter the IP with this machine, contact your local reseller or service representative. ❒ Methods of entering a destination vary Features", General Settings Guide 51 - Ricoh Aficio MP 2000 | Facsimile Reference - Page 62
not using a gatekeeper/SIP server • From IP-Fax to IP-Fax Specify the IPv4 address or host name of the receiving machine. Example: 192.168.1.10 (IPv4 address) Example: IPFAX1 (host name) • From IP-Fax to G3 fax Specify the G3 fax telephone number of the receiving machine. Example: 0312345678 ❖ When - Ricoh Aficio MP 2000 | Facsimile Reference - Page 63
receiver's IPv4 address is "192.168.1.10" and the port number is "2100", specify "192.168.1.10:2100". Ask the network administrator for Important ❒ To use Internet Fax functions, the optional printer/scanner unit must be installed. ❒ In the destination list, register senders, specify their - Ricoh Aficio MP 2000 | Facsimile Reference - Page 64
Transmission B Press [Manual]. 1 To specify a destination using a Quick Dial key, see "Using the Quick Dial Keys". C Enter the e-mail address destination and then press the {OK} key. If you enter an incorrect character, press the {Clear/Stop} key. Then, re-enter the characters correctly. To change - Ricoh Aficio MP 2000 | Facsimile Reference - Page 65
lights and transmission starts. Note 1 ❒ Depending on security settings, [Manual] may not appear, and you may be unable to enter the System Settings", General Settings Guide "Fax Features", General Settings Guide "Registering Addresses and Users for Facsimile/Scanner Functions", General Settings - Ricoh Aficio MP 2000 | Facsimile Reference - Page 66
function, the following settings must be made. For details about these settings, see "System Settings", General Settings Guide and "Using a Host Name Instead of an IPv4 Address", Network Guide. • In "System Settings", "SMTP" in "E-mail Communication Port", set the port number to "25". • To specify - Ricoh Aficio MP 2000 | Facsimile Reference - Page 67
is "192.168.1.10"; abc@[192.168.1.10] 1 Follow these computer, use the LAN-Fax Driver to specify whether or not Guide "Fax Features", General Settings Guide "Registering Addresses and Users for Facsimile/Scanner Functions", General Settings Guide "Special Operations under Windows", Network Guide - Ricoh Aficio MP 2000 | Facsimile Reference - Page 68
01 through 16, flip up to access keys 17 through 32. The destination's name is shown on the display. If you make a mistake, press the {Clear/Stop} key and try again. To select more destinations, repeat steps A and B. C Press the {Start} key. 58 - Ricoh Aficio MP 2000 | Facsimile Reference - Page 69
Guide "Registering Addresses and Users for Facsimile/Scanner Functions", General Settings Guide the maximum number of destinations you can specify for one file. For details, see "Maximum Values". A Press make a mistake, press the {Clear/Stop} key and try again. To select more groups, repeat steps A and B. - Ricoh Aficio MP 2000 | Facsimile Reference - Page 70
using {U} or {T}, and then press the {Clear/Stop} key. Reference p.61 "Checking the Specified Destination" p.186 "Maximum Values" "System Settings", General Settings Guide "Fax Features", General Settings Guide "Registering Addresses and Users for Facsimile/Scanner Functions", General Settings - Ricoh Aficio MP 2000 | Facsimile Reference - Page 71
. A Make sure the destination name appears on the display. B Press the {Check Destination} key. ARX032S C If you specified more than one destination, display them one by one using {U} or {T}. D Press the {OK} key when confirmation is complete. The display returns to that of step A. Note ❒ If you - Ricoh Aficio MP 2000 | Facsimile Reference - Page 72
telephone • Destinations dialed by Redial (regarded as already stored in memory) • Second and later destinations broadcasted to • Destinations specified in the LAN-Fax Driver on the computer ❒ To redial a fax number, do not dial any numbers before you press the {Pause/Redial} key. If you press the - Ricoh Aficio MP 2000 | Facsimile Reference - Page 73
Specifying a Destination Note ❒ You can specify Internet Fax and IP-Fax destinations using the Redial function. Select this function before pressing [Manual]. ❒ When you press [Program], you can register a selected recipient in the destination list. 1 ❒ For the maximum number of redials the - Ricoh Aficio MP 2000 | Facsimile Reference - Page 74
Transmission Programming Destinations in the Address Book 1 You can program fax numbers, e-mail addresses, IP-Fax destinations, and folder destinations using Address Book Management in Administrator Tools in the System Settings menu. A Press the {User Tools/Counter} key. ARX033S B Select [ - Ricoh Aficio MP 2000 | Facsimile Reference - Page 75
procedure to follow, see "Registering Addresses and Users for Facsimile/Scanner Functions", General Settings Guide. Note ❒ You can also register programmed fax numbers, for Admin. For details about installation, see "Monitoring and Configuring the Printer", Network Guide, or, for information about - Ricoh Aficio MP 2000 | Facsimile Reference - Page 76
register to the Ad- dress Book. B Press [Program]. For details about registering destinations, see "Registering Addresses and Users for Facsimile/Scanner Functions", General Settings Guide. C Make the settings, and then press the {OK} key. The screen returns to that of step A. Note ❒ Depending on - Ricoh Aficio MP 2000 | Facsimile Reference - Page 77
at a time. Press [Exit] and change the destination name to view fewer destinations. Reference p.186 "Maximum Values" "System Settings", General Settings Guide Search by Name Follow these steps to search for a destination registered in the Address Book by name. Important ❒ If [LDAP Search] is - Ricoh Aficio MP 2000 | Facsimile Reference - Page 78
characters to enter, press the {Shift} key to switch the mode. If you enter the wrong destination name, before pressing the {OK} key, press the {Clear/Stop} key, and then enter the destination name again. F Confirm the characters you entered, and then press the {OK} key. When the search is finished - Ricoh Aficio MP 2000 | Facsimile Reference - Page 79
Searching for a Destination in the Address Book G Select a destination using {U} or {T}, and then press {V} to specify it (put a tick against it). 1 Multiple destinations can be selected. Press {W} to deselect a destination. H Press the {OK} key. Note ❒ If no destination matches the specified text, - Ricoh Aficio MP 2000 | Facsimile Reference - Page 80
Transmission B Press the {Search Destination} key. 1 ARX034S C Select [Search Address Book] using {U} or {T}, and then press the {OK} key. D Select [Display List] using {U} or {T}, and then press the {OK} key. Destinations appear in registration number order. E Select a destination using {U} or {T}, - Ricoh Aficio MP 2000 | Facsimile Reference - Page 81
Searching for a Destination in the Address Book Search by Registration Number Follow these steps to search for a destination by specifying a registration number stored in the destination list. 1 Important ❒ If [LDAP Search] is set to [Off] in Administrator Tools, in the System Settings menu, - Ricoh Aficio MP 2000 | Facsimile Reference - Page 82
using the number keys, and then press the {OK} key. 1 If you enter the wrong registration number, before pressing the {OK} key, press the {Clear/Stop} key, and then enter the registration number again. When the search is finished, the results appear. F Press {V} to select a destination, and press - Ricoh Aficio MP 2000 | Facsimile Reference - Page 83
Searching for a Destination in the Address Book Search by Fax Number Follow these steps to search for a destination registered in the Address Book by fax number. 1 Important ❒ If [LDAP Search] is set to [Off] in Administrator Tools, in the System Settings menu, the display for selecting either - Ricoh Aficio MP 2000 | Facsimile Reference - Page 84
number you want to search for, and then press the {OK} key. 1 If you enter the wrong number, before pressing the {OK} key, press the {Clear/Stop} key, and then enter the number again. F Confirm the numbers you entered, and then press the {OK} key. When the search is finished, the - Ricoh Aficio MP 2000 | Facsimile Reference - Page 85
Searching for a Destination in the Address Book Search by E-mail Address Follow these steps to search for a destination registered in the destination list by e-mail address. 1 Important ❒ If [LDAP Search] is set to [Off] in Administrator Tools, in the System Settings menu, the display for - Ricoh Aficio MP 2000 | Facsimile Reference - Page 86
you want to search for, and then press the {OK} key. 1 If you enter the wrong e-mail address, before pressing the {OK} key, press the {Clear/Stop} key, and then enter the e-mail address again. F Confirm the e-mail address you entered, and then press the {OK} key. When the search is - Ricoh Aficio MP 2000 | Facsimile Reference - Page 87
Searching for a Destination in the Address Book Search by IP-Fax Destination Follow these steps to search for a destination registered in the Address Book by IP-Fax destination. 1 Important ❒ If [LDAP Search] is set to [Off] in Administrator Tools, in the System Settings menu, the display for - Ricoh Aficio MP 2000 | Facsimile Reference - Page 88
destination you want to search for, and then press the {OK} key. If you enter the wrong destination, before pressing the {OK} key, press the {Clear/Stop} key, and then enter the destination again. G Confirm the IP-Fax destination you entered, and then press the {OK} key. When the search is - Ricoh Aficio MP 2000 | Facsimile Reference - Page 89
Select [Search LDAP] using {U} or {T}, and then press the {OK} key. C Select [Select Server] using {U} or {T}, and then press the {OK} key. D If more than one server is programmed, select the server you want to search using {U} or {T}, and then press the {OK} key. The screen returns to that of step - Ricoh Aficio MP 2000 | Facsimile Reference - Page 90
Transmission E Select [Advanced Search] using {U} or {T}, and then press the {OK} key. 1 F Select a search condition using {U} or {T}, and then press the {OK} key. Conditions (Name, E-mail Address, Fax Destination, Company Name, and Department Name) are those programmed in the LDAP server. G Enter a - Ricoh Aficio MP 2000 | Facsimile Reference - Page 91
match the specified character. Example: When searching for "ABC", enter "ABC". • [Fuzzy Search]: Perform a fuzzy search (according to the searching method supported by the LDAP server). I Press the {Escape} key. The screen returns to that of step E. J Press [Search]. When the search is finished - Ricoh Aficio MP 2000 | Facsimile Reference - Page 92
by the search. The address retrieved by the search depends on the searching method supported by the LDAP server. Howev- 1 er, the address programmed first is normally retrieved. ❒ You can add one additional search condition for LDAP servers by specifying the Search Options under Prog/Chnge/Del - Ricoh Aficio MP 2000 | Facsimile Reference - Page 93
Quick Dial key, see "Using the Quick Dial Keys". The machine immediately dials the destination. If you make a mistake, press the {On Hook Dial} or {Clear Modes} key, and then try again. D When the line is connected and you hear a high-pitched tone, press the {Start} key. The transmission starts. If - Ricoh Aficio MP 2000 | Facsimile Reference - Page 94
you want to send a fax document (ask them to switch to facsimile mode). ❒ For details about On Hook Release Time, see "Fax Features", General Settings Guide. Reference p.58 "Using the Quick Dial Keys" "Fax Features", General Settings - Ricoh Aficio MP 2000 | Facsimile Reference - Page 95
Manual Dial Manual Dial Pick up the optional handset or the handset of the mode). The transmission starts. E Replace the handset. If you want to cancel a transmission, press the {Clear/Stop} key, and then remove the originals. After transmission, the standby display appears. Note ❒ When the - Ricoh Aficio MP 2000 | Facsimile Reference - Page 96
. ❒ You can select whether to display a sender name with the User Parameters (switch 04, bit 5) in the Fax Features menu. Reference "Fax Features", General Settings Guide 86 - Ricoh Aficio MP 2000 | Facsimile Reference - Page 97
an Internet Fax is being sent. Before the Original Is Scanned Use this procedure to cancel a transmission before pressing the {Start} key. A Press the {Clear Modes} key. ARX035S Note ❒ When originals are placed into the ADF or ARDF, you can cancel transmis- sion simply by removing them. While the - Ricoh Aficio MP 2000 | Facsimile Reference - Page 98
Follow these steps to cancel a transmission while the Communicating indicator 1 is lit. A Press the {Clear/Stop} key. ARX036S B Select the file you want to cancel using {U} or {T}, and then will not be canceled. ❒ If multiple destinations were specified, only one destination number appears. 88 - Ricoh Aficio MP 2000 | Facsimile Reference - Page 99
Canceling a Transmission Before the Transmission Is Started Use this procedure to cancel a transmission after the original is scanned. This function is useful to cancel a transmission when you notice a mistake in des- 1 tination or with the originals after storing. To cancel Memory Transmission - Ricoh Aficio MP 2000 | Facsimile Reference - Page 100
destinations were specified, only the number of the destinations that have not received the document you sent is shown. ❒ If multiple destinations were specified, only one destination number appears. 90 - Ricoh Aficio MP 2000 | Facsimile Reference - Page 101
Sending at a Specific Time (Send Later) Using this function, you can instruct the machine to delay transmission of your fax document until a specified later time lost documents. For details, see "Troubleshooting When Using the Facsimile Function", Troubleshooting. ❒ This function is unavailable with - Ricoh Aficio MP 2000 | Facsimile Reference - Page 102
Then press the {OK} key. When entering numbers smaller than 10, add a zero at the beginning. If you make a mistake, press the {Clear/Stop} key before pressing the {OK} key, and then try a Transmission" "System Settings", General Settings Guide "Troubleshooting When Using the Facsimile Function - Ricoh Aficio MP 2000 | Facsimile Reference - Page 103
name) appears on the receiver's sheet, lists, and report. 2 Important ❒ To receive transmission results by e-mail, the optional printer/scanner unit must be installed. ❒ In the destination list, register senders, specify their e-mail addresses, and register as [Sender Only] or [Dest. & Sender - Ricoh Aficio MP 2000 | Facsimile Reference - Page 104
Send Settings E Confirm the selected sender, and then press the {OK} key. 2 F To print the sender's name on the receiver's sheet, select [Stamp] using {U} or {T}, and then press the {OK} key. If you enable this function, the sender's name (user name) appears on the receiver's sheet, lists, and - Ricoh Aficio MP 2000 | Facsimile Reference - Page 105
use both of these together in User Parameters (switch 10, bit 6) in the Fax Features menu. ❒ You can program one of the User Function keys with operations for Sender General Settings Guide "Fax Features", General Settings Guide "Registering Addresses and Users for Facsimile/Scanner Functions", - Ricoh Aficio MP 2000 | Facsimile Reference - Page 106
. If you want to use PIN Code Transmission, ask the PABX administrator the PABX you are connected to supports the PIN Code function, and if it does, contact your service representative for information about setting up. Important ❒ Program the PIN Code TX function to a User Function key beforehand - Ricoh Aficio MP 2000 | Facsimile Reference - Page 107
} key. Sender Settings The standby display appears. 2 If you make a mistake, press the {Clear/Stop} key before pressing the {OK} key, and then try again. E Press the {Start fax. For details, contact your service representative. Reference p.186 "Maximum Values" "Fax Features", General Settings - Ricoh Aficio MP 2000 | Facsimile Reference - Page 108
This section explains the settings required for using the Internet Fax function. Important ❒ To use Internet Fax functions, the optional printer/scanner unit must be installed. 2 Entering the Subject Allows you to enter a subject for the e-mail document you want to send. Important ❒ To use Internet - Ricoh Aficio MP 2000 | Facsimile Reference - Page 109
of the Journal, allowing the originator to verify the transmission was received. Important ❒ The Reception Notice feature is only available if the receiver supports MDN (Message Disposition Notification). A Place the original, and then select the scan settings you require. B Press [TX Mode]. 99 - Ricoh Aficio MP 2000 | Facsimile Reference - Page 110
Send Settings C Select [E-mail Options] using {U} or {T}, and then press the {OK} key. 2 D Select [Return Receipt] using {U} or {T}, and then press the {OK} key. E Select [On] or [Off] using {U} or {T}, and then press the {OK} key. The screen returns to that of step D. F Press the {Escape} key - Ricoh Aficio MP 2000 | Facsimile Reference - Page 111
are sent to the destinations in the order in which they were specified. Reference p.150 "Printing the Journal" p.93 "Sender Settings" "Fax Features", General Settings Guide 101 - Ricoh Aficio MP 2000 | Facsimile Reference - Page 112
Send Settings Fax Header Print When the Fax Header is set to "On", the stored name is printed on the receiver's paper. Important ❒ In the USA, the Fax Header must contain the telephone number of the line 2 your machine is connected to. It will be printed on the header of every page you send. - Ricoh Aficio MP 2000 | Facsimile Reference - Page 113
Parameters (switch 18, bit 3, 2, 1, 0) in the Fax Features menu. ❒ You can program one of the User Function keys with operations for this function. Using the User Function key allows you to omit Features menu. See "Fax Features", General Settings Guide. Reference "Fax Features", General Settings - Ricoh Aficio MP 2000 | Facsimile Reference - Page 114
Send Settings Label Insertion With this function you can have the receiver's name printed on the document that is received at the other end. Important 2 ❒ To use this function, set Label Insertion to [On] when registering fax destinations in the Address Book, and also select [Programmed Name] - Ricoh Aficio MP 2000 | Facsimile Reference - Page 115
F Specify a destination, and then press the {Start} key. Note ❒ [Programmed Name] is selected by default. Label Insertion 2 105 - Ricoh Aficio MP 2000 | Facsimile Reference - Page 116
be sent via facsimiles that have the Transfer Station function. This function helps you save costs when you send the same document to more than one place in a distant area, and saves time since many documents can be sent in a single operation. Important ❒ Documents can be sent to facsimiles that - Ricoh Aficio MP 2000 | Facsimile Reference - Page 117
key ({F1} to {F3}) programmed with [SUB/SEP Code]. ARX030S H Enter a SUB Code, and then press the {OK} key. If you make a mistake, press the {Clear/Stop} key before pressing the {OK} key, and then try again. 107 - Ricoh Aficio MP 2000 | Facsimile Reference - Page 118
SUB Code is printed on lists and reports. Reference p.186 "Maximum Values" "Fax Features", General Settings Guide "Registering Addresses and Users for Facsimile/Scanner Functions", General Settings Guide Setting a Password There are times when you may want to use an "SID" (Sender ID) when sending - Ricoh Aficio MP 2000 | Facsimile Reference - Page 119
Code you entered. This function enables the machine to utilize services that use the polling function 2 or receive documents from ❒ To use this function, set [SEP Code RX] to [On]. ❒ Program this function to one of the User Function keys in advance. A Press [TX Mode]. B Select [SEP Code RX] - Ricoh Aficio MP 2000 | Facsimile Reference - Page 120
{OK} key. If you make a mistake, press the {Clear/Stop} key before pressing the {OK} key, and then try again. H When a password is required, enter the PWD Code using the number keys, General Settings Guide "Registering Addresses and Users for Facsimile/Scanner Functions", Gen- 110 eral Settings - Ricoh Aficio MP 2000 | Facsimile Reference - Page 121
Codes for Reception Entering a Password There are times you may want to use a password when receiving faxes by SEP p.186 "Maximum Values" "Registering Addresses and Users for Facsimile/Scanner Functions", General Settings Guide SEP Code RX Reserve Report This report is printed after SEP - Ricoh Aficio MP 2000 | Facsimile Reference - Page 122
menu. ❒ You can display a sender name with the User Parameters (switch 04, bit 5) in the Fax Features menu. Reference p.149 "Journal" "Fax Features", General Settings Guide 112 - Ricoh Aficio MP 2000 | Facsimile Reference - Page 123
Two-Sided Transmission (Double-Sided Transmission) Two-Sided Transmission (Double-Sided Transmission) Use this function to send two-sided originals. Important ❒ The optional ARDF is required. 2 A Place the original in the ARDF, and then select the scan settings you require. B Press [TX Mode]. - Ricoh Aficio MP 2000 | Facsimile Reference - Page 124
Send Settings E Select the position of the placed document using {U} or {T}, and then press the {OK} key. 2 To cancel Two-Sided Transmission, press the {Escape} key. The display re- turns to that of step C. F Select the page opening orientation using {U} or {T}, and then press the {OK} key. - Ricoh Aficio MP 2000 | Facsimile Reference - Page 125
❒ You can confirm whether both sides were properly scanned using the Stamp function. ❒ You can program one of the User Function keys with operations for this function. Using the User Function keys allows you to Rotation" p.40 "Stamp" p.43 "Scan Settings" "Fax Features", General Settings Guide 115 - Ricoh Aficio MP 2000 | Facsimile Reference - Page 126
Send Settings 2 116 - Ricoh Aficio MP 2000 | Facsimile Reference - Page 127
space is low. ❒ If free memory reaches 0% during Immediate Reception, any further recep- tion becomes impossible and the current communication is terminated. Note ❒ If the Substitute Reception is used, a fax document is not printed: it is stored in memory. ❒ This machine supports Standard and Detail - Ricoh Aficio MP 2000 | Facsimile Reference - Page 128
is turned on. Use this report to identify lost documents. See "Troubleshooting When Using the Facsimile Function", Troubleshooting. ❒ The machine may not be able to receive fax documents when free memory space is low. ❒ If free memory reaches 0% during Memory Reception, any further reception becomes - Ricoh Aficio MP 2000 | Facsimile Reference - Page 129
if there is not enough free memory. ❒ If free memory reaches 0% during Substitute ", General Settings Guide Receiving documents unconditionally If one of the conditions in the following list occurs, the machine receives all fax documents using Substitute Reception. Problems - Ricoh Aficio MP 2000 | Facsimile Reference - Page 130
Paper and Replacing Toner", Troubleshooting. G is lit. Toner is empty. Replace the toner bottle. For details about replacing the toner bottle, see "Adding Paper and Replacing Toner", Troubleshooting. The message "Problem All trays are out of action. Call your service representative. with this - Ricoh Aficio MP 2000 | Facsimile Reference - Page 131
handset or the handset of the external telephone. B If you hear beeps, press the {Start} key or the User Function key pro- grammed with Start Manual Reception. (The {Start} key is only available in facsimile mode when an original is not placed.) C Replace the optional handset or the handset of the - Ricoh Aficio MP 2000 | Facsimile Reference - Page 132
using {U} or {T}, and then press the {OK} key. To cancel the selection, press the {Escape} key. The standby display appears. Reference "Fax Features", General Settings Guide 122 - Ricoh Aficio MP 2000 | Facsimile Reference - Page 133
Reception and Manual E-mail Reception. Important ❒ To use Internet Fax functions, the optional printer/scanner unit must be installed. ❒ E- be received. ❒ If [Require Secure Password Authentication (SPA) for all client connections] is selected in Windows Server 2003, reception is not possible - Ricoh Aficio MP 2000 | Facsimile Reference - Page 134
Function key beforehand. A Press the User Function key ({F1} to {F3}) programmed with Manual E-mail Reception. 3 ARX030S B Press the {Start} key. The machine accesses the {Job Information} key, and then select [Manual E-mail Reception] to receive e-mail. Reference "Fax Features", General Settings - Ricoh Aficio MP 2000 | Facsimile Reference - Page 135
name and e-mail address, see "System Settings", General Set- 3 tings Guide. 1. E-mail transmitted without speci- fying a subject in "E-mail Options mail Options" at the time of transmission. If no subject is specified, one is automatically assigned in the format shown in 1 above. 7. The message - Ricoh Aficio MP 2000 | Facsimile Reference - Page 136
other functions. ❒ The display format of the subject varies according to Stamp Sender Name and other settings. Reference p.31 "E-mail Subject" "System Settings", General Settings Guide 3 126 - Ricoh Aficio MP 2000 | Facsimile Reference - Page 137
section explains useful functions for receiving fax documents. Important ❒ To use Internet Fax and IP-Fax functions, the optional printer/scanner unit must be installed. Forwarding Received Documents This machine can forward received documents to other destinations pro- 3 grammed in this machine - Ricoh Aficio MP 2000 | Facsimile Reference - Page 138
Special Sender. Documents from other senders are forwarded to the default Forwarding destination specified for this function. ❒ You can select senders or Special Senders. For details, see "Fax Features", General Settings Guide. ❒ For the maximum number of destinations you can program in a group - Ricoh Aficio MP 2000 | Facsimile Reference - Page 139
SMTP server usually tries re- sending the documents until the set timeout. Reference p.123 "Auto E-mail Reception" "System Settings", General Settings Guide Routing e-mail received via SMTP E-mail received via SMTP can be routed to other fax machines. ALT006S Important ❒ Before routing e-mail - Ricoh Aficio MP 2000 | Facsimile Reference - Page 140
the maximum number of destinations you can program in a group, see "Maximum Values". Reference p.186 "Maximum Values" "Fax Features", General Settings Guide JBIG Reception If you use JBIG (Joint Bi-level Image Experts Group) compression, you can send photographic originals faster than with other - Ricoh Aficio MP 2000 | Facsimile Reference - Page 141
Auto Fax Reception Power-Up This machine can be set to shut down automatically if no one has used it for a while. In these situations, even though the operation switch is off (Substitute Reception) printed after the machine is turned on. Reference "Fax Features", General Settings Guide 131 - Ricoh Aficio MP 2000 | Facsimile Reference - Page 142
it off completely (set the volume to the minimum level) using Adjust Sound Volume in the Fax Features menu. Reference "Fax Features", General Settings Guide Checkered Mark When this function is turned on, a Checkered Mark is printed on the first page of fax documents to help you separate them - Ricoh Aficio MP 2000 | Facsimile Reference - Page 143
may deviate a little from the exact center of the edge. Reference "Fax Features", General Settings Guide Reception Time You can have the date, time, and file number printed at the bottom of need this function, contact your service representative. Reference "Fax Features", General Settings Guide 133 - Ricoh Aficio MP 2000 | Facsimile Reference - Page 144
document is reduced if it is less than 20 mm (0.79"). When a document is split, an asterisk (p) is inserted at the split position and about 10 mm (0.39") of the split area is duplicated on the top of the second sheet. 134 - Ricoh Aficio MP 2000 | Facsimile Reference - Page 145
service : 3 • Overprinting length: 4 mm (0.16"), 10 mm (0.39"), 15 mm (0.59") • Guideline the received image so that it will fit on one page. If A4L paper is loaded and a document turn this function on or off with the User Parameters (switch 10, bit 3) in the Fax Features menu. ❒ When this - Ricoh Aficio MP 2000 | Facsimile Reference - Page 146
3 ❒ You can turn this function on or off in the User Parameters (switch 02, bit 3) in the Fax Features menu. Reference "Fax Features", General Settings Guide If There Is No Paper of the Correct Size If there is no paper in the machine that matches the size of a received document, the - Ricoh Aficio MP 2000 | Facsimile Reference - Page 147
you can make the machine use one tray for one function and another tray for Reference "System Settings", General Settings Guide Just size printing If you enable printer automatically continues printing from where it left off. • If any documents or reports were being printed manually, the printer - Ricoh Aficio MP 2000 | Facsimile Reference - Page 148
Reception 3 138 - Ricoh Aficio MP 2000 | Facsimile Reference - Page 149
the {Start} key, press the {Escape} key. The standby display appears. C Press the {Start} key. To cancel printing after pressing the {Start} key, press the {Clear/Stop} key. The display returns to that of step B. The display returns to that of step B after printing a TX Standby File List. 139 - Ricoh Aficio MP 2000 | Facsimile Reference - Page 150
whether or not to display a sender name with the User Param- eters (switch 04, bit 5) in the Fax Features menu. Reference "Fax Features", General Settings Guide 4 140 - Ricoh Aficio MP 2000 | Facsimile Reference - Page 151
To cancel printing, press the {Escape} key. The display returns to that of step B. D Press [Print]. To cancel printing after pressing [Print], press the {Clear/Stop} key. The display returns to that of step B. The display returns to that of step B after printing a TX Standby File. Repeat from step - Ricoh Aficio MP 2000 | Facsimile Reference - Page 152
Changing/Confirming Communication Information Note ❒ You can also print files that have not been successfully transmitted. 4 142 - Ricoh Aficio MP 2000 | Facsimile Reference - Page 153
Checking the Transmission Result (TX File Status) Checking the Transmission Result (TX File Status) You can confirm transmission by the display, report, or e-mail. Confirming on Display Follow these steps to display the transmission results. A Press the {Job Information} key. 4 ARX037S B Select [TX - Ricoh Aficio MP 2000 | Facsimile Reference - Page 154
result, exit TX File Status, and then try again. ❒ You can program one of the User Function keys with operations for this function. Using the key allows Reference p.186 "Maximum Values" "Fax Features", General Settings Guide Confirming by Report Print reports for confirmation. ❖ Memory - Ricoh Aficio MP 2000 | Facsimile Reference - Page 155
results by e-mail, the optional printer/scanner unit must be installed. ❒ You must first register the send fax documents from a computer, use LAN-Fax Driver to specify whether or not the LAN-Fax Result 10, bit 6) in the Fax Features menu. Reference "Fax Features", General Settings Guide 145 - Ricoh Aficio MP 2000 | Facsimile Reference - Page 156
this machine. (However, this does not mean the e-mail was delivered.) Reference p.147 "Communication Failure Report" "Fax Features", General Settings Guide Immediate TX Result Report (Immediate Transmission) If you turn this report on, a report is printed after every Immediate Transmission so you - Ricoh Aficio MP 2000 | Facsimile Reference - Page 157
the page was sent successfully, the Page column gives the total number of pages sent successfully. Reference "Fax Features", General Settings Guide Communication Failure Report 4 This report is printed when a document could not be successfully transmitted with Memory Transmission. If the machine - Ricoh Aficio MP 2000 | Facsimile Reference - Page 158
Changing/Confirming Communication Information Checking the Reception Result (RX File Status) Confirm the reception result on the screen or in a report. Confirming on Display Follow these steps to display the reception result. A Press the {Job Information} key. 4 ARX037S B Select [RX File Status] - Ricoh Aficio MP 2000 | Facsimile Reference - Page 159
result, exit RX File Status, and then try again. ❒ You can program one of the User Function keys with operations for this function. Using the key allows B. Reference p.186 "Maximum Values" "Fax Features", General Settings Guide 4 Confirming by Report Print a report to confirm reception results. - Ricoh Aficio MP 2000 | Facsimile Reference - Page 160
print the Journal manually. Important ❒ The key. To cancel printing after pressing the {Start} key, press the {Clear/Stop} key. The display returns to that of step B. The display 5) in the Fax Features menu. ❒ You can program one of the User Function keys with operations for this function. Using - Ricoh Aficio MP 2000 | Facsimile Reference - Page 161
Reference p.186 "Maximum Values" "Fax Features", General Settings Guide Journal This section explains the items printed in the Journal. Printing the Journal 4 1. Printing date Shows the date and time the report was printed. 2. Programmed - Ricoh Aficio MP 2000 | Facsimile Reference - Page 162
is indicated by a "Q", whereas "A" appears with reception notice e-mail. D: Power was disconnected during communication. Not all fax documents were transmitted. 10. User name Shows the sender's name. 11. File number Shows file management numbers. Note ❒ To prioritize a fax number or name - Ricoh Aficio MP 2000 | Facsimile Reference - Page 163
Important ❒ To transmit the Journal by e-mail, the optional printer/scanner unit must be installed. ❒ To transmit the Journal by e-mail, it is by e-mail begins with "Journal". Reference "Fax Features", General Settings Guide Journal by e-mail If the setting is made so that the Journal is - Ricoh Aficio MP 2000 | Facsimile Reference - Page 164
happens, the Power Failure Report is printed so you can confirm which documents have been deleted. For details, see "Troubleshooting When Using the Facsimile Function", Troubleshooting. A Confirm that the Receive File indicator is blinking. ARX038S B Press the {Job Information} key. 154 ARX037S - Ricoh Aficio MP 2000 | Facsimile Reference - Page 165
{Escape} key. The standby display appears. Note ❒ Even when Memory Lock is available, if free memory is insufficient, reception is not possible. ❒ You can also apply a Memory Lock to , it is deleted. Reference "Fax Features", General Settings Guide "Troubleshooting When Using the Facsimile Function - Ricoh Aficio MP 2000 | Facsimile Reference - Page 166
Changing/Confirming Communication Information 4 156 - Ricoh Aficio MP 2000 | Facsimile Reference - Page 167
Windows application, then select LAN-Fax as the printer, Driver allows this machine to be used for printing out documents prepared on a computer for proof checking. • To use the LAN-Fax Driver, connect this machine to a LAN and make the necessary network settings, and then install the LAN-Fax Driver - Ricoh Aficio MP 2000 | Facsimile Reference - Page 168
See "Connecting the Machine", General Settings Guide. Reference "Connecting the Machine", General Settings Guide "System Settings", General Settings Guide "Preparing the Machine", Printer Reference Using the Software This section provides information about LAN-Fax Driver, Address Book, and LAN-Fax - Ricoh Aficio MP 2000 | Facsimile Reference - Page 169
2003 \DRIVERS\LAN-FAX\WIN2K_XP 5 ❖ Operating environment • Computer PC/AT compatible • Operating systems Microsoft Windows 98/Me Microsoft Windows 2000/XP Microsoft Windows Server 2003 Microsoft Windows NT 4.0 • Display VGA 640×480 pixels or more Note ❒ Before beginning installation, exit - Ricoh Aficio MP 2000 | Facsimile Reference - Page 170
Clicking [Cancel] during installation aborts the installation. If you cancel the installation, restart your computer and install the rest of the software or printer driver. Note ❒ If your operating system is Windows 2000/XP or Windows Server 2003, installing a printer driver using Auto Run requires - Ricoh Aficio MP 2000 | Facsimile Reference - Page 171
install LAN-Fax Driver, Address Book, and LAN-Fax Cover Sheet Editor at one time. Important ❒ Before installing the above applications, install the installer. C Select the interface language of the software, and then click [OK]. D Click [LAN-Fax Driver]. The software license agreement window - Ricoh Aficio MP 2000 | Facsimile Reference - Page 172
Properties This section explains how to set properties required for using the LAN-Fax Driver. Note ❒ If your operating system is Windows NT 4.0, Windows 2000/XP, or Windows Server 2003, log on using an account that has Administrator rights. Setting print properties This section explains how to - Ricoh Aficio MP 2000 | Facsimile Reference - Page 173
installed in this machine. A On the [Start] menu, point to [Settings], and then click [Printers]. With Windows XP Professional or Windows Server 2003, select [Printers and Faxes] on the [Start] menu. With Windows XP the installed optional the installed optional manual as instructed, LAN - Ricoh Aficio MP 2000 | Facsimile Reference - Page 174
Windows applications. To send a fax, simply select [Print...] from the Windows application, then select [LAN-Fax M10] as the printer cannot send documents to this machine using more than one LAN-Fax at the same time. A On can retain documents sent from a LAN-Fax Driver as files to be sent. For the - Ricoh Aficio MP 2000 | Facsimile Reference - Page 175
Sending Fax Documents from Computers Reference p.165 "Specifying a destination using a destination list" p.165 "Specifying a destination using Address Book" p.166 "Specifying a destination by directly entering a fax number, Internet Fax destination, or IP-Fax destination" p.167 "Specifying Options" - Ricoh Aficio MP 2000 | Facsimile Reference - Page 176
Fax via Computer C Select [Contact] or [Group] in the [Name:] dropdown menu as the display format. Destination list contents change as follows, depending on the option selected: • Contact: Individual name, company name, department name, fax number • Group: Group name If you selected [Group], - Ricoh Aficio MP 2000 | Facsimile Reference - Page 177
186 "Maximum Values" Specifying Options You can specify the options in the following list. For details about transmission options, see the LAN-Fax Driver's Help. • Sending at specific time • Print Fax Header • Attach a Cover Sheet • Preview • Save as file To send a fax document at a specific time - Ricoh Aficio MP 2000 | Facsimile Reference - Page 178
] tab appears. B Select the [Preview] check box. C Click [Print], [Send] or [Send & Print]. The [Preview] window appears. D Click [Next] or [Previous] to check the image. To close the [Preview] window, click [Cancel]. Saving as files You can save the fax document in TIFF format (TIFF-F). A Click - Ricoh Aficio MP 2000 | Facsimile Reference - Page 179
E Select a method of file naming. To enter a file name manually, select the [Specify file name when saving] check box. To have documents are saved as multiple TIFF files. Checking Transmission Using LAN-Fax Driver From "SmartDeviceMonitor for Admin", "SmartDeviceMonitor for Client", or Web Image - Ricoh Aficio MP 2000 | Facsimile Reference - Page 180
results by e-mail, the optional printer/scanner unit must be installed. When you have done [Send to use both of these together in User Parameters (switch 10, bit 6) in the Fax Features menu. ❒ If is printed. See "System Settings", General Settings Guide for the e-mail settings, and see "LAN-Fax - Ricoh Aficio MP 2000 | Facsimile Reference - Page 181
Report is printed. Reference p.146 "Communication Result Report (Memory Transmission)" 5 "Fax Features", General Settings Guide Printing and Saving You can print documents created using Windows applications. Open the application document you want to print or create a new document, and then - Ricoh Aficio MP 2000 | Facsimile Reference - Page 182
"Specifying Options" p.168 "Saving as files" "Fax Features", General Settings Guide Editing Address Book You can program and edit destinations in the address list using the Address Book. For details about the Address Book, see the LAN-Fax Driver's Help. Note ❒ You can use files created in CSV format - Ricoh Aficio MP 2000 | Facsimile Reference - Page 183
G3-3, G4, G3 Dir. Auto, G3 PABX Auto, or I-G3. However, this machine supports G3 only. ❒ For [Protocol:] under [IP-Fax address:], select [H.323] or [SIP Ad- dress Book]. The [Address Book] dialog box appears. If LAN-Fax Driver has already started up, click [Edit Address Book...]. B Click [New/Browse - Ricoh Aficio MP 2000 | Facsimile Reference - Page 184
be inserted into the destination table of the LAN-Fax Driver by selecting [New/Browse...] in Address Book. Save the file again for the LAN-Fax Driver. Note ❒ When destinations registered in groups by this machine sheet file before attaching a cover sheet to fax document using LAN-Fax Driver. 174 - Ricoh Aficio MP 2000 | Facsimile Reference - Page 185
Sending Fax Documents from Computers Creating a cover sheet Use the following procedure to create a fax cover sheet. You can edit the following items using LAN-Fax Cover Sheet Editor. • Company name as destination information • Department name as destination information • Contact name as - Ricoh Aficio MP 2000 | Facsimile Reference - Page 186
on a computer using SmartDeviceMonitor for Admin. Note ❒ For details about SmartDeviceMonitor for Admin and its installation, see "Monitoring and Configuring the Printer", Network Guide. ❒ For details, see Network Guide and SmartDeviceMonitor for Admin Help. Reference "Monitoring and Configuring the - Ricoh Aficio MP 2000 | Facsimile Reference - Page 187
messages displayed on the computer when using the LAN-Fax Driver, and solutions to those messages. Message Causes and Solutions exceeds the maximum possible. The maximum number of destinations that can be specified at one time is 300. "LAN-Fax" has already been launched. Cannot launch it again - Ricoh Aficio MP 2000 | Facsimile Reference - Page 188
"System Settings", General Settings Guide "Monitoring and Configuring the Printer", Network Guide To Edit Machine Properties Already the address field. The top screen is displayed. C Click [Login], and then enter the Administrator's name and password. D Click [Address Book] in the left pane. The - Ricoh Aficio MP 2000 | Facsimile Reference - Page 189
of the machine you want to monitor after "http://" in the address field. 5 The top screen is displayed. C Click [Login], and then enter the Administrator's name and password. D Click [Address Book] in the left pane. The Address Book is displayed. E Click [Add User]. The [Add User] page - Ricoh Aficio MP 2000 | Facsimile Reference - Page 190
Fax via Computer 5 180 - Ricoh Aficio MP 2000 | Facsimile Reference - Page 191
• RX File Status • 2 Sided TX (option) • Print Fax Header • Forwarding • Switch Reception Mode • Start Manual Reception • Sender Settings • Transmission Stamp • E-mail Options (option) • Print TX Status Report • Manual E-mail Reception (option) • Use SMTP Server (option) • SUB/SEP Code • PIN Code TX - Ricoh Aficio MP 2000 | Facsimile Reference - Page 192
Appendix Optional Equipment This section explains the functions of options. Handset You can make or receive calls by installing the optional handset and dialing manually. Reference p.83 "On Hook Dial" p.85 "Manual Dial" 6 182 - Ricoh Aficio MP 2000 | Facsimile Reference - Page 193
Specifications Specifications ❖ Fax Transmission and Reception Standard G3 Resolution G3: 8 × 3.85/mm, 200 × 100 dpi (Standard character), 8 × 7.7/mm, 200 × 200 dpi (Detail character), 8 × 15.4/mm (Fine character) Transmission time G3: 3 seconds at 28,800 bps, Standard resolution (JBIG - Ricoh Aficio MP 2000 | Facsimile Reference - Page 194
Appendix ❖ IP-Fax Transmission and Reception Network LAN: Local Area Network Ethernet/10base-T, 100base-TX, IEEE802.11b (wireless LAN) Scan line density 8 × 3.85 mm, 200 × 100 dpi (Standard character), 8 × 7.7 mm, 200 × 200 dpi (Detail character), 8 × 15.4 mm (Fine character) Maximum original - Ricoh Aficio MP 2000 | Facsimile Reference - Page 195
Specifications Specifications Required for the Internet Fax Destination Machines This machine can communicate with Internet Fax machines that satisfy the following specification requirements. When communicating with full mode compatible machines, you can take advantage of higher specifications for - Ricoh Aficio MP 2000 | Facsimile Reference - Page 196
can search for at a time 100 Number of redials the machine can store 10 6 Number of digits for a destination 128 Number of characters you can enter DeskTopBinder", or Web Image Monitor. Number of documents sent from a LAN-Fax Driver that the machine can re- 200 tain as files to be sent Note - Ricoh Aficio MP 2000 | Facsimile Reference - Page 197
Transmission, 146 Checking the specified destination, 61 Checking the transmission result, 143 Checking transmission using LAN-Fax Driver, 169 Clear Modes key, 6, 87 Clear/Stop key, 87, 88 Communicating indicator, 88 Communication Failure Report, 147 Communication Page Count, 9 Communication Result - Ricoh Aficio MP 2000 | Facsimile Reference - Page 198
21 Immediate TX Result Report, 146 Important Safety Instructions, 4 Installing individual applications, 161 Internet fax destination machines, 185 Insertion, 104 LAN-Fax Cover Sheet Editor, 160, 174 LAN-Fax Driver, 157, 159 LAN-Fax operation messages, 177 LAN-Fax Result Report, 171 LDAP Search, - Ricoh Aficio MP 2000 | Facsimile Reference - Page 199
SmartDeviceMonitor for Admin, 176 Manual, 49, 53 Manual Dial, 85 Manual E-mail Reception, 124 Manual Reception, 121 Manuals for This Machine, scanned area, 36 Parallel Memory Transmission, 13, 19 Parameter Setting, 9 Password (PWD), 111 Password (SID), 108 Pause/Redial key, 48, 62 Photo, 43 PIN Code - Ricoh Aficio MP 2000 | Facsimile Reference - Page 200
RX Reserve Report, 111 SEP Code RX Result Report, 112 Setting LAN-Fax Driver properties, 162 Setting print properties, 162 Setting priority trays, 137 Set User name, 52 Specifying options, 167 Stamp, 40, 93 Standard, 44 Start Manual Reception, 121 Stop Communication, 89 Stop TX, 88, 89 SUB Code - Ricoh Aficio MP 2000 | Facsimile Reference - Page 201
key, 9, 64 Using the machine's Address Book data in the destination list of the LAN-Fax, 174 Using the Quick Dial keys, 58 Using the software, 158 191 - Ricoh Aficio MP 2000 | Facsimile Reference - Page 202
192 EN USA B843-7623 - Ricoh Aficio MP 2000 | Facsimile Reference - Page 203
• The product names of Windows® 2000 are as follows: Microsoft® Windows® 2000 Advanced Server Microsoft® Windows® 2000 Server Microsoft® Windows® 2000 Professional • The product names of Windows® XP are as follows: Microsoft® Windows® XP Professional Microsoft® Windows® XP Home Edition • The product - Ricoh Aficio MP 2000 | Facsimile Reference - Page 204
FAX Option Type 2000 Operating Instructions Facsimile Reference EN USA B843-7623
-
 1
1 -
 2
2 -
 3
3 -
 4
4 -
 5
5 -
 6
6 -
 7
7 -
8
-
9
-
10
-
11
-
12
-
13
-
14
-
15
-
16
-
17
-
18
-
19
-
20
-
21
-
22
-
23
-
24
-
25
-
26
-
27
-
28
-
29
-
30
-
31
-
32
-
33
-
34
-
35
-
36
-
37
-
38
-
39
-
40
-
41
-
42
-
43
-
44
-
45
-
46
-
47
-
48
-
49
-
50
-
51
-
52
-
53
-
54
-
55
-
56
-
57
-
58
-
59
-
60
-
61
-
62
-
63
-
64
-
65
-
66
-
67
-
68
-
69
-
70
-
71
-
72
-
73
-
74
-
75
-
76
-
77
-
78
-
79
-
80
-
81
-
82
-
83
-
84
-
85
-
86
-
87
-
88
-
89
-
90
-
91
-
92
-
93
-
94
-
95
-
96
-
97
-
98
-
99
-
100
-
101
-
102
-
103
-
104
-
105
-
106
-
107
-
108
-
109
-
110
-
111
-
112
-
113
-
114
-
115
-
116
-
117
-
118
-
119
-
120
-
121
-
122
-
123
-
124
-
125
-
126
-
127
-
128
-
129
-
130
-
131
-
132
-
133
-
134
-
135
-
136
-
137
-
138
-
139
-
140
-
141
-
142
-
143
-
144
-
145
-
146
-
147
-
148
-
149
-
150
-
151
-
152
-
153
-
154
-
155
-
156
-
157
-
158
-
159
-
160
-
161
-
162
-
163
-
164
-
165
-
166
-
167
-
168
-
169
-
170
-
171
-
172
-
173
-
174
-
175
-
176
-
177
-
178
-
179
-
180
-
181
-
182
-
183
-
184
-
185
-
186
-
187
-
188
-
189
-
190
-
191
-
192
-
193
-
194
-
195
-
196
-
197
-
198
-
199
-
200
-
201
-
202
-
203
-
204
 |
 |
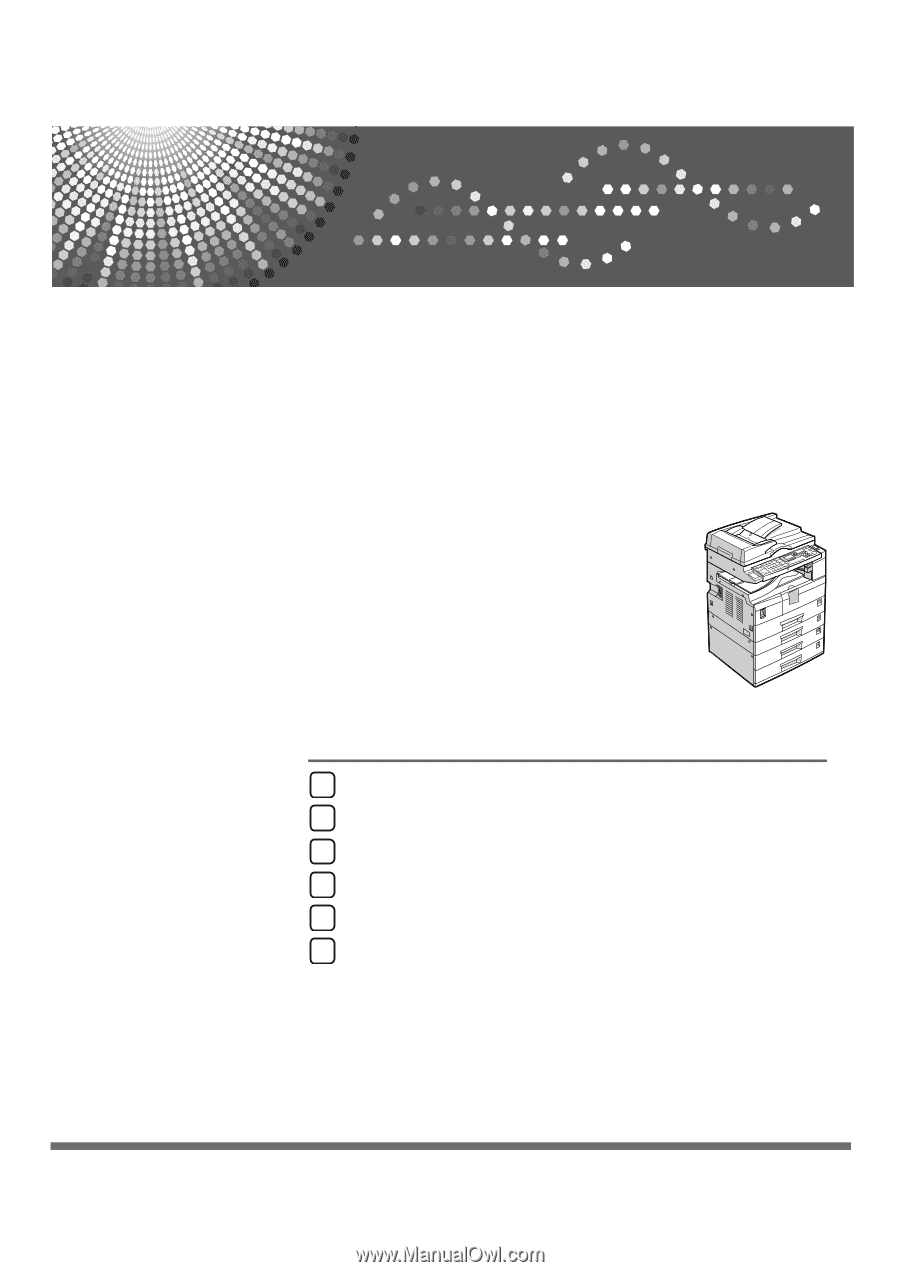
FAX Option Type 2000
Operating Instructions
Facsimile Reference
Read this manual carefully before you use this machine and keep it handy for future reference. For safe and correct use, be sure to read the
Safety Information in "About This Machine" before using the machine.
Transmission
Send Settings
Reception
Changing/Confirming Communication Information
Fax via Computer
Appendix
1
2
3
4
5
6