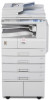
Ricoh Aficio MP 2000 Printer Reference
Ricoh Aficio MP 2000 Manual
 |
View all Ricoh Aficio MP 2000 manuals
Add to My Manuals
Save this manual to your list of manuals |
Ricoh Aficio MP 2000 manual content summary:
- Ricoh Aficio MP 2000 | Printer Reference - Page 1
Operating Instructions Printer Reference 1 Preparing the Machine 2 Setting Up the Printer Driver 3 Other Print Operations 4 The Functions and Settings of the Machine 5 Appendix Read this manual carefully before you use this machine and keep it handy for future reference. For safe and correct use, be - Ricoh Aficio MP 2000 | Printer Reference - Page 2
manual contains detailed instructions and notes on the operation and use of this machine. For your safety and benefit, read this manual carefully before using the machine. Keep this manual in a handy place for quick reference. Important Contents of this manual is meant as a guide only and is not - Ricoh Aficio MP 2000 | Printer Reference - Page 3
codes. Also refer to this manual for explanations on how to connect the machine. ❖ Trouble Shooting Provides a guide to solving common problems, and explains how to authentication. ❖ Copy Reference Explains Copier functions and operations. Also refer to this manual for explanations on how to place - Ricoh Aficio MP 2000 | Printer Reference - Page 4
systems that are supported might also differ slightly from those of this machine. ❖ Other manuals • PostScript 3 Supplement • UNIX Supplement • Manuals for DeskTopBinder Lite • DeskTopBinder Lite Setup Guide • DeskTopBinder Introduction Guide • Auto Document Link Guide Note ❒ Manuals provided are - Ricoh Aficio MP 2000 | Printer Reference - Page 5
for This Machine i Notice ...1 How to Read This Manual 3 Symbols ...3 Display Panel...4 Reading the Display and USB 42 Printing with Parallel Connection 44 Printing with Bluetooth Connection 46 Supported Profiles...46 Printing with Bluetooth Connection 46 Configuring Security Mode Settings 48 - Ricoh Aficio MP 2000 | Printer Reference - Page 6
2. Setting Up the Printer Driver PCL - Accessing the Printer Properties 55 Windows 95 / 98 / Me - Accessing the Printer Properties 55 Windows 2000 - Accessing the Printer Properties 56 Windows XP, Windows Server 2003 - Accessing the Printer Properties 58 Windows NT 4.0 - Accessing the Printer - Ricoh Aficio MP 2000 | Printer Reference - Page 7
and, if not installed and used in accordance with the instructions, may cause harmful interference to radio communications. However, there Unit Model Number: 9016/Dsm716/LD316/Aficio MP 1600 9021d/Dsm721d/LD320d/Aficio MP 2000 Responsible party: Ricoh Corporation Address: 5 Dedrick Place, West - Ricoh Aficio MP 2000 | Printer Reference - Page 8
Note to users in Canada Note: This Class B digital apparatus complies with Canadian ICES-003. Remarque concernant les utilisateurs au Canada Avertissement: Cet appareil numérique de la classe B est conforme à la norme NMB-003 du Canada. 2 - Ricoh Aficio MP 2000 | Printer Reference - Page 9
How to Read This Manual Symbols This manual uses the following symbols: Indicates important safety notes. Be sure to read these explanations. Indicates supplementary explanations of the machine's functions, and instructions on resolving user errors. This symbol is located at the end of sections. It - Ricoh Aficio MP 2000 | Printer Reference - Page 10
following options: • [Show Error Log] Displays the error logs of print jobs that are sent from a computer. Note ❒ When the power is turned on, the copier display is shown. This is a factory default. This initial setting can be changed. See "System Settings", General Settings - Ricoh Aficio MP 2000 | Printer Reference - Page 11
direction, step by step. When the {U}, {T}, {V}, or {W} key appears in this manual, press the scroll key of the same direction. 2. {OK} key Press to set on the display. Example: Basic screen When the instruction "press [JobReset]" appears in this manual, press the left selection key. Note ❒ The - Ricoh Aficio MP 2000 | Printer Reference - Page 12
on Printer Feature. Printer Feature screen appears when you press the {User Tools/Counter} key. For details, see "Printer Features", General Settings Guide. ❖ List/Test Print Multiple Lists Menu Config. Page Error Log Menu List PCL Config./Font Page PS Config./Font Page PDF Config./Font - Ricoh Aficio MP 2000 | Printer Reference - Page 13
❖ System Menu Print Error Report Auto Continue Memory Overflow Memory Usage Duplex Copies Blank Page Print Edge Smoothing Toner Saving Printer Language Sub Paper Size Page Size Letterhead Setting Bypass Tray Priority Description You can print an error report when a printer or memory error occurs. - Ricoh Aficio MP 2000 | Printer Reference - Page 14
Menu Edge to Edge Print Default Printer Lang. Tray Switching RAM Disk ❖ Host Interface I/O Buffer Menu I/O Timeout ❖ PCL Menu Orientation Form Lines Font Source Menu Font Number Point Size Font Pitch Symbol Set Courier Font Ext. A4 Width Append CR to LF Resolution 8 Description You - Ricoh Aficio MP 2000 | Printer Reference - Page 15
not displayed. ❒ Depending on the security settings, you might not be able to set certain op- tions. Reference For details, see "Printer Features", General Settings Guide. For more information about copier features and system settings, see Copy Reference and General Settings - Ricoh Aficio MP 2000 | Printer Reference - Page 16
the Bypass Tray This section gives instructions for setting paper on the bypass tray of images to be printed is opposite to that of the copier function). When printing onto paper with specific orientation requirements, such as . AAW019S1 B Lift up the paper guide release lever. 10 ASC001S - Ricoh Aficio MP 2000 | Printer Reference - Page 17
size, and then gently insert paper face down into the bypass tray. AAW020S1 1. Extender 2. Paper guides • Open out the extender to support paper sizes larger than A4 L, 81/2 ×11 L. • If the paper guides are not flush against the paper, skewing and misfeeds might occur. • Gently insert paper until it - Ricoh Aficio MP 2000 | Printer Reference - Page 18
see p.12 "Setting the Paper Size Using the Control Panel". For details about setting paper in the regular paper tray, see General Settings Guide. When loading custom size paper, see p.14 "Setting the Custom Size Paper Using the Control Panel". Select paper type when printing onto OHP transparencies - Ricoh Aficio MP 2000 | Printer Reference - Page 19
B Select [System Settings] using {T} or {U}, and then press the {OK} key. C Select [Tray Paper Settings] using {T} or {U}, and then press the {OK} key. D Select [Printer Bypass Paper Size] using {T} or {U}, and then press the {OK} key. E Select the paper size using the scroll keys, and then press - Ricoh Aficio MP 2000 | Printer Reference - Page 20
Setting the Custom Size Paper Using the Control Panel The following procedures are not required if you select the printer driver for the settings. In that case, set the paper size using the printer driver. Important ❒ Custom size settings set using the printer driver have priority over those set - Ricoh Aficio MP 2000 | Printer Reference - Page 21
. Note ❒ If the printer driver is not used, select [Machine Settings] from [Bypass Tray Priority] in [System] of [Printer Features] (see "Printer Features", General Settings Guide). Set paper size using the control panel. Reference For printer driver settings, see the printer driver Help. 15 - Ricoh Aficio MP 2000 | Printer Reference - Page 22
Setting Thick Paper or OHP Transparencies Using the Control Panel The following procedures are not required if you select the printer driver for the settings. In that case, set the paper size using the printer driver. Important ❒ Paper size settings set using the printer driver have priority over - Ricoh Aficio MP 2000 | Printer Reference - Page 23
E Select paper type from the menu using {T} or {U}, and then press the {OK} key. F Press the {User Tools/Counter} key to return to the default screen. Note ❒ The settings made will remain valid until they are reset again. After print- ing on thick paper or OHP Transparencies, be sure to clear - Ricoh Aficio MP 2000 | Printer Reference - Page 24
E Select [Thick Paper] using the {U} or {T} key, and then press the {OK} key. F Select [Printer Bypass Paper Size], and then press the {OK} key. G Select the paper envelope size from [C6envL], [C5envL], or [DlenvL], and then press the {OK} key. H Press the {User Tools/Counter} key to return to the - Ricoh Aficio MP 2000 | Printer Reference - Page 25
1. Preparing the Machine Confirming the Connection Method This machine supports network and local connection. Before installing the printer driver, check how the machine is connected. Follow the driver installation procedure that is appropriate to the - Ricoh Aficio MP 2000 | Printer Reference - Page 26
Preparing the Machine ❖ Windows 2000 Connection Method Ethernet / IEEE 802.11b 1 Available Ports SmartDeviceMonitor for Client port Standard TCP/IP LPR port ❖ Windows XP Connection Method Ethernet / IEEE 802.11b Available Ports SmartDeviceMonitor for Client port Standard TCP/IP LPR port ❖ - Ricoh Aficio MP 2000 | Printer Reference - Page 27
Confirming the Connection Method Using as a network printer This machine can be used as the Windows network printer, the NetWare print server, or the NetWare remote printer. 1 ZZZ036S Note ❒ In an IPv6 environment, Netware servers cannot be used. Reference See the explanation about how to install - Ricoh Aficio MP 2000 | Printer Reference - Page 28
Preparing the Machine Local Connection Local connections can be established via parallel, USB, and Bluetooth connec- 1 tions. Windows operating system version determines the available connection meth- ods. • Windows 95: Parallel connections • Windows 98: Parallel connections • Windows 98 SE - Ricoh Aficio MP 2000 | Printer Reference - Page 29
Installing the Printer Driver Installing the Printer Driver This section explains how to install the printer driver. There are two ways to in- stall the printer driver: using Quick Install, which installs the settings at once, or installing the appropriate driver according to the port you want to - Ricoh Aficio MP 2000 | Printer Reference - Page 30
Preparing the Machine G Click [Install]. The printer driver installation starts. H Click [Finish]. 1 A message about restarting the computer appears. Restart the computer to complete installation. I Click [Exit] in the first dialog box of the installer, and then take out the CD- ROM. Note ❒ - Ricoh Aficio MP 2000 | Printer Reference - Page 31
]. [Full install] installs all required applications: DeskTopBinder Lite and SmartDeviceMonitor for Client. [Custom Install] installs selected applications. H Follow the instructions on the display and click [Next >] to proceed next step. I After the installation is completed, select one of the - Ricoh Aficio MP 2000 | Printer Reference - Page 32
port] check box. E Click [OK] to close the [Extended Features Settings] dialog box. Reference For information about these settings, see "Using SmartDeviceMonitor for Client", Network Guide, or SmartDeviceMonitor for Client Help. 26 - Ricoh Aficio MP 2000 | Printer Reference - Page 33
Installing the Printer Driver Installing the PCL or RPCS Printer Driver (TCP/IP) Important ❒ To install this printer driver under Windows 2000 / XP Professional, Windows Server 2003, and Windows NT 4.0, you must have an account that has 1 Manage Printers permission. Log on as an Administrators - Ricoh Aficio MP 2000 | Printer Reference - Page 34
. If you still want to install the printer driver, use [Add Printer]. See "When a Message Appears during Installation of the Printer Driver", Trouble Shooting. Installing the PCL or RPCS Printer Driver (IPP) Important ❒ To install printer driver under Windows 2000 / XP Professional, Windows Server - Ricoh Aficio MP 2000 | Printer Reference - Page 35
Installing the Printer Driver E The software license agreement appears in the [License Agreement] dialog box. After reading the agreement, click [I accept the agreement.], and then click [Next >]. F Select a printer driver you want to use in the [Select Program] dialog box. 1 You can select - Ricoh Aficio MP 2000 | Printer Reference - Page 36
Auto Run. If you still want to install the printer driver, use [Add Printer]. See "When a Message Appears during Installation of the Printer Driver", Trouble Shooting. Using the Standard TCP/IP Port This describes how to install the PCL or RPCS printer driver using the TCP/IP port. Important ❒ To - Ricoh Aficio MP 2000 | Printer Reference - Page 37
box. The [Port Name] text box automatically obtains a port name. Change this name if necessary. When the device selection appears, select "RICOH NetworkPrinter Driver C Model". N Click [Next >]. O Click [Finish] in the [Add Standard TCP/IP Printer Port Wizard] dialog box. The installation start - Ricoh Aficio MP 2000 | Printer Reference - Page 38
Auto Run. If you still want to install the printer driver, use [Add Printer]. See "When a Message Appears during Installation of the Printer Driver", Trouble Shooting. Using the LPR Port This describes how to install the PCL or RPCS printer driver using the LPR port. Important ❒ To install this - Ricoh Aficio MP 2000 | Printer Reference - Page 39
using Auto Run. If you still want to install the printer driver, use [Add Printer]. See "When a Message Appears during Installation of the Printer Driver", Trouble Shooting. 33 - Ricoh Aficio MP 2000 | Printer Reference - Page 40
Preparing the Machine Using as a Windows Network Printer This describes how to install the PCL or RPCS printer driver when using the 1 printer as a Windows network printer. To use the print server, install the printer driver by selecting "Network printer server", and then select the Windows - Ricoh Aficio MP 2000 | Printer Reference - Page 41
using Auto Run. If you still want to install the printer driver, use [Add Printer]. See "When a Message Appears during Installation of the Printer Driver", Trouble Shooting. 35 - Ricoh Aficio MP 2000 | Printer Reference - Page 42
Preparing the Machine Using as a NetWare Print Server / Remote Printer 1 36 This describes how to set up the Windows computer used as the NetWare client. Important ❒ To install this printer driver under Windows 2000 / XP Professional, Win- dows Server 2003, and Windows NT 4.0, you must have an - Ricoh Aficio MP 2000 | Printer Reference - Page 43
Using as a NetWare Print Server / Remote Printer H Double-click the printer name to display the printer settings. The details shown in [Comment], [Driver], and [Port] vary depending on the operating system, printer model, and port. I Click [Port], and then click [Add]. 1 J Click [Network - Ricoh Aficio MP 2000 | Printer Reference - Page 44
Preparing the Machine Form Feed Do not use NetWare to configure form feed. Form feed is controlled by the print- 1 er driver on Windows. If NetWare form feed is configured, the printer may not print properly. Follow the procedure below to disable form feed according to the operating system used - Ricoh Aficio MP 2000 | Printer Reference - Page 45
. Windows Me - USB Important ❒ Installation via USB is not possible under Windows 95 / 98. Upgrade to Win- dows Me or later. ❒ Download USB Printing Support for Windows Me from the supplier's Web site. When USB is first used, the plug and play function starts and the [New Hardware Found], [Device - Ricoh Aficio MP 2000 | Printer Reference - Page 46
- nected. ❒ It is not necessary to reinstall USB Printing Support when connecting a different machine via USB interface when USB Printing Support is installed. ❒ After installing USB Printing Support, if the printer driver is not installed, follow the plug-and-play instructions of the printer. 40 - Ricoh Aficio MP 2000 | Printer Reference - Page 47
first used, Found New Hardware Wizard starts, and USB Printing Support is installed automatically. If the printer driver has already been installed window. If the printer driver is not installed, follow the plug-and-play instructions of the printer to install it from the supplied CD-ROM. A Connect - Ricoh Aficio MP 2000 | Printer Reference - Page 48
is first used, Found New Hardware Wizard starts, and USB Printing Support is installed automatically. If the printer driver has already been installed, . If the printer driver is not installed, follow the plug-and-play instructions of the printer to install it from the supplied CD-ROM. A Connect - Ricoh Aficio MP 2000 | Printer Reference - Page 49
Installing the Printer Driver Using USB F Click [Continue]. G Click [Finish]. If installation is successful, the icon of the printer connected to the "USB001" port is added to the [Printers and Faxes] window. 1 Note ❒ The number after "USB" varies depending on the number of printers connected. - Ricoh Aficio MP 2000 | Printer Reference - Page 50
Preparing the Machine Printing with Parallel Connection This describes how to install the PCL or RPCS printer driver when using the par- 1 allel port. To use a machine connected using a parallel interface, click [LPT1] when install- ing the printer driver. Important ❒ To install this printer - Ricoh Aficio MP 2000 | Printer Reference - Page 51
using Auto Run. If you still want to install the printer driver, use [Add Printer]. See "When a Message Appears during Installation of the Printer Driver", Trouble Shooting. 45 - Ricoh Aficio MP 2000 | Printer Reference - Page 52
be printed using BIP. • User codes are disabled for BIP. You cannot print if print functions are restricted. • Some printers do not support BIP. Note ❒ In this manual, the instruction referred to print using SPP. To print using HCRP or BIP, see the Help supplied with the Bluetooth adapter you use - Ricoh Aficio MP 2000 | Printer Reference - Page 53
[Always use for this connection] check box. ❒ System requirements vary depending on the Bluetooth standard and specifications. For details, see the manuals supplied with each product. ❒ For information about setting up Bluetooth under other operating systems or using it with different utilities, see - Ricoh Aficio MP 2000 | Printer Reference - Page 54
in the Security Mode". For all other security modes and custom settings, no password is required. For information about each mode, see the manuals supplied with the utility. D Click [OK]. Close the [Security Mode] dialog box. Reference For details about the security mode, see 3Com Bluetooth - Ricoh Aficio MP 2000 | Printer Reference - Page 55
bidirectional communications and updates the machine status automatically. ❒ The PCL printer driver supports bidirectional communications. You can up- date the machine status manually. To support bidirectional communication, the following conditions must be met: ❖ When connected with parallel - Ricoh Aficio MP 2000 | Printer Reference - Page 56
bidirectional communication. • DeskTopBinder Lite must be installed, or the Standard TCP/IP port must 1 be used. • Under Windows 2000, [Enable bidirectional support] must be selected, and [Enable printer pooling] must not be selected on the [Ports] tab with the RPCS printer driver. If the - Ricoh Aficio MP 2000 | Printer Reference - Page 57
Making Option Settings for the Printer If Bidirectional Communication Is Disabled Set up option settings when bidirectional communications are disabled. Important 1 ❒ Under Windows 2000 / XP and Windows Server 2003, Manage Printers permission is required to change the printer properties in the - Ricoh Aficio MP 2000 | Printer Reference - Page 58
administrator permission. A Quit all applications currently running. B Insert the CD-ROM into the CD-ROM drive. The installer starts. C Click [Font Manager 2000]. D Follow the instructions on the screen. 52 - Ricoh Aficio MP 2000 | Printer Reference - Page 59
Using Adobe PageMaker Version 6.0, 6.5, or 7.0 Using Adobe PageMaker Version 6.0, 6.5, or 7.0 Under Windows 95 / 98 / Me / 2000 / XP, Windows Server 2003, or Windows 1 NT 4.0 with Adobe PageMaker, you need to copy PPD files to the PageMaker folder. PPD files have the .ppd extension in the - Ricoh Aficio MP 2000 | Printer Reference - Page 60
Preparing the Machine 1 54 - Ricoh Aficio MP 2000 | Printer Reference - Page 61
2. Setting Up the Printer Driver PCL - Accessing the Printer Properties Windows 95 / 98 / Me - Accessing the Printer Properties There are two methods to open the printer properties dialog box. Making Printer Default Settings To make the printer default settings, open the printer properties dialog - Ricoh Aficio MP 2000 | Printer Reference - Page 62
start printing. Note ❒ The procedure to open the printer properties dialog box may vary depend- ing on the application. For details, see the manuals provided with the ap- 2 plication you use. ❒ With some applications, the printer driver settings are not used, and the application's own default - Ricoh Aficio MP 2000 | Printer Reference - Page 63
printing. Note ❒ The procedure to open the [Printing Preferences] dialog box may vary de- pending on the application. For details, see the manuals provided with the application you use. ❒ Any settings you make in the following procedure are valid for the current application only. ❒ General users - Ricoh Aficio MP 2000 | Printer Reference - Page 64
Setting Up the Printer Driver Windows XP, Windows Server 2003 - Accessing the Printer Properties Making Printer Default Settings - The Printer Properties 2 Important ❒ To change the printer default settings including option configuration settings, log on using an account that has Manage - Ricoh Aficio MP 2000 | Printer Reference - Page 65
] to start printing. Note ❒ The procedure to open the [Printing Preferences] dialog box may vary depending on the application. For details, see the manuals provided with the application you use. ❒ Any settings you make in the following procedure are valid for the current application only. ❒ General - Ricoh Aficio MP 2000 | Printer Reference - Page 66
Setting Up the Printer Driver C On the [File] menu, click [Properties]. The printer properties dialog box appears. D Make the necessary settings, and then click [OK]. Note ❒ Settings you make here are used as the default settings for all applications. 2 Reference For details, see the printer - Ricoh Aficio MP 2000 | Printer Reference - Page 67
to start printing. Note ❒ The procedure to open the printer properties dialog box may vary depending on the application. For details, see the manuals provided with the application you use. ❒ With some applications, the printer driver settings are not used, and the application's own default settings - Ricoh Aficio MP 2000 | Printer Reference - Page 68
Accessing the Printer Properties There are two dialog box types of the printer properties dialog box. 2 "Multi-tab" is used as an example in this manual. For details about changing the dialog box types, see the printer driver Help. ❖ Multi-tab This dialog box type is designed for users who often - Ricoh Aficio MP 2000 | Printer Reference - Page 69
to start printing. Note ❒ The procedure to open the printer properties dialog box may vary depending on the application. For details, see the manuals provided with the application you use. ❒ With some applications, the printer driver settings are not used, and the application's own default settings - Ricoh Aficio MP 2000 | Printer Reference - Page 70
Setting Up the Printer Driver Windows 2000 - Accessing the Printer Properties This describes how to launch printer driver's properties. Making Printer Default Settings - The Printer Properties 2 Important ❒ To change the printer default settings including option configuration settings, log on - Ricoh Aficio MP 2000 | Printer Reference - Page 71
printing. Note ❒ The procedure to open the [Printing Preferences] dialog box may vary de- pending on the application. For details, see the manuals provided with the application you use. ❒ Any settings you make in the following procedure are valid for the current application only. ❒ General users - Ricoh Aficio MP 2000 | Printer Reference - Page 72
Setting Up the Printer Driver Windows XP, Windows Server 2003 - Accessing the Printer Properties Making Printer Default Settings - The Printer Properties 2 Important ❒ To change the printer default settings including option configuration settings, log on using an account that has Manage - Ricoh Aficio MP 2000 | Printer Reference - Page 73
printing. Note ❒ The procedure to open the [Printing Preferences] dialog box may vary de- pending on the application. For details, see the manuals provided with the application you use. ❒ Any settings you make in the following procedure are valid for the current application only. ❒ General users - Ricoh Aficio MP 2000 | Printer Reference - Page 74
Setting Up the Printer Driver Windows NT 4.0 - Accessing the Printer Properties Making Printer Default Settings - The Printer Properties Important 2 ❒ To change the printer default settings including option configuration settings, log on using an account that has Full Control permission. - Ricoh Aficio MP 2000 | Printer Reference - Page 75
start printing. Note ❒ The procedure to open the printer properties dialog box may vary depend- ing on the application. For details, see the manuals provided with the application you use. ❒ With some applications, the printer driver settings are not used, and the application's own default settings - Ricoh Aficio MP 2000 | Printer Reference - Page 76
Setting Up the Printer Driver 2 70 - Ricoh Aficio MP 2000 | Printer Reference - Page 77
to PDF version 1.6 can be printed. ❒ Some types of High Compression PDF files may not be printed. Consult your sales representative about the supported file types. Note ❒ Paper size errors may occur when printing on custom size paper. Printing Method The following procedures explain the two methods - Ricoh Aficio MP 2000 | Printer Reference - Page 78
Other Print Operations E Follow the instructions on the display to install DeskTopBinder Lite. If you are required to restart the computer after installing DeskTopBinder Lite, restart the computer and continue the - Ricoh Aficio MP 2000 | Printer Reference - Page 79
Printing a PDF File Directly PDF Direct Printing Use the method below to print PDF files directly. A Drag the PDF file you want to print to the PDF Direct Printing icon in the palette and drop it there. B [Output File List-PDF Direct Print] is displayed. Highlight the PDF you want to print, and - Ricoh Aficio MP 2000 | Printer Reference - Page 80
Icon... Changes the icon displayed on the tool bar. 3. Printer: Displays a list of RPCS drivers that support PDF direct printing. 4. Duplex Prints on both sides of sheets. 5. Layout Prints multiple pages on a single "sftp", and "lpr". Reference For details about UNIX commands, see Network Guide. 74 - Ricoh Aficio MP 2000 | Printer Reference - Page 81
this function. If a paper with text or image patterns is copied by a copier or a multi-function printer, either the patterns are printed vividly or the pattern or text for preventing unauthorized copying more visible: • Under [Copier Features], [Original Type Setting], set [Original Type 1 (Text)] - Ricoh Aficio MP 2000 | Printer Reference - Page 82
Print Operations Using [Data security for copying] If a document printed with data security for copying is copied by or stored in the Document Box of a copier or multi-function printer with the copy data security unit, the copy or stored file is grayed out. This section explains how to specify the - Ricoh Aficio MP 2000 | Printer Reference - Page 83
set is printed. 2. The document is copied or stored in copiers / multifunction machines which the Copy Data Security unit is installed. machine can print only as described in Step 1. ❒ Only the RPCS printer driver is supported. ❒ You cannot partially embed a pattern and text in a document. ❒ Use 182 - Ricoh Aficio MP 2000 | Printer Reference - Page 84
] check box. ❖ Printing a document using [Mask type:] 1. The pattern and text you have set is printed palely. 2. The document is copied, scanned, or stored in copiers / multifunction machines. AJL031S 3. The pattern and text you have set appear clearly. 78 - Ricoh Aficio MP 2000 | Printer Reference - Page 85
Unauthorized Copy Control Note ❒ Only the RPCS printer driver is supported. ❒ You cannot partially embed patterns and text strings in a document. ❒ To make the embedded pattern clear, set the character size at least 50 pt (preferably - Ricoh Aficio MP 2000 | Printer Reference - Page 86
section gives instructions for operating the machine when there is no tray for the selected paper size or type, or when paper loaded in the machine has run out. Important ❒ The tray cannot be changed if the following functions are set: • Duplex Print to a tray that does not support duplex printing - Ricoh Aficio MP 2000 | Printer Reference - Page 87
prints using the selected tray. 3 Note ❒ If a tray with a smaller paper size is selected, the print job may be cut short, or other problems may occur. Canceling a Print Job Follow this procedure for canceling the print job if the message prompting form feed appears. A Press [JobReset]. B Press - Ricoh Aficio MP 2000 | Printer Reference - Page 88
Other Print Operations Note ❒ If the machine is shared by multiple computers, be careful not to accidentally cancel someone else's print job. ❒ Under Windows, If the machine is connected to the computer using a parallel cable, sent print jobs may be canceled if [JobReset] is pressed while " - Ricoh Aficio MP 2000 | Printer Reference - Page 89
Canceling a Print Job Canceling a Print Job This section gives instruction to stop printing from the computer or the control panel. Canceling a Print Job Using the Control Panel A Press [JobReset] on the display panel. A confirmation message - Ricoh Aficio MP 2000 | Printer Reference - Page 90
Other Print Operations Note ❒ If the machine is shared by multiple computers, be careful not to accidentally cancel someone else's print job. ❒ If the machine is connected to the computer using a parallel cable, sent print jobs may be canceled if [JobReset] is pressed while "Waiting..." is - Ricoh Aficio MP 2000 | Printer Reference - Page 91
Checking the Error Log Checking the Error Log If files could not be stored due to printing errors, identify the cause of the errors by checking the error log on the control panel. Important ❒ The most recent 30 errors are stored in the error log. If a new error is added when there are 30 errors - Ricoh Aficio MP 2000 | Printer Reference - Page 92
Other Print Operations Collate When printing multiple documents such as handouts for meetings, you can separate sets into order. This function is known as "Collate". Collate stores data transmitted from a computer in memory. The following are the two types of collate: Important ❒ Rotating Collate - Ricoh Aficio MP 2000 | Printer Reference - Page 93
Collate Reference For information about paper sizes and the number of sets you can use Collate or Rotating Collate with in every option, see Copy Reference. For printing methods, see the printer driver Help. 3 87 - Ricoh Aficio MP 2000 | Printer Reference - Page 94
Other Print Operations 3 88 - Ricoh Aficio MP 2000 | Printer Reference - Page 95
Functions and Settings of the Machine Mainframe Network Guide, PostScript 3 Supplement, and UNIX Supplement cover are using. Reference For details about functions and setting items, see Network Guide, PostScript 3 Supplement and UNIX Supplement. Functions The following functions are available with - Ricoh Aficio MP 2000 | Printer Reference - Page 96
• Device Info Menu Functions System Version Printer Language Read Read Read Read User mode Administrator mode Read Read Read Read • Counter Menu Copier Printer Fax Send/TX Total Fax Transmission Scanner Send Other Function(s) Read Read Read Read Read Read Read User mode Administrator mode - Ricoh Aficio MP 2000 | Printer Reference - Page 97
❖ Job • Job List Menu Current/Waiting Jobs Job History • Printer Menu Job History Error Log • Fax History Menu Transmission Reception LAN-Fax Read Read User mode Read Read User mode Read Read Read User mode ❖ Address Book Menu Address Book User mode None ❖ Configuration • Device Settings - Ricoh Aficio MP 2000 | Printer Reference - Page 98
The Functions and Settings of the Machine 4 92 Menu Program/Change Administrator None LDAP Server None Firmware Update None User mode • Printer Menu Basic Settings Tray Parameters (PCL) Tray Parameters (PS) PDF Temporary Password PDF Group Password PDF Fixed Password User mode Read None - Ricoh Aficio MP 2000 | Printer Reference - Page 99
List of the Setting Items • Security Menu Network Security Access Control IPP Authentication SSL/TLS ssh Site Certificate Device Certificate None None None None None None None User mode Administrator mode Read/Modify Read/Modify Read/Modify Read/Modify Read/Modify Read/Modify Read/Modify • RC - Ricoh Aficio MP 2000 | Printer Reference - Page 100
The Functions and Settings of the Machine Settings that can be used with PostScript 3 The following PostScript 3 settings can be used with the machine: Note ❒ Depending on a type of printer drivers, different items may be displayed. Settings Fit to Paper Collate Print Mode Dithering: 4 - Ricoh Aficio MP 2000 | Printer Reference - Page 101
3 : 136 fonts (Type 2:24, Type 14:112) 384 MB 100 BASE-TX / 10 BASE-T shielded twisted-pair (STP, Category/Type5) cable. • Supported Operating System: Windows Me / 2000 / XP, Windows Server 2003, MacOS 9.2.2, MacOS 10.3.3 or later • Transmission spec. USB 2.0 Standard • Connectable Device: Devices - Ricoh Aficio MP 2000 | Printer Reference - Page 102
spec.: Based on IEEE 802.11b (wireless LAN) ❖ Protocol: TCP/IP, IPX/SPX, AppleTalk Note ❒ SmartDeviceMonitor and Web Image Monitor are supported. ❖ Data transfer speed: Auto select from below speed 1 Mbps, 2 Mbps, 5.5 Mbps, 11 Mbps ❖ Frequency range: • Inch version: 2412 - 2462 MHz (1 - 11 - Ricoh Aficio MP 2000 | Printer Reference - Page 103
indoors is 10 - 100 m, depending on environment. ❖ Transmission mode: Ad hoc, and infrastructure mode Bluetooth Interface Unit Type 3245 ❖ Supported Profiles: • SPP (Serial Port Profile) • HCRP (Hardcopy Cable Replacement Profile) 5 • BIP (Basic Imaging Profile) ❖ Frequency Range: 2.45 GHz ISM - Ricoh Aficio MP 2000 | Printer Reference - Page 104
defaults, RPCS, 68 E Envelope, 17 Error log, 85 F Font Manager 2000, 52 Fonts, 95 Form Feed, 80 H Hard disk, 95 How to Read This Manual, 3 I IEEE 1284 Interface Board Type A, 96 IEEE 802.11b Interface Unit Type H, 96 Installing the Printer Driver, 23 Installing the printer driver, 23 Installing the - Ricoh Aficio MP 2000 | Printer Reference - Page 105
U Unauthorized Copy Control, 75 Using as a Windows Network Printer, 34 Using commands, 74 W Windows 2000, 44, 56, 64 Windows 95/98/Me, 55, 62 Windows NT 4.0, 59, 60, 68 Windows Server 2003, 58, 66 Windows XP, 58, 66 99 - Ricoh Aficio MP 2000 | Printer Reference - Page 106
100 EN USA B843-7803 - Ricoh Aficio MP 2000 | Printer Reference - Page 107
through X/Open Company Limited. The Bluetooth® word mark and logos are owned by the Bluetooth SIG, Inc. and any use of such marks by Ricoh Company, Ltd. is under license. NetWare is a registered trademark of Novell, Inc. UPnP is a trademark of the UPnP Implementers Corporation. Other product names - Ricoh Aficio MP 2000 | Printer Reference - Page 108
Operating Instructions Printer Reference EN USA B843-7803
-
 1
1 -
 2
2 -
 3
3 -
 4
4 -
 5
5 -
 6
6 -
 7
7 -
8
-
9
-
10
-
11
-
12
-
13
-
14
-
15
-
16
-
17
-
18
-
19
-
20
-
21
-
22
-
23
-
24
-
25
-
26
-
27
-
28
-
29
-
30
-
31
-
32
-
33
-
34
-
35
-
36
-
37
-
38
-
39
-
40
-
41
-
42
-
43
-
44
-
45
-
46
-
47
-
48
-
49
-
50
-
51
-
52
-
53
-
54
-
55
-
56
-
57
-
58
-
59
-
60
-
61
-
62
-
63
-
64
-
65
-
66
-
67
-
68
-
69
-
70
-
71
-
72
-
73
-
74
-
75
-
76
-
77
-
78
-
79
-
80
-
81
-
82
-
83
-
84
-
85
-
86
-
87
-
88
-
89
-
90
-
91
-
92
-
93
-
94
-
95
-
96
-
97
-
98
-
99
-
100
-
101
-
102
-
103
-
104
-
105
-
106
-
107
-
108
 |
 |
Operating Instructions
Printer Reference
Read this manual carefully before you use this machine and keep it handy for future reference. For safe and correct use, be sure to read the
Safety Information in "About This Machine" before using the machine.
Preparing the Machine
Setting Up the Printer Driver
Other Print Operations
The Functions and Settings of the Machine
Appendix
1
2
3
4
5