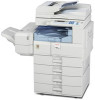
Ricoh Aficio MP 2500 Scanner Reference
Ricoh Aficio MP 2500 Manual
 |
View all Ricoh Aficio MP 2500 manuals
Add to My Manuals
Save this manual to your list of manuals |
Ricoh Aficio MP 2500 manual content summary:
- Ricoh Aficio MP 2500 | Scanner Reference - Page 1
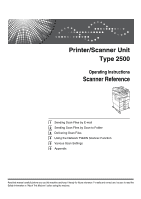
Printer/Scanner Unit Type 2500 Operating Instructions Scanner Reference 1 Sending Scan Files by E-mail 2 Sending Scan Files by Scan to Folder 3 Delivering Scan Files 4 Using the Network TWAIN Scanner Function 5 Various Scan Settings 6 Appendix Read this manual carefully before you use this machine - Ricoh Aficio MP 2500 | Scanner Reference - Page 2
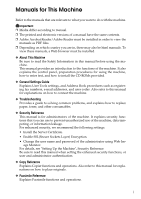
Introduction This manual contains detailed instructions and notes on the operation and use of this machine. For your safety and benefit, read this manual carefully before using the machine. Keep this manual in a handy place for quick reference. Important Contents of this manual are subject to change - Ricoh Aficio MP 2500 | Scanner Reference - Page 3
such as registering fax numbers, e-mail addresses, and user codes. Also refer to this manual for explanations on how to connect the machine. ❖ Troubleshooting Provides a guide to solving common problems, and explains how to replace paper, toner, and other consumables. ❖ Security Reference This - Ricoh Aficio MP 2500 | Scanner Reference - Page 4
Reference Explains Printer functions and operations. ❖ Scanner Reference Explains Scanner functions and operations. ❖ Network Guide Explains how to configure and operate the machine in a network environment, and use the software provided. This manual covers all models, and includes descriptions - Ricoh Aficio MP 2500 | Scanner Reference - Page 5
's Address Book 17 Manual Entry of an E-mail Address 23 Searching for a Destination in the LDAP Server 24 Registering a Manually-Entered E-mail Address Machine's Address Book 53 Sending Scan Files to a Shared Folder on the Network 59 Sending Scan Files to an FTP Server 65 Sending Scan Files to - Ricoh Aficio MP 2500 | Scanner Reference - Page 6
TWAIN Scanner Function When Using as a TWAIN Scanner 89 Outline of the TWAIN Scanner Function 90 Preparation for Using the Network TWAIN Scanner 91 Installing TWAIN Driver from Provided CD-ROM 92 Basic Procedure for Scanning Files Using TWAIN Scanner 93 5. Various Scan Settings Specifying Send - Ricoh Aficio MP 2500 | Scanner Reference - Page 7
Name: Printer/Scanner Controller Model Number: Printer/Scanner Unit Type 2500 Responsible party: Ricoh Americas and used in accordance with the instructions, may cause harmful interference to radio by turning the equipment off and on, the user is encouraged to try to correct the interference by - Ricoh Aficio MP 2500 | Scanner Reference - Page 8
explanations. Indicates supplementary explanations of the machine's functions, and instructions on resolving user errors. This symbol is located at the end of sections. It indicates where you can to as follows in this manual: • Auto Document Feeder capable of scanning both sides of a sheet→ARDF 2 - Ricoh Aficio MP 2500 | Scanner Reference - Page 9
This section describes functions you can use in the scanner mode. For details about each function, see respective chapters. the TWAIN Driver Use the TWAIN driver to specify the machine where originals will be scanned from a client computer. For details, see chapter 4 "Using the Network TWAIN Scanner - Ricoh Aficio MP 2500 | Scanner Reference - Page 10
to the E-mail screen" is given in this manual, press the left selection key. • When the instruction "press [Manual] " is given in this manual, press the center selection key. • When the instruction "press [Options] " is given in this manual, press the right selection key. ARO007S 2. {Escape - Ricoh Aficio MP 2500 | Scanner Reference - Page 11
Confirmation Displays This section explains the two confirmation displays - Check Dest. and File Status. Check destination This section explains about displayed items and how to display the Check Dest. screen. Use the Check Dest. screen to check the details of e-mail, Scan to folder, or delivery - Ricoh Aficio MP 2500 | Scanner Reference - Page 12
File status This section explains the items that appear on the screen and how to display File Status. Use the File Status screen to check e-mail, Scan to Folder, and delivery results. Press the {Job Information} key to display File Status. ❖ File Status ARO010S 1. Date / Time Displays the date and - Ricoh Aficio MP 2500 | Scanner Reference - Page 13
the {User Tools/Counter} key. For details about setting methods, see General Settings Guide. ❖ Scan Settings Items Default Scan set [Delivery Option] to [On]. This setting is available only when the Network Delivery Scanner function is enabled by the ScanRouter delivery software. Allows you to - Ricoh Aficio MP 2500 | Scanner Reference - Page 14
tries to use the TWAIN scanner while scanning is in progress. Allows you to specify the default file format of scan files. Allows you to specify a compression of scanned image data. Allows mail. Description Allows you to set the default access level for functions whose settings can be changed by - Ricoh Aficio MP 2500 | Scanner Reference - Page 15
2. SMTP server You need to have an access to an e-mail server that supports SMTP (Simple Mail Transfer Protocol), to send scan files by email. However, it Use this server for administering e-mail accounts, searching the network, and authenticating the computers that access the machine. Using the - Ricoh Aficio MP 2500 | Scanner Reference - Page 16
] under [Scanner Features]. Note ❒ This machine does not support SMTPS (SMTP over SSL). ❒ To connect the machine to the network using a wireless LAN (IEEE 802.11b), an extended wireless LAN board is required respectively. For details, see Network Guide. ❒ Items to set up in [System Settings] vary - Ricoh Aficio MP 2500 | Scanner Reference - Page 17
You can also register e-mail addresses in the address book using Web Image Monitor or SmartDeviceMonitor for Admin. For details about how to install these applications, see Network Guide. For details about registering addresses in the address book, see Help of respective applications. ❒ Depending on - Ricoh Aficio MP 2500 | Scanner Reference - Page 18
Sending Scan Files by E-mail E-mail Screen This section explains the screen layout when sending scan files by e-mail. 1 ❖ Main screen ZZZ601S ❖ When a destination is entered manually ZZZ602S ❖ When a group is selected for destination ZZZ603S 12 - Ricoh Aficio MP 2500 | Scanner Reference - Page 19
selecting multiple destinations af- 1 ple destinations are selected, press the ter a manual entry of an e-mail address, {U} or {T} key to display the destina- the {Check Destination} key. 3. E-mail / Scan to Folder / Network 7. [EditDest] When changing an e-mail address that has been entered, - Ricoh Aficio MP 2500 | Scanner Reference - Page 20
operation for sending scan files by e-mail. 1 A Make sure that no previous settings remain. If a previous setting remains, press the {Clear Modes} key. B If the Network Delivery Scanner or Scan to Folder screen is displayed, press [ ] to switch to the E-mail screen. C Place originals. D If - Ricoh Aficio MP 2500 | Scanner Reference - Page 21
default sender name. This lets you send e-mail without entering anything for [Sender's Name]. For details, see General Settings Guide. ❒ Depending on the security setting, the logged-on user Check Destination". ❒ To cancel scanning, press the {Clear/ Stop} key. Reference p.113 "Selecting Original - Ricoh Aficio MP 2500 | Scanner Reference - Page 22
destination from the machine's address book • Enter an e-mail address manually • Search the LDAP server for a destination and select it Selecting a register an e-mail destination to a Quick Dial key, see General Settings Guide. A Press the Quick Dial key to which the destination is registered. - Ricoh Aficio MP 2500 | Scanner Reference - Page 23
book. 1 Important ❒ To use this function, you must register destinations in [System Settings] in ad- vance. For details, see General Settings Guide. There are four methods of selecting a destination that is registered in the machine's address book: • Select a destination from the list • Enter - Ricoh Aficio MP 2500 | Scanner Reference - Page 24
Sending Scan Files by E-mail C Press the {U} or {T} key to select the destination from the list, and then press the {V} key. 1 The check box on the left side of the selected destination is selected. Repeat this step to add more destinations. D Press the {OK} key. Note ❒ If under [System Settings], [ - Ricoh Aficio MP 2500 | Scanner Reference - Page 25
Specifying E-mail Destinations B Press the {U} or {T} key to select [Search by Registration No.], and then press the {OK} key. 1 C Use the number keys to enter the three-digit number assigned to the desti- nation, and then press the {OK} key. Example: To enter 003 Press the {3} key, and then press - Ricoh Aficio MP 2500 | Scanner Reference - Page 26
Sending Scan Files by E-mail Searching for a destination by name Use the following procedure to search by name for a destination in the machine's address book. 1 A Press the {Search Destination} key. ZZZ610S The illustration is an example. The actual appearance may be different. B Select [ - Ricoh Aficio MP 2500 | Scanner Reference - Page 27
E Press the {OK} key. Specifying E-mail Destinations 1 Note ❒ Up to 100 destinations can be displayed as search results. ❒ If under [System Settings], [LDAP Search] is set to [On], a screen to select a search object appears when you press the {Search Destination} key. On the screen, select [Search - Ricoh Aficio MP 2500 | Scanner Reference - Page 28
Sending Scan Files by E-mail C Enter the beginning of the e-mail address, and then press the {OK} key twice. 1 Destinations that match the search conditions are displayed. D Press the {U} or {T} key to select the destination, and then press the {V} key. The check box on the left side of the selected - Ricoh Aficio MP 2500 | Scanner Reference - Page 29
Entry of an E-mail Address This section explains how to enter an e-mail address manually. A Press [Manual]. 1 B Enter the e-mail address. C Press the {OK} key. Note ❒ Depending on the security settings, [Manual] may not be displayed. For de- tails, consult the administrator. ❒ To modify or - Ricoh Aficio MP 2500 | Scanner Reference - Page 30
❒ To use this function, you must connect an LDAP server to the network. ❒ It is necessary to register the LDAP server under [System Settings]. Also to [On] under [System Settings]. For details, see "General Settings Guide". A Press the {Search Destination} key. ZZZ610S The illustration is an - Ricoh Aficio MP 2500 | Scanner Reference - Page 31
{OK} key. Specifying E-mail Destinations 1 If authentication is required to access the server, the authentication screen appears. Enter the user name and password correctly. The Search LDAP screen reappears. E Select [Advanced Search], and then press the {OK} key. F Specify the search conditions - Ricoh Aficio MP 2500 | Scanner Reference - Page 32
Sending Scan Files by E-mail I Press the {U} or {T} key to select [Fuzzy Search], and then press the {OK} key. 1 appears on the left side of the specified condition. You can also refine the search by setting multiple search conditions. J Press the {Escape} key. K Press [Search]. Destinations that - Ricoh Aficio MP 2500 | Scanner Reference - Page 33
character or characters are targeted. Example) To find "ABC", enter "ABC". • [Fuzzy Search]: a vague search (The function of this vague search depends on the system supported by the LDAP server.) Reference p.123 "E-mail" 27 - Ricoh Aficio MP 2500 | Scanner Reference - Page 34
Entered E-mail Address in the Address Book This section explains how to register a manually entered destination in the ma- 1 chine's address book. You can also register a destination , press the {OK} key. For details about specifying registration information, see General Settings Guide. 28 - Ricoh Aficio MP 2500 | Scanner Reference - Page 35
E Press the {Escape} key. Specifying E-mail Destinations 1 Note ❒ Depending on the security settings, [Program] may not appear. In such case, you cannot complete the registration. For detail, consult you administrator. 29 - Ricoh Aficio MP 2500 | Scanner Reference - Page 36
details, see General Settings Guide. ❒ In [System Settings], you can specify the administrator's e-mail address as the default sender name. This lets you send e-mails without entering anything for [Sender's Name]. ❒ Depending on the security setting, the logged-on user - Ricoh Aficio MP 2500 | Scanner Reference - Page 37
to select a sender registered to a Quick Dial key. For details about how to register e-mail senders to Quick Dial keys, see General 1 Settings Guide. A Press [Options]. B Select [Sender's Name], and then press the {OK} key. C Press the Quick Dial key to which the sender is registered. ZZZ609S - Ricoh Aficio MP 2500 | Scanner Reference - Page 38
Sending Scan Files by E-mail Selecting a Sender from the List This section explains how to select a sender from the machine's address book 1 list. A Press [Options]. B Select [Sender's Name], and then press the {OK} key. C Press the {Search Destination} key. ZZZ610S The illustration is an - Ricoh Aficio MP 2500 | Scanner Reference - Page 39
Specifying the Sender E Press the {U} or {T} key to select the sender, and then press the {V} key. 1 The check box on the left side of the selected sender is selected. To cancel a selected sender, press the {U} or {T} key to select the target sender, and then press the {W} key. F Press the {OK} key. - Ricoh Aficio MP 2500 | Scanner Reference - Page 40
Sending Scan Files by E-mail Using a Registration Number to Specify a Sender Name Select the sender using the registration numbers specified by senders in the ma- 1 chine's address book. A Press [Options]. B Select [Sender's Name], and then press the {OK} key. C Press the {Search Destination} - Ricoh Aficio MP 2500 | Scanner Reference - Page 41
Specifying the Sender E Use the number keys to enter the three-digit number assigned to the sender, and then press the {OK} key. Example: To enter 001 Press the {1} key, and then press the {OK} key. 1 F Press the {V} key. The check box on the left side of the selected sender is selected. G - Ricoh Aficio MP 2500 | Scanner Reference - Page 42
Sending Scan Files by E-mail Searching for a Sender by Name This section explains how to search by name for a sender in the machine's ad- 1 dress book. A Press [Options]. B Select [Sender's Name], and then press the {OK} key. C Press the {Search Destination} key. ZZZ610S The illustration is - Ricoh Aficio MP 2500 | Scanner Reference - Page 43
Specifying the Sender E Enter the beginning of the sender name, and then press the {OK} key twice. 1 Senders that match the search conditions are displayed. F Press the {U} or {T} key to select the sender, and then press the {V} key. The check box on the left side of the selected sender is selected. - Ricoh Aficio MP 2500 | Scanner Reference - Page 44
Sending Scan Files by E-mail Searching for a Sender by E-mail Address This section explains how to search by e-mail address for a sender in the ma- 1 chine's address book. A Press [Options]. B Select [Sender's Name], and then press the {OK} key. C Press the {Search Destination} key. ZZZ610S - Ricoh Aficio MP 2500 | Scanner Reference - Page 45
Specifying the Sender E Enter the beginning of the sender's e-mail address, and then press the {OK} key twice. 1 Destinations that match the search conditions are displayed. F Press the {U} or {T} key to select the destination, and then press the {V} key. G Press the {OK} key. H Press the {OK} key. - Ricoh Aficio MP 2500 | Scanner Reference - Page 46
not be transmitted if the e-mail software of the recipient does not support Message Disposition Notification. ❒ When the administrator's e-mail address is automatically Receipt] is selected. For details about [Admin. E-mail Address] and [Auto Specify Sender Name], see General Settings Guide. 40 - Ricoh Aficio MP 2500 | Scanner Reference - Page 47
Specifying the Subject This section explains how to specify the e-mail subject. A Press [Options]. Specifying the Subject 1 B Press the {U} or {T} key to select [Attach Subject], and then press the {OK} key. C Enter the subject, and then press the {OK} key. "Programmed" appears, and then the - Ricoh Aficio MP 2500 | Scanner Reference - Page 48
Sending Scan Files by E-mail 1 42 - Ricoh Aficio MP 2500 | Scanner Reference - Page 49
scan files by Scan to Folder. Sending scan files to shared folders 1. This machine You can send scan files to shared network folders. To send scan files to shared network folders, use the SMB protocol. 2. Computer with a shared folder To use this function, it is necessary to create a shared folder - Ricoh Aficio MP 2500 | Scanner Reference - Page 50
To send scan files to FTP server folders, use the FTP protocol. 2. FTP server The FTP server is a server that provides file transfer services among computers on the same network. Transferred files are stored on this server. It is essential to have the FTP server inside the LAN/WAN where this machine - Ricoh Aficio MP 2500 | Scanner Reference - Page 51
NCP protocol. 2. NetWare server You can use this server to share files over the network via NetWare. By sending image data to the server, images can be stored on the server. ZZZ511S 3. Client computer To download images, a computer must be running the NetWare client and be logged onto the server - Ricoh Aficio MP 2500 | Scanner Reference - Page 52
❒ Items to set up in [System Settings] vary depending on the network environment. For more information about network settings, see General Settings Guide. ❒ For more information about [Scanner Features], see General Settings Guide. ❒ Sending files using SMB is available only under a NetBIOS over TCP - Ricoh Aficio MP 2500 | Scanner Reference - Page 53
, see Network Guide. For details about registering addresses, see Help of respective applications. ❒ Depending on the machine type, you may not be able to use the machine when it is updating the address book using CSV files (retrieved using SmartDeviceMonitor for Admin) that contain user codes - Ricoh Aficio MP 2500 | Scanner Reference - Page 54
Sending Scan Files by Scan to Folder Scan to Folder Screen This section describes the screen layout when sending scan files by Scan to Folder. ❖ Main screen 2 ZZZ604S ❖ When a destination is entered manually ZZZ605S ❖ When a group is selected for destination ZZZ606S 48 - Ricoh Aficio MP 2500 | Scanner Reference - Page 55
you want to send. 2 check the selected destination, press the {Check Destination} key. 6. [Add Dest] Press to add a manually entered folder 3. E-mail /Scan to Folder /Network path as a destination. Delivery Scanner Press to switch between screens. You can also use this key to switch between - Ricoh Aficio MP 2500 | Scanner Reference - Page 56
for sending scan files by Scan to Folder. A Make sure that no previous settings remain. If a previous setting remains, press the {Clear Modes} key. 2 B If the Network Delivery Scanner or E-mail screen is displayed, press [ ] key to switch to the Scan to Folder screen. C Place originals. D If - Ricoh Aficio MP 2500 | Scanner Reference - Page 57
appear one by one by pressing the {U} or {T} key. ❒ To cancel a selected destination, display the destination in the destination field, and then press the {Clear/ Stop} key. To cancel a destination selected from the address book, press the selected destination again. ❒ To cancel scanning, press the - Ricoh Aficio MP 2500 | Scanner Reference - Page 58
destination registered in the machine's address book • Send a file to a shared network folder • Send a file to an FTP server • Send a file to NetWare a Scan to Folder destination to a Quick Dial key, see General Settings Guide. A Press the Quick Dial key to which the destination is registered. - Ricoh Aficio MP 2500 | Scanner Reference - Page 59
Specifying Scan to Folder Destinations Selecting a Destination Registered in the Machine's Address Book This section explains how to select a destination from the machine's address book. Important ❒ To use this function, you must register destinations in [System Settings] in advance. 2 There are - Ricoh Aficio MP 2500 | Scanner Reference - Page 60
Sending Scan Files by Scan to Folder C Press the {U} or {T} key to select the destination, and then press the {V} key. 2 The check box on the left side of the selected destination is selected. Repeat this step to add more destinations. D Press the {OK} key. Note ❒ To cancel a selected - Ricoh Aficio MP 2500 | Scanner Reference - Page 61
Specifying Scan to Folder Destinations C Using the number keys, enter the three-digit registration number assigned to the destination, and then press the {OK} key. Example: To enter 002 Press the {2} key, and then press the {OK} key. 2 D Press the {V} key. The check box on the left side of the - Ricoh Aficio MP 2500 | Scanner Reference - Page 62
Sending Scan Files by Scan to Folder Searching for a destination by name Use the following procedure to search by name for a destination in the machine's address book. A Press the {Search Destination} key. 2 ZZZ610S The illustration is an example. The actual appearance may be different. B Select [ - Ricoh Aficio MP 2500 | Scanner Reference - Page 63
E Press the {OK} key. Specifying Scan to Folder Destinations Note 2 ❒ Up to 100 destinations can be displayed as search results. Search for a destination by folder path Use the following procedure to search by folder path for a destination in the machine's address book. A Press the {Search - Ricoh Aficio MP 2500 | Scanner Reference - Page 64
Sending Scan Files by Scan to Folder D Press the {U} or {T} key to select the destination, and then press the {V} key. 2 The check box on the left side of the selected destination is selected. E Press the {OK} key. Note ❒ Up to 100 destinations can be displayed as search results. 58 - Ricoh Aficio MP 2500 | Scanner Reference - Page 65
shared folder may require authentication. ❒ The machine does not support DFS (Distributed File System). You can send a file to a shared folder over the network by any of the following methods: • Enter the destination path manually • Specify the destination folder path by browsing Entering the path - Ricoh Aficio MP 2500 | Scanner Reference - Page 66
of specifying the destination using its computer name, you can also use its IPv4 address. 2 E Enter a user name used to log on to the client computer, and then press the {OK} key. F Enter the password used to log on to the client computer, and then press the {OK} key. The Confirm Destination - Ricoh Aficio MP 2500 | Scanner Reference - Page 67
the login screen appears. Enter the user name and password. ❒ If you change the protocol after entering the path name, user name, or password, not have write privileges for the shared folder or there is not enough free hard disk space. ❒ You can register the destination path in the machine's - Ricoh Aficio MP 2500 | Scanner Reference - Page 68
by browsing to a destination folder Use the following procedure to specify a destination folder path by browsing computers on the network. A Press [Dest.:]. 2 B Select [SMB], and then press the {OK} key. C Press [Browse Network], and then press the {OK} key. A list of domains or work groups on the - Ricoh Aficio MP 2500 | Scanner Reference - Page 69
Specifying Scan to Folder Destinations F A login screen appears if authentication is required. Enter a user name and password used to log on to the client computer, and then press the {OK} key. G Select the destination folder, and then press [Apply]. 2 If you cannot - Ricoh Aficio MP 2500 | Scanner Reference - Page 70
login screen appears. Enter the user name and password. ❒ If you change the protocol after entering the path name, user name, or password, a confirmation message appears. ❒ If you press [Cancel] while browsing the network folder or there is not enough free hard disk space. ❒ You can register the - Ricoh Aficio MP 2500 | Scanner Reference - Page 71
server. Directly enter the path for the folder on the FTP Server You can enter the path to an FTP server manually. A Press [Dest.:]. 2 B Select [FTP], and then press the {OK} key. C Enter the FTP number keys, and then press the {OK} key. E Enter the user name, and then press the {OK} key. 65 - Ricoh Aficio MP 2500 | Scanner Reference - Page 72
. I The test result appears. Press [Exit]. J Press the {OK} key. Note ❒ If you change the protocol after entering the path name, user name, or password, a confirmation message appears. ❒ The connection test may take time. ❒ You can register the destination path in the machine's address book. For - Ricoh Aficio MP 2500 | Scanner Reference - Page 73
environment. Consult your administrator. You can send a file to NetWare server by any of the following methods: • Enter the destination path manually • Specify the destination folder path by browsing Entering the path to a destination folder Enter the destination folder path of the NetWare - Ricoh Aficio MP 2500 | Scanner Reference - Page 74
Sending Scan Files by Scan to Folder D Select [Manual Entry], and then press the {OK} key. 2 E context containing the user object. If the user name is "user" and the name of the Context is "context", the user name will be "user.context". G If a password is specified for the log on user, enter it, - Ricoh Aficio MP 2500 | Scanner Reference - Page 75
key. Note ❒ If you change the protocol after entering the path name, user name, or password, a confirmation message appears. ❒ You can connect only to folders that have write privileges for the file or there is not enough free hard disk space. ❒ You can register the destination path in the machine - Ricoh Aficio MP 2500 | Scanner Reference - Page 76
NDS tree. Select [Bindery] to specify a folder on the NetWare Bindery server. D Press [Browse Network], and then press the {OK} key. A list of NetWare Bindery servers or NDS trees on the network appears. E Select the NDS tree or NetWare Bindery server that contains the required destination folder - Ricoh Aficio MP 2500 | Scanner Reference - Page 77
Specifying Scan to Folder Destinations F A login screen appears if authentication is required. Enter a user name and password, and then press the {OK} key. G Select a context or volume that contains the required destination folder, 2 and then press the {OK} key. A list of destination - Ricoh Aficio MP 2500 | Scanner Reference - Page 78
NDS tree or on the 2 NetWare Bindery server might appear garbled. ❒ If the selected NDS tree or NetWare Bindery server requires authentica- tion, a login screen appears. Enter a user name and password for logging on to the NDS tree or NetWare Bindery server. If you log on to the NDS tree, enter - Ricoh Aficio MP 2500 | Scanner Reference - Page 79
Path to the Selected Destination in the Address Book This section explains how to register folder paths you have entered manually or specified by browsing the network to the machine's address book. A Press the {Check Destination} key. 2 ZZZ611S The illustration is an example. The actual appearance - Ricoh Aficio MP 2500 | Scanner Reference - Page 80
Sending Scan Files by Scan to Folder 2 74 - Ricoh Aficio MP 2500 | Scanner Reference - Page 81
This section outlines the function for delivering files using the network delivery scanner. 1. This machine You can send scan details about delivery types and the setting method, see ScanRouter delivery software manuals. 3. Client computer The delivery method determines how you can check files - Ricoh Aficio MP 2500 | Scanner Reference - Page 82
and sender. For details, see the ScanRouter delivery software manuals. Note ❒ To connect the machine to the network using a wireless LAN (IEEE 802.11b), an extended wireless LAN board is required respectively. For details, see Network Guide. ❒ Items to set up in [System Settings] vary depending - Ricoh Aficio MP 2500 | Scanner Reference - Page 83
CD-ROM into the CD-ROM drive. The installer is automatically started and the [Scanner Driver and Utilities] dialog box appears. 3 B Click [DeskTopBinder Lite]. The [DeskTopBinder Lite Setup] dialog box appears. For the subsequent installation steps, see Setup Guide that can be displayed from the - Ricoh Aficio MP 2500 | Scanner Reference - Page 84
they were selected. To check the selected destination, press the {Check Destination} key. 3. E-mail /Scan to Folder /Network Delivery Scanner Press to switch between screens. ZZZ608S 4. [Manual] To send a file by e-mail via the delivery server to a destination not registered in the delivery server - Ricoh Aficio MP 2500 | Scanner Reference - Page 85
Before Delivering Scan Files 6. [Add Dest] When selecting multiple destinations after a manual entry of an e-mail address, press [Add Dest], and then enter the e-mail address of the destination. 7. [EditDest] When changing an e-mail address that has - Ricoh Aficio MP 2500 | Scanner Reference - Page 86
. A Make sure that no previous settings remain. 3 If a previous setting remains, press the {Clear Modes} key. B If the E-mail or Scan to Folder screen is displayed, press [ to the Network Delivery Scanner screen. ] to switch C Place originals. D If necessary, select the original type. For - Ricoh Aficio MP 2500 | Scanner Reference - Page 87
, see "Manual Entry of an Email Address". ❒ If you have selected two or more destinations, the destinations can be made to appear one by one by pressing the {U} or {T} key. ❒ To cancel a selected destination, display the destination in the destination field, and then press the {Clear/ Stop} key - Ricoh Aficio MP 2500 | Scanner Reference - Page 88
the manuals supplied with the ScanRouter delivery software. Note, however, that if the receiving party's email application does not support the {Clear/ Stop} key. Reference p.113 "Selecting Original Type" p.114 "Adjusting Image Density" p.83 "Specifying Delivery Destinations" p.23 "Manual Entry of - Ricoh Aficio MP 2500 | Scanner Reference - Page 89
key. For details about how to register a delivery destination to a Quick Dial key, see General Settings Guide. A Press a Quick Dial key of the same number as the [Short ID] of the destina- For details about how to set Short IDs, see the manuals supplied with the ScanRouter delivery software. 83 - Ricoh Aficio MP 2500 | Scanner Reference - Page 90
Delivering Scan Files Selecting a Destination Registered in the Destination List of the Delivery Server This section explains how to select a destination registered in the delivery server's Destination List. There are four methods of selecting a destination that is registered in the delivery - Ricoh Aficio MP 2500 | Scanner Reference - Page 91
by entering its Short ID number (registered using the ScanRouter delivery software). For details about how to set Short IDs, see the manuals supplied with the ScanRouter delivery software. A Press the {Search Destination} key. ZZZ610S The illustration is an example. The actual appearance may be - Ricoh Aficio MP 2500 | Scanner Reference - Page 92
Delivering Scan Files C Using the number keys, enter the three-digit registration number assigned to the destination, and then press the {OK} key. Example: To enter 003 Press the {3} key, and then press the {OK} key. 3 D Press the {V} key. The check box on the left side of the selected - Ricoh Aficio MP 2500 | Scanner Reference - Page 93
Specifying Delivery Destinations B Select [Search by Name], and then press the {OK} key. C Enter the beginning of the destination name, and then press the {OK} key twice. 3 D Press the {U} or {T} key to select the destination, and then press the {V} key. The check box on the left side of the - Ricoh Aficio MP 2500 | Scanner Reference - Page 94
Delivering Scan Files Searching for a destination by comment Use the following procedure to search by comment for a destination in the delivery server's Destination List. The Search by Comment function searches for a destination using the comment (one of the registration items required by the - Ricoh Aficio MP 2500 | Scanner Reference - Page 95
is on the supplied CD-ROM. For details about installing the TWAIN driver, see "Installing TWAIN Driver from Provided CD-ROM". ❒ To use the network TWAIN scanner, a TWAIN-compliant application, such as DeskTopBinder, must be installed on the client computer. DeskTopBinder Lite is on the supplied - Ricoh Aficio MP 2500 | Scanner Reference - Page 96
section outlines the network TWAIN scanner function. In the TWAIN scanner mode, you can a scan instruction from a client computer, and then sends the scan file over the network to the an application that supports the network TWAIN scanner. Note ❒ When using the machine as a network TWAIN scanner, - Ricoh Aficio MP 2500 | Scanner Reference - Page 97
set up in [System Settings] vary depending on the network environment. For more information about network settings, see General Settings Guide. ❒ For more information about [System Settings], see General Settings Guide. Reference p.92 "Installing TWAIN Driver from Provided CD-ROM" p.77 "Installing - Ricoh Aficio MP 2500 | Scanner Reference - Page 98
drive of the client computer. The installer is automatically started and the [Scanner Driver and Utilities] dialog 4 box appears. B Click [TWAIN Driver]. C The installer of the TWAIN Driver starts. Follow the instructions here. ❒ Notes on using the network TWAIN scanner are provided in Readme.txt - Ricoh Aficio MP 2500 | Scanner Reference - Page 99
, and orientation of the original. For details, see the TWAIN driver Help. I In the Scanner Control dialog box, click [Scan]. Depending on the security setting, if you press [Scan], a dialog box for entering the user name and password may appear. If there are more originals to be scanned, place - Ricoh Aficio MP 2500 | Scanner Reference - Page 100
and print scan files. For more information about DeskTopBinder, see DeskTopBinder manuals. ❒ The model name of the connected scanner appears in the same model on the network, make sure you have selected the correct scanner. If you have not, click [Select Scanner Driver...], and then select the - Ricoh Aficio MP 2500 | Scanner Reference - Page 101
5. Various Scan Settings This section describes various scan settings. Specifying Send Options This section describes procedure for specifying send options. Note ❒ For details about setting [Sender's Name], [Attach Subject], and [Return Receipt], see chapter 1 "Sending Scan Files by E-mail". - Ricoh Aficio MP 2500 | Scanner Reference - Page 102
Various Scan Settings D Press the {Escape} key. Note ❒ Image compression level can limit Maximum image size. Original Orientation This section explains how to correctly display the top/bottom orientation of scanned originals on a client computer screen. A Press [Options]. 5 B Press the {U} or {T} - Ricoh Aficio MP 2500 | Scanner Reference - Page 103
easier to understand. Even if the actual shape of the original is different, the combination of original orientation and the orientation specified on the scanner driver does not change. 97 - Ricoh Aficio MP 2500 | Scanner Reference - Page 104
Various Scan Settings Original Setting This section explains the settings for scanning one-sided or two-sided originals. Important ❒ This function is not available unless ARDF is installed. A Press [Options]. B Press the {U} or {T} key to select [Original Setting], and then press the {OK} key. 5 C - Ricoh Aficio MP 2500 | Scanner Reference - Page 105
Specifying Send Options Scan Size Select the size of the original to be scanned. The following items and sizes can be selected: ❖ [Auto Detect] Scans original sizes using the automatic size detect function. ❖ Template size 11 × 17S, 81/2 × 14S, 81/2 × 13S, 81/2 × 11R, 81/2 × 11S, 51/2 × 81/2R, - Ricoh Aficio MP 2500 | Scanner Reference - Page 106
Various Scan Settings Relationship of original of mixed sizes and scan size This section explains differences you need to be aware of when scanning originals of the same width but different length (such as 11" × 17" & 11" × 81/2") using the original position setting and size. • If you set [Mixed - Ricoh Aficio MP 2500 | Scanner Reference - Page 107
A Press [Options]. Specifying Send Options B Press the {U} or {T} key to select [Scan Size], and then press the {OK} key. C Press the scroll keys to select [Custom Size], and then press the {OK} key. 5 D Using the number keys, enter the horizontal width, and then press the {OK} key or {q} key. E - Ricoh Aficio MP 2500 | Scanner Reference - Page 108
Various Scan Settings How to set originals to scan them by custom size This section explains how to place originals you want to scan at Custom Size. ❖ Original orientation setting Under [Original Orientation], select [ ] or [ ] according to the orientation of your original. To display [Original - Ricoh Aficio MP 2500 | Scanner Reference - Page 109
Specifying Send Options Mixed Sizes This section explains how to set the machine to detect the length of individual originals when scanning a batch of originals that are the same width but different length. A Press [Options]. B Press the {U} or {T} key to select [Mixed Sizes], and then press the {OK - Ricoh Aficio MP 2500 | Scanner Reference - Page 110
want to identify scanned originals. ARO006S This illustration is an example when scanning a two-sided original. Important ❒ To enable stamping, you must install the stamp cartridge. 104 - Ricoh Aficio MP 2500 | Scanner Reference - Page 111
❒ [Stamp] appears only if the ARDF is installed. ❒ Stamping may continue even if scanning is interrupted, depending on the cause of interruption. ❒ Replace the stamp cartridge when Stamp begins to fade. For details, see Troubleshooting. 105 - Ricoh Aficio MP 2500 | Scanner Reference - Page 112
the procedure for selecting a file type. Important ❒ To deliver files, set the file type using the delivery server computer. For details, see the manuals supplied with the ScanRouter delivery software. You can select one of the following file types: • Single Page:TIFF • Single Page:PDF • Multi-page - Ricoh Aficio MP 2500 | Scanner Reference - Page 113
unauthorized access to PDF files. Important ❒ Security settings can be made for PDF files only. Encrypting PDF file Set a password to protect a PDF file. Only users who have the password can open the PDF file. Important ❒ Encryption is possible only for scan files sent by e-mail or Scan to - Ricoh Aficio MP 2500 | Scanner Reference - Page 114
Programmed" appears, and then the PDF Security Encryption screen reappears. G Press the {Escape} key twice. Note ❒ The Encryption Password must be different from the Master Password (which is used for changing PDF Security Permissions). ❒ You can enter up to 32 alphanumeric characters for a document - Ricoh Aficio MP 2500 | Scanner Reference - Page 115
Specifying Send Options Selecting an encryption level for a PDF file This section explains how to select an encryption level for a PDF file. A Press [Options]. B Press the {U} or {T} key to select [PDF Security Encryption], and then press the {OK} key. 5 C Select [Encryption level], and then press - Ricoh Aficio MP 2500 | Scanner Reference - Page 116
to restrict unauthorized printing, changing, copying, or extracting of a PDF file's content. Only users who have the Master Password can reset or change these restrictions. Important ❒ Encryption is possible only for scan files sent by e-mail or Scan to Folder. ❒ You cannot reset or - Ricoh Aficio MP 2500 | Scanner Reference - Page 117
entered here will be required to change the security settings of the PDF file. F Enter the password again, and then press the {OK} key. "Programmed" appears, and then the PDF Security Permissions screen reappears. 5 G Select [Permissions], and then press the {OK} key. H - Ricoh Aficio MP 2500 | Scanner Reference - Page 118
settings to a PDF file. K Press the {Escape} key three times. Note ❒ The Master Password must be different from the Encryption Password. ❒ You can enter up to 32 alphanumeric characters for a Master Password. ❒ If [40 bit] is selected as the PDF encryption level, you cannot select [Permit - Ricoh Aficio MP 2500 | Scanner Reference - Page 119
the selected original type using [Original Type Setting] under [Scanner Features]. For details about [Original Type Setting], see General Settings Guide. The following table explains the relationship between the {Original} key and [Original Type Setting]. {Original} key Text Photo [Original Type - Ricoh Aficio MP 2500 | Scanner Reference - Page 120
Various Scan Settings Adjusting Image Density This section explains how to specify the scanning density. There are five levels of scanning density. A Press the {Lighter} or {Darker} key to adjust the density. 5 ARO009S The density indicator " " moves one place per button push. 114 - Ricoh Aficio MP 2500 | Scanner Reference - Page 121
Scan Settings When Using Twain Scanner Scan Settings When Using Twain Scanner This section explains how to specify original orientation and scan setting for a bundle of mixed size originals when using the TWAIN scanner. Setting Original Orientation on the TWAIN Scanner This section explains how - Ricoh Aficio MP 2500 | Scanner Reference - Page 122
glass Original orientation TWAIN Scanner Control dialog box key top edge touches top left of exposure glass This orientation is the TWAIN driver's standard setting. Place originals in this orientation normally. top edge touches rear of exposure glass 5 ❖ ARDF Original orientation top edge of - Ricoh Aficio MP 2500 | Scanner Reference - Page 123
Scan Settings When Using Twain Scanner When Scanning Originals of Mixed Sizes Using TWAIN Scanner This section describes differences you need to be aware of when using the TWAIN scanner to scan originals of the same width but different length, such as A3&A4 or B4&B5. • If [Auto detect(Mixed-size)] - Ricoh Aficio MP 2500 | Scanner Reference - Page 124
Various Scan Settings 5 118 - Ricoh Aficio MP 2500 | Scanner Reference - Page 125
specifications of the scanner function and explains supplementary settings. Software Supplied on CD-ROM This section explains the applications on the supplied "Scanner Driver and Utilities" CD-ROM. Auto-Run Program This section explains the auto-run program. When the CD-ROM is inserted into a client - Ricoh Aficio MP 2500 | Scanner Reference - Page 126
scan originals or use the machine as a network TWAIN scanner. ❖ File path The TWAIN driver is stored in the following folder on the CD-ROM: \DRIVERS\TWAIN ❖ System requirements • Hardware PC/AT-compatible machines that support the operating system properly This driver cannot be used in RISC-based - Ricoh Aficio MP 2500 | Scanner Reference - Page 127
functions for stored files. For details about DeskTopBinder Lite, see DeskTopBinder Lite manuals or DeskTopBinder Lite Help. ❖ File path The DeskTopBinder Lite is stored System requirements • Hardware PC/AT-compatible machines that support the operating system properly 6 • Operating system When - Ricoh Aficio MP 2500 | Scanner Reference - Page 128
periodically, retrieves files delivered to in-trays, and notifies the user of delivery. • Function Palette Function Palette allows you to use Extended Features. For details about Function Palette, see DeskTopBinder manuals. • Extended Features Wizard The Extended Features Wizard allows you - Ricoh Aficio MP 2500 | Scanner Reference - Page 129
Values of Various Set Items for Transmission/Delivery Function Values of Various Set Items for Transmission/Delivery Function This section explains the values of various transmission/delivery function settings. Note ❒ Depending on the type or settings of the file or original, you may not be able to - Ricoh Aficio MP 2500 | Scanner Reference - Page 130
on FTP ters Number of path name charac- 128 alphanumeric charac- - ters on NCP ters Number of user name charac- 64 alphanumeric charac- - ters on NCP ters Number of password charac- 64 alphanumeric charac- - ters on NCP ters Number of addresses that can 32 be specified simultaneously - Ricoh Aficio MP 2500 | Scanner Reference - Page 131
retrieved destinations. - The Network Delivery Function The following table tells you the values of setting items for the network delivery scanner function. 6 software you are using. For details, see the manuals supplied with the ScanRouter delivery software. Sendable file size 8.75 MB - Ricoh Aficio MP 2500 | Scanner Reference - Page 132
600 dpi Selectable scanning resolutions when using 100 dpi, 200 dpi, 300 dpi, 400 dpi, 600 dpi the E-mail/Scan to Folder/Network delivery scanner function Selectable scanning resolution when using TWAIN scanner 100 dpi to 600 dpi Sendable file formats TIFF, PDF Image compression type TIFF - Ricoh Aficio MP 2500 | Scanner Reference - Page 133
B Bindery, 67, 70 Browse Network, 62, 70 C CD-ROM, 119 DeskTopBinder Lite, 121 TWAIN driver, 120 Check destination, 5 Confirmation Install, 77, 92 I/O device, 76 J Job Information, 6 L LDAP server, 9 M Manual Entry E-mail address, 23 path to a destination folder, 59, 67 Mixed Sizes, 103, 117 - Ricoh Aficio MP 2500 | Scanner Reference - Page 134
driver, 93 Scanner Features, 7 Administrator Tools, 7 Destination List settings, 7 Scan Settings, 7 Send Settings, 7 Scanner Mode, 3 ScanRouter delivery software, 75 Scan Size, 99 Scan to Folder, 50 Screen E-mail, 12 Network , 95 Shared folder, 43 SmartDeviceMonitor for Admin, 11, 47 SMB, 59, 62 - Ricoh Aficio MP 2500 | Scanner Reference - Page 135
Copyright © 2007 - Ricoh Aficio MP 2500 | Scanner Reference - Page 136
Printer/Scanner Unit Type 2500 Operating Instructions Scanner Reference EN USA D327-7663
-
 1
1 -
 2
2 -
 3
3 -
 4
4 -
 5
5 -
 6
6 -
 7
7 -
8
-
9
-
10
-
11
-
12
-
13
-
14
-
15
-
16
-
17
-
18
-
19
-
20
-
21
-
22
-
23
-
24
-
25
-
26
-
27
-
28
-
29
-
30
-
31
-
32
-
33
-
34
-
35
-
36
-
37
-
38
-
39
-
40
-
41
-
42
-
43
-
44
-
45
-
46
-
47
-
48
-
49
-
50
-
51
-
52
-
53
-
54
-
55
-
56
-
57
-
58
-
59
-
60
-
61
-
62
-
63
-
64
-
65
-
66
-
67
-
68
-
69
-
70
-
71
-
72
-
73
-
74
-
75
-
76
-
77
-
78
-
79
-
80
-
81
-
82
-
83
-
84
-
85
-
86
-
87
-
88
-
89
-
90
-
91
-
92
-
93
-
94
-
95
-
96
-
97
-
98
-
99
-
100
-
101
-
102
-
103
-
104
-
105
-
106
-
107
-
108
-
109
-
110
-
111
-
112
-
113
-
114
-
115
-
116
-
117
-
118
-
119
-
120
-
121
-
122
-
123
-
124
-
125
-
126
-
127
-
128
-
129
-
130
-
131
-
132
-
133
-
134
-
135
-
136
 |
 |
Printer/Scanner Unit
Type 2500
Operating Instructions
Scanner Reference
Read this manual carefully before you use this machine and keep it handy for future reference. For safe and correct use, be sure to read the
Safety Information in "About This Machine" before using the machine.
Sending Scan Files by E-mail
Sending Scan Files by Scan to Folder
Delivering Scan Files
Using the Network TWAIN Scanner Function
Various Scan Settings
Appendix
1
2
3
4
5
6