Ricoh Aficio MP 2500 Scanner Reference - Page 88
Check Destination, Clear/ Stop, p.23 Manual Entry of an E-mail Address
 |
View all Ricoh Aficio MP 2500 manuals
Add to My Manuals
Save this manual to your list of manuals |
Page 88 highlights
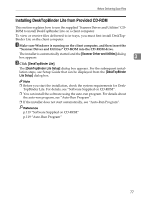
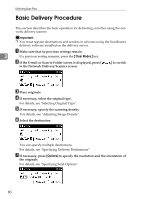
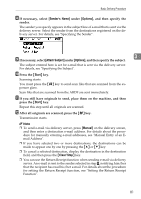
Delivering Scan Files ❒ To enable the Return Receipt function, it is necessary to make the settings to send e-mail by SMTP with ScanRouter delivery software. For details about how to specify this setting, see the manuals supplied with the ScanRouter delivery software. Note, however, that if the receiving party's email application does not support Message Disposition Notification (MDN), notification e-mail might not be returned. ❒ Register the sender's e-mail address using the ScanRouter delivery software in advance. ❒ If you press the {Check Destination} key, the initial scanner screen switches to the Check Dest. screen. You can use the Check Dest. screen to check the 3 details of the selected destinations. For details, see "Check Destination". ❒ To cancel scanning, press the {Clear/ Stop} key. Reference p.113 "Selecting Original Type" p.114 "Adjusting Image Density" p.83 "Specifying Delivery Destinations" p.23 "Manual Entry of an E-mail Address" p.95 "Specifying Send Options" p.30 "Specifying the Sender" p.40 "Setting the Return Receipt Function" p.41 "Specifying the Subject" p.5 "Check destination" 82
-
 1
1 -
2
-
3
-
4
-
5
-
6
-
7
-
8
-
9
-
10
-
11
-
12
-
13
-
14
-
15
-
16
-
17
-
18
-
19
-
20
-
21
-
22
-
23
-
24
-
25
-
26
-
27
-
28
-
29
-
30
-
31
-
32
-
33
-
34
-
35
-
36
-
37
-
38
-
39
-
40
-
41
-
42
-
43
-
44
-
45
-
46
-
47
-
48
-
49
-
50
-
51
-
52
-
53
-
54
-
55
-
56
-
57
-
58
-
59
-
60
-
61
-
62
-
63
-
64
-
65
-
66
-
67
-
68
-
69
-
70
-
71
-
72
-
73
-
74
-
75
-
76
-
77
-
78
-
79
-
80
-
81
-
82
-
 83
83 -
 84
84 -
 85
85 -
 86
86 -
 87
87 -
 88
88 -
 89
89 -
 90
90 -
 91
91 -
 92
92 -
 93
93 -
94
-
95
-
96
-
97
-
98
-
99
-
100
-
101
-
102
-
103
-
104
-
105
-
106
-
107
-
108
-
109
-
110
-
111
-
112
-
113
-
114
-
115
-
116
-
117
-
118
-
119
-
120
-
121
-
122
-
123
-
124
-
125
-
126
-
127
-
128
-
129
-
130
-
131
-
132
-
133
-
134
-
135
-
136
 |
 |