Ricoh Aficio MP 5002 User Guide - Page 108
Step 3: Specifying access privileges for the created shared folder, Registering an SMB Folder
 |
View all Ricoh Aficio MP 5002 manuals
Add to My Manuals
Save this manual to your list of manuals |
Page 108 highlights
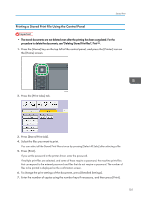
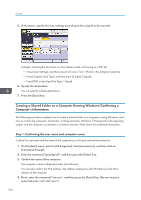
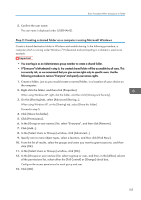
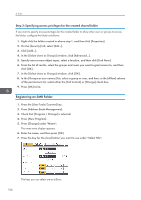
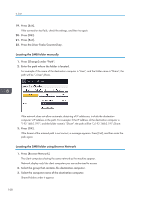
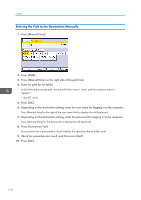
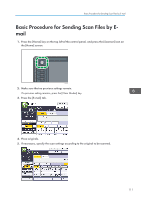
6. Scan Step 3: Specifying access privileges for the created shared folder If you want to specify access privileges for the created folder to allow other users or groups to access the folder, configure the folder as follows: 1. Right-click the folder created in above step 1, and then click [Properties]. 2. On the [Security] tab, select [Edit...]. 3. Click [Add...]. 4. In the [Select Users or Groups] window, click [Advanced...]. 5. Specify one or more object types, select a location, and then click [Find Now]. 6. From the list of results, select the groups and users you want to grant access to, and then click [OK]. 7. In the [Select Users or Groups] window, click [OK]. 8. In the [Groups or user names:] list, select a group or user, and then, in the [Allow] column of the permissions list, select either the [Full Control] or [Change] check box. 9. Press [OK] twice. Registering an SMB Folder 1. Press the [User Tools/Counter] key. 2. Press [Address Book Management]. 3. Check that [Program / Change] is selected. 4. Press [New Program]. 5. Press [Change] under "Name". The name entry display appears. 6. Enter the name, and then press [OK]. 7. Press the key for the classification you want to use under "Select Title". The keys you can select are as follows: 106
-
 1
1 -
2
-
3
-
4
-
5
-
6
-
7
-
8
-
9
-
10
-
11
-
12
-
13
-
14
-
15
-
16
-
17
-
18
-
19
-
20
-
21
-
22
-
23
-
24
-
25
-
26
-
27
-
28
-
29
-
30
-
31
-
32
-
33
-
34
-
35
-
36
-
37
-
38
-
39
-
40
-
41
-
42
-
43
-
44
-
45
-
46
-
47
-
48
-
49
-
50
-
51
-
52
-
53
-
54
-
55
-
56
-
57
-
58
-
59
-
60
-
61
-
62
-
63
-
64
-
65
-
66
-
67
-
68
-
69
-
70
-
71
-
72
-
73
-
74
-
75
-
76
-
77
-
78
-
79
-
80
-
81
-
82
-
83
-
84
-
85
-
86
-
87
-
88
-
89
-
90
-
91
-
92
-
93
-
94
-
95
-
96
-
97
-
98
-
99
-
100
-
101
-
102
-
 103
103 -
 104
104 -
 105
105 -
 106
106 -
 107
107 -
 108
108 -
 109
109 -
 110
110 -
 111
111 -
 112
112 -
 113
113 -
114
-
115
-
116
-
117
-
118
-
119
-
120
-
121
-
122
-
123
-
124
-
125
-
126
-
127
-
128
-
129
-
130
-
131
-
132
-
133
-
134
-
135
-
136
-
137
-
138
-
139
-
140
-
141
-
142
-
143
-
144
-
145
-
146
-
147
-
148
-
149
-
150
-
151
-
152
-
153
-
154
-
155
-
156
-
157
-
158
-
159
-
160
-
161
-
162
-
163
-
164
-
165
-
166
-
167
-
168
-
169
-
170
-
171
-
172
-
173
-
174
-
175
-
176
-
177
-
178
-
179
-
180
-
181
-
182
-
183
-
184
-
185
-
186
-
187
-
188
-
189
-
190
-
191
-
192
-
193
-
194
-
195
-
196
-
197
-
198
-
199
-
200
-
201
-
202
-
203
-
204
-
205
-
206
-
207
-
208
-
209
-
210
-
211
-
212
-
213
-
214
-
215
-
216
-
217
-
218
-
219
-
220
-
221
-
222
-
223
-
224
-
225
-
226
-
227
-
228
 |
 |
