Ricoh Aficio MP 6000 General Settings Guide - Page 260
Auth. Info, Specify Other Auth. Info, Change, Folder, Bindery, Do not Specify
 |
View all Ricoh Aficio MP 6000 manuals
Add to My Manuals
Save this manual to your list of manuals |
Page 260 highlights
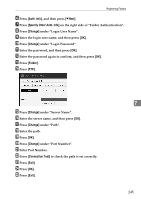
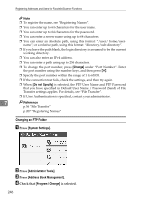
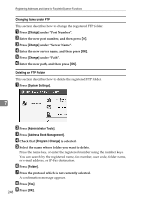
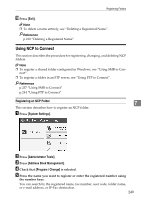
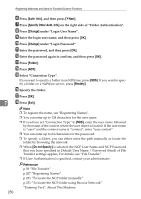
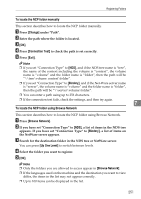
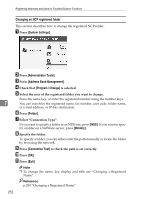
Registering Addresses and Users for Facsimile/Scanner Functions F Press [Auth. Info], and then press [TNext]. G Press [Specify Other Auth. Info] on the right side of "Folder Authentication". H Press [Change] under "Login User Name". I Enter the login user name, and then press [OK]. J Press [Change] under "Login Password". K Enter the password, and then press [OK]. L Enter the password again to confirm, and then press [OK]. M Press [Folder]. N Press [NCP]. O Select "Connection Type". If you want to specify a folder in an NDS tree, press [NDS]. If you want to specify a folder on a NetWare server, press [Bindery]. P Specify the folder. Q Press [OK]. 7 R Press [Exit]. Note ❒ To register the name, see "Registering Names". ❒ You can enter up to 128 characters for the user name. ❒ If you have set "Connection Type" to [NDS], enter the user name followed by the name of the context where the user object is located. If the user name is "user" and the context name is "context", enter "user.context" ❒ You can enter up to 64 characters for the password. ❒ To specify a folder, you can either enter the path manually or locate the folder by browsing the network. ❒ When [Do not Specify] is selected, the NCP User Name and NCP Password that you have specified in Default User Name / Password (Send) of File Transfer settings applies. For details, see "File Transfer". ❒ If User Authentication is specified, contact your administrator. Reference p.56 "File Transfer" p.207 "Registering Names" p.251 "To locate the NCP folder manually" p.251 "To locate the NCP folder using Browse Network" "Entering Text", About This Machine 250
-
 1
1 -
2
-
3
-
4
-
5
-
6
-
7
-
8
-
9
-
10
-
11
-
12
-
13
-
14
-
15
-
16
-
17
-
18
-
19
-
20
-
21
-
22
-
23
-
24
-
25
-
26
-
27
-
28
-
29
-
30
-
31
-
32
-
33
-
34
-
35
-
36
-
37
-
38
-
39
-
40
-
41
-
42
-
43
-
44
-
45
-
46
-
47
-
48
-
49
-
50
-
51
-
52
-
53
-
54
-
55
-
56
-
57
-
58
-
59
-
60
-
61
-
62
-
63
-
64
-
65
-
66
-
67
-
68
-
69
-
70
-
71
-
72
-
73
-
74
-
75
-
76
-
77
-
78
-
79
-
80
-
81
-
82
-
83
-
84
-
85
-
86
-
87
-
88
-
89
-
90
-
91
-
92
-
93
-
94
-
95
-
96
-
97
-
98
-
99
-
100
-
101
-
102
-
103
-
104
-
105
-
106
-
107
-
108
-
109
-
110
-
111
-
112
-
113
-
114
-
115
-
116
-
117
-
118
-
119
-
120
-
121
-
122
-
123
-
124
-
125
-
126
-
127
-
128
-
129
-
130
-
131
-
132
-
133
-
134
-
135
-
136
-
137
-
138
-
139
-
140
-
141
-
142
-
143
-
144
-
145
-
146
-
147
-
148
-
149
-
150
-
151
-
152
-
153
-
154
-
155
-
156
-
157
-
158
-
159
-
160
-
161
-
162
-
163
-
164
-
165
-
166
-
167
-
168
-
169
-
170
-
171
-
172
-
173
-
174
-
175
-
176
-
177
-
178
-
179
-
180
-
181
-
182
-
183
-
184
-
185
-
186
-
187
-
188
-
189
-
190
-
191
-
192
-
193
-
194
-
195
-
196
-
197
-
198
-
199
-
200
-
201
-
202
-
203
-
204
-
205
-
206
-
207
-
208
-
209
-
210
-
211
-
212
-
213
-
214
-
215
-
216
-
217
-
218
-
219
-
220
-
221
-
222
-
223
-
224
-
225
-
226
-
227
-
228
-
229
-
230
-
231
-
232
-
233
-
234
-
235
-
236
-
237
-
238
-
239
-
240
-
241
-
242
-
243
-
244
-
245
-
246
-
247
-
248
-
249
-
250
-
251
-
252
-
253
-
254
-
 255
255 -
 256
256 -
 257
257 -
 258
258 -
 259
259 -
 260
260 -
 261
261 -
 262
262 -
 263
263 -
 264
264 -
 265
265 -
266
-
267
-
268
-
269
-
270
-
271
-
272
-
273
-
274
-
275
-
276
-
277
-
278
-
279
-
280
-
281
-
282
-
283
-
284
-
285
-
286
-
287
-
288
-
289
-
290
-
291
-
292
-
293
-
294
-
295
-
296
-
297
-
298
-
299
-
300
-
301
-
302
-
303
-
304
-
305
-
306
-
307
-
308
-
309
-
310
 |
 |