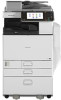
Ricoh Aficio MP C4502 General Settings Guide - Page 191
Wait Time for Next Originals: SADF, Original Setting, Switch to Batch, Mixed Original Sizes Priority
 |
View all Ricoh Aficio MP C4502 manuals
Add to My Manuals
Save this manual to your list of manuals |
Page 191 highlights
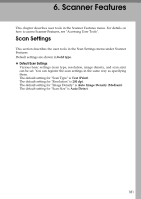
Scan Settings ❖ Wait Time for Next Original(s): SADF When dividing originals and scanning them separately with the ADF to form a single file, select [Set Wait Time] or [Continuous Wait] for the waiting status. The default setting is Set Wait Time. The default setting time is 60 sec.. This setting is valid if [SADF] is specified for [Original Feed Type] when scan- ning. If [Set Wait Time] is selected, enter the wait time in seconds (3-999) for placing additional originals with the number keys. Scanning will start automatically if additional originals are placed within this time. You can end scanning and begin transmission by pressing the {q} key within this time. Once the spec- ified time has elapsed, transmission starts automatically. If [Continuous Wait] is selected, the machine will wait for the additional origi- nals until the {q} key is pressed. Scanning will start when additional origi- nals are placed and the {Start} key is pressed. You can end scanning and begin sending by pressing the {q} key. Even if originals are placed on the exposure glass, the machine will operate according to the specified settings. However, every time originals are placed on the exposure glass, you must press the {Start} key to start scanning. If a paper misfeed occurs or any of the following operations are performed while the machine is waiting for additional originals, the countdown stops and does not start again until the {q} key is pressed. 6 • Changing the settings such as the scan settings • Opening the upper cover of the ADF • Pressing the {Interrupt} key to activate the copy mode ❖ Original Setting Set the default for whether originals are one-sided or two-sided and if twosided, the relationship between those sides. When the originals are always the same, set this for the default to make operation easier. You can select [1 Sided Original], [2 Sided Orig.: T to T] (Top to Top), or [2 Sided Orig.: T to B] (Top to Bottom). The default setting is 1 Sided Original. ❖ Switch to Batch Select [SADF] or [Batch] as the scanning mode that appears as [Original Feed Type] in the initial display of the scanner mode. The default setting is SADF. ❖ Mixed Original Sizes Priority This setting determines whether the original size is to be automatically detected when originals of different sizes are inserted in the ADF. You can select [On] or [Off]. The default setting is Off. If the original size is specified when scanning, this setting is ignored. When [Off] is selected and [Auto Detect] is selected for scan size, if originals of different sizes are placed in the ADF, the maximum size will be detected as the scan size. 183
-
 1
1 -
2
-
3
-
4
-
5
-
6
-
7
-
8
-
9
-
10
-
11
-
12
-
13
-
14
-
15
-
16
-
17
-
18
-
19
-
20
-
21
-
22
-
23
-
24
-
25
-
26
-
27
-
28
-
29
-
30
-
31
-
32
-
33
-
34
-
35
-
36
-
37
-
38
-
39
-
40
-
41
-
42
-
43
-
44
-
45
-
46
-
47
-
48
-
49
-
50
-
51
-
52
-
53
-
54
-
55
-
56
-
57
-
58
-
59
-
60
-
61
-
62
-
63
-
64
-
65
-
66
-
67
-
68
-
69
-
70
-
71
-
72
-
73
-
74
-
75
-
76
-
77
-
78
-
79
-
80
-
81
-
82
-
83
-
84
-
85
-
86
-
87
-
88
-
89
-
90
-
91
-
92
-
93
-
94
-
95
-
96
-
97
-
98
-
99
-
100
-
101
-
102
-
103
-
104
-
105
-
106
-
107
-
108
-
109
-
110
-
111
-
112
-
113
-
114
-
115
-
116
-
117
-
118
-
119
-
120
-
121
-
122
-
123
-
124
-
125
-
126
-
127
-
128
-
129
-
130
-
131
-
132
-
133
-
134
-
135
-
136
-
137
-
138
-
139
-
140
-
141
-
142
-
143
-
144
-
145
-
146
-
147
-
148
-
149
-
150
-
151
-
152
-
153
-
154
-
155
-
156
-
157
-
158
-
159
-
160
-
161
-
162
-
163
-
164
-
165
-
166
-
167
-
168
-
169
-
170
-
171
-
172
-
173
-
174
-
175
-
176
-
177
-
178
-
179
-
180
-
181
-
182
-
183
-
184
-
185
-
 186
186 -
 187
187 -
 188
188 -
 189
189 -
 190
190 -
 191
191 -
 192
192 -
 193
193 -
 194
194 -
 195
195 -
 196
196 -
197
-
198
-
199
-
200
-
201
-
202
-
203
-
204
-
205
-
206
-
207
-
208
-
209
-
210
-
211
-
212
-
213
-
214
-
215
-
216
-
217
-
218
-
219
-
220
-
221
-
222
-
223
-
224
-
225
-
226
-
227
-
228
-
229
-
230
-
231
-
232
-
233
-
234
-
235
-
236
-
237
-
238
-
239
-
240
-
241
-
242
-
243
-
244
-
245
-
246
-
247
-
248
-
249
-
250
-
251
-
252
-
253
-
254
-
255
-
256
-
257
-
258
-
259
-
260
-
261
-
262
-
263
-
264
-
265
-
266
-
267
-
268
-
269
-
270
-
271
-
272
-
273
-
274
-
275
-
276
-
277
-
278
-
279
-
280
-
281
-
282
-
283
-
284
-
285
-
286
-
287
-
288
-
289
-
290
-
291
-
292
-
293
-
294
-
295
-
296
 |
 |