Ricoh Aficio MP C5502 User Guide
Ricoh Aficio MP C5502 Manual
 |
View all Ricoh Aficio MP C5502 manuals
Add to My Manuals
Save this manual to your list of manuals |
Ricoh Aficio MP C5502 manual content summary:
- Ricoh Aficio MP C5502 | User Guide - Page 1
Machine Safety Information Information for This Machine Appendix For information not in the printed manual, refer to the HTML/PDF files on the supplied CD-ROM. Printed in China EN US D143-7008 D1437008 Read this manual carefully before you use this machine and keep it handy for future reference - Ricoh Aficio MP C5502 | User Guide - Page 2
Provided with This Machine Manuals for This Machine...7 Manuals List...10 On-screen Operating Instructions...11 Formats of the Operating Instructions...11 Reading the HTML Manuals on the CD-ROM 11 Installing and Opening the HTML Manuals 12 Reading the PDF Manuals on the CD-ROM 12 2. Safety - Ricoh Aficio MP C5502 | User Guide - Page 3
Part 68 of the FCC Rules regarding Facsimile Unit 42 Important Safety Instructions for Facsimile Unit 44 IMPORTANTES MESURES DE SÉCURITÉ de l'unité Fax 44 Notes to Canadian Users of Facsimile Unit 45 Remarques à l'attention des utilisateurs canadiens - Ricoh Aficio MP C5502 | User Guide - Page 4
Introduction Read this manual carefully before you use this machine and keep it handy for future reference. For safe and correct use, be sure to read the Safety Information in this manual before using the machine. 3 - Ricoh Aficio MP C5502 | User Guide - Page 5
errors. This symbol is located at the end of sections. It indicates where you can find further relevant information. [ ] Indicates the names of keys on the machine's display or control panels. Indicates instructions Started . Disclaimer Contents of this manual are subject to change without prior - Ricoh Aficio MP C5502 | User Guide - Page 6
manuals. • Type 1: MP C3002/Aficio MP C3002/MP C3002G/Aficio MP C3002G • Type 2: MP C3502/Aficio MP C3502/MP C3502G/Aficio MP C3502G • Type 3: MP C4502/MP C4502A/Aficio MP C4502/Aficio MP C4502A/MP C4502G/Aficio MP C4502G • Type 4: MP C5502/MP C5502A/Aficio MP C5502/Aficio MP C5502A/MP C5502G/Aficio - Ricoh Aficio MP C5502 | User Guide - Page 7
6 - Ricoh Aficio MP C5502 | User Guide - Page 8
manuals as PDF files. • A Web browser must be installed in order to view the html manuals. User Guide Regarding the basic usage of this machine, frequently used functions, troubleshooting when an error preparations for using the machine, operating instructions, character input methods, and how to - Ricoh Aficio MP C5502 | User Guide - Page 9
. Also refer to this manual for explanations on how to specify the settings for originals. Fax Explains Facsimile functions and operations. Print Describes how to print using the printer driver. It also describes the functions available for printing. Scan Describes how to scan paper data using this - Ricoh Aficio MP C5502 | User Guide - Page 10
for This Machine • Driver Installation Guide and HTML manuals are available in English, German, French, Italian, Spanish, Dutch, and Russian. • The following software products are referred to using general names: Product name ScanRouter EX - Ricoh Aficio MP C5502 | User Guide - Page 11
and Specifications No Troubleshooting No Copy/ Document Server No Fax No Print No Scan No Connecting the Machine/ System Settings No Security Guide No PostScript 3 No VM Card Extended Feature Settings No Driver Installation Guide No UNIX Supplement No HTML Manuals Provided No - Ricoh Aficio MP C5502 | User Guide - Page 12
instructions of this machine are provided in the following formats: • Printed manuals • HTML manuals • PDF manuals For details about the contents of each manual, see p.7 "Manuals for This Machine". The various manuals are available in different formats. For details about availability, see p.10 - Ricoh Aficio MP C5502 | User Guide - Page 13
and then click [OK]. 3. Click [Install manuals]. 4. Install the HTML manuals by following the on-screen instructions. 5. When the installation is complete, click [ PDF Manuals on the CD-ROM This section describes how to read the PDF manuals on the supplied manual CD-ROM. File path The manuals are - Ricoh Aficio MP C5502 | User Guide - Page 14
Adobe Acrobat Reader/Adobe Reader installed on your computer. • If you want to read the PDF manuals on a Macintosh, insert the CD-ROM in the CD-ROM drive, and then click [Read PDF manuals]. • Driver Installation Guide is available in English, German, French, Italian, Spanish, Dutch, and Russian. 13 - Ricoh Aficio MP C5502 | User Guide - Page 15
1. Manuals Provided with This Machine 14 - Ricoh Aficio MP C5502 | User Guide - Page 16
2. Safety Information This chapter describes the safety precautions. Safety During Operation In this manual, the following important symbols are used: Indicates a potentially hazardous situation which, if instructions are not followed, could result in death or serious injury. Indicates a potentially - Ricoh Aficio MP C5502 | User Guide - Page 17
2. Safety Information Safety Precautions to Be Followed This section explains safety precautions that should always be followed when using this machine. Environments where the machine can be used This section explains safety precautions about environments where the machine can be used. • Do not use - Ricoh Aficio MP C5502 | User Guide - Page 18
electric shock. • Do not use extension cords. Doing so could result in fire or electric shock. • Do not use power cords that are damaged, broken, or modified. Also, do not use power cords that have been trapped under heavy objects, pulled hard, or bent severely. Doing so could result in fire or - Ricoh Aficio MP C5502 | User Guide - Page 19
cord plug with wet hands. Doing so could result in electric shock. • If the power cord is damaged and its inner wires are exposed or broken, contact your service representative for a replacement. Use of damaged power cords could result in fire or electric shock. • Be sure to disconnect the plug - Ricoh Aficio MP C5502 | User Guide - Page 20
smoke or odours, or if it behaves unusually, you must turn off its power immediately. After turning off the power, be sure to disconnect the power cord plug from the wall outlet. Then contact your service representative and report the problem. Do not use the machine. Doing so could result in fire or - Ricoh Aficio MP C5502 | User Guide - Page 21
take care that the power cord is not damaged under the machine. Failing to take these lift the machine without the assistance of your service representative. The machine will be damaged if control panel while moving the machine. Doing so may damage the control panel, cause a malfunction, or result - Ricoh Aficio MP C5502 | User Guide - Page 22
than those explicitly mentioned in this manual. Inside this machine are high voltage cause blindness. Contact your sales or service representative if any of the machine's or injure your fingers. • Keep your hands clear of the booklet finisher tray when removing misfed paper, pulling out or pushing - Ricoh Aficio MP C5502 | User Guide - Page 23
accumulation of dust inside this machine. Contact your sales or service representative for details about and charges for cleaning the machine the cleaner designed for dust explosion-proof purpose. If toner is spilled over the floor, sweep up spilled toner slowly and clean remainder with wet cloth. • - Ricoh Aficio MP C5502 | User Guide - Page 24
the stain impossible. • When removing jammed paper or replacing toner, avoid getting toner (new or used) on your skin. If toner comes into contact with your skin, wash the affected area thoroughly with soap and water. • Do not attempt to print on stapled sheets, aluminum foil, carbon paper, or any - Ricoh Aficio MP C5502 | User Guide - Page 25
labels for Users of Types 1 and 2 This machine has labels for WARNING and CAUTION at the positions shown below. For safety, please follow the instructions and handle the machine as indicated. Main unit 1 2 CJZ001 1 CJZ003 High temperature parts. Wait a while to allow the Fusing Unit to cool down - Ricoh Aficio MP C5502 | User Guide - Page 26
Safety Labels of This Machine CJZ004 Do not touch the parts a label indicates. The inside of the machine could be very hot. Caution should be taken when removing misfed paper. 25 - Ricoh Aficio MP C5502 | User Guide - Page 27
2. Safety Information Paper trays 3 4 CJZ005 3 CJZ006 The inside of the machine could be very hot. Do not touch the parts which a label is put on. Otherwise, an injury might occur. 4 CKA025 The inside of the machine could be very hot. Do not touch the parts which a label is put on. Otherwise, an - Ricoh Aficio MP C5502 | User Guide - Page 28
Bridge unit 5 Safety Labels of This Machine 6 CJZ023 5 CKA023 During operation, rollers for transporting the paper revolve. Take care not to touch rollers during operation. Otherwise, an injury might occur. 6 CJZ002 Do not touch the parts a label indicates. The inside of the bridge unit could be - Ricoh Aficio MP C5502 | User Guide - Page 29
7 7 8 CJZ007 CJZ008 Keep your hands clear of the booklet finisher tray when pulling out or pushing in the finisher's staple unit, or removing paper jam. You might trap your fingers if you do not. Take care not to touch the booklet finisher tray during operation. Otherwise, an injury might occur - Ricoh Aficio MP C5502 | User Guide - Page 30
Safety Labels of This Machine Keep your hands clear of the booklet finisher tray when pulling out or pushing in the finisher's staple unit, or removing paper jam. You the paper revolve. Take care not to touch rollers during operation. Otherwise, an injury might occur. Finisher SR3070 10 CJZ027 29 - Ricoh Aficio MP C5502 | User Guide - Page 31
2. Safety Information 10 CJZ028 Do not lean against Finisher SR3070. It may fall off the machine and cause an injury. External tray 11 11 CJZ031 CKA023 During operation, - Ricoh Aficio MP C5502 | User Guide - Page 32
labels for Users of Types 3 and 4 This machine has labels for WARNING and CAUTION at the positions shown below. For safety, please follow the instructions and handle the machine as indicated. Main unit 1 2 3 CJZ012 1 CJZ013 Do not touch the parts a label indicates. The inside of the machine could be - Ricoh Aficio MP C5502 | User Guide - Page 33
2. Safety Information CJZ004 Do not touch the parts a label indicates. The inside of the machine could be very hot. Caution should be taken when removing misfed paper. 32 - Ricoh Aficio MP C5502 | User Guide - Page 34
Paper trays 4 Safety Labels of This Machine 4 5 CJZ014 CJZ006 The inside of the machine could be very hot. Do not touch the parts which a label is put on. Otherwise, an injury might occur. 5 CKA025 The inside of the machine could be very hot. Do not touch the parts which a label is put on. - Ricoh Aficio MP C5502 | User Guide - Page 35
2. Safety Information Bridge unit 6 7 CJZ026 6 CKA023 During operation, rollers for transporting the paper revolve. Take care not to touch rollers during operation. Otherwise, an injury might occur. 7 CJZ002 Do not touch! Surface may be very hot. 34 - Ricoh Aficio MP C5502 | User Guide - Page 36
Finisher SR3120 or Booklet Finisher SR3110 8 9 8 Safety Labels of This Machine 10 CJZ022 CJZ011 During operation, rollers for transporting the paper revolve. Take care not to touch rollers during operation. Otherwise, an injury might occur. 9 CJZ008 35 - Ricoh Aficio MP C5502 | User Guide - Page 37
paper jam. You might trap your fingers if you do not. Take care not to touch the booklet finisher tray during operation. Otherwise, an injury might occur. 10 CJZ009 Keep your hands clear of the booklet finisher tray when pulling out or pushing in the finisher's staple unit, or removing paper jam - Ricoh Aficio MP C5502 | User Guide - Page 38
12 12 CJZ032 CKA023 During operation, rollers for transporting the paper revolve. Take care not to touch rollers during operation. Otherwise, an injury might occur. Power Switch Symbols The meanings of the symbols for the - Ricoh Aficio MP C5502 | User Guide - Page 39
2. Safety Information 38 - Ricoh Aficio MP C5502 | User Guide - Page 40
which reproduction is prohibited by law. Copying or printing the following items is generally prohibited by local law: bank notes, revenue stamps, bonds, stock certificates, bank drafts, checks, passports, driver's licenses. The preceding list is meant as a guide only and is not inclusive. We assume - Ricoh Aficio MP C5502 | User Guide - Page 41
direction, and 7 degrees (minimum) and 10 degrees (maximum) in the horizontal direction, and laser beams are generated in Continuous Wave (CW) mode. Caution: Use of controls or adjustments or performance of procedures other than those specified in the manuals might result in hazardous radiation - Ricoh Aficio MP C5502 | User Guide - Page 42
Number: • MP C3002/Aficio MP C3002 • MP C3502/Aficio MP C3502 • MP C3002G/Aficio MP C3002G • MP C3502G/Aficio MP C3502G • MP C4502/Aficio MP C4502 • MP C4502A/Aficio MP C4502A • MP C5502/Aficio MP C5502 • MP C5502A/Aficio MP C5502A • MP C4502G/Aficio MP C4502G • MP C5502G/Aficio MP the instructions, - Ricoh Aficio MP C5502 | User Guide - Page 43
radio /TV technician for help. Caution: Changes or installation instructions for detail. 4. The REN is used to determine the number of service. 7. If trouble is experienced with this equipment, for repair or warranty information, please contact Ricoh Americas Corporation Customer Support - Ricoh Aficio MP C5502 | User Guide - Page 44
, communication error indication), see the manual provided with this machine for instruction on resolving the problem. 9. Connection to party line service is subject to state tariffs. Contact the state public utility commission, public service commission or corporation commission for information. 10 - Ricoh Aficio MP C5502 | User Guide - Page 45
gas leak to report the leak. • Use only the power cord and batteries indicated in this manual. Do not dispose of batteries in a fire. They may explode. Check with local codes for possible special disposal instructions. Save these instructions. IMPORTANTES MESURES DE SÉCURITÉ de l'unité Fax Certaines - Ricoh Aficio MP C5502 | User Guide - Page 46
Notes to Canadian Users of Facsimile Unit This product meets the applicable Industry Canada technical specifications. The Ringer Equivalence Number is an indication of the maximum number of devices allowed to be connected to a telephone interface. The termination on an interface may consist of any - Ricoh Aficio MP C5502 | User Guide - Page 47
manufacturers participate voluntarily. Targeted products are computers, monitors, printers, facsimiles, copiers, scanners, and multi-function devices. Energy Star standards and logos are internationally uniform. • For details about the "default delay time", see p.47 "Energy Saving Functions". 46 - Ricoh Aficio MP C5502 | User Guide - Page 48
minute. This default time can be changed. • The machine can print jobs from computers and receive faxes while in Sleep mode. Specification for types 1 and 2 Type 1 Reduced electrical consumption in Low 79 W Power mode Time of switch into Low Power mode Off Time of switch out from Low Power mode - Ricoh Aficio MP C5502 | User Guide - Page 49
scanning ADF) Type 3 Reduced electrical consumption in Low 98 W Power mode Time of switch into Low Power mode Off Time of switch out from Low Power mode 10 seconds Reduced electrical consumption in Sleep 1.0 W mode Time of switch into Sleep mode 1 minute Time of switch out from Sleep mode - Ricoh Aficio MP C5502 | User Guide - Page 50
Notes to users in the state of California (Notes to Users in USA) Notes to users in the state of California (Notes to Users in USA) Perchlorate Material - special handling may apply, See www.dtsc.ca.gov/hazardouswaste/ perchlorate 49 - Ricoh Aficio MP C5502 | User Guide - Page 51
3. Information for This Machine 50 - Ricoh Aficio MP C5502 | User Guide - Page 52
Foundation. Macintosh and Safari are trademarks of Apple Inc., registered in the United States and other countries. Microsoft®, Windows®, Windows Server®, Windows Vista®, and Internet Explorer® are either registered trademarks or trademarks of Microsoft Corporation in the United States and/or - Ricoh Aficio MP C5502 | User Guide - Page 53
Server 2003 R2 are as follows: Microsoft® Windows Server® 2003 R2 Standard Edition Microsoft® Windows Server® 2003 R2 Enterprise Edition • The product names of Windows Server 2008 are as follows: Microsoft® Windows Server® 2008 Standard Microsoft® Windows Server® 2008 Enterprise • The product names - Ricoh Aficio MP C5502 | User Guide - Page 54
© 2011 - Ricoh Aficio MP C5502 | User Guide - Page 55
press [OK]. Re-enter the password after the message Confirm Password appears on the screen, and then press [OK]. Print > Printing Stored Documents You can specify the time in 24-hour For users mainly in Europe and > Storing Documents in the Hard format. To cancel the print time, Asia: Disk Drive - Ricoh Aficio MP C5502 | User Guide - Page 56
Topic Error Corrections Security Guide > select times for "Random Numbers", overwrite three times for "Random the maximum time to complete Numbers", the maximum time Users]. Security Guide > 7. Managing the Machine > Managing Device Information Printing Log Files Both Printing Log Files Help. - Ricoh Aficio MP C5502 | User Guide - Page 57
the when Output Mode Switch case, check the [Output Mode Switch Timer] setting and cancel print restrictions, Timer is enabled or specify [Print Standby to Print Files] so that a report can be printed manually. -- The amount of free memory space becomes less than 100%, or the number of received - Ricoh Aficio MP C5502 | User Guide - Page 58
, EXEMPLARY, OR CONSEQUENTIAL DAMAGES (INCLUDING, BUT NOT LIMITED TO, PROCUREMENT OF SUBSTITUTE GOODS OR SERVICES; LOSS OF USE, DATA, OR PROFITS; OR BUSINESS INTERRUPTION) HOWEVER CAUSED AND ON ANY , EVEN IF ADVISED OF THE POSSIBILITY OF SUCH DAMAGE. © 2011 Printed in China EN US EN AU D143-7046 - Ricoh Aficio MP C5502 | User Guide - Page 59
User Guide What You Can Do with This Machine Getting Started Copy Fax Print Scan Document Server Web Image Monitor Adding Paper and Toner Troubleshooting Appendix For information not in this manual, refer to the HTML/PDF files on the supplied CD-ROM. Read this manual carefully before you use this - Ricoh Aficio MP C5502 | User Guide - Page 60
- Ricoh Aficio MP C5502 | User Guide - Page 61
of the Machine's External Options 33 Guide to the Names and Functions of the Machine's Control Panel 45 How to Use the [Home] Screen...48 Adding Icons to the [Home] Screen...49 Registering Functions in a Program...53 Example of Programs...55 Turning On/Off the Power...59 Turning On the Main - Ricoh Aficio MP C5502 | User Guide - Page 62
Connection to Destination (Immediate Transmission 92 Canceling a Transmission...94 Canceling a Transmission Before the Original Is Scanned 94 Canceling a Transmission While the Original Is Being Scanned 94 Canceling a Transmission After the Original Is Scanned 95 Sending at a Specific Time (Send - Ricoh Aficio MP C5502 | User Guide - Page 63
Printing the Journal Manually...100 5. Print Quick Install...101 Displaying the Printer Driver Properties...102 Standard Printing...103 When Using the PCL 6 Printer Driver...103 Locked Print...104 Sending a Locked Print File...104 Printing a Locked Print File Using the Control Panel 104 Hold Print - Ricoh Aficio MP C5502 | User Guide - Page 64
Faxes or Scanned Documents When Toner Has Run Out 162 Disposing of Used Toner...163 10. Troubleshooting Indicators...165 When an Indicator for the [Check Status] Key Is Lit 166 Panel Tone...168 When You Have Problems Operating the Machine 169 When Messages Are Displayed on the Control Panel 176 - Ricoh Aficio MP C5502 | User Guide - Page 65
INDEX...235 5 - Ricoh Aficio MP C5502 | User Guide - Page 66
How to Read the Manuals Symbols Used in the Manuals This manual uses the following errors. This symbol is located at the end of sections. It indicates where you can find further relevant information. [ ] Indicates the names of keys on the machine's display or control panels. Indicates instructions - Ricoh Aficio MP C5502 | User Guide - Page 67
240 V (mainly North America) If the label contains the following, your machine is a region B model: • CODE XXXX -17, -51, -57 • 120-127 V • Dimensions in this manual are given in two units of measure: metric and inch. If your machine is a Region A model, refer to the metric units. If your machine is - Ricoh Aficio MP C5502 | User Guide - Page 68
Names of Major Features In this manual, major features of the machine are referred to as follows: • Auto Reverse Document Feeder ARDF • Auto Document Feeder ADF (in this manual, "ADF" refers to the ARDF and the one-pass duplex scanning ADF) • Large capacity tray LCT • Envelope Feeder EF3020 Small - Ricoh Aficio MP C5502 | User Guide - Page 69
and received faxes on a single sheet (Combine (Copier/Fax)) See "Combined Copying", Copy/ Document Server . See "Combine Two Originals", Fax . Printing received faxes on both sides of sheets (2 Sided Print) See "Two-Sided Printing", Fax . Converting received faxes to electronic formats (Paperless - Ricoh Aficio MP C5502 | User Guide - Page 70
Scan Files by E-mail", Scan . Sending the URL of the folder in which scan files are stored See "Sending the URL by E-mail", Scan . Storing scan files in a shared folder See "Basic Procedure When Using Scan to Folder", Scan . Storing scan Server and Other Functions", Copy/ Document Server . 10 - Ricoh Aficio MP C5502 | User Guide - Page 71
"Entering an E-mail Address Manually", Scan . Using Web Image Monitor to register destinations from a computer See "Registering Internet Fax Destination Information Using Web Image Monitor", Fax . Downloading destinations registered in the machine to the LAN-Fax driver destination list See "Using - Ricoh Aficio MP C5502 | User Guide - Page 72
as Defaults (Copier/Document Server/Fax/Scanner)) See "Changing the Default Functions of the Initial Screen", Convenient Functions . Registering frequently-used printing settings to the printer driver See "Using One Click Presets", Print . Changing the initial settings of the printer driver to - Ricoh Aficio MP C5502 | User Guide - Page 73
You Can Customize the [Home] Screen as You Like You Can Customize the [Home] Screen as You Like The icons of each function are displayed on the [Home] screen. CJQ611 • You can add shortcuts to often used programs or Web pages to the [Home] screen. The programs or Web pages can be recalled easily by - Ricoh Aficio MP C5502 | User Guide - Page 74
color. You can switch the color copy mode depending on the type of originals used and the desired finish. • You can print stamps on copies. Stamps can include background numbers, scanned images, dates, and page numbers. • You can adjust the color • Copier functions such as Duplex, Combine, Booklet, - Ricoh Aficio MP C5502 | User Guide - Page 75
machine supports network and local connections. • You can send PDF files directly to the machine for printing, without having to open a PDF application. • You can print or delete print jobs stored on the machine's hard disk, which have been previously sent from computers using the printer driver - Ricoh Aficio MP C5502 | User Guide - Page 76
. You can also change print settings and print multiple documents (Document Server). CJQ603 • You can retrieve stored documents scanned in scanner mode to your computer. • Using the file format converter, you can download documents stored in copier, Document Server, or printer mode to your computer - Ricoh Aficio MP C5502 | User Guide - Page 77
electronic formats in the machine's hard disk without printing them. CJQ604 You can use Web Image Monitor to check, print, delete, retrieve, or download documents using your computer (Storing received documents). • See "Confirming/Printing/Deleting Received and Stored Documents", Fax . Transmission - Ricoh Aficio MP C5502 | User Guide - Page 78
1. What You Can Do with This Machine CJQ605 • To send a fax, print from the Windows application you are working with, select LAN-Fax as the printer, and then specify the destination. • You can also check the sent image data. • For details about the machine's settings, see "Network Settings - Ricoh Aficio MP C5502 | User Guide - Page 79
Transmission and Reception This machine converts scanned document images to e-mail format, Fax Reception and Mail to Print). • Internet Fax compatible machines or host name instead of a fax number (IP-Fax Transmission). • This machine connected to the public switched telephone network (PSTN). - Ricoh Aficio MP C5502 | User Guide - Page 80
1. What You Can Do with This Machine • For details about how to transmit and receive documents over the Internet, see "Transmission" and "Reception", Fax . 20 - Ricoh Aficio MP C5502 | User Guide - Page 81
• The procedure for sending faxes is as same as that of for the machine with the fax unit. When a job has finished, confirm results displayed on sending history or printed on reports. • You can forward the received documents from the remote machine with facsimile function to the client-side machine - Ricoh Aficio MP C5502 | User Guide - Page 82
for the ScanRouter delivery software*1 (Network delivery scanner). You can save scan files in the delivery server or send them to a folder in a computer on the same network. • You can use Web Services on Devices (WSD) to send scan files to a client computer. *1 The ScanRouter delivery software is no - Ricoh Aficio MP C5502 | User Guide - Page 83
from unauthorized access and stop them from being copied without permission. • You can control the use of the machine, as well as prevent machine settings from being changed without authorization. • By setting passwords, you can prevent unauthorized access via the network. • You can erase or encrypt - Ricoh Aficio MP C5502 | User Guide - Page 84
which tray is running out of paper, register information in the Address Book, specify the network settings, configure and change the system settings, manage jobs, print the job history, and configure the authentication settings. • See Connecting the Machine/ System Settings or Web Image Monitor - Ricoh Aficio MP C5502 | User Guide - Page 85
, showing that the copy is unauthorized. • Using the printer driver, you can embed text in the printed document for unauthorized copy prevention. If the document is copied, scanned, or stored in a Document Server by a copier or multifunction printer, the embedded text appears conspicuous in the copy - Ricoh Aficio MP C5502 | User Guide - Page 86
1. What You Can Do with This Machine 26 - Ricoh Aficio MP C5502 | User Guide - Page 87
2. Getting Started This chapter describes how to start using this machine. Guide to Names and Functions of Components Guide to Components of Types 1 and 2 • Do not obstruct the ventilation automatically feed the originals one by one. The ARDF scans both sides of an original one side at a time. 27 - Ricoh Aficio MP C5502 | User Guide - Page 88
holes Prevent overheating. 4. Main power switch To operate the machine, the main power switch must be on. If it is off, open the cover and turn the switch on. 5. Control panel See p.45 "Guide to the Names and Functions of the Machine's Control Panel". 6. Internal tray 1 Copied/printed paper and fax - Ricoh Aficio MP C5502 | User Guide - Page 89
1. Ventilation holes Prevent overheating. 2. Bypass tray Use to copy or print on OHP transparencies and label paper (adhesive labels). 3. Paper guides When loading paper in the bypass tray, align the paper guides flush against the paper. 4. Extender Pull this extender out when loading - Ricoh Aficio MP C5502 | User Guide - Page 90
Getting Started Guide to Components of Types 3 and 4 • Do not obstruct the ventilation holes by placing objects near them or leaning things against them. If the machine overheats, a fault might occur. Front and left view 1 2 5 6 4 7 3 8 9 CJS004 1. ARDF or one-pass duplex scanning ADF (The - Ricoh Aficio MP C5502 | User Guide - Page 91
of Components 4. Main power switch To operate the machine, the main power switch must be on. If it is off, open the cover and turn the switch on. 5. Control panel See p.45 "Guide to the Names and Functions of the Machine's Control Panel". 6. Internal tray 1 Copied/printed paper and fax messages - Ricoh Aficio MP C5502 | User Guide - Page 92
loading paper in the bypass tray, align the paper guides flush against the paper. 4. Extender Pull this extender out when loading sheets larger than A4 5. Lower right cover , 81/2 × 11 in the bypass tray. Open - Ricoh Aficio MP C5502 | User Guide - Page 93
to Functions of the Machine's Options Guide to Functions of the Machine's Options Guide to Functions of the Machine's External Options External options for types 1 and 2 10 13 9 (mainly Europe and Asia) 12 8 7 1 2 11 6 5 4 3 CJS007 1. Small size paper tray Holds small size sheets of - Ricoh Aficio MP C5502 | User Guide - Page 94
the finisher. 9. Internal shift tray Sorts and stacks multiple sheets of paper. 10. External tray If you select this as the output tray, copied/printed paper and fax messages are delivered here face down. 11. Booklet Finisher SR3100 Sorts, stacks, staples, and punches multiple sheets of paper. The - Ricoh Aficio MP C5502 | User Guide - Page 95
External options for types 1 and 2 11 14 10 Guide to Functions of the Machine's Options (mainly North America) 1 13 9 8 2 3 12 7 6 5 4 CJS008 1. Handset Used as a receiver when a fax unit is installed. Allows you to use the On Hook Dial and Manual Dial functions. It also allows you to use - Ricoh Aficio MP C5502 | User Guide - Page 96
9. Bridge unit Relays paper to the finisher. 10. Internal shift tray Sorts and stacks multiple sheets of paper. 11. External tray If you select this as the output tray, copied/printed paper and fax messages are delivered here face down. 12. Booklet Finisher SR3100 Sorts, stacks, staples, and punches - Ricoh Aficio MP C5502 | User Guide - Page 97
(models equipped with the ARDF) (mainly Europe and Asia) 1 12 9 8 11 7 2 6 10 5 4 3 CJS009 1. Scanner accessibility unit This unit lets you operate the machine or scan documents from the side instead of using the control panel on the machine. 2. Small size paper tray Holds small size sheets of - Ricoh Aficio MP C5502 | User Guide - Page 98
you select this as the output tray, copied/printed paper and fax messages are delivered here face down. 10. Finisher SR3120 Sorts, stacks, staples, and and fold them into booklets. Consists of the following paper trays: • Finisher upper tray • Finisher shift tray • Finisher booklet tray 12. Finisher - Ricoh Aficio MP C5502 | User Guide - Page 99
accessibility unit This unit lets you operate the machine or scan documents from the side instead of using the control panel on the machine. 2. Handset Used as a receiver when a fax unit is installed. Allows you to use the On Hook Dial and Manual Dial functions. It also allows you to use the machine - Ricoh Aficio MP C5502 | User Guide - Page 100
and stacks multiple sheets of paper. 10. External tray If you select this as the output tray, copied/printed paper and fax messages are delivered here fold them into booklets. Consists of the following paper trays: • Finisher upper tray • Finisher shift tray • Finisher booklet tray 13. Finisher - Ricoh Aficio MP C5502 | User Guide - Page 101
Guide to Functions of the Machine's Options External options for types 3 and 4 (models equipped with the one-pass duplex scanning ADF) (mainly Europe and Asia) 12 9 8 11 7 2 6 10 5 4 you select this as the output tray, copied/printed paper or fax messages are delivered here face down. 41 - Ricoh Aficio MP C5502 | User Guide - Page 102
. 8. External tray If you select this as the output tray, copied/printed paper and fax messages are delivered here face down. 9. Finisher SR3120 Sorts following paper trays: • Finisher upper tray • Finisher shift tray 10. Booklet Finisher SR3110 Sorts, stacks, staples, and punches multiple sheets of - Ricoh Aficio MP C5502 | User Guide - Page 103
for types 3 and 4 (models equipped with the one-pass duplex scanning ADF) (mainly North America) 12 9 8 1 11 7 2 6 10 5 4 3 CJS012 1. Handset Used as a receiver when a fax unit is installed. Allows you to use the On Hook Dial and Manual Dial functions. It also allows you to use the machine - Ricoh Aficio MP C5502 | User Guide - Page 104
you select this as the output tray, copied/printed paper and fax messages are delivered here face down. 10. Finisher SR3120 Sorts, stacks, staples, and and fold them into booklets. Consists of the following paper trays: • Finisher upper tray • Finisher shift tray • Finisher booklet tray 12. Finisher - Ricoh Aficio MP C5502 | User Guide - Page 105
to the Names and Functions of the Machine's Control Panel Guide to the Names and Functions of the Machine's Control Panel This illustration shows the control panel of the machine with options fully installed. 12 3 456 7 8 9 20 10 11 19 18 17 16 15 14 13 12 22 21 CJS060 1. [Home] key Press - Ricoh Aficio MP C5502 | User Guide - Page 106
Frequently Used Functions", Convenient Functions . • Press to program defaults for the initial display when modes are cleared or reset, or immediately after the main power switch is turned on. See "Changing the Default Functions of the Initial Screen", Convenient Functions . 6. [Interrupt - Ricoh Aficio MP C5502 | User Guide - Page 107
system status, operational status of each function, and current jobs. You can also display the job history and the machine's maintenance information. 19. Data In indicator (facsimile and printer mode) Flashes when the machine is receiving print jobs or LAN-Fax documents from a computer. See Fax and - Ricoh Aficio MP C5502 | User Guide - Page 108
press the [Home] key. 1 2 3 45 6 9 8 7 CJS052 1. [Copier] Press to make copies. For details about how to use the copy function, see Scan . 4. [Printer] Press to make settings for using the machine as a printer. For details about how to make settings for the printer function, see Print - Ricoh Aficio MP C5502 | User Guide - Page 109
49 "Adding Icons to the [Home] Screen". The program number appears on the bottom of the shortcut icon. 8. [ . 9. [Document Server] Press to store or print documents on the machine's hard disk. For details shortcuts to programs stored in copier, facsimile, or scanner mode, or Web pages registered - Ricoh Aficio MP C5502 | User Guide - Page 110
icon you want to add. 7. Click [OK] four times. Adding icons to the [Home] screen using the User Tools In the following procedure, a shortcut to a copier program is registered to the [Home] screen. 1. Register a program. 2. Press the [User Tools/Counter] key. CJS039 3. Press [Edit Home]. 50 - Ricoh Aficio MP C5502 | User Guide - Page 111
4. Press [Add Icon]. How to Use the [Home] Screen 5. Press the [Program] tab. 6. Make sure that [Copier Program] is selected. 7. Select the program you want to add. 51 - Ricoh Aficio MP C5502 | User Guide - Page 112
2. Getting Started 8. Specify the position where [Blank] is displayed. 9. Press [OK]. 10. Press the [User Tools/Counter] key. • Press [ ] on the upper-right corner of the screen to check the position on the simple screen. 52 - Ricoh Aficio MP C5502 | User Guide - Page 113
Bottom, Booklet, Magazine, Finishing, Cover/Slip Sheet (except for Designate: Copy, Designate: Blank, Chapter, and Main Sheet Tray in Designate / Chapter), Edit / Stamp, number of prints Facsimile: Scan Settings, density, Original Feed Type, File Type, Store File (except for User Name and Password - Ricoh Aficio MP C5502 | User Guide - Page 114
on the top left of the control panel, and press the [Copier] icon on the [Home] screen. CJS113 2. Edit the copy settings so all functions you want to store in a program are selected. 3. Press the [Program] key. CJU601 4. Press [Program]. 5. Press the program number you want to register. 6. Enter the - Ricoh Aficio MP C5502 | User Guide - Page 115
description Specify [Combine 2 Sides] in [Dup./Combine/Series]. You can save paper and toner. In [Edit / Colour], specify [CONFIDENTIAL] under [Preset Stamp], and [Date Stamp]. You can increase security awareness by printing "Secret" and the date on copies. Specify [Combine 2 Sides] in [Dup./Combine - Ricoh Aficio MP C5502 | User Guide - Page 116
a sheet, so that you can you to save paper. Scanner mode Program name Easy PDF scan High compression scan Long-term storage scan Program description Select [Full Colour: Text / Photo] in [Scan Settings]. In [Send File Type / Name], select [PDF] under [File Type] and enter the business details such - Ricoh Aficio MP C5502 | User Guide - Page 117
when reprinting scanned data. In [Send File Type / Name], specify [PDF], [High Compression PDF], or [PDF/A] in scans to a large volume of originals and send the scanned originals as a single job. Facsimile mode Mode]. You can send a fax at a specified time. Specify [Fax Header Print] in [TX Mode]. - Ricoh Aficio MP C5502 | User Guide - Page 118
just examples. You can assign any name to a program according to your objectives. • Depending on your business details or the type of documents to be scanned, registering a program cannot be recommended. 58 - Ricoh Aficio MP C5502 | User Guide - Page 119
cords could result in fire or electric shock. • After turning the machine's power off, wait at least a few seconds before turning it back on. If the message "Turn main Power Switch off" appears, turn the machine's power off, wait 10 seconds or more, and then turn it back on again. Never turn the - Ricoh Aficio MP C5502 | User Guide - Page 120
• Make sure to turn off the main power switch before pulling out the power plug. Not doing so may result in damage to the hard disk or memory, leading to malfunctions. • Do not turn off the power while the machine is in operation. 1. Open the main power switch cover, and then turn off the main - Ricoh Aficio MP C5502 | User Guide - Page 121
for the Login User Name, Login Password, and User Code. For details about user authentication, see Security Guide . • User Code to enter on In Using the Control Panel This section explains the procedure for logging in to the machine when Basic Authentication, Windows Authentication, LDAP - Ricoh Aficio MP C5502 | User Guide - Page 122
Enter a Login Password, and then press [OK]. When the user is authenticated, the screen for the function you are using appears. Logging Out Using the Control Panel This section explains the procedure for logging out the machine when Basic Authentication, Windows Authentication, LDAP Authentication - Ricoh Aficio MP C5502 | User Guide - Page 123
Placing Originals Placing Originals on the Exposure Glass Placing Originals • Do not lift the ADF forcefully. Otherwise, the cover of the ADF might open or be damaged. 1. Lift the ADF. Be sure to lift the ADF by more than 30 degrees. Otherwise, the size of the original might not be detected - Ricoh Aficio MP C5502 | User Guide - Page 124
2. Getting Started ARDF (Types 1 and 2) 1 ARDF (Types 3 and 4) CJW003 1 CJW004 One-pass duplex scanning ADF (Types 3 and 4) 1 1. Sensors CJW005 1. Adjust the original guide to the original size. 2. Set the aligned originals squarely face up in the ADF. Do not stack originals beyond the limit - Ricoh Aficio MP C5502 | User Guide - Page 125
1 2 CJW006 • ARDF (Types 3 and 4) 1 2 CJW007 • One-pass duplex scanning ADF (Types 3 and 4) 1 2 CJW008 1. Limit mark 2. Original guide Placing Originals 65 - Ricoh Aficio MP C5502 | User Guide - Page 126
2. Getting Started 66 - Ricoh Aficio MP C5502 | User Guide - Page 127
the control panel, and press the [Copier] icon number of copies with the number keys. The maximum copy quantity that can be entered is 999. 6. Press the [Start] key. When placing the original on the exposure glass, press the [ ] key after all originals are scanned. Some functions such as Batch mode - Ricoh Aficio MP C5502 | User Guide - Page 128
3. Copy 7. When the copy job is finished, press the [Reset] key to clear the settings. 68 - Ricoh Aficio MP C5502 | User Guide - Page 129
based on the paper size you select. CKN008 • If you select a reproduction ratio after pressing [Auto Reduce / Enlarge], [Auto Reduce / Enlarge] is canceled and the image cannot be rotated automatically. This is useful to copy different size originals to the same size paper. If the orientation in - Ricoh Aficio MP C5502 | User Guide - Page 130
Exposure glass ADF Original size and orientation 11 × 17 , 81/2 × 14 , 81/2 × 11 , 51/2 × 81/2 11 × 17 , 81/2 × 14 , 81/2 × 11 , 51/2 × 81/2 , 10 × 14 , 71/4 × 101/2 , A3 , A4 1. Press [Auto Reduce / Enlarge]. 2. Select the paper size. 3. Place the originals, and then press the [Start] key. 70 - Ricoh Aficio MP C5502 | User Guide - Page 131
Duplex Copying Duplex Copying Copies two 1-sided pages or one 2-sided page onto a 2-sided page. During copying, the image is shifted to allow for the binding margin. CKN009 There are two types of Duplex. 1 Sided 2 Sided Copies two 1-sided pages on one 2-sided page. 2 Sided 2 Sided Copies one 2- - Ricoh Aficio MP C5502 | User Guide - Page 132
3. Copy Original Placing originals Original Orientation Orientation Top to Top Copy 1. Press [Dup./Combine/Series]. Top to Bottom 2. Make sure that [Duplex] is selected. If [Duplex] is not selected, press [Duplex]. 3. Select [1 Sided 2 Sided] or [2 Sided 2 Sided] according to how you want - Ricoh Aficio MP C5502 | User Guide - Page 133
Combined Copying Combined Copying This mode can be used to select a reproduction ratio automatically and orientation and the number of originals to be combined. • Portrait ( ) originals CKN015 • Landscape ( ) originals CKN016 Placing originals (originals placed in the ADF) The default value for the - Ricoh Aficio MP C5502 | User Guide - Page 134
3. Copy CKN010 • Originals read from right to left CKN017 One-Sided Combine Combine several pages onto one side of a sheet. CKN014 There are six types of One-Sided Combine. 1 Sided 2 Originals Combine 1 Side Copies two 1-sided originals to one side of a sheet. 1 Sided 4 Originals Combine 1 Side - Ricoh Aficio MP C5502 | User Guide - Page 135
[Combine]. 3. Select [1 Sided] or [2 Sided] for [Original:]. If you selected [2 Sided], you can change the orientation. 4. Press [Combine 1 Side]. 5. Select the number of originals to combine. 6. Press [OK]. 7. Select the paper size. 8. Place the originals, and then press the [Start] key. Two-Sided - Ricoh Aficio MP C5502 | User Guide - Page 136
3. Copy CKN074 There are six types of Two-Sided Combine. 1 Sided 4 Originals Combine 2 Sides Copies four 1-sided originals to one sheet with two pages per side. 1 Sided 8 Originals Combine 2 Sides Copies eight 1-sided originals to one sheet with four pages per side. 1 Sided 16 Originals Combine 2 - Ricoh Aficio MP C5502 | User Guide - Page 137
4. Press [Combine 2 Sides]. 5. Press [Orientation]. 6. Select [Top to Top] or [Top to Bottom] for [Original:] and/or [Copy:], and then press [OK]. 7. Select the number of originals to combine. 8. Press [OK]. 9. Select the paper size. 10. Place the originals, and then press the [Start] key. 77 - Ricoh Aficio MP C5502 | User Guide - Page 138
range will vary depending on which options are installed. • When prints are delivered to the trays of the finisher: Horizontal length: Custom Size]. 5. Enter the horizontal size with the number keys, and then press [ ]. 6. Enter the vertical size with the number keys, and then press [ ]. 7. Press [ - Ricoh Aficio MP C5502 | User Guide - Page 139
to the weight of the envelopes you are printing on. For details about the relationship between paper Paper Sizes and Types". About handling envelopes, supported envelope types, and how to load envelopes, , press [1 sided 2 sided:TtoT] to cancel the setting. To copy onto custom size envelopes - Ricoh Aficio MP C5502 | User Guide - Page 140
3. Copy 1. Place the original face down on the exposure glass. The original should be aligned to the rear left corner. 1 CJW001 1. Positioning mark 2. Load the envelopes face down in the bypass tray. [Bypass] is automatically selected. 3. Press the [ ] key. 4. Press [Paper Size]. 5. Specify the - Ricoh Aficio MP C5502 | User Guide - Page 141
Finishing Staple Each copy set can be stapled together. Finishing CKN021 • You cannot use the bypass tray with this function. Original orientation and staple position Place all the originals in the ADF in the orientation in which they can be read normally. When placing the original on the - Ricoh Aficio MP C5502 | User Guide - Page 142
3. Copy Bottom Slant Placing the original on the exposure glass Placing the original in the ADF Staple position*1 Left 2 *2 Top 2 *3 *2 *3 Center *1 The above tables show staple positioning. The orientation of the paper does not indicate orientation of delivery. *2 You cannot staple at - Ricoh Aficio MP C5502 | User Guide - Page 143
2. Select one of the staple positions. Finishing When you select a staple position, Sort is automatically selected. 3. Press [OK]. 4. Enter the number of copy sets with the number keys. 5. Place the originals, and then press the [Start] key. Punch You can make punch holes in copies. CKN022 The - Ricoh Aficio MP C5502 | User Guide - Page 144
3. Copy When the paper that is loaded is the same size and orientation as the original, the relationship between the orientation in which you place the original and the punch hole positions is as follows. You can confirm the punch hole positions that can be selected on the screen that appears when - Ricoh Aficio MP C5502 | User Guide - Page 145
1. Press [Finishing]. Finishing 2. Select one of the punch hole positions. 3. Press [OK]. 4. Enter the number of copy sets with the number keys. 5. Place the originals, and then press the [Start] key. 85 - Ricoh Aficio MP C5502 | User Guide - Page 146
on the hard disk of this machine. Thus you can print them later applying necessary conditions. You can check the stored name, or password if necessary. 3. Press [OK]. 4. Place the originals. 5. Make the scanning settings for the original. 6. Press the [Start] key. Stores scanned originals in - Ricoh Aficio MP C5502 | User Guide - Page 147
. As soon as the main power switch is turned on, the Power Failure Report is printed to help you check the list of deleted files. See "Turning Off the Main Power / In the Event of Power Failure", Troubleshooting . 1. Press the [Home] key on the top left of the control panel, and press the [Facsimile - Ricoh Aficio MP C5502 | User Guide - Page 148
highlighted. 4. Place the original into the ADF. 5. Make the scan settings such as scan size and resolution. 6. Configure the transmission settings such as "TX Mode" as necessary. 7. Specify a destination. You can enter the destination's number or address directly or select from the Address Book by - Ricoh Aficio MP C5502 | User Guide - Page 149
select are as follows: • [Frequent]: Added to the page that is displayed first. • [AB], [CD], [EF], [GH], [IJK], [LMN], [OPQ], [RST], [UVW], [XYZ], [1] to [10]: Added to the list of items in the selected title. You can select [Frequent] and one more key for each title. 8. Press [Fax Dest.]. 9. Press - Ricoh Aficio MP C5502 | User Guide - Page 150
4. Fax 10. Enter the fax number using the number keys, and then press [OK]. 11. Specify optional settings such as "SUB Code", "SEP Code", and "International TX Mode". 12. Press [OK]. 13. Press [Exit]. 14. Press the [User Tools/Counter] key. Deleting a Fax Destination • If you delete a destination - Ricoh Aficio MP C5502 | User Guide - Page 151
7. Press [Delete All], and then press [OK]. Basic Procedure for Transmissions (Memory Transmission) 8. Press [OK]. 9. Press [Exit]. 10. Press the [User Tools/Counter] key. 91 - Ricoh Aficio MP C5502 | User Guide - Page 152
or multiple destinations, the transmission mode is automatically switched to Memory Transmission. • It control panel, and press the [Facsimile] icon on the [Home] screen. CJS113 2. Make sure "Ready" appears on the screen. 3. Press [Immed. TX]. 4. Place the original into the ADF. 5. Select the scan - Ricoh Aficio MP C5502 | User Guide - Page 153
Transmitting while Checking Connection to Destination (Immediate Transmission) 6. Specify a destination. If you make a mistake, press the [Clear] key, and then enter again. 7. Press the [Start] key. 93 - Ricoh Aficio MP C5502 | User Guide - Page 154
the [Start] key. 1. Press the [Reset] key. CJN023 Canceling a Transmission While the Original Is Being Scanned Use this procedure to cancel scanning or transmitting of the original while it is being scanned. If you cancel a transmission using the standard memory transmission function, you need to - Ricoh Aficio MP C5502 | User Guide - Page 155
sent, stored in memory, or if it fails to transmit. All the scanned data is deleted from memory. 1. Press the [Stop] key. CJN024 You can also press [TX/RX Status / Print], and then [Check / Stop Transmission File]. 2. Press [Standby File List]. To cancel transmission of a file stored in the memory - Ricoh Aficio MP C5502 | User Guide - Page 156
lost for this reason, a Power Failure Report is automatically printed when the main power switch is turned on. Use this report to check the list of lost documents. See "Turning Off the Main Power / In the Event of Power Failure", Troubleshooting . 1. Press [TX Mode]. 2. Press [Send Later]. 3. Enter - Ricoh Aficio MP C5502 | User Guide - Page 157
so as not to send to unspecified people. A four to eight digit number can be specified as a password. You can also change the file information after storing files. 1. Place the original, and then specify the scan settings you require. Specify the "Original Orientation" setting correctly. If you do - Ricoh Aficio MP C5502 | User Guide - Page 158
Manual Entry], and then enter the name. After specifying a user name, press [OK]. • File Name Press [File Name], enter a file name, and then press [OK]. • Password Press [Password], enter a password using the number The stored documents are sent with the scan settings made when they were stored. You - Ricoh Aficio MP C5502 | User Guide - Page 159
Press the Thumbnails key to switch the screen to thumbnail display. 3. If you select a document with a password, enter the password using the number keys, and then press [ the original, and then select any scan settings you require. 7. Specify the destination, and then press the [Start] key. 99 - Ricoh Aficio MP C5502 | User Guide - Page 160
Fax Printing the Journal Manually To print the Journal manually, select the printing method: "All", "Print per File No.", or "Print per User". All Prints the results of communications in the order made. Print per File No. Prints only the results of communications specified by file number. Print per - Ricoh Aficio MP C5502 | User Guide - Page 161
, default printer, and shared printer as necessary. 9. Click [Continue]. The installation starts. If the [User Account Control] dialog box appears, and then click [Yes] or [Continue]. 10. Click [Finish]. When you are prompted to restart your computer, restart it by following the instructions that - Ricoh Aficio MP C5502 | User Guide - Page 162
5. Print Displaying the Printer Driver Properties This section explains how to open the printer driver properties from [Devices and Printers]. • Manage Printers permission is required to change the printer settings. Log on as an Administrators group member. • You cannot change the machine default - Ricoh Aficio MP C5502 | User Guide - Page 163
is in Low Power mode or Sleep mode, an error message might appear when the print job is complete. In this case, check if the document was printed. When Using the PCL 6 Printer Driver 1. Click the WordPad menu button in the upper left corner of the window, and then click [Print]. 2. In the [Select - Ricoh Aficio MP C5502 | User Guide - Page 164
5. Print Locked Print Sending a Locked Print File 1. Click the WordPad menu button in the upper left corner of the window, and then click [Print]. 2. In the "Select Printer" list, select the printer you want to use. 3. Click [Preferences]. 4. In the "Job Type:" list, click [Locked Print]. 5. Click [ - Ricoh Aficio MP C5502 | User Guide - Page 165
2. Press the [Print Jobs] tab. Locked Print 3. Press [Locked Print Job]. 4. Select the files you want to print. You can select all the Locked Print files at once by pressing [Select All Jobs] after selecting a file. 5. Press [Print]. 6. Enter the password using the number keys, and then press [OK - Ricoh Aficio MP C5502 | User Guide - Page 166
5. Print Hold Print Sending a Hold Print File 1. Click the WordPad menu button in the upper left corner of the window, and then click [Print]. 2. In the "Select Printer" list, select the printer you want to use. 3. Click [Preferences]. 4. In the "Job Type:" list, click [Hold Print]. 5. Click [ - Ricoh Aficio MP C5502 | User Guide - Page 167
the files you want to print. You can select all the Hold Print files at once by pressing [Select All Jobs] after selecting a file. 5. Press [Print]. 6. To change the print settings of the document, press [Detailed Settings]. 7. Enter the number of copies using the number keys if necessary, and then - Ricoh Aficio MP C5502 | User Guide - Page 168
5. Print Stored Print Sending a Stored Print File 1. Click the WordPad menu button in the upper left corner of the window, and then click [Print]. 2. In the "Select Printer" list, select the printer you want to use. 3. Click [Preferences]. 4. In the "Job Type:" list, select the print method to be - Ricoh Aficio MP C5502 | User Guide - Page 169
2. Press the [Print Jobs] tab. 3. Press [Stored Print Job]. 4. Select the files you want to print. You can select all the Stored Print files at once by pressing [Select All Jobs] after selecting a file. 5. Press [Print]. If you set the password in the printer driver, enter the password. If multiple - Ricoh Aficio MP C5502 | User Guide - Page 170
the optional hard disk is installed on the machine. • Large PDF files might not be printable using the PDF direct print function. • If print jobs through PDF direct printing are being canceled, print using the printer driver from a PDF viewer such as Adobe Reader. Related Topics Using the Media Slot - Ricoh Aficio MP C5502 | User Guide - Page 171
cards are supported for direct printing. However, certain types of USB flash memory devices and SD cards cannot be used. For details, contact your sales or service representative. • This machine supports SD cards with a maximum capacity of 32 GB. • USB flash memory devices with password protection - Ricoh Aficio MP C5502 | User Guide - Page 172
. If necessary, press [Preview] to check the print image of the document. Press [Start Printing] or the [Start] key to start printing. If you start printing a file before the current print job is complete, an error message will appear. When printing is complete, Press [dev. slct.]. Remove the - Ricoh Aficio MP C5502 | User Guide - Page 173
files you select does not exceed 1 GB. • The machine might print data that appears to be black-and-white in color printing mode. If you need to make sure that the data is printed in black-and-white, specify black-andwhite for the print job. • Paper size is not automatically selected when a JPEG file - Ricoh Aficio MP C5502 | User Guide - Page 174
Device Screen for Direct Printing To display this screen, press the [Home] key on the top left of the control panel, and press the [Printer] icon on the you want to print or the folder you want to open. Press [ ] or 5 [ ] to scroll through the list if necessary. Depending on the number of files, - Ricoh Aficio MP C5502 | User Guide - Page 175
PDF files may not be printed using this function. • Print settings are effective for the format of the currently selected file, and will remain effective as long as the file of that format stays selected. • The machine will remember an entered PDF password until you switch out of the 5 printer - Ricoh Aficio MP C5502 | User Guide - Page 176
send more images, an error message is sent to the camera and printing fails. • The number of copies that can be printed at one time depends on the digital camera 5 that you are using. For details, see the manual provided with the digital camera. • Since printing conditions are specified on the - Ricoh Aficio MP C5502 | User Guide - Page 177
your digital camera's manual. Exiting PictBridge • Do not disconnect the USB cable while data is being sent to the machine. If you do, printing will fail. Check the control panel of this machine is displaying the "Ready" state. Disconnect the USB cable from the machine. Supported Functions This - Ricoh Aficio MP C5502 | User Guide - Page 178
to the address book. 1. Press the [Home] key on the top left of the control panel, and press the [Scanner] icon on the [Home] screen. CJS113 2. Make sure that no previous settings remain. If a previous setting remains, press the [Clear Modes] key. 3. Press the [Folder] tab. 4. Place originals. 111 - Ricoh Aficio MP C5502 | User Guide - Page 179
according to the original to be scanned. Example: Scanning the document in color/duplex mode, and saving as a PDF file. • Press [Scan Settings], and then press [Full on a computer running Windows, and how to confirm the computer's information. In these examples, Windows 7 Professional is the - Ricoh Aficio MP C5502 | User Guide - Page 180
] window, click [Advanced...]. 9. Specify one or more object types, select a location, and then click [Find Now]. 10. From window, click [OK]. 12. In the [Groups or user names:] list, select a group or user, and then, in the [Allow] column of the permissions list, select either the [Full Control - Ricoh Aficio MP C5502 | User Guide - Page 181
Scan access to, and then click [OK]. 7. In the [Select Users or Groups] window, click [OK]. 8. In the [Groups or user names:] list, select a the permissions list, select either the [Full Control] or [Change] check box. 9. Press [OK] twice. Registering an SMB Folder 1. Press the [User Tools/Counter - Ricoh Aficio MP C5502 | User Guide - Page 182
on the right side of "Folder Authentication". When [Do not Specify] is selected, the SMB User Name and SMB Password that you have specified in "Default User Name / Password (Send)" of File Transfer settings are applied. 10. Press [Change] under "Login User Name". 11. Enter the login user name of the - Ricoh Aficio MP C5502 | User Guide - Page 183
6. Scan 19. Press [Exit]. If the connection test fails, check the settings, and then try again. 20. Press [OK]. 21. Press [Exit]. 22. Press the [User Tools/Counter] key. Locating the SMB folder manually 1. Press [Change] under "Path". 2. Enter the path where the folder is located. For example: if - Ricoh Aficio MP C5502 | User Guide - Page 184
Basic Procedure When Using Scan to Folder You can press [Up One Level] to switch between levels. 4. Select the folder you want to register. 5. Press [OK]. Deleting an SMB Registered Folder 1. Press the [User Tools/Counter] key. 2. Press [Address Book Management]. 3. Check that [Program / Change] is - Ricoh Aficio MP C5502 | User Guide - Page 185
6. Scan Entering the Path to the Destination Manually 1. Press [Manual Entry]. 2. Press [SMB]. 3. Press [Manual Entry] on the right Depending on the destination setting, enter the password for logging in to the computer. Press [Manual Entry] for the password to display the soft keyboard. 8. Press - Ricoh Aficio MP C5502 | User Guide - Page 186
mail Basic Procedure for Sending Scan Files by Email 1. Press the [Home] key on the top left of the control panel, and press the [Scanner] icon on the [Home] screen. CJS113 2. Make sure that no previous settings remain. If a previous setting remains, press the [Clear Modes] key. 3. Press the [E-mail - Ricoh Aficio MP C5502 | User Guide - Page 187
6. Scan Example: Scanning the document in color/duplex mode, and saving as a PDF file. • Press [Scan Settings], and then press [Full Colour: Text / Photo] in the [Original Type] tab. • Press [Original Feed Type], and then press [2 Sided Original]. • Press [PDF] under [Send File Type / Name]. 6. - Ricoh Aficio MP C5502 | User Guide - Page 188
Basic Procedure for Sending Scan Files by E-mail You can select [Frequent] and one more key for each title. 8. Press [E-mail]. 9. Press [Change] under "E-mail Address". 10. Enter the e-mail address. 11. Press [OK]. 12. Select [E-mail / Internet Fax Destination] or [Internet Fax Destination Only]. If - Ricoh Aficio MP C5502 | User Guide - Page 189
fax number, folder name, e-mail address, or IP-Fax destination. 5. Press [E-mail]. 6. Press [Change] under "E-mail Address". 7. Press [Delete All], and then press [OK]. 8. Press [OK]. 9. Press [Exit]. 10. Press the [User Tools/Counter] key. Entering an E-mail Address Manually 1. Press [Manual Entry - Ricoh Aficio MP C5502 | User Guide - Page 190
files from unauthorized access by specifying passwords. • Scan file stored in the machine may [Home] key on the top left of the control panel, and press the [Scanner] icon on the settings remain. If a previous setting remains, press the [Clear Modes] key. 3. Place originals. 4. Press [Store File]. - Ricoh Aficio MP C5502 | User Guide - Page 191
6. Scan Press [User Name], and then select a user name. To specify an unregistered user name, press [Manual Entry], and then enter the name. After specifying a user name, press [OK]. • File Name Press [File Name], enter a file name, and then press [OK]. • Password Press [Password], enter a password, - Ricoh Aficio MP C5502 | User Guide - Page 192
, one file is created for each single page and the number of files sent is the same as the number of pages scanned. • Multi-page: [TIFF], [PDF], [High Compression PDF] ,[PDF/A] If you select a multi-page file type when scan multiple originals, scanned pages are combined and sent as a single file - Ricoh Aficio MP C5502 | User Guide - Page 193
6. Scan Specifying Scan Settings 1. Press [Scan Settings]. 2. Specify resolution, scan size, and other settings, as required. 3. Press [OK]. 126 - Ricoh Aficio MP C5502 | User Guide - Page 194
you switch the machine back on. • USB flash memory devices and SD cards are supported for direct printing. However, certain types of USB flash memory devices and SD cards cannot be used. For details, contact your sales or service representative. Press the [Home] key on the top left of the control - Ricoh Aficio MP C5502 | User Guide - Page 195
OK] twice. If necessary, select [Send Settings] or [Original], and specify the scan settings according to the original to be scanned. Example: Scanning the document in color/duplex mode, and saving as a PDF file. • Press [Original], and then press [2 Sided]. • Press [Send Settings]. Select [Type - Ricoh Aficio MP C5502 | User Guide - Page 196
Scanned be printed from the machine's control panel. For details, see "Printing Files from an External Memory Device", Print. Password]. • The amount of free space on the memory device is displayed. Note that if the amount of free space exceeds 10 GB, "9999.99 MB" will be displayed. 6 • To cancel - Ricoh Aficio MP C5502 | User Guide - Page 197
Storing the Scanned Documents to a USB Flash Memory or SC Card 6 126D - Ricoh Aficio MP C5502 | User Guide - Page 198
the [Reset] key to cancel the document selection. • is automatically attached to the scanned document. You can change the Password To prevent unauthorized printing, you can specify a password for any stored document. A protected document can only be accessed if its password is entered. If a password - Ricoh Aficio MP C5502 | User Guide - Page 199
press [OK]. 7. Press [Password]. 8. Enter a password with the number keys, and then press [OK]. You can use four to eight digits for the password. 9. For double-check, enter the password again, and then press [OK]. 10. Place the original. 11. Specify the original scanning conditions. 12. Press the - Ricoh Aficio MP C5502 | User Guide - Page 200
tray • The number of prints • [Finishing] ([Sort] / [Rotate Sort] / [Stack] / [Staple] / [Punch]) • [Cover/Slip Sheet] ([Front Cover], [Front/Back Cover], [Designate/Chapter], [Slip Sheet]) • [Edit / Stamp] ([Margin Adj.], [Stamp]) • [2 Sided Copy Top to Top], [2 Sided Copy Top to Bottom], [Booklet - Ricoh Aficio MP C5502 | User Guide - Page 201
7. Document Server 130 - Ricoh Aficio MP C5502 | User Guide - Page 202
address is "192.168.001.010", you must enter it as "192.168.1.10". 1. Start your Web browser. 2. Enter "http://(machine's IP address or area The dialog box for switching to the user mode and administrator mode appears, and each mode's menu will be displayed. The link to Help and dialog box for - Ricoh Aficio MP C5502 | User Guide - Page 203
): Click at the upper right in the work area to update the machine information. Click the Web browser's [Refresh] button to refresh the entire browser screen. (Help): Use Help to view or download Help file contents. 4. Basic Information area Displays the basic information of the machine. 5. Work - Ricoh Aficio MP C5502 | User Guide - Page 204
Monitor. 2. Click [Fax Received File] on the [Print Job/Stored File] menu in the left pane. 3. download the received fax document, select [PDF], [PDF/A], or [Multi-page: TIFF], and then click [Download]. When you select [PDF], make the necessary "PDF File Security Settings" before clicking [Download - Ricoh Aficio MP C5502 | User Guide - Page 205
8. Web Image Monitor 134 - Ricoh Aficio MP C5502 | User Guide - Page 206
representative. • (mainly North America) Tray 1 can hold 81/2 × 11 paper only. If you want to print on A4 , A5 , or B5 JIS from tray 1, contact your service representative. • If a paper tray is pushed vigorously when putting it back into place, the position of the tray's side fences may slip - Ricoh Aficio MP C5502 | User Guide - Page 207
9. Adding Paper and Toner CJW012 3. Carefully push the paper tray fully in. • Various sizes of paper can be loaded in trays 2-4 by adjusting the positions of side fences and - Ricoh Aficio MP C5502 | User Guide - Page 208
Load only as much paper as can be held between the paper guides on the bypass tray. For the maximum number of sheets you can load, see p.148 "Recommended Paper Sizes ", Copy/ Document Server . When printing from a computer, see p.138 "Settings to Use the Bypass Tray under the Printer Function". 137 - Ricoh Aficio MP C5502 | User Guide - Page 209
9. Adding Paper and Toner • Certain types of paper might not be detected control panel have priority over the printer driver settings. For details, see "System", Print . • The default setting of [Bypass Tray] is [Driver / Command]. • Settings remain valid until they are changed. After printing - Ricoh Aficio MP C5502 | User Guide - Page 210
Setting the paper size using the control panel 1. Press the [User Tools/Counter] key. Loading Paper into the Bypass Tray CJS039 2. Press [Tray Paper Settings]. 3. Press [Printer Bypass Paper Size]. 4. Select the paper size. 5. Press [OK]. 6. Press the [User Tools/Counter] key. • When loading - Ricoh Aficio MP C5502 | User Guide - Page 211
type. Setting thick paper, thin paper, or OHP transparencies using the control panel • Certain types of OHP transparencies for color printing cannot be used. For details about types that can be used, contact your sales or service representative. • Use A4 or 81/2 × 11 size OHP transparencies, and - Ricoh Aficio MP C5502 | User Guide - Page 212
1. Press the [User Tools/Counter] key. Loading Paper into the Bypass Tray CJS039 2. Press [Tray Paper Settings]. 3. Press [ Next]. 4. Press [Paper Type: Bypass Tray]. 5. Select the proper items, according to the paper type you want to set. • Press [OHP (Transparency)] on the [Paper Type] area when - Ricoh Aficio MP C5502 | User Guide - Page 213
Toner Loading Paper into the Small Size Paper Tray • Check the paper edges are aligned at the right side. • If a paper tray is pushed vigorously when putting it back into place, the position of the tray's side fences may slip out of place. • When loading a low number and load it print side up. Do - Ricoh Aficio MP C5502 | User Guide - Page 214
Loading Paper into the Small Size Paper Tray • Various sizes of paper can be loaded in the small size paper tray by adjusting the positions of side fences and end fence. For details, see "Changing the Paper Size in the Small Size Paper Tray", Paper Specifications and Adding Paper . • You can load - Ricoh Aficio MP C5502 | User Guide - Page 215
9. Adding Paper and Toner Loading Paper into Tray 3 (LCT) • When paper loaded in the Europe and Asia) Tray 3 (LCT) can hold A4 paper only. If you want to print on 81/2 × 11 from Tray 3 (LCT), contact your service representative. • (mainly North America) Tray 3 (LCT) can hold 81/2 × 11 paper only. - Ricoh Aficio MP C5502 | User Guide - Page 216
• Left half of the tray pulled out Loading Paper into Tray 3 (LCT) CJW017 3. Carefully push the paper tray fully in. • You can load paper even if Tray 3 (LCT) is in use. It is okay to pull out the left half of the tray while Tray 3 (LCT) is in use. 145 - Ricoh Aficio MP C5502 | User Guide - Page 217
9. Adding Paper and Toner Loading Paper into the Large Capacity Tray (LCT) • (mainly Europe and Asia) The large capacity tray (LCT) can hold A4 paper only. If you want to print on 81/2 × 11 or B5 JIS from the large capacity tray (LCT), contact your service representative. • (mainly North - Ricoh Aficio MP C5502 | User Guide - Page 218
Loading Paper into the Large Capacity Tray (LCT) CJW020 4. Load paper by repeating steps 2 and 3. 5. Close the right cover of the large capacity tray (LCT). 147 - Ricoh Aficio MP C5502 | User Guide - Page 219
Toner Recommended Paper Sizes and Types This section describes recommended paper sizes and types. • If you use damp or curled paper, a staple clogging or paper jam may occur. • Do not use paper designed for inkjet printers any of the sizes specified above, contact your service representative. 148 - Ricoh Aficio MP C5502 | User Guide - Page 220
/4 × 101/2 Select the paper size using the System Settings menu: 550 sheets 11 × 17 , 81/2 × 14 , 81/2 × 13 , 81/2 × 11 , 81/4 × 14 , 81/4 × 13 , 8 × 13 , 8 × 10 , 71/4 × 101/2 , 8K , 16K , 11 × 15 , 10 × 14 A3 , A4 , B4 JIS , B5 JIS , 81/2 × 13 , 81/4 × 14 , 81/4 × 13 , 8 × 13 - Ricoh Aficio MP C5502 | User Guide - Page 221
9. Adding Paper and Toner Paper type and weight 52-256 g/m2 (14 lb. Bond-140 lb. Index) Thin Paper-Thick Paper 3 Paper size Custom size: Paper capacity 550 sheets - Ricoh Aficio MP C5502 | User Guide - Page 222
Recommended Paper Sizes and Types Paper type and weight 52-256 g/m2 (14 lb. Bond-140 lb. Index) Thin Paper-Thick Paper 3 Paper size Custom size: Paper capacity 550 sheets Vertical: 100.0-220.0 mm Horizontal: 148.0-432.0 mm Envelopes Vertical: 3.94-8.66 inches Horizontal: 5.83-17.00 inches - Ricoh Aficio MP C5502 | User Guide - Page 223
30 sheets Envelopes *1 41/8 × 91/2 , 37/8 × 71/2 , C5 Env , C6 Env , DL Env 10 sheets *1 Select the paper size. For copier mode, see "Copying onto Regular Size Paper from the Bypass Tray", Copy/ Document Server . For printer mode, see p.139 "Setting the paper size using the control panel". 152 - Ricoh Aficio MP C5502 | User Guide - Page 224
copier mode, see "Copying onto Custom Size Paper from the Bypass Tray", Copy/ Document Server . For printer mode, see p.140 "Setting custom size paper using the control panel". *3 In printer or facsimile mode the sizes specified above, contact your service representative. Large capacity tray (LCT) - Ricoh Aficio MP C5502 | User Guide - Page 225
9. Adding Paper and Toner Paper Thickness Paper Thickness *1 Thin Paper *2 Plain Paper 1 Plain Paper 2 Certain types of paper produce noise when delivered. This noise does not indicate a problem and print quality is unaffected. (Glossy paper and OHP transparencies can produce noise when delivered.) - Ricoh Aficio MP C5502 | User Guide - Page 226
Switching function to work.) This saves interrupting a copy run to replenish paper when making a large number the Auto Tray Switching function, see "Copier / Document printing on OHP transparencies from the computer, see p.140 "Setting thick paper, thin paper, or OHP transparencies using the control - Ricoh Aficio MP C5502 | User Guide - Page 227
9. Adding Paper and Toner • If coated sheets of paper jam, make noise, or if side fences flush against the paper stack. • Jams and misfeeds can occur when printing on thick glossy sheets. To prevent such problems, be sure to fan glossy sheets thoroughly before loading them. If sheets continue to - Ricoh Aficio MP C5502 | User Guide - Page 228
the machine) by running a pencil or ruler across them. In copier mode The way to load envelopes varies depending on the orientation of the machine • Side to be scanned: face down • Flaps: open • Bottom side of envelopes: toward the right of the machine • Side to be printed: face up • Flaps: open - Ricoh Aficio MP C5502 | User Guide - Page 229
machine • Side to be scanned: face down • Flaps: closed • Bottom side of envelopes: toward the back of the machine • Side to be printed: face up • Flaps: closed Envelopes". In printer mode The way to load envelopes varies depending on the orientation of the envelopes. When printing onto envelopes, - Ricoh Aficio MP C5502 | User Guide - Page 230
2-4. When loading envelopes, select "Envelope" as the paper types using both the User Tools and printer driver and specify the thickness of envelopes. For details, see " Printing on Envelopes", Print . To print on envelopes that are loaded with their short edges against the machine body, rotate the - Ricoh Aficio MP C5502 | User Guide - Page 231
to become creased. • Depending on the environment, copying or printing on envelopes may wrinkle them even if they are recommended. • Certain types of envelopes might come out creased, dirtied, or misprinted. If you are printing a solid color on an envelope, lines may appear where the overlapped - Ricoh Aficio MP C5502 | User Guide - Page 232
This section explains precautions when adding toner, how to send faxes or scanned documents when the toner has run out, and how to dispose of used toner. • Do not incinerate toner (new or used) or toner containers. Doing so risks burns. Toner will ignite on contact with naked flame. • Do not store - Ricoh Aficio MP C5502 | User Guide - Page 233
repeatedly install and remove toner cartridges. This will result in toner leakage. Follow the instruction on the screen regarding how to replace a toner cartridge. • If " Toner Cartridge is almost empty." appears, the toner has almost run out. Have a replacement toner cartridge at hand. • If appears - Ricoh Aficio MP C5502 | User Guide - Page 234
perform transmission operation. The error message disappears. • Any reports are not printed. Disposing of Used Toner This section describes what to do with used toner. Toner cannot be re-used. Pack used toner containers in the container's box or a bag to prevent the toner from leaking out of the - Ricoh Aficio MP C5502 | User Guide - Page 235
9. Adding Paper and Toner 164 - Ricoh Aficio MP C5502 | User Guide - Page 236
10. Troubleshooting This chapter describes basic troubleshooting procedures. Indicators This toner bottle is full. Contact your sales or service representative. Appears when the hole punch receptacle is full. For details about removing punch waste, see "Removing Punch Waste", Troubleshooting - Ricoh Aficio MP C5502 | User Guide - Page 237
10. Troubleshooting When an Indicator for the [Check Status] Key Is Lit If an Each icon that can be displayed is described below: : The function is performing a job. : An error has occurred on the machine. : An error has occurred in the function being used. Or, the function cannot be used because - Ricoh Aficio MP C5502 | User Guide - Page 238
problems that cause the indicator to light. Problem Documents and reports do not print out. Documents and reports do not print out. An error error messages and their solutions, see p.176 "When Messages Are Displayed on the Control problem as described here, contact your service representative. 167 - Ricoh Aficio MP C5502 | User Guide - Page 239
10. Troubleshooting Panel Tone The following table describes the control panel or screen, or the entered password was incorrect. Job completed successfully. A Copier/Document Server Features job has finished. Machine has warmed up. When the power is turned on or the machine exits Sleep mode - Ricoh Aficio MP C5502 | User Guide - Page 240
appear, follow the instructions displayed. Problem Causes Solutions The [Facsimile] or [Scanner] icon does not appear on the [Home] screen even though the copier screen appears when the machine is turned on using the main power switch. Functions other than the copier function are not yet - Ricoh Aficio MP C5502 | User Guide - Page 241
10. Troubleshooting Problem Causes Solutions Nothing happens when the [Check Status] key or the [Energy Saver] key is pressed. The main power switch is turned off. Turn on the main power switch. "Please wait." appears. This message appears when Wait for a while. If the machine does you - Ricoh Aficio MP C5502 | User Guide - Page 242
password, see Security Guide . "Authentication has failed." The machine cannot perform For details about authentication, see appears. authentication. Security Guide see Security Guide . the selected function. An error message remains Paper", Troubleshooting . Original images are printed on the - Ricoh Aficio MP C5502 | User Guide - Page 243
10. Troubleshooting Problem Misfeeds occur frequently. Misfeeds occur frequently. Misfeeds occur frequently. Misfeeds occur frequently when printing they are output. Raise the guide on internal tray 2, and then try printing the job again. For details about raising the guide, see "When Printouts on - Ricoh Aficio MP C5502 | User Guide - Page 244
guide on internal tray 2. For details about raising the guide, see "When Printouts on the Internal Tray 2 Are Curled", Getting Started . Cannot print in duplex mode resume printing. "Turn main Power Switch off" appears. The machine does not shut down normally when the main power switch is turned - Ricoh Aficio MP C5502 | User Guide - Page 245
10. Troubleshooting Problem Causes Solutions "Shutting down... Please wait. Main power will be turned off automatically." appears. The shut down procedure has begun because the main power switch was turned off while the machine was in standby mode or performing an operation. Follow the message - Ricoh Aficio MP C5502 | User Guide - Page 246
images to be image to be added is not added must be JPEG. Specify the supported. image again. • If you cannot make copies as you want because of paper type, paper size, or paper capacity problems, use the recommended paper. For details about recommended paper, see p.148 "Recommended Paper Sizes - Ricoh Aficio MP C5502 | User Guide - Page 247
10. Troubleshooting When Messages Are Displayed on the Control Panel Messages Displayed When Using the Copy/Document Server Function This section describes the machine's main messages. If other messages appear, follow their instructions Have Problems manually - do not use Auto Paper Select mode - Ricoh Aficio MP C5502 | User Guide - Page 248
this paper size." Duplex mode has been selected. Select a proper paper size. For details about paper, see "Duplex Copying", Copy/ Document Server . "Exceeded max. number of pages per file. Do you want to store the scanned pages as 1 file?" The number of scanned pages exceeds the capacity per - Ricoh Aficio MP C5502 | User Guide - Page 249
full color mode and black & white mode. Make sure originals for the "Magazine" or "Booklet" function are stored using the same color mode. However, you can select the "Magazine" or "Booklet" function for a single original stored using printer function with different color mode. "Maximum number of - Ricoh Aficio MP C5502 | User Guide - Page 250
other suspended jobs press [Job List]." appears, press [Cancel Scanning]. "Please wait." The destination list is being updated from the network using Web Image Monitor. Wait until the message disappears. Do not switch off the power while this message is displayed. Depending on the number of - Ricoh Aficio MP C5502 | User Guide - Page 251
10. Troubleshooting Message Causes Solutions "The selected file(s) contained file(s) without number. The scanned originals exceed the number of pages that can be stored in memory. Press [Print] to copy scanned originals and cancel the scanning data. Press [Clear Memory] to cancel the scanning - Ricoh Aficio MP C5502 | User Guide - Page 252
Help. Message Causes Solutions "Cannot detect original size. Select scan size." The machine failed to detect the size of the original. On the control panel, under [Scan Size], specify the scan area in [Scan there are any network problems." [13-10] The alias telephone number you entered is - Ricoh Aficio MP C5502 | User Guide - Page 253
10. Troubleshooting Message "Check whether there are any network problems." [13-17] "Check whether there are any network problems." [13-18] "Check whether there are any network problems." [13-24] "Check whether there are any network problems." [13-25] Causes Solutions Registering of user name is - Ricoh Aficio MP C5502 | User Guide - Page 254
on the Control Panel Message "Check whether there are any network problems." [13-26] "Check whether there are any network problems." [14- Connecting the Machine/ System Settings . • For details about network problems, contact your administrator. • Check that the following settings in [System - Ricoh Aficio MP C5502 | User Guide - Page 255
10. Troubleshooting Message "Check whether there are any network problems." [14-09] "Check whether there are any network problems." [14-33] Connecting the Machine/ System Settings . • Check that the user ID and password for the computer with the folder for forwarding are correctly specified. • - Ricoh Aficio MP C5502 | User Guide - Page 256
Control Panel Message "Check whether there are any network problems." [15-01] "Check whether there are any network problems." [15-02] "Check whether there are any network problems about network problems, contact your administrator. • Check that the correct User Name and Password are listed in - Ricoh Aficio MP C5502 | User Guide - Page 257
10. Troubleshooting Message "Check whether there are any network problems." [15-11] "Check whether there are any network problems." [15-12] server name or IP address of the POP3/ IMAP4 server • the port number of the POP3/IMAP4 server • Reception Protocol For details about these settings, see - Ricoh Aficio MP C5502 | User Guide - Page 258
problems, contact your administrator. "Connection with LDAP server has failed. Check the server status." A network error has occurred and connection has failed Settings . "Error occurred, and transmission was cancelled." • Original jammed during Immediate Transmission. • A problem occurred in the - Ricoh Aficio MP C5502 | User Guide - Page 259
the code number shown on the screen, and then contact your service representative. Other functions can be used. "LDAP server authentication has failed. Check the settings." A network error has occurred and connection has failed. Make settings correctly for the user name and the password for LDAP - Ricoh Aficio MP C5502 | User Guide - Page 260
being processed and which could be stopped, have been suspended. To continue scanning and printing press [Continue], to cancel scanning press [Cancel Scanning]. To delete other suspended jobs press [Job List]." appears, press [Cancel Scanning]. "Put original back, check it and press the Start key - Ricoh Aficio MP C5502 | User Guide - Page 261
10. Troubleshooting Message Causes Solutions "Some page(s) are near blank." The first page of the document is almost blank. The original's blank side might have been scanned Do not switch off the power while this message is displayed. Depending on the number of destinations to be updated, there - Ricoh Aficio MP C5502 | User Guide - Page 262
When Messages Are Displayed on the Control Panel Message Causes Solutions "Connection with the remote machine has failed. Check the remote machine status." A network error occurred while using the remote fax function. • Check that the remote machine supports the remote fax function. • Check - Ricoh Aficio MP C5502 | User Guide - Page 263
10. Troubleshooting Message Causes Solutions "Connection with the remote machine has failed. Check the remote machine status." A timeout error occurred while an attempt was made to connect the device via remote fax function. • Check that the LAN cable is correctly connected to the machine. • - Ricoh Aficio MP C5502 | User Guide - Page 264
When Messages Are Displayed on the Control Panel Message Causes "The destination cannot be selected because its certificate be installed. For details about the user certificate (destination certificate), see Security Guide . A new user certificate must be installed. For details about the user - Ricoh Aficio MP C5502 | User Guide - Page 265
10. Troubleshooting Message Causes "Transmission cannot be performed because the certificate for encryption is must be installed. For details about the user certificate (destination certificate), see Security Guide . A new device certificate (S/MIME) must be installed. For details about how to - Ricoh Aficio MP C5502 | User Guide - Page 266
on the Control Panel Message the device certificate (S/MIME), see Security Guide . "XXX cannot be YYY because there is a problem with the device certificate used for about the device certificate (S/MIME), see Security Guide . "The PDF Digital Signature's device certificate is not currently valid - Ricoh Aficio MP C5502 | User Guide - Page 267
digital signature) must be installed. For details about how to install a device certificate (PDF with digital signature), see Security Guide . "XXX cannot be YYY because there is a problem with the PDF Digital Signature's device certificate. Check the device certificate." (XXX and YYY indicate the - Ricoh Aficio MP C5502 | User Guide - Page 268
Using the Printer Function This section describes the principal messages that appear on the display panel, error logs or reports. If other messages appear, follow their instructions. Status messages Message "Hex Dump Mode" "Job Suspended..." "Offline" "Please wait." "Printing..." "Ready" "Resetting - Ricoh Aficio MP C5502 | User Guide - Page 269
data to print. Wait a while. Printing was temporarily suspended because [Job Operation] or the [Stop] key was pressed. The @Remote certificate is being updated. Wait a while. Messages displayed on the control panel when using the printer function • Before turning the main power switch off, see - Ricoh Aficio MP C5502 | User Guide - Page 270
is inserted correctly. And then, turn on the main power switch again. If the message appears again, contact your service representative. "Load following paper in n. To cancel job, press [Job Reset]." (A figure is placed at n.) The printer driver settings are incorrect or the tray does not contain - Ricoh Aficio MP C5502 | User Guide - Page 271
paper size specified in the printer driver. • You have printed on small size paper from a tray that is not specified as the small size tray. "Problem: Printer Font Error" An error has occurred in the font settings. "Problems with the wireless card. Please call service." (A "wireless LAN board" or - Ricoh Aficio MP C5502 | User Guide - Page 272
permission to delete, see Security Guide . "The same paper tray switch off the power while this message is displayed. Depending on the number of destinations to be updated printing function from removable memory devices, contact your service representative. The USB flash memory that features password - Ricoh Aficio MP C5502 | User Guide - Page 273
10. Troubleshooting than 1GB cannot be printed. • When the total print by using a function other than the Direct printing 1GB cannot be printed. • When the print by using a function other than the Direct printing error messages that are printed on the error logs or reports. Message "84: Error" "85: Error - Ricoh Aficio MP C5502 | User Guide - Page 274
the data is valid. "92: Error" Printing was canceled because [Job Reset] or the [Stop] key was selected on the machine's control panel. Perform the print operation again if necessary. "98: Error" The machine could not access Hard disk correctly. Turn off the main power switch, and then back on - Ricoh Aficio MP C5502 | User Guide - Page 275
. The classification code is not supported with the printer driver. Select Optional for classification code. For details about how to specify classification code settings, see "Configuring Classification Codes", Print . Collate was canceled. Turn off the main power switch, and then back on again - Ricoh Aficio MP C5502 | User Guide - Page 276
Control Panel Message Causes Solutions "Compressed Data Error." The printer detected corrupt compressed data. • Check the connection between the computer and the printer. • Check that the program you used to compress the data is functioning correctly. "Data storage error." You tried to print - Ricoh Aficio MP C5502 | User Guide - Page 277
max. pages. Collate is incomplete." The number of pages exceeds the maximum number of sheets that you can use Collate with. Reduce the number of pages to print. "Exceeded max. number of pages. (Auto)" While using the error job store function to store Normal Print jobs as Hold Print files, the - Ricoh Aficio MP C5502 | User Guide - Page 278
about print volume use limitation, see Security Guide . PDF direct printing could not be performed because the file system could not be obtained. Turn off the main power switch, and then back on again. If the message appears again, contact your service representative. PDF file does not print out - Ricoh Aficio MP C5502 | User Guide - Page 279
long time to complete a print job. PostScript 3 Select a lower resolution on the printer driver. For details about how to change the resolution setting, see the printer driver Help. "Memory Retrieval Error" A memory allocation error occurred. Turn off the main power switch, and then back on again - Ricoh Aficio MP C5502 | User Guide - Page 280
. size is not supported. Job was cancelled." Job reset is automatically performed if the specified paper size is incorrect. Specify the correct paper size, and then print the file again. "Sending data failed." The machine received a command to stop transmission from the printer driver. Check if - Ricoh Aficio MP C5502 | User Guide - Page 281
10. Troubleshooting Message Causes Solutions "The print job has been cancelled because capture file(s) could not be stored: Exceeded max. memory." The hard disk became full after a file was stored. Delete the files stored in the Document Server or reduce the file size to be sent. "The print - Ricoh Aficio MP C5502 | User Guide - Page 282
error messages that appear on the control panel. If a message not described here appears, act according to the message. Message Causes "Authentication with the destination has failed. Check settings. To check the current status, press [Scanned Files Status]." The entered user name or password - Ricoh Aficio MP C5502 | User Guide - Page 283
's IP address exclusion settings. For details about the procedure for excluding an IP address, see your firewall's Help. "Cannot start scanning Scan Profile is not set on the because communication was client computer. failed." Set Scan Profile. For details about how to do this, see "Changing - Ricoh Aficio MP C5502 | User Guide - Page 284
Control Panel Message Causes Solutions "Cannot start scanning because communication was failed." The [Take no action] setting has been selected on the client computer, forcing the client computer to remain inactive when it receives scan data, or press [Cancel] to redo the scan. "Cannot write on - Ricoh Aficio MP C5502 | User Guide - Page 285
10. Troubleshooting Message Causes Solutions "Captured file exceeded max. number of pages per file. Cannot send the scanned data." The maximum number of pages per file has been exceeded. Reduce the number of pages in the transmitted file, and then resend the file. For details about the maximum - Ricoh Aficio MP C5502 | User Guide - Page 286
Are Displayed on the Control Panel Message Causes Solutions "Exceeded max. E-mail size. Sending E-mail has been cancelled. Check [Max. scan function, see "Relationship between Resolution and Scan Size", Scan . "Exceeded max. number of alphanumeric characters for the path." The maximum number - Ricoh Aficio MP C5502 | User Guide - Page 287
10. Troubleshooting Message Causes Solutions "Exceeded max. number of alphanumeric characters." The maximum enterable number of alphanumeric characters has been exceeded. Check the maximum number to send the scanned data, or press [Cancel] to delete." The number of scanned pages exceeded the - Ricoh Aficio MP C5502 | User Guide - Page 288
When Messages Are Displayed on the Control Panel Message Causes Solutions "Exceeded max. page capacity per file. Press [Write] to write the scanned data to the memory storage device, or press [Cancel] to delete." The scan could not be completed because the maximum number of pages that can be - Ricoh Aficio MP C5502 | User Guide - Page 289
10. Troubleshooting Message Causes Solutions "Memory is full. Do you want to store scanned file?" Because there is not enough free hard disk space in the machine for storing in the Document Server, only some of the pages could be scanned. Specify whether to use the data or not. "Memory is - Ricoh Aficio MP C5502 | User Guide - Page 290
the Control Panel Message "Original(s) is being scanned for a different function." Causes A function of the machine other than the Scanner function is being used such as the Copier function. "Output buffer is full. Sending the data has been cancelled. Please try again later." Too many jobs are - Ricoh Aficio MP C5502 | User Guide - Page 291
10. Troubleshooting Message Causes Solutions "Selected file is currently in use. Password cannot be changed." You cannot change the password of a file whose status is "Waiting..." or that is being edited with DeskTopBinder. Cancel transmission ("Waiting..." status cleared) or the DeskTopBinder - Ricoh Aficio MP C5502 | User Guide - Page 292
the Control Panel Guide . "Transmission has failed. Insufficient memory in the destination hard disk. To check the current status, press [Scanned Files Status]." Transmission has failed failed. To check the current status, press [Scanned Files Status]." While a file was being sent, a network error - Ricoh Aficio MP C5502 | User Guide - Page 293
10. Troubleshooting Message Causes Solutions "Updating the destination list A network error has has failed list, see the anti-virus software Help. • To prevent a firewall blocking the switch off the power while this message is displayed. Depending on the number of destinations to be updated - Ricoh Aficio MP C5502 | User Guide - Page 294
of the original, and then try to scan the original again. "The PDF Digital Signature's device certificate has expired. The file cannot be sent." The device certificate (PDF with digital signature) has expired. A new device certificate (PDF with digital signature) must be installed. For - Ricoh Aficio MP C5502 | User Guide - Page 295
digital signature) must be installed. For details about how to install a device certificate (PDF with digital signature), see Security Guide . "XXX cannot be YYY because there is a problem with the PDF Digital Signature's device certificate. Check the device certificate." (XXX and YYY indicate the - Ricoh Aficio MP C5502 | User Guide - Page 296
When Messages Are Displayed on the Control Panel Message Causes "Transmission cannot be performed because the certificate . For details about how to install a device certificate (S/ MIME), see Security Guide . A new user certificate must be installed. For details about the user certificate - Ricoh Aficio MP C5502 | User Guide - Page 297
Guide . scanner function. "Call Service" "Please call your service representative." An unrecoverable error has Contact your service representative. occurred in the machine. "Cannot add any more scanning mode." The maximum number of registerable scan modes has been exceeded. The maximum number - Ricoh Aficio MP C5502 | User Guide - Page 298
whether the main power switch of the scanner used for the previous scan is turned on. "Cannot find "XXX" scanner used for the previous scan. "YYY" will the network correctly. • Cancel the personal firewall of the client computer. For details about firewall, see Windows Help. • Use an application - Ricoh Aficio MP C5502 | User Guide - Page 299
10. Troubleshooting Message "Clear Misfeed(s) in ADF." "Communication error has occurred on the network." "Error has occurred in the scanner driver." "Error has occurred in the scanner." "Fatal error has occurred in the scanner." "Insufficient memory. Close all other applications, then restart - Ricoh Aficio MP C5502 | User Guide - Page 300
see TWAIN driver Help. The problem may be due to the following cause: • Scanning cannot be your system codes. authentication, see Security Guide . administrator." "No response from the own firewall. For details about firewall, see Windows Help. "No response from the scanner." The network - Ricoh Aficio MP C5502 | User Guide - Page 301
10. Troubleshooting Message Causes Solutions "Scanner is in use for other function. Please wait." A function of the machine other than the Scanner function is being used such as the Copier function. • Wait for a while, and then reconnect. • Cancel the job that is being processed. For example, - Ricoh Aficio MP C5502 | User Guide - Page 302
whether the machine is connected to the network correctly. • Deselect the personal firewall function of the client computer. For details about firewall, see Windows Help. • Use an application such as telnet to make sure SNMPv1 or SNMPv2 is set as the machine's protocol. For details about how to - Ricoh Aficio MP C5502 | User Guide - Page 303
10. Troubleshooting 232 - Ricoh Aficio MP C5502 | User Guide - Page 304
Vista® are either registered trademarks or trademarks of Microsoft Corporation in the United States and/or other countries. PCL® is a registered trademark of Hewlett-Packard Company. PictBridge is a trademark. The proper names of the Windows operating systems are as follows: • The product names of - Ricoh Aficio MP C5502 | User Guide - Page 305
• The product names of Windows Server 2008 are as follows: Microsoft® Windows Server® 2008 Standard Microsoft® Windows Server® 2008 Enterprise • The product names of Windows Server 2008 R2 are as follows: Microsoft® Windows Server® 2008 R2 Standard Microsoft® Windows Server® 2008 R2 Enterprise - Ricoh Aficio MP C5502 | User Guide - Page 306
79, 137, 138 C Canceling a transmission 94, 95 Caster table 33, 35 Check Status key 45, 166 Clear key 45 Combine 9, 14, 73 Communicating indicator 45 Computer 226 Confidential File indicator 45 Control panel 27, 30, 45 Converting documents to electronic formats.......10 Copier 48, 67 Copy - Ricoh Aficio MP C5502 | User Guide - Page 307
198 Printer driver 101, 102 Problem 169 Program 12, 53, 55 Program key 45 Punch 83 Q Quick install 101 R Rear and left view 27, 30 Region A 7 Region B 7 Registering Destinations 11 Remote Fax 21 Reset key 45 Rotate Copy 69 Running out of toner 162 S Sample Copy key 45 Sample Print 15 - Ricoh Aficio MP C5502 | User Guide - Page 308
Stored Print 15, 108 Stored print file 108, 109 Storing a document 97 Storing data 86 Storing received documents 17 Symbols 6 T Thick paper 140, 156 Thin paper 140 Toner 161, 162 Trademark 233 Tray 1 27, 30 Tray 2 27, 30 Tray 3 33, 35, 37, 39, 41, 43, 144 Turning On/Off the Power 59 - Ricoh Aficio MP C5502 | User Guide - Page 309
MEMO 238 - Ricoh Aficio MP C5502 | User Guide - Page 310
MEMO 239 - Ricoh Aficio MP C5502 | User Guide - Page 311
MEMO 240 EN GB EN US EN AU D143 - Ricoh Aficio MP C5502 | User Guide - Page 312
© 2011 - Ricoh Aficio MP C5502 | User Guide - Page 313
EN GB EN US EN AU D143-7003 - Ricoh Aficio MP C5502 | User Guide - Page 314
PCL 6/5c Printer Driver Installation Guide This manual assumes that you are familiar with general Windows procedures and practices. If you are not, see the documentation that comes with Windows for details. ❒❒ Before starting this installation, close all documents and applications. In a net- work - Ricoh Aficio MP C5502 | User Guide - Page 315
kinds of PCL printer drivers, PCL 6 and PCL 5c, are provided with this machine. We recommend PCL 6 updating the printer driver by installing the latest version, you should uninstall that of former version, if any. If you want to cancel Default interface language is English. Click [PCL Printer Drivers - Ricoh Aficio MP C5502 | User Guide - Page 316
with certain options, you should set up the options with the printer driver. ❒❒ Changing the printer settings requires Manage Printers permission. Members of the Administrators and Power Users groups have Manage Printers permission by default. When you set up options, log on using an account that - Ricoh Aficio MP C5502 | User Guide - Page 317
Trademarks Microsoft®, Windows®, Windows Server®, and Windows Vista® are either registered trademarks or trademarks of Microsoft Corporation in the United States and/or other countries. PCL® is a registered trademark of Hewlett-Packard Company. Other product names used herein are for identification - Ricoh Aficio MP C5502 | User Guide - Page 318
Symbols This manual uses the following symbols: Indicates points to pay attention to sure to read these explanations. Indicates supplementary explanations of the machine's functions, and instructions on resolving user errors. [ ] Indicates the names of keys that appear on the machine's display panel - Ricoh Aficio MP C5502 | User Guide - Page 319
Operating Instructions Driver Installation Guide For safe and correct use, be sure to read the Safety Information in "Read This First" before using the machine. - Ricoh Aficio MP C5502 | User Guide - Page 320
- Ricoh Aficio MP C5502 | User Guide - Page 321
1. Introduction Start Installer...3 Software and Utilities Included on the CD-ROM 5 Printer Drivers...5 TWAIN Driver...7 LAN-Fax Driver...8 Font Manager...9 For Mac OS X Users...10 2. Installing the Printer Driver Confirming the Connection Method...11 Network Connection...11 Local Connection...12 - Ricoh Aficio MP C5502 | User Guide - Page 322
45 Setting LAN-Fax Driver Properties...47 Setting Print Properties...47 Configuring Option Settings for the Facsimile 48 5. Troubleshooting Messages Displayed When Installing the Printer Driver 49 If USB Connection Fails...51 6. Installing the Printer Driver Under Mac OS X Installing the PPD - Ricoh Aficio MP C5502 | User Guide - Page 323
13 "Quick Install". PCL Printer Drivers Installs the PCL 6 and/or PCL 5c printer drivers. For details about installing the driver, see p.14 "Installing the Printer Driver for a Network Connection" or p.27 "Installing the Printer Driver for a Local Connection". PostScript 3 Printer Driver Install the - Ricoh Aficio MP C5502 | User Guide - Page 324
Language Change the interface language. Browse This CD-ROM Browse the contents of this CD-ROM. Exit Quit Installer. • Manage Printers permission is required to install the driver. Log on as an Administrators group member. • Auto Run might not work automatically with certain OS settings. If this is - Ricoh Aficio MP C5502 | User Guide - Page 325
site. Printer Drivers Printing requires installation of a printer driver for your operating system. The following drivers are included on the CD-ROM. Operating System Windows XP *1 *6 Windows Vista *2 *6 Windows 7 *3 *6 Windows Server 2003 *4 *6 Windows Server 2008 *5 *6 Mac OS X *7 PCL 5c OK - Ricoh Aficio MP C5502 | User Guide - Page 326
or later (native mode). Any versions higher than Mac OS X 10.6 are not supported. PCL printer drivers Two kinds of PCL printer driver (PCL 5c and PCL 6) are included. These drivers allow your computer to communicate with this machine via a printer language. Adobe® PostScript® printer driver and PPD - Ricoh Aficio MP C5502 | User Guide - Page 327
Portuguese Russian Catalan Turkish Brazilian Portuguese Greek PCL 5c *1 Printer Language PCL 6 *2 PostScript 3 *2 PPD (Mac OS X) : Supported : Supported, but the printer language is displayed in English *1 The PCL 5c printer driver does not support Brazilian Portuguese and Greek. Use the - Ricoh Aficio MP C5502 | User Guide - Page 328
1. Introduction Windows XP/Vista/7 Windows Server 2003/2003 R2/2008/2008 R2 *1 Operates in 32-bit compatibility mode on 64-bit operating systems • Display resolution 800 × 600 pixels, 256 colors or higher Supported languages The TWAIN driver uses the same interface language as the one specified by - Ricoh Aficio MP C5502 | User Guide - Page 329
CD-ROM Font Manager For installing new screen fonts, or organizing and managing fonts already in the system. For details about Font Manager, see the manual on the CD-ROM. File path The software is included in the following folder on the CD-ROM: \FONTMAN\DISK1 • For details about installing the - Ricoh Aficio MP C5502 | User Guide - Page 330
to each function: • When using the scanner function, the TWAIN driver cannot be used. • When using the fax function, the LAN-Fax driver cannot be used. • When using the printer function, use the printer driver for Mac OS X. For details, see p.53 "Installing the Printer Driver Under Mac OS X". 10 - Ricoh Aficio MP C5502 | User Guide - Page 331
Method This machine supports network and local connection. Before installing the printer driver, check how the machine is connected. Follow the driver installation procedure that is appropriate to the connection method. Network Connection This machine can be used as a Windows printing port or - Ricoh Aficio MP C5502 | User Guide - Page 332
(using IPv4 only) • Windows 2000 print server • Windows XP print server • Windows Vista print server • Windows 7 print server • Windows Server 2003/2003 R2 print server • Windows Server 2008/2008 R2 print server • For details about how to install the printer driver to print server, see p.22 "Using - Ricoh Aficio MP C5502 | User Guide - Page 333
, default printer, and shared printer as necessary. 9. Click [Continue]. The installation starts. If the [User Account Control] dialog box appears, and then click [Yes] or [Continue]. 10. Click [Finish]. When you are prompted to restart your computer, restart it by following the instructions that - Ricoh Aficio MP C5502 | User Guide - Page 334
the printer drivers for network connection. • Manage Printers permission is required to install the driver. Log on as an Administrators group member. • If the [User Account Control] dialog box appears during the driver installation procedure, click [Yes] or [Continue]. • If the [Windows Security - Ricoh Aficio MP C5502 | User Guide - Page 335
manual.) 2. Insert the provided CD-ROM into the computer's CD-ROM drive. If the [AutoPlay] dialog box appears, click [Run AUTORUN.EXE]. 3. Select an interface language, and then click [OK]. For details about the languages supported in the printer drivers, see p.6 "Supported languages". 4. Click [PCL - Ricoh Aficio MP C5502 | User Guide - Page 336
PCL6\X64\MUI\DISK1 • PostScript 3 32-bit driver D:\X86\DRIVERS\PS\XP_VISTA\MUI\DISK1 64-bit driver D:\X64\DRIVERS\PS\X64\MUI\DISK1 For details about the languages supported in the printer drivers, see p.6 "Supported languages". 10. Click [Open]. 11. Click [OK] to close the [Install From Disk] window - Ricoh Aficio MP C5502 | User Guide - Page 337
Driver for a Network Connection 12. Select the manufacturer and model name of the machine you want to use, and then click [Next]. The installation starts. 13. Follow the instructions that appear. Modify settings such as printer name and default printer configuration, as necessary. You can also print - Ricoh Aficio MP C5502 | User Guide - Page 338
)\DISK1 • PCL 6 32-bit driver D:\X86\DRIVERS\PCL6\XP_VISTA\MUI\DISK1 64-bit driver D:\X64\DRIVERS\PCL6\X64\MUI\DISK1 • PostScript 3 32-bit driver D:\X86\DRIVERS\PS\XP_VISTA\MUI\DISK1 64-bit driver D:\X64\DRIVERS\PS\X64\MUI\DISK1 For details about the languages supported in the printer drivers, see - Ricoh Aficio MP C5502 | User Guide - Page 339
PCL6\X64\MUI\DISK1 • PostScript 3 32-bit driver D:\X86\DRIVERS\PS\XP_VISTA\MUI\DISK1 64-bit driver D:\X64\DRIVERS\PS\X64\MUI\DISK1 For details about the languages supported in the printer drivers, see p.6 "Supported languages". 13. Click [Open]. 14. Click [OK] to close the [Install From Disk] window - Ricoh Aficio MP C5502 | User Guide - Page 340
manual.) 2. Insert the provided CD-ROM into the computer's CD-ROM drive. If the [AutoPlay] dialog box appears, click [Run AUTORUN.EXE]. 3. Select an interface language, and then click [OK]. For details about the languages supported in the printer drivers, see p.6 "Supported languages". 4. Click [PCL - Ricoh Aficio MP C5502 | User Guide - Page 341
Help. 17. Click [OK]. 18. Check that the port of the selected printer is displayed in [Port :]. 19. Configure the user code, default printer, and shared printer Configuration:] window appears. Windows Vista, Windows Server 2008: 1. On the [Start] menu, click [Control Panel]. 2. Click [Printer]. 3. - Ricoh Aficio MP C5502 | User Guide - Page 342
is required. Server OS Client OS Windows Server Windows NetWare Windows Printer Driver Type Reference p.22 "Using Windows print server" p.23 "Using NetWare print server" Using Windows print server 1. Quit all applications. (Do not close this manual.) 2. Insert the provided CD-ROM into - Ricoh Aficio MP C5502 | User Guide - Page 343
manual.) 2. Insert the provided CD-ROM into the computer's CD-ROM drive. If the [AutoPlay] dialog box appears, click [Run AUTORUN.EXE]. 3. Select an interface language, and then click [OK]. For details about the languages supported in the printer drivers, see p.6 "Supported languages". 4. Click [PCL - Ricoh Aficio MP C5502 | User Guide - Page 344
, open the printer window. • Windows XP, Windows Server 2003/2003 R2: On the [Start] menu, select [Printers and Faxes]. • Windows Vista, Windows Server 2008: On the [Start] menu, select [Control Panel], and then click [Printers] in [Hardware and Sound] category. • Windows 7, Windows Server 2008 R2 - Ricoh Aficio MP C5502 | User Guide - Page 345
when using NetWare Form Feed Do not use NetWare to configure form feed. Form feed is controlled by the printer driver on Windows. If NetWare form feed is configured, the printer may not print properly. Follow the procedure below to disable form feed according to the operating system used: • Clear - Ricoh Aficio MP C5502 | User Guide - Page 346
Printer Driver 5. Click [OK]. Printing after Resetting the Printer Printer to print server connection requires 30 - 40 seconds to resume after the printer is reset. During this period, jobs may be accepted (depending on NetWare specifications) but not printed. To print after resetting the printer - Ricoh Aficio MP C5502 | User Guide - Page 347
computer and no print jobs are in progress. If the printer driver has already been installed, and plug and play is enabled, the icon of the printer connected to the "USB" port is added to the [Printers], [Printers and Faxes], or [Devices and Printers] window. If the printer driver is not installed - Ricoh Aficio MP C5502 | User Guide - Page 348
D:\X86\DRIVERS\PCL6\XP_VISTA\MUI\DISK1 64-bit driver D:\X64\DRIVERS\PCL6\X64\MUI\DISK1 • PostScript 3 32-bit driver D:\X86\DRIVERS\PS\XP_VISTA\MUI\DISK1 64-bit driver D:\X64\DRIVERS\PS\X64\MUI\DISK1 For details about the languages supported in the printer drivers, see p.6 "Supported languages". 10 - Ricoh Aficio MP C5502 | User Guide - Page 349
)\DISK1 • PCL 6 32-bit driver D:\X86\DRIVERS\PCL6\XP_VISTA\MUI\DISK1 64-bit driver D:\X64\DRIVERS\PCL6\X64\MUI\DISK1 • PostScript 3 32-bit driver D:\X86\DRIVERS\PS\XP_VISTA\MUI\DISK1 64-bit driver D:\X64\DRIVERS\PS\X64\MUI\DISK1 For details about the languages supported in the printer drivers, see - Ricoh Aficio MP C5502 | User Guide - Page 350
)\DISK1 • PCL 6 32-bit driver D:\X86\DRIVERS\PCL6\XP_VISTA\MUI\DISK1 64-bit driver D:\X64\DRIVERS\PCL6\X64\MUI\DISK1 • PostScript 3 32-bit driver D:\X86\DRIVERS\PS\XP_VISTA\MUI\DISK1 64-bit driver D:\X64\DRIVERS\PS\X64\MUI\DISK1 For details about the languages supported in the printer drivers, see - Ricoh Aficio MP C5502 | User Guide - Page 351
manual.) 2. Insert the provided CD-ROM into the computer's CD-ROM drive. If the [AutoPlay] dialog box appears, click [Run AUTORUN.EXE]. 3. Select an interface language, and then click [OK]. For details about the languages supported in the printer drivers, see p.6 "Supported languages". 4. Click [PCL - Ricoh Aficio MP C5502 | User Guide - Page 352
BIP. • User codes are disabled for BIP. • You cannot print if print functions are restricted. • Some printers do not support BIP. Instructions in this manual relate to printing via HCRP. To print using SPP or BIP, see the Help supplied with the Bluetooth adapter you want to use, or the Microsoft - Ricoh Aficio MP C5502 | User Guide - Page 353
. • If there is a problem with the test page, click [Troubleshooting] in the test print window. Windows Vista, Windows Server 2008 1. Quit all applications. (Do not close this manual.) 2. On the [Start] menu, click [Control Panel]. 3. In the "Hardware and Sound" area, click [Printers]. 4. In the top - Ricoh Aficio MP C5502 | User Guide - Page 354
checking it, click [Close] to close the test print window. • If there is a problem with the test page, click [Troubleshooting Printer Problems] in the test print window. Windows 7, Windows Server 2008 R2 1. Quit all applications. (Do not close this manual.) 2. On the [Start] menu, click [Devices and - Ricoh Aficio MP C5502 | User Guide - Page 355
of the PCL 6 or PostScript 3 printer driver, you must select the [Automatically Update Printer Information] check box on the [Accessories] tab in the printer driver's properties window. • The PCL 5c printer driver supports bidirectional communication. You can update the printer status manually. 35 - Ricoh Aficio MP C5502 | User Guide - Page 356
member. 1. Open the printer window. • Windows XP, Windows Server 2003: On the [Start] menu, select [Printers and Faxes]. • Windows Vista, Windows Server 2008: On the [Start] menu, select [Control Panel], and then click [Printers] in [Hardware and Sound] category. • Windows 7, Windows Server 2008 R2 - Ricoh Aficio MP C5502 | User Guide - Page 357
Manager Installing Font Manager • Manage Printers permission is required to install Font Manager. Log on as an Administrators group member. • The operating systems compatible with Font Manager are Windows XP/Vista. 1. Quit all applications. (Do not close this manual.) 2. Insert the provided CD-ROM - Ricoh Aficio MP C5502 | User Guide - Page 358
on your language selection. • For PageMaker 7.0 default installation The directory is "C:\PM7\RSRC\USENGLISH\PPD4". The "USENGLISH" may vary depending on your language selection. • If the driver is not set correctly after copying the ".ppd" file, printing may not be performed properly. • When using - Ricoh Aficio MP C5502 | User Guide - Page 359
supported in the TWAIN driver, see p.7 "TWAIN Driver". 4. Click [TWAIN Driver]. 5. The installer of the TWAIN driver starts. Follow the instructions or [All Programs] on the [Start] menu. Help can be displayed from here. • Notes on using computer. You can download DeskTopBinder from the manufacturer - Ricoh Aficio MP C5502 | User Guide - Page 360
3. Installing the Scanner Driver 40 - Ricoh Aficio MP C5502 | User Guide - Page 361
the same as one that is already in use by the existing driver is specified, the LAN-FAX driver installation may fail. If the printer driver is already installed, make sure that the port numbers of the LAN-FAX driver and the printer driver match. For details, see p.41 "Specifying the Same Port as the - Ricoh Aficio MP C5502 | User Guide - Page 362
4 3 1, 2, 4 List of Items to Replace No. Items to be replaced The name of the button that 1 starts the installation procedure Procedure/description in the Procedure/description in the printer driver LAN-Fax driver Click [PCL Printer Drivers] or [PostScript 3 Printer Driver]. Click [LAN-Fax - Ricoh Aficio MP C5502 | User Guide - Page 363
[Printer Name : ]. The destination folder in 3 which the driver files are stored The destination folder is written in the description. The LAN-FAX driver is installed in the following folder: • 32-bit driver X86\DRIVERS\LANFAX\XP_VISTA\DISK1 • 64-bit driver X64\DRIVERS\LANFAX - Ricoh Aficio MP C5502 | User Guide - Page 364
\DRIVERS\LAN-FAX • 64-bit driver D:\X64\DRIVERS\LAN-FAX 4. Open the file "IfxShLnk.ini" that has been copied to your computer using a text editor. 5. Edit the items that are related to the prevention function. Edit the following three items: • ConfirmFAXNo Syntax: ConfirmFAXNo=0/1/2/3/4/5/6/7/8/9/10 - Ricoh Aficio MP C5502 | User Guide - Page 365
LAN-FAX driver in "Add Printer" Install the LAN-FAX driver after the configuration file has been edited. 1. Open the printer window. • Windows XP, Windows Server 2003: On the [Start] menu, select [Printers and Faxes]. • Windows Vista, Windows Server 2008: On the [Start] menu, select [Control Panel - Ricoh Aficio MP C5502 | User Guide - Page 366
4. Installing the Facsimile Driver 8. Click [Finish]. When you are prompted to restart your computer, restart it by following the instructions that appear. 46 - Ricoh Aficio MP C5502 | User Guide - Page 367
The method for selecting the LAN-Fax driver will vary according to your operating system. For details, see Windows Help. Setting Print Properties This section explains how to make settings such as paper size or resolution. 1. Open the printer window. • Windows XP, Windows Server 2003/2003 R2: On the - Ricoh Aficio MP C5502 | User Guide - Page 368
the Facsimile Driver Configuring Option Settings for the Facsimile 1. Open the printer windows. • Windows XP, Windows Server 2003/2003 R2: On the [Start] menu, select [Printers and Faxes]. • Windows Vista, Windows Server 2008: On the [Start] menu, select [Control Panel], and then click [Printers] in - Ricoh Aficio MP C5502 | User Guide - Page 369
)\DISK1 • PCL 6 32-bit driver D:\X86\DRIVERS\PCL6\XP_VISTA\MUI\DISK1 64-bit driver D:\X64\DRIVERS\PCL6\X64\MUI\DISK1 • PostScript 3 32-bit driver D:\X86\DRIVERS\PS\XP_VISTA\MUI\DISK1 64-bit driver D:\X64\DRIVERS\PS\X64\MUI\DISK1 For details about the languages supported in the printer drivers, see - Ricoh Aficio MP C5502 | User Guide - Page 370
5. Troubleshooting • Available ports vary according to your Windows operating system or the type of interface. For details, see p.11 "Confirming the Connection Method". 50 - Ricoh Aficio MP C5502 | User Guide - Page 371
Fails If USB Connection Fails This section describes how to troubleshoot a problem related to USB connections. Problem Causes Solutions The machine is not automatically recognized. The USB cable is not connected properly. Disconnect the USB cable, and then turn off the main power switch - Ricoh Aficio MP C5502 | User Guide - Page 372
5. Troubleshooting 52 - Ricoh Aficio MP C5502 | User Guide - Page 373
and configure the printer drivers for use on the Mac OS X operating system. Installing the PPD Files To print using the printer specific features under Mac OS X, install the PPD files. • Mac OS X 10.2 or higher is required. • You need an administrator name and a password (phrase). For details - Ricoh Aficio MP C5502 | User Guide - Page 374
to the manual of each version. USB Connection • Make sure the computer and the machine are connected using the USB cable, and the power of the devices are turned on beforehand. • USB2.0 can be used only with Mac OS X 10.3.3 or higher. Mac OS X 10.2 - 10.3 1. Start Print Center or Printer Setup - Ricoh Aficio MP C5502 | User Guide - Page 375
Printer Under Mac OS X". 9. Quit Print Center or Printer Setup Utility. Mac OS X 10.4 - 10.6 1. Start System Preferences. 2. Click [Print & Fax]. 3. Click the [ ] button. 4. Click [Default Browser] or [Default [Print Using:], select its manufacturer, [Select a driver to use...], or [Select Printer - Ricoh Aficio MP C5502 | User Guide - Page 376
, see p.57 "Configuring Option Settings for the Printer Under Mac OS X". 9. Quit Print Center or Printer Setup Utility. Mac OS X 10.4 - 10.6 1. Start System Preferences. 2. Click [Print & Fax]. 3. Click the [ ] button. 4. Click [Default Browser] or [Default]. 5. Select the machine that has "Bonjour - Ricoh Aficio MP C5502 | User Guide - Page 377
Settings for the Printer Under Mac OS X Configuring Option Settings for the Printer Under Mac OS X This section explains how to configure the printer driver. Mac OS X 10.2 - 10.3 1. Start Print Center or Printer Setup Utility in Applications\Utilities. 2. Click [Set Up Printers...]. Depending on - Ricoh Aficio MP C5502 | User Guide - Page 378
6. Installing the Printer Driver Under Mac OS X 58 - Ricoh Aficio MP C5502 | User Guide - Page 379
Administrators group member. • If the [User Account Control] dialog box appears, click [Yes] or [Continue]. • If the [Windows Security] dialog box appears, click [Install this driver software anyway]. Updating the Driver Printer driver / LAN-Fax driver You can download the most recent version of the - Ricoh Aficio MP C5502 | User Guide - Page 380
the machine model, and then click [Next]. The driver update starts. 9. Click [Finish]. 10. Click [OK] to close the printer properties window. 11. Restart the computer. TWAIN driver You can download the most recent version of the TWAIN driver from the manufacturer's Web site. Delete the old version - Ricoh Aficio MP C5502 | User Guide - Page 381
Updating or Deleting the Driver 8. Click [Delete]. 9. Click [OK]. 10. Click [Close] to close the print server properties window. Windows 7, Windows Server 2008 R2 1. On the [Start] menu, click [Devices and Printers]. 2. Right-click the icon of the machine you want to delete, and then click [Remove - Ricoh Aficio MP C5502 | User Guide - Page 382
7. Appendix 3. Quit uninstaller. 62 - Ricoh Aficio MP C5502 | User Guide - Page 383
. Macintosh, and Mac OS are registered PCL® is a registered trademark of Hewlett-Packard Company. Other product names used herein are for identification purposes only and might be trademarks of their respective companies. We disclaim any and all right to those marks. The proper names of the Windows - Ricoh Aficio MP C5502 | User Guide - Page 384
Server 2003 R2 are as follows: Microsoft® Windows Server® 2003 R2 Standard Edition Microsoft® Windows Server® 2003 R2 Enterprise Edition • The product names of Windows Server 2008 are as follows: Microsoft® Windows Server® 2008 Standard Microsoft® Windows Server® 2008 Enterprise • The product names - Ricoh Aficio MP C5502 | User Guide - Page 385
12, 27 LPR port 17 M Mac OS X 10 Messages displayed when installing the printer driver 49 N NetWare 22, 25 NetWare print server 23 Network connection 11, 14, 55 Network printer 12, 22 O Option settings 35, 48, 57 P PageMaker 38 Parallel connection 13, 31 PCL 5, 13, 14, 22 PostScript - Ricoh Aficio MP C5502 | User Guide - Page 386
MEMO 66 - Ricoh Aficio MP C5502 | User Guide - Page 387
MEMO 67 - Ricoh Aficio MP C5502 | User Guide - Page 388
MEMO 68 EN GB EN US EN AU D143-7038 - Ricoh Aficio MP C5502 | User Guide - Page 389
- Ricoh Aficio MP C5502 | User Guide - Page 390
EN GB EN US EN AU D143-7038 © 2011 - Ricoh Aficio MP C5502 | User Guide - Page 391
Operating Instructions UNIX Supplement For safe and correct use, be sure to read the Safety Information in "Read This First" before using the machine. - Ricoh Aficio MP C5502 | User Guide - Page 392
- Ricoh Aficio MP C5502 | User Guide - Page 393
Shell Script...9 After Executing the Installation Shell Script 12 Printing Method...17 Printing with lpr, lp...17 Printing with rsh, rcp, ftp...17 Printer Status...20 Viewing the Print Job Status with lpq and lpstat 20 Viewing the Printer Status with rsh and ftp 20 Copying Information to - Ricoh Aficio MP C5502 | User Guide - Page 394
Binding...34 Orientation...34 Image Direction...35 Resolution...35 Gradation Quality...36 Billing Code...37 Fold...37 Staple...38 Punch, Punchhole...39 Usercode...41 Symbol Set...41 Trademarks...45 INDEX...47 2 - Ricoh Aficio MP C5502 | User Guide - Page 395
, or consequential damages as a result of handling or operating the machine. For good output quality, the manufacturer recommends that you use genuine toner from the manufacturer. The manufacturer shall not be responsible for any damage or expense that might result from the use of parts other than - Ricoh Aficio MP C5502 | User Guide - Page 396
machine's functions, and instructions on resolving user errors. This symbol is located at the end of sections. It indicates where you can find further relevant information. [ ] Indicates the names of keys on the machine's display or control panels. Notes Contents of this manual are subject to change - Ricoh Aficio MP C5502 | User Guide - Page 397
which reproduction is prohibited by law. Copying or printing the following items is generally prohibited by local law: bank notes, revenue stamps, bonds, stock certificates, bank drafts, checks, passports, driver's licenses. The preceding list is meant as a guide only and is not inclusive. We assume - Ricoh Aficio MP C5502 | User Guide - Page 398
6 - Ricoh Aficio MP C5502 | User Guide - Page 399
UNIX Configuration This section explains how to set up a network printer and check print status using UNIX Before Setup • To print from a UNIX workstation, use a file that the printer supports. • Setup varies depending on the print command. Make sure to configure settings accordingly. Using the lp - Ricoh Aficio MP C5502 | User Guide - Page 400
the setting, see the operating instructions for Red Hat. • When you use NIS (Network Information Service) or DNS, you should configure manual that came with the utility. Assigning the IP Address • Configure the machine to use TCP/IP. • Make sure that TCP/IP on the machine is set to active. (Default - Ricoh Aficio MP C5502 | User Guide - Page 401
For details about how to make the above settings, see the manual that comes with this machine. Checking the IP address configuration Follow workstation printing environment. • Before executing the installation shell script, the IP address, host name, and printer name are required. • Download the - Ricoh Aficio MP C5502 | User Guide - Page 402
the [RETURN] ([ENTER]) key, and printing with PostScript® is enabled. • If you want to set the device option, enter the option parameter. Enter remote printer name [default lp]:tray=tray1 • If you enter "text", text printing is enabled. • If you enter "text", printing with PostScript is disabled. 10 - Ricoh Aficio MP C5502 | User Guide - Page 403
printer name [default are not supported. Use download the installation shell script, contact your sales or service representative. • For details about lpr and lp, see p.17 "Printing Method". • For details about the device option, see p.22 "Specifying the Device Option". Deleting the printer To print - Ricoh Aficio MP C5502 | User Guide - Page 404
usr/lib/lpsched After Executing the Installation Shell Script The printing environment is set up automatically when the installation shell do not use NIS or DNS, you must manually enter the IP address and host name of each workstation using the network printer in the /etc/hosts file. Adding an entry - Ricoh Aficio MP C5502 | User Guide - Page 405
Host name of the printer. The host name that was registered with the /etc/hosts file. Optional specification. "lp" will be assigned, if the option is not used. Select options for printing. For details about available options, see p.22 "Specifying the Device Option". Path name of the spool - Ricoh Aficio MP C5502 | User Guide - Page 406
1. UNIX Configuration • The spool directory is used to control data used for print jobs. For example, when a print job is created, a temporary copy of the data used is created in the spool directory. All workstations accessing the network printer need to have a spool directory for the network - Ricoh Aficio MP C5502 | User Guide - Page 407
If your workstation is Solaris 2.5.1, register the print server and print client to the print service. # lpsystem -t bsd -R 0 -y Network Printer nphost 2. Register the printer as a remote printer. # lpadmin -p np -s nphost!option -T dump -I any • "np" is the printer name, "nphost" is the host name - Ricoh Aficio MP C5502 | User Guide - Page 408
"option", see p.22 "Specifying the Device Option". "lp" will be assigned, if the option is not used. 3. Set the printer so the print job is listed in the print queue. /usr/lib/accept np 4. Set the printer to perform the print job. /usr/lib/enable np 5. Restart the scheduler. /usr/lib/lpsched 16 - Ricoh Aficio MP C5502 | User Guide - Page 409
see the manual that comes with this machine. • The number of print sessions does not change, whether you increase or reduce the machine's total memory size. Printing with rsh, rcp, ftp You can also print using the rsh, rcp, and ftp commands. • Print using a format the printer supports. • You should - Ricoh Aficio MP C5502 | User Guide - Page 410
when the maximum number of print requests is reached. • The maximum number of print sessions varies depending on the command. • When using the rsh or rcp command, the maximum number of print sessions is 5; when using the ftp command, the number is 3. rsh % rsh host_name print < file_name For example - Ricoh Aficio MP C5502 | User Guide - Page 411
For details about the user name and password, consult your administrator. Name: Password: 3. Set the file transfer mode to binary. ftp> bin If the file transfer mode is not set to binary, the image may not be printed correctly. 4. Print the file. For example, to print the file named file1: ftp> put - Ricoh Aficio MP C5502 | User Guide - Page 412
to display printer status or information about print jobs using specified parameters. You can use these commands for BSD and System V UNIX. If your workstation is HP-UX, use the remsh command instead of rsh. • rsh % rsh host_name parameter • ftp % ftp host_name User user_name password: ftp> get - Ricoh Aficio MP C5502 | User Guide - Page 413
returned Status of the printer. Information about print jobs. Information about the paper tray, output tray and printer language. Record of the last 10 jobs printed. Record of messages about the network interface board. • For details about the user name and password, consult your administrator - Ricoh Aficio MP C5502 | User Guide - Page 414
Option With the following options, you can print with specific printer functions. This manual covers all models, and therefore contains functions are for printing with rsh, rcp, and ftp : switch to PostScript, feed paper from paper feed tray 1, set the printing amount to 3 sets, and print with the - Ricoh Aficio MP C5502 | User Guide - Page 415
List of the device options Device option filetype filter tray paper Value Function summary pcl, postscript (rps), pdf, pictbridge Specifies the printer language for printing. text Specifies the text printing. tray1 - tray4, lct, bypass, all Specifies the input tray. a3, a3wide, a4, a5, a6 - Ricoh Aficio MP C5502 | User Guide - Page 416
, bond, cardstock, translucent, usercolor1, usercolor2, color, middlethick, prepunched, plainorrecycled, envelope, coated, Number of copies (1-999) Specifies the number of copies to print. Number of collated sets (1-999) Specifies the number to collate. on, off Specifies whether duplex printing - Ricoh Aficio MP C5502 | User Guide - Page 417
for 400, 600, 1200) printing. 1, 2, 4 Specifies the print quality. Value of billing code booklet, lefttop, righttop Specifies the staple position. off, leftport, leftland, rightport, rightland, topport, topland Specifies the punch position. multi, us2, eu4, neu4, us3 Specifies the number - Ricoh Aficio MP C5502 | User Guide - Page 418
, winl2, winl5 Specifies the set of print characters. Printer Language Select a printer language to be used. filetype=printer language fil=printer language Printer language PCL 5c or PCL 5e PostScript 3 PDF PictBridge pcl postscript or rps pdf pictbridge Value The following sample shows how - Ricoh Aficio MP C5502 | User Guide - Page 419
available printer languages, see the manual that comes with this machine. Text Printing Set this function when printing text print text files directly. • rsh % rsh nphost print filter=text < file1 • rcp % rcp file1 nphost:filter=text • ftp ftp> put file1 filter=text Input Tray Select a default - Ricoh Aficio MP C5502 | User Guide - Page 420
model you are using. For details about available tray, see the manual that comes with this machine. Paper Size Select the paper size. • Only the loaded paper sizes are available. • When PostScript 3 is selected in Printer Language, and a custom paper size that exceeds "297x418.4 mm" is specified - Ricoh Aficio MP C5502 | User Guide - Page 421
15 .35 (267 390 mm) 7.68 10 .5 (195 267 mm) Custom size inch11x14 nch10x15 inch10x14 legal letter governmentlg engquatro halfletter executive fgl glt foolscap folio com10 c5 c6 dl monarch k8 k16 custom Value The following sample shows how to print using A4 size paper (host name: nphost, file name - Ricoh Aficio MP C5502 | User Guide - Page 422
=a4 • The value or actions that can be selected differ depending on the model you are using. For details about available paper size, see the manual that comes with this machine. Paper Type Select the paper type. • Only the loaded paper types are available. mediatype=value of paper type Paper type - Ricoh Aficio MP C5502 | User Guide - Page 423
Coated Paper Glossy Paper Auto Paper Select preprinted labels bond cardstock translucent usercolor1 usercolor2 middlethick envelope color prepunched coated glossy auto Value The following sample shows how to print using recycled paper (host name: nphost, file name: file1): • rsh % rsh nphost - Ricoh Aficio MP C5502 | User Guide - Page 424
tray, see the manual that comes with this machine. Copies Specify the number of copies. copies=number of copies (1 to 999) • Do not specify "copies" and "qty" *1 commands at the same time. *1 "qty" specifies the number of collated sets. The following sample shows how to print 10 copies (host name - Ricoh Aficio MP C5502 | User Guide - Page 425
the number of collated sets. qty=number of collated sets (1 to 999) The following sample shows how to print 10 copies using the collate function (host name: nphost, file name: file1): • rsh % rsh nphost print qty=10 < file1 • rcp % rcp file1 nphost:qty=10 • ftp ftp> put file1 qty=10 Duplex Printing - Ricoh Aficio MP C5502 | User Guide - Page 426
• Before selecting the binding option, the duplex option must be set to on. • Data and paper volume affect completion of the print job. Orientation Select the paper feed orientation. orientation=feed direction (portrait or landscape) Portrait Landscape Orientation portrait landscape value 34 - Ricoh Aficio MP C5502 | User Guide - Page 427
=portrait < file1 • rcp % rcp file1 nphost:orientation=portrait • ftp ftp> put file1 orientation=portrait Image Direction Select the print image rotation. imagedirection=value of print image rotation 0 degree 180 degrees Rotation normal reverse Value The following sample shows how to - Ricoh Aficio MP C5502 | User Guide - Page 428
the model you are using. For details about available resolution, see the manual that comes with this machine. Gradation Quality Select this option to improve print quality. • Before you can select the bitsperdot option, the printer language must be set to PostScript 3 and the resolution must be set - Ricoh Aficio MP C5502 | User Guide - Page 429
model you are using. For details about available gradation quality, see the manual that comes with this machine. Billing Code Specify the billing code. on GW-PJL source) - 27 bytes (number of characters for @PJL SET BILLINGCODE = "") • rsh % rsh nphost print billingcode=0x09 < file1 • rcp % - Ricoh Aficio MP C5502 | User Guide - Page 430
simple4 two zbottom zleft zright off Value The following sample shows how to print with the fold on the upper left using finisher shift tray (host you are using. For details about available folding position, see the manual that comes with this machine. Staple Select the staple position for the - Ricoh Aficio MP C5502 | User Guide - Page 431
right2land, right2port top2land, top2port booklet The following sample shows how to print with the staple on the lefttop,outbin=finishershift Punch, Punchhole Select the punch position for the output and the number of punch holes. • When using this option, the optional finisher unit is required - Ricoh Aficio MP C5502 | User Guide - Page 432
an appropriate value referring to the table below. Number of punch holes 2 3 4 Multi us2 us3 eu4, neu4 multi Value The following sample shows how to print with four punch holes on the left using is not specified, the machine executes the punch function using the default number of punch holes. 40 - Ricoh Aficio MP C5502 | User Guide - Page 433
are using. For details about available punch holes, see the manual that comes with this machine. Usercode Specify the usercode. printing with the ftp command, enter the usercode in uppercase letters. Symbol Set Select the set of print characters for the chosen font. • This function is only for PCL - Ricoh Aficio MP C5502 | User Guide - Page 434
1. UNIX Configuration ISO 4 ISO 6 ISO 11 ISO 15 ISO 17 ISO 21 ISO 60 ISO 69 ISO Cyrillic ISO Greek ISO Hebrew ISO L1 ISO L2 ISO L5 ISO L6 ISO L9 Legal Math-8 MC Text MS Publ PC-8 PC-775 PC-850 PC-851 PC-852 Symbol Set 42 iso4 iso6 iso11 iso15 iso17 iso21 iso60 iso69 isocyr isogrk isoheb isol1 - Ricoh Aficio MP C5502 | User Guide - Page 435
pc1004 pc8dn pc8grk pc8tk pifont psmath pstext roman8 roman9 ucs2 win30 winarb winbaltic wincyr wingrk winl1 winl2 winl5 Value The following sample shows how to print the ISO 4 character set (host name : nphost, file name : file1): • rsh 43 - Ricoh Aficio MP C5502 | User Guide - Page 436
1. UNIX Configuration % rsh nphost print symset=iso4 < file1 • rcp % rcp file1 nphost:symset=iso4 • ftp ftp> put file1 symset=iso4 44 - Ricoh Aficio MP C5502 | User Guide - Page 437
Trademarks Trademarks Linux® is the registered trademark of Linus Torvalds in the U.S. and other countries. Microsoft®, Windows®, Windows Server®, and Windows Vista® are either registered trademarks or trademarks of Microsoft Corporation in the United States and/or other countries. Monotype is a - Ricoh Aficio MP C5502 | User Guide - Page 438
Server 2003 R2 are as follows: Microsoft® Windows Server® 2003 R2 Standard Edition Microsoft® Windows Server® 2003 R2 Enterprise Edition • The product names of Windows Server 2008 are as follows: Microsoft® Windows Server® 2008 Standard Microsoft® Windows Server® 2008 Enterprise • The product names - Ricoh Aficio MP C5502 | User Guide - Page 439
34 BSD UNIX workstation 17, 20 C Collating 33 Configuring the device option 22 Copies 32 Copying information 21 D Deleting the printer 11 Device option 22 Duplex printing 33 F Fold 37 ftp 17, 20 ftp commands 7 G Gradation quality 36 H How to read this manual 4 HP-UX 15, 17, 20 I Image - Ricoh Aficio MP C5502 | User Guide - Page 440
MEMO 48 EN GB EN US EN AU D143-7042 - Ricoh Aficio MP C5502 | User Guide - Page 441
- Ricoh Aficio MP C5502 | User Guide - Page 442
EN GB EN US EN AU D143-7042 © 2011 - Ricoh Aficio MP C5502 | User Guide - Page 443
Operating Instructions Security Guide For safe and correct use, be sure to read the Safety Information in "Read This First" before using the machine. - Ricoh Aficio MP C5502 | User Guide - Page 444
- Ricoh Aficio MP C5502 | User Guide - Page 445
out Using the Control Panel...24 Logging out Using Web Image Monitor...24 Supervisor...25 Resetting the Administrator's Password...25 Changing the Passwords 39 Specifying Login Details...41 Windows Authentication...43 Specifying Windows Authentication...45 Installing Internet Information Services - Ricoh Aficio MP C5502 | User Guide - Page 446
Job Authentication...64 Printer Job Authentication Levels...64 Printer Job Types...64 "authfree" Command...67 Auto Registration to the Address Book...68 Data Carry-over Setting for Address Book Auto-program 68 User Lockout Function...70 Specifying the User Lockout Function...71 Canceling Password - Ricoh Aficio MP C5502 | User Guide - Page 447
Clearing Print Volume Use Counters...92 Configuring the Updating the Encryption Key...106 Canceling Data Encryption...107 Deleting Data on the Hard Disk...108 Conditions for Use...108 Instructions for Use...108 Auto Erase Memory...109 Erase All Memory...113 5. Enhanced Network Security Access Control - Ricoh Aficio MP C5502 | User Guide - Page 448
Items of IEEE 802.1X for Wireless LAN 177 SNMPv3 Encryption...179 Encrypting Transmitted Passwords...181 Specifying a Driver Encryption Key...181 Specifying an IPP Authentication Password 182 Kerberos Authentication Encryption Setting 184 6. Preventing the Leaking of Documents Configuring Access - Ricoh Aficio MP C5502 | User Guide - Page 449
User Information on Paper...198 Managing Locked Print Files...201 Deleting Locked Print Files...201 Changing the Password of a Locked Print File 203 Unlocking a Locked Print File...204 Enforced Storage of Documents to be Printed on a Printer 206 7. Managing the Machine Managing Log Files...207 - Ricoh Aficio MP C5502 | User Guide - Page 450
Settings You Can Configure Using the Control Panel 274 Settings You Can Configure Using Web Image Monitor 276 Settings You Can Configure When IPsec Is Available/Unavailable 277 8. Troubleshooting If Authentication Fails...281 If a Message is Displayed...281 If an Error Code is Displayed...283 If - Ricoh Aficio MP C5502 | User Guide - Page 451
: Customize Screen per User 371 Web Image Monitor: Document Server...372 Web Image Monitor: Fax Received File...373 Web Image Monitor: Printer: Print Jobs...374 List of Operation Privileges for Stored Files 375 List of Operation Privileges for Address Books 377 Trademarks...381 INDEX...383 7 - Ricoh Aficio MP C5502 | User Guide - Page 452
Functions That Require Options The following functions require certain options and additional functions. • Data security for copying function Copy Data Security Unit 8 - Ricoh Aficio MP C5502 | User Guide - Page 453
Main Software Products Product name Names in the text DeskTopBinder Lite and DeskTopBinder Professional *1 DeskTopBinder ScanRouter EX Professional *1 and ScanRouter EX Enterprise *1 the ScanRouter delivery software Remote Communication Gate S Pro for @Remote Enterprise *2 and Remote - Ricoh Aficio MP C5502 | User Guide - Page 454
10 - Ricoh Aficio MP C5502 | User Guide - Page 455
to ensure appropriate operation by users, administrators must read the Security Guide completely and thoroughly, paying particular attention to the section entitled "Before communication security functions and connect it to devices that support security functions such as encrypted communication. 11 - Ricoh Aficio MP C5502 | User Guide - Page 456
as an administrator, see p.22 "Administrator Login Method". 8. Point to [Device Management], and then click [Configuration]. 9. Click [E-mail] under "Device Settings". 10. Enter the e-mail address of the administrator of this machine in "Administrator E-mail Address" and click [OK]. 11. Install the - Ricoh Aficio MP C5502 | User Guide - Page 457
Before Using This Machine 13. Change the administrator's user name and password. For details about specifying administrators' user names and passwords, see p.21 "Using Web Image Monitor to Configure Administrator Authentication". 14. Log out and then close Web Image Monitor. 15. Disconnect this - Ricoh Aficio MP C5502 | User Guide - Page 458
other important functions and settings. When an administrator controls limited access and settings, first select the machine's passwords. Administrators cannot use functions such as copying and printing. To use these functions, the administrator must be authenticated as the user. For instructions - Ricoh Aficio MP C5502 | User Guide - Page 459
password is used for encrypting data transmitted via SNMPv3. It is also used by applications such as SmartDeviceMonitor for Admin that use SNMPv3. Administrators are limited to managing the machine's settings and controlling user access, so they cannot use functions such as copying and printing - Ricoh Aficio MP C5502 | User Guide - Page 460
[On]. Once settings are activated, the default setting items allocated to each administrator become controlled items. To log in as an administrator, use the default login user name and login password. The default login user name is "admin". No login password is configured. For details about logging - Ricoh Aficio MP C5502 | User Guide - Page 461
login user name and login password. If you do forget them, a service representative will have to return the machine to its default state. This will result in Management], or [File Management] to select which settings to manage. 7. Set "Admin. Authentication" to [On]. "Available Settings" appears. 17 - Ricoh Aficio MP C5502 | User Guide - Page 462
more than one category, repeat steps 6 to 8. 9. Press [OK]. 10. Press the [User Tools/Counter] key. Registering and Changing Administrators If 24 "Administrator Logout Method". 1. The administrator logs in from the control panel. 2. Press [System Settings]. 3. Press [Administrator Tools]. 4. Press [ - Ricoh Aficio MP C5502 | User Guide - Page 463
5. Press [Program / Change Administrator]. Configuring Administrator Authentication 6. In the line for the administrator whose privilege you want to specify, press [Administrator 1], [Administrator 2], [Administrator 3] or [Administrator 4], and then press [Change]. When allocating privileges for - Ricoh Aficio MP C5502 | User Guide - Page 464
login user name, and then press [OK]. 9. Press [Change] for "Login Password". 10. Enter the login password, and then press [OK]. Follow the password policy to make the login password more secure. For details about the password policy and how to specify it, see p.262 "Specifying the Extended Security - Ricoh Aficio MP C5502 | User Guide - Page 465
login user names and passwords. Names and passwords are case sensitive. • Upper case letters: A to Z (26 characters) • Lower case letters: a to z (26 characters) • Numbers: 0 to 9 (10 characters) • Symbols: desired. 5. Log out. • For details about Web Image Monitor, see Web Image Monitor Help. 21 - Ricoh Aficio MP C5502 | User Guide - Page 466
Administrator Login Method If administrator authentication has been specified, log in using an administrator's user name and password. Supervisors log in the same way. Logging in Using the Control Panel 1. Press the [User Tools/Counter] key. 2. Press the [Login/Logout] key. CJS040 The login screen - Ricoh Aficio MP C5502 | User Guide - Page 467
it as "192.168.1.10" to connect to the machine. Enter the IPv6 address with brackets before and after, like this: [2001:db8::9abc]. 3. Click [Login]. 4. Enter the login name and password of an administrator, and then click [Login]. The default login name for administrators is "admin" and that for - Ricoh Aficio MP C5502 | User Guide - Page 468
authentication has been specified, be sure to log out after completing settings. Supervisors log out in the same way. Logging out Using the Control Panel 1. Press the [Login/Logout] key. 2. Press [Yes]. • You can log out using the following procedures also. • Press the [Energy Saver] key. Logging - Ricoh Aficio MP C5502 | User Guide - Page 469
password. If you do forget them, a service representative will have to return the machine to its default state. This will result in all data in the machine being lost and the service password or specify a new one. Resetting the Administrator's Password 1. The supervisor logs in from the control - Ricoh Aficio MP C5502 | User Guide - Page 470
[Change] for the administrator you wish to reset. 7. Press [Change] for "Login Password". 8. Enter the login password, and then press [OK]. 9. If a password reentry screen appears, enter the login password, and then press [OK]. 10. Press [OK] twice. You will be automatically logged out. • Log in as - Ricoh Aficio MP C5502 | User Guide - Page 471
Name". 8. Enter the login user name, and then press [OK]. 9. Press [Change] for "Login Password". 10. Enter the login password, and then press [OK]. 11. If a password reentry screen appears, enter the login password, and then press [OK]. 12. Press [OK] twice. You will be automatically logged out. 27 - Ricoh Aficio MP C5502 | User Guide - Page 472
1. Getting Started 28 - Ricoh Aficio MP C5502 | User Guide - Page 473
user authentication. Users A user performs normal operations on the machine, such as copying and printing. Users are managed using the personal information in the machine's Address Book, and can use "Registering User Information", Connecting the Machine/ System Settings or Web Image Monitor Help. 29 - Ricoh Aficio MP C5502 | User Guide - Page 474
which the user's ID is confirmed via a login user name and password when the user starts to use this machine or when accessing the machine , such as copying and printing. 2. Group A group performs normal operations on the machine, such as copying and printing. 3. Unauthorized user 4. Unauthorized - Ricoh Aficio MP C5502 | User Guide - Page 475
Configuring User Authentication To control users' access to the machine, perform user authentication using login user names and passwords. There are five types of user authentication methods: User Code authentication, Basic authentication, Windows authentication, LDAP authentication, and - Ricoh Aficio MP C5502 | User Guide - Page 476
. In this case, since the User Code authentication does not have a password, the login password is set as blank. • When authentication switches to an external authentication method (Windows authentication, LDAP authentication, or Integration Server authentication), authentication will not occur - Ricoh Aficio MP C5502 | User Guide - Page 477
specifying the user code for the printer driver, see Print or the printer driver Help. For details about specifying the LAN-Fax driver user code, see the LAN-Fax driver Help. For details about specifying the TWAIN driver user code, see the TWAIN driver Help. • To control the use of DeskTopBinder for - Ricoh Aficio MP C5502 | User Guide - Page 478
for individuals or groups, see p.80 "Limiting Available Functions". If you do not want to specify printer job authentication, proceed to step 15. 9. Select an option other than [PC Control] for "Printer" under "Functions to Restrict". If you cannot see this item, press [ Next] to display more - Ricoh Aficio MP C5502 | User Guide - Page 479
Authentication" level. User Code Authentication For a description of the printer job authentication levels, see p.64 "Printer Job Authentication". If you select [Entire] or [Simple (All)], proceed to step 15. If you select [Simple (Limitation)], proceed to step 12. 12. Press [Change]. 13. - Ricoh Aficio MP C5502 | User Guide - Page 480
2. Configuring User Authentication 16. Press the [Login/Logout] key. A confirmation message appears. If you press [Yes], you will be automatically logged out. 36 - Ricoh Aficio MP C5502 | User Guide - Page 481
administrator authentication is properly configured under "Administrator Authentication Management". 1. The machine administrator logs in from the control panel. 2. Press [System Settings]. 3. Press [Administrator Tools]. 4. Press [ Next]. 5. Press [User Authentication Management]. 6. Select [Basic - Ricoh Aficio MP C5502 | User Guide - Page 482
"Printer Job Authentication" level. For a description of the printer job authentication levels, see p.64 "Printer Job Printer Job Authentication". You can specify the IPv4 address range to which this setting is applied, and whether or not to apply the setting to the parallel and USB interfaces. 10 - Ricoh Aficio MP C5502 | User Guide - Page 483
you want to permit. The functions you select here become the default Basic Authentication settings that will be assigned to all new users of see Web Image Monitor Help. Specifying Login User Names and Passwords In "Address Book Management", specify the login user name and login password to be used - Ricoh Aficio MP C5502 | User Guide - Page 484
2. Configuring User Authentication 1. The user administrator logs in from the control panel. 2. Press [Address Book Mangmnt]. 3. Select the user. 4. Press [Auth. Info]. 5. Press [Change] for "Login User Name". 6. Enter a login user name, and then press [OK]. 40 - Ricoh Aficio MP C5502 | User Guide - Page 485
Basic Authentication 8. Enter a login password, and then press [OK]. 9. If a password reentry screen appears, enter the login password, and then press [OK]. 10. Press [OK]. 11. Press [Exit]. 12. Log out. Specifying Login Details The login user name and password specified in "Address Book Management - Ricoh Aficio MP C5502 | User Guide - Page 486
2. Configuring User Authentication 5. Select [Use Auth. Info at Login] in "SMTP Authentication". For folder authentication, select [Use Auth. Info at Login] in "Folder Authentication". For LDAP authentication, select [Use Auth. Info at Login] in "LDAP Authentication". If the function you want to - Ricoh Aficio MP C5502 | User Guide - Page 487
when scanned data is sent or a received fax message is transferred via e-mail. Windows supports TLSv1, SSLv2, or SSLv3. Compatible operating systems are listed below. • Windows Server 2003/2003 R2 • Windows Server 2008/2008 R2 To use Kerberos authentication under Windows Server 2008, Service - Ricoh Aficio MP C5502 | User Guide - Page 488
server is enabled, even users not registered in the domain controller can be authenticated. When this account is enabled, users are registered in the Address Book and can use the functions available under "*Default Group". • Under Windows Authentication, you can select whether or not to use secure - Ricoh Aficio MP C5502 | User Guide - Page 489
"Administrator Authentication Management". 1. The machine administrator logs in from the control panel. 2. Press [System Settings]. 3. Press [Administrator Tools]. 4. Press [ Next]. 5. Press [User Authentication Management]. 6. Select [Windows Auth.]. If you do not want to use user authentication - Ricoh Aficio MP C5502 | User Guide - Page 490
and proceed to step 9. 8. Select Kerberos authentication realm and proceed to step 10. To enable Kerberos authentication, a realm must be registered beforehand. The realm name ] for "Domain Name", enter the name of the domain controller to be authenticated, and then press [OK]. 10. Press [ Next]. 46 - Ricoh Aficio MP C5502 | User Guide - Page 491
11. Select the "Printer Job Authentication" level. Windows Authentication For a description of the printer job authentication levels, see p.64 "Printer Job Authentication". If you select [Entire] or [Simple (All)], proceed to step 15. If you select [Simple (Limitation)], proceed to step 12. 12. - Ricoh Aficio MP C5502 | User Guide - Page 492
the machine by entering the names of the global groups registered in the Windows Server. (Keep in mind that group names are case sensitive.) Then use the available functions specified in [*Default Group]. By default, all functions are available to *Default Group members. Specify the limitation on - Ricoh Aficio MP C5502 | User Guide - Page 493
function you want to select is not displayed, press [ Next]. Windows Authentication will be applied to the selected functions. Users can use the will be automatically logged out. Installing Internet Information Services (IIS) and Certificate Services Specify this setting if you want the machine to - Ricoh Aficio MP C5502 | User Guide - Page 494
and then click [Next>]. 10. Select a cryptographic service provider, key length, and defaults, and then click [Next>]. 14. Read the notes, and then click [Next>]. 15. Select the role service Services (IIS) and Certificate services Windows components, create the Server Certificate as follows: Windows - Ricoh Aficio MP C5502 | User Guide - Page 495
Services (IIS) Manager] by clicking [Finish]. If the Fax Number Cannot be Obtained If the fax number cannot be obtained during authentication, specify the setting as follows: Windows Right-click [facsimileTelephoneNumber], and then click [Properties]. 10. Select the "Replicate this attribute to the - Ricoh Aficio MP C5502 | User Guide - Page 496
When using LDAP authentication, to prevent the password information being sent over the network unencrypted, LDAP authentication using Web Image Monitor, see Web Image Monitor Help. • During LDAP authentication, the data registered in the Base • Port Number • SSL communication • Authentication 52 - Ricoh Aficio MP C5502 | User Guide - Page 497
simple authentication mode, authentication will fail if the password is left blank. To allow blank passwords, contact your service representative. • LDAP server is configured using Windows Active Directory, "Anonymous Authentication" might be available. If Windows authentication is available, we - Ricoh Aficio MP C5502 | User Guide - Page 498
2. Configuring User Authentication 1. The machine administrator logs in from the control panel. 2. Press [System Settings]. 3. Press [Administrator Tools]. 4. Press [ Next]. 5. Press [User Authentication Management]. 6. Select [LDAP Auth.]. If you do not want to use user authentication - Ricoh Aficio MP C5502 | User Guide - Page 499
. LDAP Authentication For a description of the printer job authentication levels, see p.64 "Printer Job Authentication". If you select [Entire] or [Simple (All)], proceed to step 12. If you select [Simple (Limitation)], proceed to step 9. 9. Press [Change]. 10. Specify the range in which [Simple - Ricoh Aficio MP C5502 | User Guide - Page 500
2. Configuring User Authentication 14. Enter the login name attribute, and then press [OK]. Use the login name attribute as a search criterion to obtain information about an authenticated user. You can create a search filter based on the login name attribute, select a user, and then retrieve the - Ricoh Aficio MP C5502 | User Guide - Page 501
20. Press the [Login/Logout] key. A confirmation message appears. If you press [Yes], you will be automatically logged out. LDAP Authentication 57 - Ricoh Aficio MP C5502 | User Guide - Page 502
For details about specifying SSL using Web Image Monitor, see Web Image Monitor Help. • During Integration Server Authentication, the data registered in the server, such as S is "Admin". This is different from the default administrator name for the machine, which is "admin". Specifying Integration - Ricoh Aficio MP C5502 | User Guide - Page 503
5. Press [User Authentication Management]. Integration Server Authentication 6. Select [Integration Svr. Auth.]. If you do not want to use user authentication management, select [Off]. 7. Press [Change] for "Server Name". Specify the name of the server for external authentication. 8. Enter the - Ricoh Aficio MP C5502 | User Guide - Page 504
Select an available authentication system. For general usage, select [Default]. 10. Press [Change] for "Domain Name". 11. Enter the domain name, and then press [OK]. You cannot specify a domain name under an authentication system that does not support - Ricoh Aficio MP C5502 | User Guide - Page 505
have not registered a group, proceed to step 20. If you have registered a group, proceed to step 14. If you set "Authentication Type" to [Windows (Native)] or [Windows (NT Compatible)], you can use the global group. If you set "Authentication Type" to [Notes], you can use the Notes group. If you set - Ricoh Aficio MP C5502 | User Guide - Page 506
Authentication" level. If you cannot see this item, press [ Next] to display more settings. For a description of the printer job authentication levels, see p.64 "Printer Job Authentication". If you select [Entire] or [Simple (All)], proceed to step 25. If you select [Simple (Limitation)], proceed - Ricoh Aficio MP C5502 | User Guide - Page 507
22. Press [Change]. Integration Server Authentication 23. Specify the range in which [Simple (Limitation)] is applied to "Printer Job Authentication". You can specify the IPv4 address range to which this setting is applied, and whether or not to apply the setting to the parallel - Ricoh Aficio MP C5502 | User Guide - Page 508
all printer jobs and remote settings, and cancels jobs and settings that fail authentication. To print in an environment that does not support authentication, select [Simple (All)] or [Simple (Limitation)]. • Simple (All) Select this setting when you want to print with a printer driver or - Ricoh Aficio MP C5502 | User Guide - Page 509
entered using the PostScript 3 printer driver or PS3 universal driver. This also applies to recovery/parallel printing using a PCL printer driver that does not support authentication. 7. A printer job or PDF file is sent from a host computer without a printer driver and is printed via LPR. This can - Ricoh Aficio MP C5502 | User Guide - Page 510
possible if user authentication is successful. If user authentication fails, the print job is reset. C: Printing is possible if user authentication is successful and "Driver Encryption Key" for the printer driver and machine match. X: Printing is not possible regardless of user authentication, and - Ricoh Aficio MP C5502 | User Guide - Page 511
, the telnet authfree command makes it possible to specify objects to be excluded from printer job authentication. The default user name for logging in to telnet is "admin". No password is configured. For details on how to login to and use telnet, see "Using telnet", Connecting the Machine - Ricoh Aficio MP C5502 | User Guide - Page 512
If a user logs in via Windows, LDAP or integration server authentication, Address Book items • Login User Name • Login Password • Registration No. • Name*1 • Key Display*1 registered. 1. The user administrator logs in from the control panel. 2. Press [System Settings]. 3. Press [Administrator - Ricoh Aficio MP C5502 | User Guide - Page 513
Auto Registration to the Address Book 5. Press [Carry-over Data]. 6. Use the number keys to enter the registration number of the Address Book that will use the setting content and press [ ]. 7. Press [OK]. 8. Press the [Login/Logout] key. A confirmation message appears. If you press [ - Ricoh Aficio MP C5502 | User Guide - Page 514
enters the correct password later, authentication will fail and the 10 Lockout Release Timer Specify whether or not to cancel lockout after a specified period elapses. • Active • Inactive Lock Out User for Specify the number of minutes after which lockout is canceled. 1-9999 min. Default - Ricoh Aficio MP C5502 | User Guide - Page 515
the locked out user's account. 4. Click [Manual Input], and then click [Change]. 5. Set "Lockout" to [Inactive] under "Authentication Information". 6. Click [OK]. 7. Log out. • You can cancel the administrator and supervisor password lockout by turning the main power off and then turning it back on - Ricoh Aficio MP C5502 | User Guide - Page 516
Windows authentication, LDAP authentication or Integration Server authentication, the machine automatically logs you off if you do not use the control Logout Timer], select [Off]. 6. Enter "60" to "999" (seconds) using the number keys, and then press [ ]. If you make a mistake, press [Clear]. 7. - Ricoh Aficio MP C5502 | User Guide - Page 517
Auto Logout • If a paper jam occurs or toner runs out, the machine might not be able to perform the Auto Logout function. • The auto logout time for Web Image Monitor is fixed at 30 minutes. 73 - Ricoh Aficio MP C5502 | User Guide - Page 518
2. Configuring User Authentication Authentication Using an External Device To authenticate using an external device, see the device manual. For details, contact your sales representative. 74 - Ricoh Aficio MP C5502 | User Guide - Page 519
destination of faxes and scanned documents can be restricted to the destination is input manually. Restrict Use of the other party's fax number, email address or folder password. Only the user administrator can change items other than the password. 1. The user administrator logs in from the control - Ricoh Aficio MP C5502 | User Guide - Page 520
3. Restricting Machine Usage 5. Press [Extended Security]. 6. Press [ Next]. 7. Press [On] for "Restrict Use of Destinations (Fax)" and/or "Restrict Use of Destinations (Scanner)". If you set "Restrict Use of Destinations (Fax)" to [On], "Restrict Adding of User Destinations (Fax)" will not appear. - Ricoh Aficio MP C5502 | User Guide - Page 521
made by each administrator, see p.305 "List of Operation Privileges for Settings". Register the administrators before using the machine. For instructions on registering the administrator, see p.18 "Registering and Changing Administrators". Prohibiting Users from Making Changes to Settings Makes it - Ricoh Aficio MP C5502 | User Guide - Page 522
[Level 2], it eliminates the ability of users to register programs. Copy Function 1. The machine administrator logs in from the control panel. 2. Press [Copier / Document Server Features]. 3. Press [Administrator Tools]. 4. Press [Menu Protect]. 5. Select the menu protect level, and then press [OK - Ricoh Aficio MP C5502 | User Guide - Page 523
administrator logs in from the control panel. 2. Press [Printer Features]. 3. Press [Maintenance]. 4. Press [Menu Protect]. 5. Select the menu protect level, and then press [OK]. 6. Log out. Scanner Function 1. The machine administrator logs in from the control panel. 2. Press [Scanner Features - Ricoh Aficio MP C5502 | User Guide - Page 524
the copier, Document Server, fax, scanner, printer, and browser functions. Specifying Which Functions are Available Specify the functions available to registered users. By making this setting, you can limit the functions available to users. 1. The user administrator logs in from the control - Ricoh Aficio MP C5502 | User Guide - Page 525
Limiting Available Functions 6. In "Available Functions", select the functions you want to specify. If the function you want to select is not displayed, press [ Next]. 7. Press [OK]. 8. Log out. 81 - Ricoh Aficio MP C5502 | User Guide - Page 526
slots. With this setting, you can restrict storing scanned files on a removable memory device, and also restrict printing of files stored on a removable memory device. 1. The machine administrator logs in from the control panel. 2. Press [System Settings]. 3. Press [Administrator Tools]. 4. Press - Ricoh Aficio MP C5502 | User Guide - Page 527
Restricting Media Slot Access • If you select [Prohibit] under "Print from Memory Storage Device", the [Print from Memory Storage Device] button is not displayed on the printer function's initial screen. 83 - Ricoh Aficio MP C5502 | User Guide - Page 528
of paper size, color mode, and function. The default per-page unit count for every print condition is 1. The paper size "Others" refers to paper sizes other than A3 and DLT (11 × 17 in). • Copier:Colour:A3/DLT • Copier:Black & White:A3/DLT • Printer:Colour:A3/DLT • Printer:Black & White:A3/DLT - Ricoh Aficio MP C5502 | User Guide - Page 529
system that does not support the current authentication method • Printing data using the Mail to Print function, received faxes, LAN-Fax data, and files stored using the fax function Specifying Limitations for Print Volume 1. The machine administrator logs in from the control panel. 2. Press [System - Ricoh Aficio MP C5502 | User Guide - Page 530
Tools]. 9. Press [Print Volume Use Limitation: Unit Count Setting]. 10. For each print condition, use the number keys to enter a per-page unit count between "0" and "200", and then press [ ]. If you specify "0" for a print condition, no volume restriction is applied to jobs matching that condition - Ricoh Aficio MP C5502 | User Guide - Page 531
: • If [PC Control] is selected for the printer function, the values specified for print volume use units might not be applied to users' print counters. Do not select [PC Control] if you want to limit print volume when running User Code authentication. • Under Basic, Windows, and LDAP authentication - Ricoh Aficio MP C5502 | User Guide - Page 532
3. Restricting Machine Usage [Print Volum. Use Limit.: Default Limit Value] does not appear if you have selected [Allow Continue Use] in "Machine action when limit is reached". 5. Use the number keys to enter a value between "0" and "999,999" as the maximum available print volume, and then press [ - Ricoh Aficio MP C5502 | User Guide - Page 533
not Limit]. 7. Press [Change], and then use the number keys to enter a value between "0" and "999,999" as the maximum available print volume, and then press [ ]. A user whose maximum print volume is set to "0" can only print jobs whose print conditions match those with a unit value of "0". 8. Press - Ricoh Aficio MP C5502 | User Guide - Page 534
You can search for users by entering a name in the text box at the top of the control panel, and then pressing [Search]. • You can specify a maximum print volume for up to 500 users. Checking Print Volume per User This procedure can be done by any administrator. 1. The administrator logs in from the - Ricoh Aficio MP C5502 | User Guide - Page 535
administrator can also use [Address Book] in Web Image Monitor to check users' print volume use counters. Printing a List of Print Volume Use Counters 1. The machine administrator logs in from the control panel. 2. Press [System Settings]. 3. Press [Administrator Tools]. 4. Press [Display / Clear - Ricoh Aficio MP C5502 | User Guide - Page 536
A3, or 11 × 17 in. Clearing Print Volume Use Counters Clearing a user's print volume counter or increasing a user's print volume limit allows the user to continue printing beyond his/her original print volume limit. 1. The user administrator logs in from the control panel. 2. Press [System Settings - Ricoh Aficio MP C5502 | User Guide - Page 537
Press [Display / Clear / Print Counter per User]. Managing Print Volume per User 5. Press [Print Volume Use]. A list of users' print volume use counters is displayed. 6. To clear the print volume use counters of every user, press [Clear] under "All Users". To clear the print volume use counters - Ricoh Aficio MP C5502 | User Guide - Page 538
use [Address Book] in Web Image Monitor to clear the print volume use counters. However if you want to clear the print volume use counters of all users simultaneously, use the control panel. Configuring the Auto-Reset Function The print volume counter can be reset at a specified time. Options - Ricoh Aficio MP C5502 | User Guide - Page 539
Print Volume per User 5. Press [Volume Use Counter: Scheduled/Specified Reset Settings] 6. Select one of [Every Month], [Specify Date] and [Specify Cycle]. 7. Configure the conditions. 8. Press [OK]. 9. Log out. • If the machine is off at the specified time, the volume is reset when the power - Ricoh Aficio MP C5502 | User Guide - Page 540
3. Restricting Machine Usage 96 - Ricoh Aficio MP C5502 | User Guide - Page 541
Book Access Permissions These access permissions can be specified by the users registered in the Address Book or with full control, or the user administrator. 1. The user administrator logs in from the control panel. 2. Press [Address Book Mangmnt]. 3. Select the user. 4. Press [Protection]. 97 - Ricoh Aficio MP C5502 | User Guide - Page 542
select the permission. Select the permission, from [Read-only], [Edit], [Edit / Delete], or [Full Control]. 10. Press [Exit]. 11. Press [OK]. 12. Log out. • The "Edit", "Edit / Delete", and "Full Control" access permissions allow a user to perform high level operations that could result in loss of - Ricoh Aficio MP C5502 | User Guide - Page 543
Encrypting Data in the Address Book 1. The user administrator logs in from the control panel. 2. Press [System Settings]. 3. Press [Administrator Tools]. 4. Press [ Next]. 5. Press [Extended Security]. Protecting the Address Book 6. Press [On] for "Encrypt User Custom Settings & Address Book". 7. - Ricoh Aficio MP C5502 | User Guide - Page 544
9. Press [Encrypt / Decrypt]. 10. Press [Yes]. Do not switch the main power off during encryption, as doing so may corrupt the data. Encrypting the data in the Address Book may take a long time. The time it takes to encrypt the data in the Address Book depends on the number of registered users. The - Ricoh Aficio MP C5502 | User Guide - Page 545
be replaced, the existing data can be transferred to a new machine, even if the data is encrypted. To transfer data, contact your service representative. Time required for encryption When setting up encryption, specify whether to start encryption after deleting data (initialize) or encrypt existing - Ricoh Aficio MP C5502 | User Guide - Page 546
Print • Spooled jobs • Stored documents (stored documents in Document Server, Locked Print files / Sample Print files / Stored Print files / Hold Print files, and received and stored fax documents) • Registered stamps to their system defaults even if [Format All Data], [File System Data Only], - Ricoh Aficio MP C5502 | User Guide - Page 547
you have completed the control panel procedure and rebooted the machine by turning off and on the main power switch. If both the erase If the encryption key update was not completed, the printed encryption key will not be valid. 1. The machine administrator logs in from the control panel. 2. Press [ - Ricoh Aficio MP C5502 | User Guide - Page 548
selected [Save to SD Card], load an SD card into the media slot on the front of the control panel and press [OK] to back up the machine's data encryption key. If you have selected [Print on Paper], press the [Start] key and print out the machine's data encryption key. 9. Press [OK]. 104 - Ricoh Aficio MP C5502 | User Guide - Page 549
off." appears, and then turn the main power switches off again. For details about turning off the power, see "Turning On/Off the Power", Getting Started. Backing Up the Encryption Key The encryption key can be backed up. Select whether to save it to an SD card or to print it. • The encryption key is - Ricoh Aficio MP C5502 | User Guide - Page 550
the procedure on the machine's control panel, turn off the power and restart the machine to enable the new settings. Restarting can be slow when there is data to be carried over to the hard disk. • If the encryption key update was not completed, the printed encryption key will not be valid - Ricoh Aficio MP C5502 | User Guide - Page 551
switches off again. For details about turning off the power, see "Turning On/Off the Power", Getting Started. Canceling Data Encryption Use the following procedure to cancel the encryption settings when encryption is no longer necessary. • After completing this procedure on the machine's control - Ricoh Aficio MP C5502 | User Guide - Page 552
document data from the copier, printer and scanner functions. It transmission data, fax numbers and network TWAIN Instructions for Use • Before turning off the main power of the machine, always make sure that the Data Overwrite icon has turned to "Clear". • If the machine enters Energy Saver mode - Ricoh Aficio MP C5502 | User Guide - Page 553
scanned in copier, or scanner mode, or print data sent from a printer driver is temporarily stored on the machine's hard disk. Even after the job Overwrite icon will indicate "Clear" when there is a Sample Print/Locked Print/Hold Print/Stored Print job. • If the Data Overwrite icon is not displayed, - Ricoh Aficio MP C5502 | User Guide - Page 554
completed, overwriting will continue once the main power switch is turned back on. • If an error occurs before overwriting is completed, turn off the main power. Turn it on, and then repeat from step 1. 1. The machine administrator logs in from the control panel. 2. Press [System Settings]. 3. Press - Ricoh Aficio MP C5502 | User Guide - Page 555
of times that you want to overwrite using the number keys, and then press [ ]. 10. Press [OK]. Auto Erase Memory is set. 11. Log out. • If you specify to both overwrite and encrypt the data, the data will all be encrypted. Canceling Auto Erase Memory 1. Follow steps 1 to 5 in "Using Auto Erase - Ricoh Aficio MP C5502 | User Guide - Page 556
Memory". Data overwritten by Auto Erase Memory Copier • Copy jobs Printer • Print jobs • Sample Print/Locked Print/Hold Print/Stored Print jobs A Sample Print/Locked Print/Hold Print job can only be overwritten after it has been executed. A Stored Print job is overwritten after it has been deleted - Ricoh Aficio MP C5502 | User Guide - Page 557
codes, counters under each user code, user stamps, data stored in the Address Book, printer fonts downloaded by users, applications using Embedded Software Architecture, SSL server certificates, and the machine's network settings. • If the main power switch is turned off before "Erase All Memory - Ricoh Aficio MP C5502 | User Guide - Page 558
step 8. 8. Press [Change]. 9. Enter the number of times that you want to overwrite using the number keys, and then press [ ]. 10. Press [Erase]. 11. Press [Yes]. 12. When overwriting is completed, press [Exit], and then turn off the main power. Before turning the power off, see "Turning On/Off the - Ricoh Aficio MP C5502 | User Guide - Page 559
be turned off before "Erase All Memory" is completed, overwriting will continue once the main power switch is turned back on. • If an error occurs before overwriting is completed, turn off the main power. Turn it on again, and then repeat from step 2. • If you specify to both overwrite and encrypt - Ricoh Aficio MP C5502 | User Guide - Page 560
4. Preventing Leakage of Information from Machines 116 - Ricoh Aficio MP C5502 | User Guide - Page 561
possible will be from [192.168.15.16] to [192.168.15.20]. • Using access control, you can limit access involving LPR, RCP/RSH, FTP, ssh/sftp, Bonjour, SMB, WSD (Device), WSD (Printer), WSD (Scanner), IPP, DIPRINT, RHPP, Web Image Monitor, SmartDeviceMonitor for Client, or DeskTopBinder. You cannot - Ricoh Aficio MP C5502 | User Guide - Page 562
configure the settings from there. Protocol Port IPv4 - IPv6 - IPsec - Setting method When disabled • Control panel • Web Image Monitor • telnet • SmartDeviceMonitor for Admin • Remote Communication Gate S All applications that operate over IPv4 cannot be used. IPv4 cannot be disabled - Ricoh Aficio MP C5502 | User Guide - Page 563
. You can restrict personal information from being displayed by making settings on the control panel using "Restrict Display of User Information". • Web Image Monitor • telnet • SmartDeviceMonitor for Admin • Remote Communication Gate S Functions that require sftp cannot be used. You can restrict - Ricoh Aficio MP C5502 | User Guide - Page 564
also make settings to require SSL transmission using the control panel or Web Image Monitor. • Control panel • Web Image Monitor • telnet • SmartDeviceMonitor for Admin SMB printing functions cannot be used. • Remote Communication Gate S • telnet SMB printing functions via TCP/IP, as well as - Ricoh Aficio MP C5502 | User Guide - Page 565
require SNMPv3 encrypted transmission and restrict the use of other transmission methods using the control panel, Web Image Monitor, or telnet. • Web Image Monitor • telnet • SmartDeviceMonitor for Admin • Remote Communication Gate S Functions that require RSH and network TWAIN functions cannot be - Ricoh Aficio MP C5502 | User Guide - Page 566
Web Image Monitor • telnet • SmartDeviceMonitor for Admin Device discovery using UPnP from Windows cannot be used. • Web Image Monitor • telnet • SmartDeviceMonitor for Admin Bonjour functions cannot be used. • Remote Communication Gate S • Control panel • telnet @Remote cannot be used. 122 - Ricoh Aficio MP C5502 | User Guide - Page 567
DIPRINT functions cannot be used. • Remote Communication Gate S • Control panel • telnet You can attempt to update firmware via FTP. • Control panel • Web Image Monitor • telnet • SmartDeviceMonitor for Admin • Remote Communication Gate S Cannot print with NetWare. SNMP over IPX cannot be used - Ricoh Aficio MP C5502 | User Guide - Page 568
S WSD (Device, Printer, Scanner) search function cannot be used. • Web Image Monitor • telnet • SmartDeviceMonitor for Admin Cannot print with RHPP. • telnet Enabling and Disabling Protocols Using the Control Panel 1. The network administrator logs in from the control panel. 2. Press [System - Ricoh Aficio MP C5502 | User Guide - Page 569
. 2. Point to [Device Management], and then click [Configuration]. 3. Click [Network Security] under "Security". 4. Set the desired protocols to active/inactive (or open/close). 5. Click [OK]. 6. "Updating..." appears. Wait for about one or two minutes, and then click [OK]. 7. Log out. 125 - Ricoh Aficio MP C5502 | User Guide - Page 570
can make network security level settings on the control panel, as well as Web Image Monitor. . • With some utilities, communication or login may fail depending on the network security level. Network Security Levels and [Level 2]. It only uses a password as recommended by the U.S. government as its - Ricoh Aficio MP C5502 | User Guide - Page 571
Image Monitor. 2. Point to [Device Management], and then click [Configuration]. 3. Click [Network Security] under "Security". 4. Select the network security level in "Security Level". 5. Click [OK]. 6. "Updating..." appears. Wait for about one or two minutes, and then click [OK]. 7. Log out. 127 - Ricoh Aficio MP C5502 | User Guide - Page 572
5. Enhanced Network Security Status of Functions under Each Network Security Level TCP/IP Function TCP/IP HTTP > Port 80 IPP > Port 80 IPP > Port 631 SSL/TLS > Port 443 SSL/TLS > Permit SSL/TLS Communication SSL/TLS Version > TLS1.2 SSL/TLS Version > TLS1.1 SSL/TLS Version > TLS1.0 SSL/TLS - Ricoh Aficio MP C5502 | User Guide - Page 573
Specifying Network Security Level Function SSDP SMB NetBIOS over TCP/IPv4 WSD (Device) WSD (Printer) WSD (Scanner) WSD (Encrypted and IPv6. TCP/IP setting is not governed by the security level. Manually specify whether to activate or inactivate this setting. NetWare NetWare Function Level - Ricoh Aficio MP C5502 | User Guide - Page 574
3DES-168 3DES-168 3DES-168 AES-256 bit bit bit bit S/MIME > Digest Algorithm SHA1 SHA1 SHA1 SHA-256 bit SNMPv3 > Authentication Algorithm MD5 SHA1 SHA1 SHA1 96/ DES3-CBCSHA1 AES256CTSHMACSHA1-96/ AES128CTSHMACSHA1-96 Driver Encryption Key > Encryption Simple DES AES AES - Ricoh Aficio MP C5502 | User Guide - Page 575
SHA512 is set for the "Algorithm Signature" on the device certificate, Windows XP SP3 or later is required to connect the device using Internet Explorer 6.0. Creating and Installing a Device Certificate from the Control Panel (Self-Signed Certificate) Create and install the device certificate using - Ricoh Aficio MP C5502 | User Guide - Page 576
7. Press [Certificate 1]. Only [Certificate 1] can be created from the control panel. 8. Make the necessary settings. To use S/MIME, specify the to show that a device certificate for the machine has been installed. 10. Log out. • Select [Delete] to delete the device certificate from Help. 132 - Ricoh Aficio MP C5502 | User Guide - Page 577
Certificate] under "Security". 4. Check the radio button next to the number of the certificate you want to create. To device certificate for the machine has been installed. 10. Log out. • Click [Delete] to delete and selectable items, see Web Image Monitor Help. This section explains the use of a - Ricoh Aficio MP C5502 | User Guide - Page 578
. 10. cancel the request for the device certificate. Installing the Device Certificate (Issued by a Certificate Authority) Install the device certificate using Web Image Monitor. For details about the displayed items and selectable items, see Web Image Monitor Help radio button next to the number of - Ricoh Aficio MP C5502 | User Guide - Page 579
Click [Device Certificate] under "Security". 4. Check the radio button next to the number of the certificate you want to install. 5. Click [Install For details about the items and settings of a certificate, see Web Image Monitor Help. 7. Click [OK]. 8. Wait a moment for the device to restart, - Ricoh Aficio MP C5502 | User Guide - Page 580
5. Enhanced Network Security Configuring SSL/TLS Configuring the machine to use SSL/TLS enables encrypted communication. Doing so makes it possible to prevent data from being intercepted during transmission, and its content from being analyzed or tampered with. Flow of SSL/TLS encrypted - Ricoh Aficio MP C5502 | User Guide - Page 581
device certificate from the control panel or Web Image • If you enable SSL/TLS for IPP (printer functions), sent data is encrypted, preventing it from the protocol version used in "SSL/TLS". 5. Select the encryption communication mode for "Permit SSL/TLS Communication". 6. If you want to disable a - Ricoh Aficio MP C5502 | User Guide - Page 582
"Updating..." appears. Wait for about one or two minutes, and then click [OK]. 10. Log a protocol that does not support a Web browser, or specify using the machine's control panel, and then print via IPP-SSL from Windows Vista/7, Windows Server 2008/2008 R2. The network administrator must instruct - Ricoh Aficio MP C5502 | User Guide - Page 583
(login user name and password) is to be changed, the printer must be deleted and after the user's information authentication settings are changed, the printer must then be reinstalled. Setting the SSL/TLS Encryption Mode By specifying the SSL/TLS encrypted communication mode, you can change the - Ricoh Aficio MP C5502 | User Guide - Page 584
/TLS encrypted communication mode can also be specified using Web Image Monitor. For details, see Web Image Monitor Help. Enabling SSL for SMTP Connections Use the following procedure to enable SSL encryption for SMTP connections. 1. The network administrator logs in from the control panel. 2. Press - Ricoh Aficio MP C5502 | User Guide - Page 585
]. Configuring SSL/TLS If you are not using SSL for SMTP connections, press [Off]. When "Use Secure Connection (SSL)" is set to [On], the port number is changed to 465. 6. Press [OK]. 7. Log out. • If you set "Use Secure Connection (SSL)" to [On], you cannot bypass the SMTP server to send - Ricoh Aficio MP C5502 | User Guide - Page 586
later • Windows Live Mail support S/MIME at the same time, the e-mail is separated into encrypted and unencrypted groups and then sent. • When using S/MIME, the e-mail size is larger than normal. • For details about using S/MIME with the scanner function, see "Security Settings to E-mails", Scan - Ricoh Aficio MP C5502 | User Guide - Page 587
DER encoded binary X.509", "Base 64 encoded X.509", and "PKCS #7" error message if the certificate file contains more than one certificate. If this error will be installed. 4. Click [Manual Input], and then click [Change Updating..." appears. Wait for about one or two minutes, and then click [OK]. 10 - Ricoh Aficio MP C5502 | User Guide - Page 588
The algorithm for S/MIME is set. 6. Click [Logout]. • Configure the settings taking into consideration the encryption algorithm and digest algorithm supported by the user's e-mail software. Attaching an Electronic Signature To attach an electronic signature to sent e-mail, a device certificate must - Ricoh Aficio MP C5502 | User Guide - Page 589
the drop-down box in "S/ MIME" under "Certification". 5. Click [OK]. The certificate to be used for the S/MIME electronic signature is set. 6. "Updating..." appears. Wait for about one or two minutes, and then click [OK]. 7. Log out. • If the selected device certificate expires, signatures cannot be - Ricoh Aficio MP C5502 | User Guide - Page 590
Document Server (Utility)" under "Signature". 10. Click [OK]. The settings for the the encryption algorithm and digest algorithm supported by the user's e-mail software. which the valid period is checked. Operation mode Security Priority Performance Priority Description The validity period - Ricoh Aficio MP C5502 | User Guide - Page 591
[Configuration]. 3. Click [S/MIME] under "Security". 4. Select the Operation Mode. 5. Click [OK]. 6. Log out. • If the validity period of administrator's e-mail address. The error content can be viewed in the job log. When using S/MIME, be sure to enable the job log collection function. For details - Ricoh Aficio MP C5502 | User Guide - Page 592
drop-down box in "PDF Digital Signature" or "PDF/A Digital Signature" under "Certification". PDF Digital Signature: This can be attached to PDFs in formats other than PDF/A. PDF/A Digital Signature: This can be attached to PDFs in the PDF/A format. 5. Click [OK]. 6. "Updating..." appears. Wait for - Ricoh Aficio MP C5502 | User Guide - Page 593
exchange and encryption key manual settings. Using the auto configuration problems, disable IPsec in System Settings on the control panel, supported by Windows XP SP2 and Windows Server 2003/2003 R2. IPsec for both IPv4 and IPv6 is supported by Windows Vista/7, Windows Server 2008/2008 R2, Mac OS X 10 - Ricoh Aficio MP C5502 | User Guide - Page 594
Also, for further security, the SA can be periodically auto updated by applying a validity period (time limit) for its settings. This machine only supports IKEv1 for encryption key auto exchange. If you specify the encryption key manually, the SA settings must be shared and specified identically by - Ricoh Aficio MP C5502 | User Guide - Page 595
default setting Using either the manual or auto exchange method, you can configure four separate sets of SA details (such as different shared keys and IPsec algorithms). In the default to use "Encryption Key Manual Settings". The IPsec setting can also be made from the control panel. Encryption key - Ricoh Aficio MP C5502 | User Guide - Page 596
the transmission partner and prevent unauthorized packet tampering. Packet encryption helps prevent eavesdropping attacks. This level provides less security than " Encryption Security Policy Apply Apply Apply Encapsulation Mode Transport Transport Transport IPsec Requirement Level Use When - Ricoh Aficio MP C5502 | User Guide - Page 597
remote address must still be configured manually. After you specify a security level switches automatically to "User Setting". Setting Address Type Local Address Description Setting value Specify the address type for which IPsec transmission is used. • Inactive • IPv4 • IPv6 • IPv4/IPv6 (Default - Ricoh Aficio MP C5502 | User Guide - Page 598
an IPv6 address. Specify how IPsec is handled. • Apply • Bypass • Discard Specify the encapsulation mode. (auto setting) • Transport • Tunnel (Tunnel beginning address Tunnel ending address) Select the transport mode (this has no bearing on the security level). If you specify "Tunnel", you must - Ricoh Aficio MP C5502 | User Guide - Page 599
(using ASCII characters). If you are using "PSK", specify a PSK password using up to 32 ASCII characters. If you specify "Certificate", the AES-128-CBC • AES-192-CBC • AES-256-CBC Select the Diffie-Hellman group number used for IKE encryption key generation. (auto setting) •1 •2 • 14 Specify the - Ricoh Aficio MP C5502 | User Guide - Page 600
5. Enhanced Network Security Setting Phase 2 Security Protocol Phase 2 Authentication Algorithm Phase 2 Encryption Algorithm Permissions Phase 2 PFS Phase 2 Validity Period Description Setting value Specify the security protocol to be used in Phase 2. To apply both encryption and authentication - Ricoh Aficio MP C5502 | User Guide - Page 601
manual settings items Setting Address Type Local Address Remote Address Encapsulation Mode SPI (Output) Description Setting value Specify the address type for which IPsec transmission is used. • Inactive • IPv4 • IPv6 • IPv4/IPv6 (Default 's SPI input value. Any number between 256 and 4095 157 - Ricoh Aficio MP C5502 | User Guide - Page 602
SPI (Input) Security Protocol Authentication Algorithm Description Setting value Specify the same value as your transmission partner's SPI output value. Any number between 256 and 4095 To apply both encryption and authentication to sent data, specify "ESP" or "ESP+AH". To apply authentication - Ricoh Aficio MP C5502 | User Guide - Page 603
to the encryption algorithm. Hexadecimal value 0-9, a-f, A-F • If HMAC-MD5-96, set 32 digits • If HMAC-SHA1-96, set 40 digits • If HMAC-SHA256-128, set 64 digits • If HMAC-SHA384-192, set 96 digits • If HMAC-SHA512-256, set 128 digits ASCII • IF HMAC-MD5-96, set 16 characters • If HMAC - Ricoh Aficio MP C5502 | User Guide - Page 604
. hexadecimal value 0-9, a-f, A-F • DES, set 16 digits • 3DES, set 48 digits • AES-128, set 32 digits • AES-192, set 48 digits • AES-256, set 64 digits ASCII • DES, set 8 characters • 3DES, set 24 characters • AES-128, set 16 characters • AES-192, set 24 characters • AES-256, set 32 characters 160 - Ricoh Aficio MP C5502 | User Guide - Page 605
[Edit] under "Encryption Key Auto Exchange Settings". 5. Make encryption key auto exchange settings in [Settings 1]. If you want to make multiple settings, select the settings number and add settings. 6. Click [OK]. 7. Select [Active] for "IPsec" in "IPsec". 161 - Ricoh Aficio MP C5502 | User Guide - Page 606
you do not want to use IPsec for HTTPS transmission. 9. Click [OK]. 10. "Updating..." appears. Wait for about one or two minutes, and then click [OK]. 11 here uses Windows 7 when the "Authentication and Low Level Encryption" security level is selected. 1. On the [Start] menu, click [Control Panel], - Ricoh Aficio MP C5502 | User Guide - Page 607
Account Control" dialog default response rule" check box, and then click [Next]. 8. Select "Edit properties", and then click [Finish]. 9. In the "General" tab, click [Settings]. If you are using Windows XP, in the [General] tab, click [Advanced]. 10 number for the "Other" target protocol type. 163 - Ricoh Aficio MP C5502 | User Guide - Page 608
5. Enhanced Network Security 24. Click [Finish]. 25. Click [OK]. 26. Select the IP filter that was just created, and then click [Next]. 27. Click [Add]. Filter action wizard appears. 28. Click [Next]. 29. In [Name], enter an IP Filter action name, and then click [Next]. 30. Select "Negotiate - Ricoh Aficio MP C5502 | User Guide - Page 609
using PFS in Windows, the PFS group number used in phase 2 is automatically negotiated in phase 1 from the Diffie-Hellman group number (set in time to confirm that transmission has been established. Specifying Encryption Key Manual Settings 1. Log in as the network administrator from Web Image - Ricoh Aficio MP C5502 | User Guide - Page 610
number and add settings. 7. Click [OK]. 8. Select [Active] for "IPsec" in "IPsec". 9. Set "Exclude HTTPS Communication" to [Active] if you do not want to use IPsec for HTTPS communication. 10. Click [OK]. 11. "Updating The default user name for logging in to telnet is "admin". No password is - Ricoh Aficio MP C5502 | User Guide - Page 611
To display or specify the encryption key manual settings, use the "ipsec manual" command. Display current settings msh> ipsec manual {1|2|3|4|default} • To display the settings 1-4, specify the number [1-4]. • To display the default setting, specify [default]. • Not specifying any value displays all - Ricoh Aficio MP C5502 | User Guide - Page 612
the current setting. Encapsulation mode setting msh> ipsec manual {1|2|3|4|default} mode {transport|tunnel} • Enter the separate setting number [1-4] or [default] and specify the encapsulation mode. • To specify transport mode, enter [transport]. To specify tunnel mode, enter [tunnel]. • If you - Ricoh Aficio MP C5502 | User Guide - Page 613
numbers 2-64 digits long. • If you are setting an ASCII character string, enter it as is. If you have set the encryption algorithm to [null], enter an encryption key of arbitrary numbers msh> ipsec manual {1|2|3|4|default|all} clear • Enter the separate setting number [1-4] or [default] and reset - Ricoh Aficio MP C5502 | User Guide - Page 614
the current setting. Encapsulation mode setting msh> ipsec ike {1|2|3|4|default} mode {transport|tunnel} • Enter the separate setting number [1-4] or [default] and specify the encapsulation mode. • To specify transport mode, enter [transport]. To specify tunnel mode, enter [tunnel]. • If you - Ricoh Aficio MP C5502 | User Guide - Page 615
Configuring IPsec • Not specifying an encapsulation mode displays the current setting. Tunnel end point setting msh> ipsec ike {1|2|3|4|default} tunneladdr "beginning IP address" "ending IP address" • Enter the separate setting number [1-4] or [default] and specify the tunnel end point beginning and - Ricoh Aficio MP C5502 | User Guide - Page 616
} ph2 auth {hmac-md5|hmac-sha1|hmac-sha256|hmacsha384|hmac-sha512} • Enter the separate setting number [1-4] or [default] and specify the IPsec SA (phase 2) authentication algorithm. • Separate multiple encryption algorithm entries with a comma (,). The current setting values are displayed in order - Ricoh Aficio MP C5502 | User Guide - Page 617
Configuring IPsec Reset setting values msh> ipsec ike {1|2|3|4|default|all} clear • Enter the separate setting number [1-4] or [default] and reset the specified setting. Specifying [all] resets all of the settings, including default. 173 - Ricoh Aficio MP C5502 | User Guide - Page 618
Device Management], and then click [Configuration]. 3. Click [Site Certificate] under "Security". 4. Click [Browse] on the "Site Certificate to Import" window, and then select the CA certificate you obtained. 5. Click [Open]. 6. Click [Import]. 7. Check that the imported certificate's [Status] shows - Ricoh Aficio MP C5502 | User Guide - Page 619
box in "IEEE 802.1X" under "Certification". 5. Click [OK]. 6. "Updating..." appears. Wait for about one or two minutes, and then click [OK]. [Change] in "Password", and then enter the password set in the RADIUS server. EAP-TTLS • Click [Change] in "Password", and then enter the password set in the - Ricoh Aficio MP C5502 | User Guide - Page 620
". 10. Select [Active] in "Ethernet Security". 11. Click [OK]. 12. "Updating..." appears. Wait for about one or two minutes, and then click [OK]. 13. Log out. • If there is a problem with settings, you might not be able to communicate with the machine. To identify the problem, print a network - Ricoh Aficio MP C5502 | User Guide - Page 621
Server ID". • Select [On] or [Off] in "Permit Sub-domain". LEAP • Click [Change] in "Password", and then enter the password set in the RADIUS server. EAP-TTLS • Click [Change] in "Password", and then enter the password set in the RADIUS server. • Click [Change] in "Phase 2 User Name", and then enter - Ricoh Aficio MP C5502 | User Guide - Page 622
Method". 15. Click [OK]. 16. "Updating..." appears. Wait for about one or two minutes, and then click [OK]. 17. Log out. • If there is a problem with settings, you might not be able to communicate with the machine. To identify the problem, print a network summary. • If you cannot identify - Ricoh Aficio MP C5502 | User Guide - Page 623
and [Encryption Password] in [SNMP Authentication Information] in SmartDeviceMonitor for Admin, in addition to specifying [Permit SNMPv3 Communication] on the machine. For details about specifying [Encryption Password] in SmartDeviceMonitor for Admin, see SmartDeviceMonitor for Admin Help. 179 - Ricoh Aficio MP C5502 | User Guide - Page 624
5. Enhanced Network Security • If network administrator's [Encryption Password] setting is not specified, the data for transmission may not be encrypted or sent. For details about specifying the network administrator's [Encryption Password] setting, see p.18 "Registering and Changing Administrators - Ricoh Aficio MP C5502 | User Guide - Page 625
string used for encrypting the login passwords or document passwords that are sent from each kind of driver. To encrypt the login password, specify the driver encryption key on the machine and on the printer driver installed in the user's computer. Password for IPP Authentication To encrypt the - Ricoh Aficio MP C5502 | User Guide - Page 626
the printer driver, see the printer driver Help. • For details about specifying the encryption key on the LAN-FAX driver, see the LAN-FAX driver Help. • For details about specifying the encryption key on the TWAIN driver, see the TWAIN driver Help. Specifying an IPP Authentication Password Specify - Ricoh Aficio MP C5502 | User Guide - Page 627
the "User Name" box. 6. Enter the password in the "Password" box. 7. Click [OK]. IPP authentication is specified. 8. "Updating..." appears. Wait for about one or two minutes, and then click [OK]. 9. Log out. • When using the IPP port under Windows XP/Vista/7, Windows Server 2003/2003 R2/2008/2008 R2 - Ricoh Aficio MP C5502 | User Guide - Page 628
depending on the type of KDC server. Select the algorithm that suits your environment. KDC server Windows Server 2003 Active Directory Windows Server 2008 Windows Server 2008 R2 Heimdal Supported encryption algorithms • RC4-HMAC (ARCFOUR-HMAC-MD5) • AES256-CTS-HMAC-SHA1-96 • AES128-CTS-HMAC-SHA1 - Ricoh Aficio MP C5502 | User Guide - Page 629
to access stored scan files and files stored in Document Server. This can prevent activities such as printing or sending of passwords for stored files can be set. • Files can be stored by any user who is allowed to use Document Server, copy function, scanner function, fax function or printer - Ricoh Aficio MP C5502 | User Guide - Page 630
6. Preventing the Leaking of Documents • The default access permission for the file creator (owner) is " (owner) logs in from the control panel. 2. Press the [User Tools/Counter] key to switch to the normal screen. 3. Press the [Home] key on the top left of the control panel, and press the [Document - Ricoh Aficio MP C5502 | User Guide - Page 631
4. Select the file. Configuring Access Permissions for Stored Files 5. Press [Change File Info.]. 6. Press [Change Access Priv.]. 187 - Ricoh Aficio MP C5502 | User Guide - Page 632
6. Preventing the Leaking of Documents 7. Press [Program/Change/Delete]. 8. Press [New Program]. 9. Select the users or groups to whom you want to assign access permission. You can select more than one user. By pressing [All Users], you can select all the users. 10. Press [Exit]. 188 - Ricoh Aficio MP C5502 | User Guide - Page 633
Monitor. For details, see Web Image Monitor Help. • The "Edit", "Edit / Delete", and "Full Control" access permissions allow a user to perform high the control panel. 2. Press the [User Tools/Counter] key to switch to the normal screen. 3. Press the [Home] key on the top left of the control panel, - Ricoh Aficio MP C5502 | User Guide - Page 634
6. Preventing the Leaking of Documents 10. Press [OK] twice. 11. Log out. Configuring Access Permission the files in question. 1. The user administrator or the file creator (owner) logs in from the control panel. 2. Press [Address Book Mangmnt]. 3. Select the user. 4. Press [Protection]. 5. Under " - Ricoh Aficio MP C5502 | User Guide - Page 635
to whom you want to assign access permission, and then select the permission. Select the access permission from [Read-only], [Edit], [Edit / Delete], or [Full Control]. 10. Press [Exit]. 11. Press [OK]. 12. Press [Exit]. 13. Log out. • The "Edit", "Edit / Delete", and "Full - Ricoh Aficio MP C5502 | User Guide - Page 636
the Leaking of Documents Specifying Passwords for Stored Files This can be specified by the file administrator or file creator (owner). 1. The file administrator or the file creator (owner) logs in from the control panel. 2. Press the [User Tools/Counter] key to switch to the normal screen. 3. Press - Ricoh Aficio MP C5502 | User Guide - Page 637
6. Press [Change Password]. Specifying Passwords for Stored Files 7. Enter the password using the number keys. You can use 4 to 8 numbers as the password for the stored file. 8. Press [OK]. 9. Confirm the password by re-entering it using the number keys. 10. Press [OK]. The icon appears next to a - Ricoh Aficio MP C5502 | User Guide - Page 638
6. Preventing the Leaking of Documents 5. Press [Change File Info.]. 6. Press [Unlock Files]. 7. Press [Yes]. The icon changes to the icon. 8. Press [OK]. 9. Log out. 194 - Ricoh Aficio MP C5502 | User Guide - Page 639
user. For details on how to specify settings on the printer driver, see "Printing Documents that are not Allowed to Duplicate", Print. 3. Set the data security for copying function to appear gray when documents with the function are copied, scanned, or stored on the machine. The settings must be - Ricoh Aficio MP C5502 | User Guide - Page 640
user can specify the pattern to be printed using the printer driver. • [Driver / Command] Specifies all the content of the pattern to be printed using the printer driver. • [Driver/Command (Most Settgs)] Specifies the settings other than pattern type, color and density using the printer driver. 196 - Ricoh Aficio MP C5502 | User Guide - Page 641
Unauthorized Copy Prevention / Data Security for Copying • [Machine Setting(s)] The pattern cannot be specified using the printer driver. The pattern specified using the machine is printed. 8. Press [OK]. 9. Log out. • For details of the settings when specifying the pattern using the machine, see " - Ricoh Aficio MP C5502 | User Guide - Page 642
who outputs it (name or login user name), machine number or IP address of the machine can be forced to be printed on paper. This function is called Compulsory Security Stamp. Always printing out information on the person who outputs a job has the effect of suppressing leaks of information. It can - Ricoh Aficio MP C5502 | User Guide - Page 643
is printed. If "Stamp Login User Name" is selected, the "Login User Name" in the "Auth. Info" in the Address Book is printed. When user authentication is not set up, or when User Code authentication is not set up, the name of the person who outputs a job is not printed. • Machine ID The same number - Ricoh Aficio MP C5502 | User Guide - Page 644
6. Preventing the Leaking of Documents 8. Set the stamp position. 9. Press [OK] twice. 10. Log out. 200 - Ricoh Aficio MP C5502 | User Guide - Page 645
The file administrator or the file creator (owner) logs in from the control panel. 2. Press the [User Tools/Counter] key to switch to the normal screen. 3. Press the [Home] key on the top left of the control panel, and press the [Printer] icon on the [Home] screen. CJS049 4. Press [Print Jobs]. 201 - Ricoh Aficio MP C5502 | User Guide - Page 646
the Leaking of Documents 5. Press [Locked Print Job]. 6. Select the file. 7. Press [Delete]. 8. Enter the password of the Locked Print file, and then press [OK]. The password entry screen does not appear if the file administrator is logged in. 9. Press [Yes]. 10. Log out. • You can configure this - Ricoh Aficio MP C5502 | User Guide - Page 647
the control panel. 2. Press the [User Tools/Counter] key to switch to the normal screen. 3. Press the [Home] key on the top left of the control panel, and press the [Printer] icon on the [Home] screen. 4. Press [Print Jobs]. 5. Press [Locked Print Job]. 6. Select the file. 7. Press [Change Password - Ricoh Aficio MP C5502 | User Guide - Page 648
panel. 2. Press the [User Tools/Counter] key to switch to the normal screen. 3. Press the [Home] key on the top left of the control panel, and press the [Printer] icon on the [Home] screen. 4. Press [Print Jobs]. 5. Press [Locked Print Job]. 6. Select the file. The icon appears next to a file - Ricoh Aficio MP C5502 | User Guide - Page 649
7. Press [Unlock File]. Managing Locked Print Files 8. Press [Yes]. The icon disappears. 9. Log out. • This can also be specified via Web Image Monitor. For details, see Web Image Monitor Help. 205 - Ricoh Aficio MP C5502 | User Guide - Page 650
due to users failing to collect prints or leaving prints unattended. With respect to printer output, the following print jobs are subject to compulsory storage. • Normal Print • Sample Print • Store and Print 1. The machine administrator logs in from the control panel. 2. Press [Printer Features - Ricoh Aficio MP C5502 | User Guide - Page 651
this machine: the job log, access log, and eco-friendly log. • Job Log Stores details of user file-related operations such as copying, printing, and saving in Document Server, and control panel operations such as sending and receiving faxes, sending scan files and printing reports (the configuration - Ricoh Aficio MP C5502 | User Guide - Page 652
transfer log setting, see the log collection server manual. 1. The machine administrator logs in from the control panel. 2. Press [System Settings]. 3. Press via Web Image Monitor if the collection setting of one of the logs - job log, access log or eco-friendly log is enabled. Managing Logs from the - Ricoh Aficio MP C5502 | User Guide - Page 653
download log files. Specifying log collect settings Enable the collection settings for each kind of log and configure the collection level. Job are changed, the level changes to [User Settings]. 6. Click [OK]. 7. The "Updating..." screen is displayed. Wait for one or two minutes, and then click [OK]. - Ricoh Aficio MP C5502 | User Guide - Page 654
[OK]. A confirmation message appears. 6. Click [OK]. 7. Log out. • To encrypt the logs, it is necessary to make the collection setting active for each of the job logs, access logs, and/or eco-friendly log. • If the data stored in the machine has been encrypted, the log files will still be encrypted - Ricoh Aficio MP C5502 | User Guide - Page 655
the [Download] button is clicked will not be downloaded. The "Result" field of the log entry for uncompleted jobs will be blank. • Download time may vary depending on the number of logs. • If an error occurs while the CSV file is downloading or being created, the download is canceled and details - Ricoh Aficio MP C5502 | User Guide - Page 656
entries, as logs that are in the process of downloading cannot be updated with new entries. • Batch deletion of logs can be performed from the control panel or through Web Image Monitor. Notes on operation when the number of log entries reaches maximum If the number of logs that can be stored on the - Ricoh Aficio MP C5502 | User Guide - Page 657
Managing Log Files The job log and access log are downloaded as one file. "If logs are downloaded without overwriting" below indicates that the job log and access log are mixed after download. "If logs are downloaded during overwriting" below indicates that part of the access log is overwritten. In - Ricoh Aficio MP C5502 | User Guide - Page 658
completed. • If overwriting did occur, the last line will contain the following message: Download completed. A part of the logs before Log ID xxxx does not exist any more. • Examine logs following "Log ID xxxx". Printer Job Logs Print Log entries are made before the login entry is made in the Access - Ricoh Aficio MP C5502 | User Guide - Page 659
the Access Log. 8. Information about the processing of the print job is recorded as an entry in the Job Log (using the same ID). 9. Information about the outputting of the print job is recorded as an entry in the Job Log (using the same ID). 10. Authentication (logout) data is recorded as an entry - Ricoh Aficio MP C5502 | User Guide - Page 660
of files stored in Document Server and downloaded using Web Image Monitor or DeskTopBinder. Stored File Printing Stored File Printing Details of files printed using the Document Server screen. Scanner: Sending Scanner: Sending Details of sent scan files. Scanner: URL Link Sending and Storing - Ricoh Aficio MP C5502 | User Guide - Page 661
: Sample Print Printer: Hold Print (Incomplete) Printer: Hold Print Printer: Stored Print Printer: Store and Normal Print Printer: Stored File Printing Printer: Document Server Sending Report Printing Content Details of stored scan files whose URLs were sent by e-mail. Details of normal print jobs - Ricoh Aficio MP C5502 | User Guide - Page 662
mailing Details of job results printed from the control panel or notified by e-mail. Scanner: TWAIN Driver Scanning Scanner: TWAIN Driver Scanning Details of stored scan files that were sent using Network TWAIN Scanner. Printer: Hold Print File Printing Printer: Hold Print File Printing When - Ricoh Aficio MP C5502 | User Guide - Page 663
of changes to job log collection levels, access log collection levels, and types of log collected. Log of encrypted transmissions between the utility, Web Image Monitor or outside devices. Details of failed access attempts. Details of lockout activation. Details of firmware updates. Details of - Ricoh Aficio MP C5502 | User Guide - Page 664
the stored files. Password Change Password Change Details of changes made to the login password. Administrator Change Administrator Enhanced Print Volume Use Limitation: Tracking Permission Result Enhanced Print Volume Use Limitation: Tracking Permission Result Log of when a tracking error - Ricoh Aficio MP C5502 | User Guide - Page 665
Log Item Log Type Attribute Main Power On Main Power On Main Power Off Main Power Off Power Status Transition Result Job Related Information Paper Usage Power Status Transition Result Job Related Information Paper Usage Content Log of when the main power switch is turned on. Log of when - Ricoh Aficio MP C5502 | User Guide - Page 666
order according to Log ID. File structure The data title is printed in the first line (header line) of the file. Differences in log data formatting • Job log Multiple lines appear in the order of All, Source (job input data), and Target (job output data). The same log ID is assigned to all lines - Ricoh Aficio MP C5502 | User Guide - Page 667
". This is Item 3 of the CSV file. Indicates the result of an operation or event: • If "Succeeded" is displayed for a job log entry, the operation completed successfully; "Failed" indicates the operation was unsuccessful. If the operation is still in progress, this will be blank. • If "Succeeded" is - Ricoh Aficio MP C5502 | User Guide - Page 668
Mismatch", "User Not Programmed", "Other Failures", "User Locked Out", "File Password Mismatch", "No Privileges", "Failed to Access File", "File Limit Exceeded", "Transfer Cancelled", "Power Failure", "Lost File", "Functional Problem", "Communication Failure", or "Communication Result Unknown". 224 - Ricoh Aficio MP C5502 | User Guide - Page 669
Storage Device Full" is recorded. If an abnormality is found in the external media, "Memory Storage Device Error" is recorded. If encryption fails, "Encryption Failed" is recorded. If decoding fails, "Decoding Failed" is recorded. If there are no common keys, "Common Key Not Exist" is recorded. If - Ricoh Aficio MP C5502 | User Guide - Page 670
during output, "Output Failure" is recorded. For the reason it failed, refer to the output information (Target) noted below it. If an error is detected prior to execution of a job, "Other Error" is recorded. If power is lost, "Power Failure" is recorded. If the accounting device is unplugged during - Ricoh Aficio MP C5502 | User Guide - Page 671
the number of Print Data Error" is recorded. If the wrong type of driver is used, a network malfunction occurs, a job is cancelled by the PC fax driver or a fax communication failure occurs, "Data Transfer Interrupted" is recorded. If any other error occurs, "Other Error" is recorded. If a fax fails - Ricoh Aficio MP C5502 | User Guide - Page 672
. If the wrong type of driver is used, a network malfunction occurs, a job is cancelled by the PC fax driver or a fax communication failure occurs, "Data Transfer Interrupted" is recorded. If an attempt to use a PDL or port not installed on the machine is made, "Print Data Error" is recorded. If the - Ricoh Aficio MP C5502 | User Guide - Page 673
. If the logged in user exceeds their paper usage limit, "Exceeded Print Volume Use Limitation" is recorded. If a time-out occurs, "Timeout size that cannot be stored, "Unavailable Size to Store" is recorded. If the number of pages that can be captured is exceeded, "Exceed Max. Stored Page (Image - Ricoh Aficio MP C5502 | User Guide - Page 674
Failed with Memory Full" is recorded. If the memory range for processing data becomes full, "Memory Full" is recorded. If the wrong type of driver is used, a network malfunction occurs, a job is cancelled by the PC fax driver is recorded. If any other error occurs, "Other Error" is recorded. If there - Ricoh Aficio MP C5502 | User Guide - Page 675
Print, Locked Print, and Stored Print jobs (such as when the [Auto Delete Temporary Print Jobs] setting is enabled), and operations related to changing the access permissions of such jobs. Displays Address Book updates when Auto registration of users is enabled through Windows and scanning) and - Ricoh Aficio MP C5502 | User Guide - Page 676
File Sending", "Printer: Stored File Printing", and "Fax: Stored File Downloading" (Job logs) and "File Storing" and "Stored File Deletion" (Access logs). Access log information items Item Access Log Type Authentication Server Name No. of Authentication Server Switches Logout Mode Login Method - Ricoh Aficio MP C5502 | User Guide - Page 677
was a registered supervisor. "Custom Engineer (Service Mode)" indicates the logged in user was a whom the following settings are applied: • Lockout • Password Change Target User Code/User Name User code or user number of the user who performs the operation is recorded. Address Book Operation Mode - Ricoh Aficio MP C5502 | User Guide - Page 678
File ID Stored File Name File Location Collect Job Logs Content The mode of operation access. "Lockout" indicates activation of password lockout; "Release" indicates deactivation of password lockout. "Manual" is recorded if the machine is unlocked manually. "Auto" is recorded if the machine is - Ricoh Aficio MP C5502 | User Guide - Page 679
made to the log encryption setting. If a log's collection level setting has been changed, this function indicates details of the change: "Job Log" indicates the job log's collection level has been changed. "Access Log" indicates the access log's collection level has been changed. "Eco-friendly Log - Ricoh Aficio MP C5502 | User Guide - Page 680
UDP; "Unknown" indicates the destination's protocol could not be identified. Destination IP address. Destination port number. This is in decimal. Destination MAC (physical) address. Indicates the primary communication protocol. Indicates the secondary communication protocol. Indicates the protocol - Ricoh Aficio MP C5502 | User Guide - Page 681
either "Password Entry Violation" or "Device Access Violation". Network Attack Type Details Indicates details about the type of network attack: "Authentication Error" or "Encryption Error". Network Attack Route Identifies the route of the network attack as either "Attack from Control Panel" or - Ricoh Aficio MP C5502 | User Guide - Page 682
Number Firmware module part number. Version Firmware update was finished. Machine Data Encryption Key Type Identifies the type of the encryption key as "Encryption Key for Hard Disk", "Encryption Key for NVRAM", or "Device Certificate". Validity Error that tracking information failed to be sent - Ricoh Aficio MP C5502 | User Guide - Page 683
"Scan File" indicates the job file was scanned in; "Stored File" indicates the job file was stored on the hard disk; "Printer" indicates the job file was sent from the printer driver; "Received File" indicates the job file was received over the network; "Report" indicates the job file was a printed - Ricoh Aficio MP C5502 | User Guide - Page 684
ON, Power OFF, Status of Power, Job Information or Consumption of Paper is recorded. Whether the event has ended or not is displayed. When the event ends normally, "Completed" is recorded. When the event does not end normally, "Failed" is recorded. The result of the event is recorded. When the event - Ricoh Aficio MP C5502 | User Guide - Page 685
. When the controller is stopped, "Controller Off" is recorded. When in the STR state (Suspend to RAM), "STR" is recorded. When in a silent print state, "Night Print" is recorded. When in a low-noise print state, "Low Print" is recorded. The elapsed time from the start of the previous job until the - Ricoh Aficio MP C5502 | User Guide - Page 686
2. Auto Logout Timer(seconds) Description 1. Whether the lockout is active (Active) or inactive (Inactive) is recorded. 2. The number of times a user may enter a login password is recorded. 3. Whether the lockout release timer is active (Active) or inactive (Inactive) is recorded. 4. The time until - Ricoh Aficio MP C5502 | User Guide - Page 687
Mode 2. Certificate No. 3. Certificate No. (XXX) (XXX) is replaced by one of the following: • SSL/TLS • IEEE 802.1X • S/MIME • IPsec • PDF Digital Signature • PDF Certificate" is recorded. 2. The number of the certificate to be used is recorded. 3. The number of the certificate for applications is - Ricoh Aficio MP C5502 | User Guide - Page 688
Managing the Machine Category IPsec Compulsory Security Stamp Attribute Description 1. IPsec 2. Encryption Key Auto Exchange / Encryption Key Manual Exchange: Setting1-4: Remote Address 3. Encryption Key Auto Exchange: Setting1-4, Default: Security Level 4. Encryption Key Auto Exchange: Setting1 - Ricoh Aficio MP C5502 | User Guide - Page 689
4. When Sending E-mail by Fax 5. When E-mailing TX Results by Fax 6. When Transferring Files Stored in Document Server (Utility) Description 1. The mode of operation is recorded. 2. The signature is recorded when the scanner is used for sending e-mail. 3. The signature is recorded when transferring - Ricoh Aficio MP C5502 | User Guide - Page 690
7. Managing the Machine Customizing the Control Panel Configurations of settings such as a user logs in, their personalized home screen is displayed. 1. The machine administrator logs in from the control panel. 2. Press [System Settings]. 3. Press [Administrator Tools]. 4. Press [ Next] four times. - Ricoh Aficio MP C5502 | User Guide - Page 691
Customizing the Control Panel • The home information for each user is maintained even when home screen is created for that user. At that time, their user's own home screen is configured with the default settings (arrangement of icons). • If Menu Protect is set to either [Level 1] or [Level 2], the - Ricoh Aficio MP C5502 | User Guide - Page 692
Monitor Help. If [Site Certificate Check] is disabled and the user accesses an untrusted Web site, a warning message may appear. If this is the case, the connected Web site may have a security problem. In such a case, the machine administrator must refer to p.251 "Troubleshooting", and then instruct - Ricoh Aficio MP C5502 | User Guide - Page 693
to enable cache files. When using cache files, specify a size within a range between 1024 and 10240 KB. To clear cache files, press [Clear Caches]. Default: [Do not use] Keep the History by User Specify whether or not to keep the history. When keeping the history, specify a duration between 1 and - Ricoh Aficio MP C5502 | User Guide - Page 694
When using a proxy server, specify "Proxy Server Name", "Proxy Port", "Proxy User Name", "Proxy Password", and "Exception Addresses". Default: [Off] User Agent Specify the user agent. Enter the user agent's name using the keyboard. Default HTTP Request Method Specify the type of HTTP request method - Ricoh Aficio MP C5502 | User Guide - Page 695
to enable the size of the window displayed on the control panel. Default: [Allow] Checking the Usage Status of the Browser Functions The following logs can be used to check how the browser functions has been used. • View Send Log • View Download Log • View Print Log 1. The machine administrator logs - Ricoh Aficio MP C5502 | User Guide - Page 696
7. Managing the Machine • "This site has a security problem. Verification of the server to connect to cannot be performed." • "This site has a security problem. The http subcontents are included in the https site."*1 *1 The connected Web site contains non-encrypted data. 252 - Ricoh Aficio MP C5502 | User Guide - Page 697
Copier) • Program (Scanner) • Web Image Monitor Setting • Web Service Settings • System Settings Data that cannot be imported or exported • Address book • Programs (fax function) • Programs (printer function) • Scanner function programs that include password settings • User stamp in the copy default - Ricoh Aficio MP C5502 | User Guide - Page 698
card into the media slot on the side of the control panel. 2. Log in from the control panel as an administrator with all privileges. 3. Press [ Unique Information". "Device Unique Information" includes the IP address, host name, fax number, etc. • Select [On] or [Off] for "Encryption". If [On] - Ricoh Aficio MP C5502 | User Guide - Page 699
Help. • If data export fails, the details of the error can be viewed in the log. Importing Device Information Import device information saved on an SD card. 1. Insert an SD card into the media slot on the side of the control panel. 2. Log in from the control - Ricoh Aficio MP C5502 | User Guide - Page 700
number, etc. • Specify the encryption key if the settings file was encrypted during export. 8. Press [Run Import]. 9. Press [OK]. 10. Press [Exit]. The machine restarts. • If importing failed or if some of the device information was not imported, the content of the logs can be printed. Periodically - Ricoh Aficio MP C5502 | User Guide - Page 701
whether or not to send e-mail notification to the machine administrator when importing fails. 7. Press [OK]. 8. Log out. • This can also be configured from Web Image Monitor. For details, see Web Image Monitor Help. • When the managing device sever is used, more detailed import settings can be - Ricoh Aficio MP C5502 | User Guide - Page 702
of the device information was not imported, the content of the logs can be printed. Printing Log Files The logs can be printed when either exporting or importing fails. 1. Log in from the control panel as an administrator with all privileges. 2. Press [System Settings]. 3. Press [Administrator Tools - Ricoh Aficio MP C5502 | User Guide - Page 703
color, two-sided and multi-page printing to the total number of output pages. How much toner and paper are being saved is indicated by the eco-friendly index. • When Basic, Windows logs in from the control panel. 2. Press [ is collected for the number of days specified. Default: [Do not Count - Ricoh Aficio MP C5502 | User Guide - Page 704
Time Set up the timing for displaying information. Default: [Every Time Login] Clearing a Machine's Eco-friendly Counter A machine's eco-friendly counter can be cleared. 1. The machine administrator logs in from the control panel. 2. Press [System Settings]. 3. Press [Administrator Tools]. 4. Press - Ricoh Aficio MP C5502 | User Guide - Page 705
Managing Eco-friendly Counter • The eco-friendly counter for all users is cleared. The eco-friendly counter for individual users cannot be cleared. 261 - Ricoh Aficio MP C5502 | User Guide - Page 706
transmitted data and data in the Address Book. 1. Log in from the control panel as an administrator with privileges. 2. Press [System Settings]. 3. for encrypting the login passwords or document passwords that are sent from each kind of driver. To specify the driver encryption key, register the - Ricoh Aficio MP C5502 | User Guide - Page 707
AES are accepted. If [AES] is specified, jobs encrypted with AES are accepted. If you select [AES] or [DES], specify the encryption settings using the printer driver. For details about specifying the printer driver, see the printer driver Help. Default: [Simple Encryption] Restrict Display of User - Ricoh Aficio MP C5502 | User Guide - Page 708
Use of Destinations (Scanner)" is set to [On], you can register fax numbers only. If you specify the setting to receive e-mails via SMTP, you registered as destination can change their password. Only the user administrator can change items other than the password. Default: [Off] Transfer to Fax - Ricoh Aficio MP C5502 | User Guide - Page 709
on to the machine, you cannot cancel a copy or print job that is being processed if you are not privileged to use the copy and printer functions. You can specify "Authenticate Current Job" only if "User Authentication Management" was specified. Default: [Off] @Remote Service This can be specified by - Ricoh Aficio MP C5502 | User Guide - Page 710
next time administrator authentication is specified, the setting will return to the default, [Do not Prohibit]. If you select [Do not Prohibit], firmware structure change detection is disabled. Default: [Do not Prohibit] Password Policy This can be specified by the user administrator. This setting - Ricoh Aficio MP C5502 | User Guide - Page 711
access are cleared. Use the number keys to enter the number between "10" and "30", and then press [ ]. Default: [10] • Authentication Delay Time Specify the setting values. Password Entry Violation This can be specified by the machine administrator. If the number of authentication requests exceeds - Ricoh Aficio MP C5502 | User Guide - Page 712
authentication attempts. When the measurement time is over, the logged counts of failed authentication attempts are cleared. Use the number keys to enter the time between "1" and "10", and then press [ ]. Default: [5] • Depending on the values of the settings for [Max. Allowed No. of Access] and - Ricoh Aficio MP C5502 | User Guide - Page 713
Specifying the Extended Security Functions Specify the monitoring interval of "Managed User Host Limit" and "Password Entry Host Limit". Use the number keys to enter the time between "1" and "10", and then press [ ]. Default: [3] • Off Default: [Off] 269 - Ricoh Aficio MP C5502 | User Guide - Page 714
setting "Switch 04, Bit No. 4" and "Switch 04, Bit No. 5" in [Parameter Setting], under [Initial Settings]. Making this setting helps prevent names and passwords. Only authorized users can manage fax files stored on the hard disk. For details, see "Facsimile Features", Fax. Printing the Journal - Ricoh Aficio MP C5502 | User Guide - Page 715
Scanner (Pull Type)", Scan. System Status Pressing the [Check Status] key on the control panel allows you to Firmware Validity When the machine starts up, this function verifies the validity of its firmware. If an error occurs during the verification, a verification error is displayed on the control - Ricoh Aficio MP C5502 | User Guide - Page 716
Service Mode Lock This can be specified by the machine administrator. Service mode is used by a service representative for inspection or repair. If you set "Service Mode Lock" to [On], service mode cannot be used unless the machine administrator logs on to the machine and cancels the service mode - Ricoh Aficio MP C5502 | User Guide - Page 717
7. Press [Yes]. 8. Log out. Limiting Machine Operations to Customers Only 273 - Ricoh Aficio MP C5502 | User Guide - Page 718
's security. Settings You Can Configure Using the Control Panel Use the control panel to configure the security settings shown in the time. See p.72 "Auto Logout". Select [Basic Auth.], and then set "Printer Job Authentication" to [Entire]. See p.37 "Basic Authentication". Select [On], and then - Ricoh Aficio MP C5502 | User Guide - Page 719
Functions". Network Security Level Level 2 To acquire the machine status through printer driver or Web Image Monitor, set "SNMP" to Active on Web Image Monitor. See p.126 "Specifying Network Security Level". Service Mode Lock On See p.272 "Limiting Machine Operations to Customers Only". Machine - Ricoh Aficio MP C5502 | User Guide - Page 720
. Category Device Settings Logs Device Settings Logs Security User Lockout Policy Security User Lockout Policy Item Collect Job Logs Active Setting Collect Access Logs Active Lockout Number of Attempts before Lockout Active For details, see p.70 "User Lockout Function". 5 times or less. For - Ricoh Aficio MP C5502 | User Guide - Page 721
setting, set "Network Security Level" to [Level 2] on the control panel. "Encryption Algorithm": AES-128 bit, AES-256 bit, or 3DES-168 bit You must register the user certificate in order to use S/MIME which IPsec is enabled is encrypted. If your network supports IPsec, we recommend you enable it. 277 - Ricoh Aficio MP C5502 | User Guide - Page 722
settings Category Security IPsec Security IPsec Item Encryption Key Manual Settings Encryption Key Auto Exchange Settings Security Level to enhance the security of the data traveling on your network. Control panel settings System Settings Tab Item Setting Interface Settings IPsec Inactive - Ricoh Aficio MP C5502 | User Guide - Page 723
Printing Files Directly from Windows", Connecting the Machine/ System Settings. For details about IPP settings, see "Installing the Printer Driver for the Selected Port", Driver Installation Guide send, and download scanned files. • S/MIME authentication function When sending scanned files attached - Ricoh Aficio MP C5502 | User Guide - Page 724
7. Managing the Machine 280 - Ricoh Aficio MP C5502 | User Guide - Page 725
8. Troubleshooting This chapter describes what to do if the machine does not function properly. If Authentication Fails This section explains what to do if a user cannot operate the machine because of a problem related to user authentication. Refer to this section if a user comes to you with such a - Ricoh Aficio MP C5502 | User Guide - Page 726
password. See the error codes below for possible solutions: B, W, L, I 0104-000 B, W, L, I 0206-003 W, L, I 0406-003 Authentication failed because no more users can be registered. (The number LAN administrator. If an error code appears, follow the instructions next to the error code in the table - Ricoh Aficio MP C5502 | User Guide - Page 727
failed." appears with an error code. The following lists explain the different methods for resolving each error code. If the error code that appears is not on this table, write down the error code and contact your service representative. Error code display position 1 CJD014 1. Error code An error - Ricoh Aficio MP C5502 | User Guide - Page 728
other user is logged on to the machine, and then try again. Failed to decrypt password. 1. A password error occurred. Make sure the password is entered correctly. 2. Either [DES] or [AES] is selected for "Driver Encryption Key: Encryption Strength". The administrator has restricted use of simple - Ricoh Aficio MP C5502 | User Guide - Page 729
maximum number of failed authentication attempts allowed. Ask the user administrator to unlock the account. Windows authentication Error Code Failed to encrypt password. 1. A password error occurred. Make sure the password is entered correctly. 2. Either [DES] or [AES] is selected for "Driver - Ricoh Aficio MP C5502 | User Guide - Page 730
because of the high number of authentication attempts. Wait . Kerberos authentication failed because the server password error occurred. Make sure that the user is registered on the server. Use a registered login user name and password. 3. A domain name error occurred. Make sure that the Windows - Ricoh Aficio MP C5502 | User Guide - Page 731
If Authentication Fails Error Code W0406-104 W0406-104 Cause Solution 4. Cannot resolve the domain name. Specify was unsuccessful: 1. Make sure that Restrict LM/NTLM is not set in either "Domain Controller Security Policy" or "Domain Security Policy". 2. Make sure that the ports for the domain - Ricoh Aficio MP C5502 | User Guide - Page 732
8. Troubleshooting Error Code W0406-104 Cause Solution 4. Cannot resolve the domain name. Under Windows 7, if the Windows firewall is activated, create a firewall rule in the "Advanced settings" on the "System and security" control panel, and then authorize ports 137 and 139. Under Windows XP, - Ricoh Aficio MP C5502 | User Guide - Page 733
Fails Error Code W0406-104 W0400-105 Cause 5. Kerberos authentication failed. fail if automatic retrieval for KDC fails. Ask your service representative to make sure the KDC retrieval settings are set to "automatic retrieval". If automatic retrieval is not functioning properly, switch to manual - Ricoh Aficio MP C5502 | User Guide - Page 734
Troubleshooting Error the machine and the group name on the DC (domain controller) are exactly the same. The DC is case sensitive. name in "Interface Settings". Due to the high number of authentication attempts, all resources are busy. Wait fails in a parent/subdomain environment. Use UserPrincipleName - Ricoh Aficio MP C5502 | User Guide - Page 735
", "admin", "supervisor" or "HIDE*" in general user accounts. Authentication failed because no more users can be registered. (The number of users . Wait a few minutes and then try again. LDAP authentication Error Code L0103-000 Cause A TWAIN operation occurred during authentication. Solution - Ricoh Aficio MP C5502 | User Guide - Page 736
8. Troubleshooting Error Code L0104-000 L0105-000 L0206-002 L0206-003 L0207-001 L0306-018 Cause Solution Failed to encrypt password. 1. A password error occurred. Make sure the password is entered correctly. 2. Either [DES] or [AES] is selected for "Driver Encryption Key: Encryption Strength". - Ricoh Aficio MP C5502 | User Guide - Page 737
Authentication Fails Error Code L0307-001 L0406-200 L0406-201 L0406-202 L0406-203 Cause Solution An authentication error occurred because the Address Book is being used at another location. Wait a few minutes and then try again. Authentication cannot be completed because of the high number of - Ricoh Aficio MP C5502 | User Guide - Page 738
blank in simple authentication mode. To allow blank passwords, contact your service representative. 2. In simple authentication mode, the DN of the login user name is obtained in the user account. Authentication fails if the DN cannot be obtained. Make sure there are no errors in the server name - Ricoh Aficio MP C5502 | User Guide - Page 739
Cause Kerberos authentication failed. Failed to obtain user information in LDAP search. An authentication error occurred because the name, and supporting domain name are specified correctly. 2. The KDC and machine timing do not match. Authentication will fail if the service representative. 295 - Ricoh Aficio MP C5502 | User Guide - Page 740
8. Troubleshooting Error Code L0511-000 L0607-001 L606-004 L0612-005 L0707-001 general users. Do not use "other", "admin", "supervisor" or "HIDE*" in general user accounts. Authentication failed because no more users can be registered. (The number of users registered in the Address Book has - Ricoh Aficio MP C5502 | User Guide - Page 741
-000 I0105-000 I0206-002 I0206-003 I0207-001 Cause Solution Failed to decrypt password. 1. A password error occurred. Make sure the password is entered correctly. 2. Either [DES] or [AES] is selected for "Driver Encryption Key: Encryption Strength". The administrator has restricted use of simple - Ricoh Aficio MP C5502 | User Guide - Page 742
error occurred. 1. Make sure the login user name and password are entered correctly. 2. Make sure that a usable login name is registered on the machine. Authentication will fail situation does not return to normal, contact your service representative. The authentication server login name is the - Ricoh Aficio MP C5502 | User Guide - Page 743
users are operating the machine, provide the instructions on how to deal with them. Condition Cause Solution Cannot perform the following: • Print with the printer driver • Connect with the TWAIN driver • Send or print with the LANFax driver User authentication has been rejected. Confirm the - Ricoh Aficio MP C5502 | User Guide - Page 744
8. Troubleshooting Condition Cause Solution Cannot connect with the TWAIN driver. The SNMPv3 account, password, and encryption algorithm do not match settings specified on this machine. Specify the account, password and the encryption algorithm of SNMPv3 registered in the machine using network - Ricoh Aficio MP C5502 | User Guide - Page 745
Fails Condition Cause Solution Cannot access the machine using ScanRouter EX Professional V3 / ScanRouter EX Enterprise V2. "Driver Encryption software. The ScanRouter delivery software may not be supported by the machine. Update to the latest version of the ScanRouter delivery software - Ricoh Aficio MP C5502 | User Guide - Page 746
8. Troubleshooting Condition Cause Cannot send e-mail from the scanner. Similarly: • Cannot select an or is invalid. • The validity period of the device certificate (PDF with digital signature) has expired. • The device certificate (PDF with digital signature) does not exist or is invalid. • The - Ricoh Aficio MP C5502 | User Guide - Page 747
If Authentication Fails Condition Cause Cannot transfer faxed documents. Similarly: • Cannot select an or is invalid. • The validity period of the device certificate (PDF with digital signature) has expired. • The device certificate (PDF with digital signature) does not exist or is invalid. • - Ricoh Aficio MP C5502 | User Guide - Page 748
p.97 "Protecting the Address Book". Cannot print when user authentication has been enabled. User authentication may not be specified in the printer driver. Specify user authentication in the printer driver. For details, see the printer driver Help. [Finish Job and Limit] is selected in "Machine - Ricoh Aficio MP C5502 | User Guide - Page 749
9. Checking Operation Privileges This chapter specifies a list of the administrator and user operation privileges for the machine settings when administrator authentication or user authentication is enabled. List of Operation Privileges for Settings Understanding headers • User The user - Ricoh Aficio MP C5502 | User Guide - Page 750
9. Checking Operation Privileges • When [Menu Protect] is set to [Off], users can execute, change and read all of the settings of each function. 306 - Ricoh Aficio MP C5502 | User Guide - Page 751
Beeper Copy Count Display Function Priority Function Key Allocation Screen Colour Setting Print Priority Function Reset Timer Output: Copier Output: Document Server Output: Facsimile Output: Printer Key Repeat System Status/Job List Display Time ADF Original Table Elevation*1 Small Size Paper Tray - Ricoh Aficio MP C5502 | User Guide - Page 752
R R R/W R R R/W R R R/W R R R/W R R R/W R R R/W R Timer Settings Settings Sleep Mode Timer Low Power Mode Timer System Auto Reset Timer Copier / Document Server Auto Reset Timer Facsimile Auto Reset Timer Printer Auto Reset Timer Scanner Auto Reset Timer Set Date User Mach N/W File Unset Set - Ricoh Aficio MP C5502 | User Guide - Page 753
Configuration IPsec Domain Name*1 WINS Configuration Effective Protocol NCP Delivery Protocol NW Frame Type SMB Computer Name SMB Work Group Ethernet Speed User Mach N/W File Unset Set R R/W R R R/W R R R/W R R R/W R R R/W R R R/W R R R/W R R R/W R User Mach N/W File Unset Set - Ricoh Aficio MP C5502 | User Guide - Page 754
IEEE 802.1X Authentication for Ethernet Restore IEEE 802.1X Authentication to Defaults User Mach N/W File Unset Set R R R/W R R/W R - - R/W - R/W R R R R/W R R/W R R R R R R/W R Signal Control R R/W R R R/W R Wireless LAN Settings Communication Mode SSID Setting Ad-hoc Channel - Ricoh Aficio MP C5502 | User Guide - Page 755
R R R/W R R/W R Default User Name / Password (Send)*4 R R/W R R R/W R Program / Change / Delete E-mail Message R R/W R R R/W R/W Auto Specify Sender Name R R R/W R R/W R Fax E-mail Account R R/W R R R/W R Scanner Resend Interval Time R R R/W R R/W R Number - Ricoh Aficio MP C5502 | User Guide - Page 756
9. Checking Operation Privileges *4 Passwords cannot be read. Administrator Tools Settings Address Book Management Address Book: Program / Change / Delete Group Address Book: Change Order Print Address Book: Destination List Address Book: Edit Title Address Book: Switch Title Backup/Restore: User - Ricoh Aficio MP C5502 | User Guide - Page 757
Charge Unit Management R R/W R R R/W R Driver Encryption Key*12 - - R/W - R/W - Driver Encryption Key:Encryption Strength*12 R R R/W R Job*12 R R/W R R R/W R @Remote Service*12 R R/W R R R/W R Update Firmware*12 R R/W R R - - Change Firmware Structure*12 R R/W R R - - Password - Ricoh Aficio MP C5502 | User Guide - Page 758
: Delete All Unsent Files Capture: Ownership Capture: Public Priority Capture: Owner Defaults Program / Change / Delete LDAP Server*4 LDAP Search Sleep Mode Service Test Call Notify Machine Status Service Mode Lock Firmware Version Network Security Level Auto Erase Memory Setting Erase All Memory - Ricoh Aficio MP C5502 | User Guide - Page 759
Print Export Result Log*14 PDF File Type: PDF/A Fixed Stop Key to Suspend Print Job Energy Saver Key to Change Mode Compulsory Security Stamp:Copier Compulsory Security Stamp:Doc. Srvr. Compulsory Security Stamp:Facsimile Compulsory Security Stamp:Printer R R R R *4 Passwords cannot be read. 315 - Ricoh Aficio MP C5502 | User Guide - Page 760
and read differ according is set to access privilege. *7 Can only be cleared. *8 Can only be printed. *9 Cannot be changed when using the individual authentication function. *10 Only the administrator privilege settings can be changed. *11 Administrators can only change their own accounts. *12 - Ricoh Aficio MP C5502 | User Guide - Page 761
". Edit Home Settings Edit Icons: Move Icon Edit Icons: Delete Icon Edit Icons: Add Icon Edit Icons: Restore Default Icon Display Insert Image: Insert Image on Home Screen User Mach N/W File Unset Set - R/W - - R/W - - R/W - - R/W - - R/W - - R/W - - R/W - - R/W - - R/W - - R/W - 317 - Ricoh Aficio MP C5502 | User Guide - Page 762
9. Checking Operation Privileges Maintenance When administrator authentication is set, the restrictions to user operations differ depending on the configurations in "Available Settings". Maintenance Settings Auto Colour Calibration Colour Registration Plain Paper Setting User Mach N/W File Unset - Ricoh Aficio MP C5502 | User Guide - Page 763
Original Type Display Paper Display Original Orientation in Duplex Mode Copy Orientation in Duplex Mode Max. Copy Quantity Auto Tray Switching Alert Sound: Original left on Exposure Glass Job End Call Customize Function: Copier Customize Function: Document Server Storage User Mach N/W File Lv - Ricoh Aficio MP C5502 | User Guide - Page 764
Width Front Cover Copy in Combine Copy Order in Combine Orientation: Booklet, Magazine Copy on Designating Page in Combine Image Repeat Separation Line Double Copies Separation Line Separation Line in Combine Stamp Background Numbering Settings Size Density Stamp Colour User Mach N/W File Lv.1 Lv - Ricoh Aficio MP C5502 | User Guide - Page 765
Copier / Document Server Features Preset Stamp Settings Stamp Language Stamp Priority Stamp Format: COPY Stamp Format: URGENT Stamp Format: PRIORITY Stamp Format: For Your Info. Stamp Format: PRELIMINARY Stamp Format: For Internal Use Only Stamp Format: CONFIDENTIAL Stamp Format: DRAFT - Ricoh Aficio MP C5502 | User Guide - Page 766
be set. The print position itself cannot be configured. Page Numbering Settings User Mach N/W File Lv.1 Lv.2 Stamp Format R R/W R R R R Font R R/W R R R/W R Size R R/W R R R/W R Duplex Back Page Stamping Position R R/W R R R/W R Page Numbering in Combine R R/W R R R/W R Stamp on - Ricoh Aficio MP C5502 | User Guide - Page 767
R R R/W *3 R R R/W R R R/W R R R/W R R R/W R R R/W R R R R *3 Only adjustments to print position can be set. The print position itself cannot be configured. Stamp Text Settings Font Size Superimpose Stamp Colour Stamp Setting Change Job Serial No. for First Job User Mach N/W File Lv.1 Lv - Ricoh Aficio MP C5502 | User Guide - Page 768
9. Checking Operation Privileges Settings Memory Full Auto Scan Restart Letterhead Setting Staple Position Punch Type Simplified Screen: Finishing Types Adjust Colour Image Settings Background Density of ADS (Full Colour) Colour Sensitivity A.C.S. Sensitivity A.C.S. Priority - Ricoh Aficio MP C5502 | User Guide - Page 769
on the "Menu Protect" setting. General Settings Settings Quick Operation Key 1-3 Switch Title Search Destination Communication Page Count Adjust Sound Volume Box Setting Box Setting: Print List On Hook Mode Release Time Delete Recent Destinations Auto Print Fax Journal User Mach N/W File Lv.1 Lv - Ricoh Aficio MP C5502 | User Guide - Page 770
Settings Settings Reception File Settings Switch Reception Mode Program Special Sender Program Special Sender: Print List Stored Reception File User Setting SMTP RX File Delivery Settings 2 Sided Print Checkered Mark Centre Mark Print Reception Time Reception File Print Quantity Paper Tray Specify - Ricoh Aficio MP C5502 | User Guide - Page 771
Facsimile Features Settings Program Fax Information Enable H.323 Enable SIP H.323 Settings SIP Settings Program / Change / Delete Gateway Menu Protect E-mail Setting Folder Setting File Type to Transfer Security for E-mail TX Results User Mach N/W File Lv.1 Lv.2 R R/W R R R R R R R/W R R R - Ricoh Aficio MP C5502 | User Guide - Page 772
Operation Privileges Printer Functions When administrator authentication is set, the restrictions to user operations differ depending on the "Menu Protect" setting. Printer Functions Settings Print from Memory Storage Device Job Reset Job Operation Form Feed Spooling Job List Error Log User - Ricoh Aficio MP C5502 | User Guide - Page 773
Printer Features Printer Features When administrator authentication is set, the restrictions to user operations differ depending on the "Menu Protect" setting. List / Test Print Settings Multiple Lists Configuration Page Error Log PCL Configuration / Font Page PS Configuration / Font Page PDF - Ricoh Aficio MP C5502 | User Guide - Page 774
Skip Errored Job Memory Overflow Job Separation Rotate by 180 Degrees Print Compressed Data Duplex Copies Blank Page Print Reserved Job Waiting Time Printer Language Sub Paper Size Page Size Letterhead Setting Tray Setting Priority Edge to Edge Print Default Printer Language Tray Switching Extended - Ricoh Aficio MP C5502 | User Guide - Page 775
Form Lines Font Source Font Number Point Size Font Pitch Symbol Set Courier Font Extend A4 Width Append CR to LF Resolution PS Menu Settings Job Timeout Wait Timeout Swtchng. btwn. 1&2 Sided Prt. Func. Data Format Resolution Toner Saving Colour Setting Colour Profile Printer Features User Mach - Ricoh Aficio MP C5502 | User Guide - Page 776
9. Checking Operation Privileges Settings Process Colour Model Orientation Auto Detect PDF Menu Settings Change PDF Password PDF Group Password Reverse Order Printing Resolution Toner Saving Colour Setting Colour Profile Process Colour Model Orientation Auto Detect Unauthorized Copy Preventn. - Ricoh Aficio MP C5502 | User Guide - Page 777
Switch Title Update Delivery Server Destination List Search Destination Ext. Auth.: Folder Path Overwrite Setting PC Scan Command Standby Time Destination List Display Priority 1 Destination List Display Priority 2 Print & Delete Scanner Journal Print - - - Scan Settings Settings A.C.S. - Ricoh Aficio MP C5502 | User Guide - Page 778
) Compression Method (Black & White) Compression (Grey Scale / Full Colour) Compression Method for High Compression PDF High Compression PDF Level Max. E-mail Size Divide & Send E-mail Insert Additional E-mail Info No. of Digits for Single Page Files Stored File E-mail Method Default E-mail Subject - Ricoh Aficio MP C5502 | User Guide - Page 779
Browser Features Settings Browser Default Settings Settings par Users View Logs Browser Features User Mach N/W File Unset Set - R/W - - R R - R/W - - R R - R - - R R 335 - Ricoh Aficio MP C5502 | User Guide - Page 780
9. Checking Operation Privileges Extended Feature Settings Extended Feature Settings Settings Startup Setting Install Uninstall Extended Feature Info Administrator Tools Add. Program Startup Setting Install Add. Program Uninstall Add. Program Add. Program Info User Mach N/W File Unset Set R R/W - Ricoh Aficio MP C5502 | User Guide - Page 781
*1 Can be viewed if user code authentication is used for the user authentication method. Printer Settings Spool Printing: Delete Job History Error Log User Mach N/W File Unset Set - R/W - - - R/W R R/W R R R R - R - - R R Fax History Transmission Reception LAN-Fax Settings User - Ricoh Aficio MP C5502 | User Guide - Page 782
9. Checking Operation Privileges Settings Fax Remote Send History Scanner Remote Send History User Mach N/W File Unset Set - R - - R R*1 - R - - R R*1 *1 Can be viewed when using user code authentication for the user authentication method. 338 - Ricoh Aficio MP C5502 | User Guide - Page 783
Location Spool Printing Protect Printer Display Panel Print Priority Function Reset Timer Energy Saver Key to Change Mode Stop Key to Suspend Print Job Permit Firmware Update Permit Firmware Structure Change Display IP Address on Device Display Panel Media Slot Use PDF File Type: PDF/A Fixed Output - Ricoh Aficio MP C5502 | User Guide - Page 784
Bypass Tray Date/Time Settings Set Date Set Time SNTP Server Name SNTP Polling Interval Time Zone Timer Settings Sleep Mode Timer Low Power Mode Timer System Auto Reset Timer Copier/Document Server Auto Reset Timer Facsimile Auto Reset Timer Scanner Auto Reset Timer User Mach N/W File Unset Set - Ricoh Aficio MP C5502 | User Guide - Page 785
Settings Printer Auto Reset Timer Auto Logout Timer Weekly Timer Code Weekly Timer: Monday-Sunday Logs Settings Job Log Access Log Eco-friendly Logs Transfer Logs*1 Encrypt Logs Classification Code Delete All Logs *1 Can only be changed to [Inactive]. Download Logs Settings Logs to Download Download - Ricoh Aficio MP C5502 | User Guide - Page 786
Name SMTP Port No. SMTP Authentication SMTP Auth. E-mail Address SMTP Auth. User Name SMTP Auth. Password*2 SMTP Auth. Encryption POP before SMTP POP E-mail Address POP User Name POP Password*2 Timeout setting after POP Auth. POP3/IMAP4 Server Name POP3/IMAP4 Encryption POP3 Reception Port No. IMAP4 - Ricoh Aficio MP C5502 | User Guide - Page 787
Message Access Restriction to Information Receivable E-mail Address/Domain Name Settings File Transfer Settings SMB User Name SMB Password*2 FTP User Name FTP Password*2 NCP User Name NCP Password*2 User Mach N/W File Unset Set - R/W - - R/W - - R/W - - R/W - User Mach N/W File Unset Set - Ricoh Aficio MP C5502 | User Guide - Page 788
Operation Privileges *2 Passwords cannot be read. User Authentication Management Settings User Authentication Management Printer Job Authentication Settings User Code Authentication Settings Basic Authentication Settings Windows Authentication Settings Group Settings for Windows Authentication LDAP - Ricoh Aficio MP C5502 | User Guide - Page 789
Name*1 Login Password*1 Encryption Password*1 User Mach N/W File Unset Set R/W R R R - - R R/W R R - - R R R/W R - - R R R R/W - - R/W R/W R/W R/W - - R/W R/W R/W R/W - - R/W R/W R/W R/W - - *1 Administrators can only change their own accounts. Print Volume Use Limitation - Ricoh Aficio MP C5502 | User Guide - Page 790
9. Checking Operation Privileges Firmware Update Settings Update Firmware Version User Mach N/W File Unset Set - R/W - - - - - R - - - - Comparing New File to Last Import File*1 E-mail Failure Notification*1 Number of Retries*1 Retry Interval*1 Encryption Key*1 User Mach N/W File - Ricoh Aficio MP C5502 | User Guide - Page 791
Time Count Period Administrator Message User Mach N/W File Unset Set R R/W R R R/W R R R/W R R R/W R R R/W R R R/W R R R/W R R R/W R Compulsory Security Stamp Settings Compulsory Security Stamp Adjust Stamp Position User Mach N/W File Unset Set R R/W R R R R R R/W R R R R 347 - Ricoh Aficio MP C5502 | User Guide - Page 792
Settings Settings Print Error Report Auto Continue Memory Overflow Job Separation Auto Delete Temporary Print Jobs Auto Delete Stored Print Jobs Jobs Not Printed As Machine Was Off Rotate by 180 Degrees Print Compressed Data Duplex Copies Blank Page Print Reserved Job Waiting Time Printer Language - Ricoh Aficio MP C5502 | User Guide - Page 793
Printer Settings Edge to Edge Print Default Printer Language Tray Switching List/Test Print Lock Extended Auto Tray Switching Virtual Printer Restrict Direct Print Jobs Initial screen switch setting Host Interface PCL Menu PS Menu PDF R R R R Setting Priority (Driver/Command/Machine) R R/W R R - Ricoh Aficio MP C5502 | User Guide - Page 794
(PS) Virtual Printer Settings Settings Virtual Printer Name Protocol Print Error Report Job Separation Rotate by 180 Degrees Memory Usage Duplex Copies Blank Page Print Sub Paper Size Input Tray Page Size Paper Type Output Tray Letterhead Setting Edge to Edge Print PCL Menu PS Menu PDF Menu RHPP - Ricoh Aficio MP C5502 | User Guide - Page 795
PDF Temporary Password Settings PDF Temporary Password PDF Group Password Settings PDF Group Password PDF Fixed Password Settings PDF Fixed Password Web Image Monitor: Printer User Mach N/W File Lv.1 Lv.2 - - - - R/W R/W User Mach N/W File Lv.1 Lv.2 - R/W - - - - User Mach N/W File Lv.1 - Ricoh Aficio MP C5502 | User Guide - Page 796
- - R/W - - - - - R/W - - - - Send / Reception Settings Settings Maximum E-mail Size Switch Reception Mode SMTP RX File Delivery Settings 2 Sided Print Checkered Mark Center Mark Print Reception Time Reception File Print Quantity Paper Tray Memory Lock Reception User Mach N/W File Lv.1 Lv - Ricoh Aficio MP C5502 | User Guide - Page 797
Image Monitor: Fax Reception File Settings Settings Output Mode Switch Timer Prohibit Auto Print Print Standby to Print Files User Mach N/W File Lv.1 Lv.2 Settings Settings Just Size Printing Combine 2 Originals Convert to PDF When Transferring to Folder Automatic Printing Report E-mail User Mach - Ricoh Aficio MP C5502 | User Guide - Page 798
differ depending on the "Menu Protect" setting. General Settings Settings Switch Title Search Destination PC Scan Command Standby Time Destination List Display Priority 1 Destination List Display Priority 2 Print & Delete Scanner Journal External Authentication: Folder Path Overwrite Setting User - Ricoh Aficio MP C5502 | User Guide - Page 799
Settings Settings Menu Protect Display WSD Destination List Prohibit WSD Scan Command User Mach N/W File Lv.1 Lv.2 R R/W R R R - R R/W R R R R R R/W R R R R Default Settings for Normal Screens on Device Store File Preview Scan Settings Send File Type Settings User Mach N/W File Lv - Ricoh Aficio MP C5502 | User Guide - Page 800
9. Checking Operation Privileges Send File Type Settings User Mach N/W File Lv.1 Lv.2 - R/W - - R R 356 - Ricoh Aficio MP C5502 | User Guide - Page 801
authentication is set, the restrictions to user operations differ depending on the configurations in "Available Settings". Interface Settings Settings LAN Type Network MAC Address Ethernet Security Ethernet Speed Bluetooth Operation Mode USB USB Host PictBridge User Mach N/W File Unset Set - Ricoh Aficio MP C5502 | User Guide - Page 802
9. Checking Operation Privileges Settings Security Method WEP Authentication WEP Key Number WEP Key WPA Authentication Method WPA-PSK/WPA2-PSK User Mach N/W File Unset Set R R R/W R R/W R - - R/W - R/W - R R R/W R R/W R R R R/W R R/W R R R R/W R R/W R R R R/W R R/W R 358 - Ricoh Aficio MP C5502 | User Guide - Page 803
Web Image Monitor: Network Web Image Monitor: Network These settings are in [Configuration] in [Device Management]. When administrator authentication is set, the restrictions to user operations differ depending on the configurations in "Available Settings". IPv4 Settings IPv4 Host Name DHCP - Ricoh Aficio MP C5502 | User Guide - Page 804
Operation Privileges Settings Stateless Address Manual Configuration Address DHCPv6 DHCPv6 Address DDNS LLMNR Details NetWare Settings NetWare Netware Print Settings NCP Delivery SMB Settings SMB Protocol Workgroup Name Computer Name Comment Share Name Notify Print Completion User Mach N/W File - Ricoh Aficio MP C5502 | User Guide - Page 805
SNMP Settings SNMP Protocol SNMPv1,v2 Setting Community SNMPv3 Settings SNMP Protocol SNMPv3 Setting SNMPv3 Trap Communication Setting Account (User) Account (Network Administrator) Account (Machine Administrator) SSDP SSDP UUID Profile Expires TTL Settings Bonjour Bonjour Settings Web Image - Ricoh Aficio MP C5502 | User Guide - Page 806
9. Checking Operation Privileges Settings Local Hostname Details Print Order Priority System Log System Log Settings User Mach N/W File Unset Set R R R R R R R R R/W R R/W R R R R/W R R/W R User Mach N/W File Unset Set R R R R R - 362 - Ricoh Aficio MP C5502 | User Guide - Page 807
Web Image Monitor: Security Web Image Monitor: Security These settings are in [Configuration] in [Device Management]. Settings Network Security Access Control IPP Authentication SSL/TLS ssh Site Certificate Device Certificate S/MIME IPsec User Lockout Policy IEEE 802.1X User Mach N/W File Unset - Ricoh Aficio MP C5502 | User Guide - Page 808
Image Monitor: @Remote These settings are in [Configuration] in [Device Management]. Settings Setup RC Gate Update RC Gate Firmware RC Gate Proxy Server Notify Functional Problems of Device User Mach N/W File Unset Set - R/W - - - - - R/W - - - - - R/W - - - - - R/W - - - - 364 - Ricoh Aficio MP C5502 | User Guide - Page 809
depending on the configurations in "Available Settings". Settings Webpage Language Set URL Target of Link Page Set Help URL Target WSD/UPnP Setting Download Help File User Mach N/W File Unset Set R R R/W R R/W R R R R/W R R/W R R R R/W R R/W R R R R/W R R/W R R/W R/W R/W R/W R/W R/W 365 - Ricoh Aficio MP C5502 | User Guide - Page 810
9. Checking Operation Privileges Web Image Monitor: Extended Feature Settings These settings are in [Configuration] in [Device Management]. Settings Startup Setting Extended Feature Info Install Uninstall Administrator Tools Additional Program Startup Setting Install Additional Program Uninstall - Ricoh Aficio MP C5502 | User Guide - Page 811
Adding of User Destinations (Scanner)] of [Extended Security] are set to [On], when the machine is configured for basic authentication, users can only change the password of their own account. 367 - Ricoh Aficio MP C5502 | User Guide - Page 812
9. Checking Operation Privileges Web Image Monitor: Reset Printer Job These settings are in [Device Management]. Settings Reset Current Job Reset All Jobs User Mach N/W File Unset Set - R/W - - - - - R/W - - - - 368 - Ricoh Aficio MP C5502 | User Guide - Page 813
Web Image Monitor: Reset the Machine Web Image Monitor: Reset the Machine These settings are in [Device Management]. When administrator authentication is set, the restrictions to user operations differ depending on the configurations in "Available Settings". Settings Reset the Machine User Mach - Ricoh Aficio MP C5502 | User Guide - Page 814
administrator authentication is set, the restrictions to user operations differ depending on the configurations in "Available Settings". Settings Edit Icons Restore Default Icon Display Home Screen Settings User Mach N/W File Unset Set R R/W R R R/W R - R/W - - R/W - R R/W R R R/W R 370 - Ricoh Aficio MP C5502 | User Guide - Page 815
Web Image Monitor: Customize Screen per User Web Image Monitor: Customize Screen per User Users can change only their own settings. Settings Function Priority per User User Mach N/W File Unset Set - - - - R/W R/W 371 - Ricoh Aficio MP C5502 | User Guide - Page 816
settings are in [Print Job/Stored File]. What users can do with stored files depends on their access privileges. For details, see p.375 "List of Operation Privileges for Stored Files". Settings Print Send Delete Edit detailed information (Detailed information icon) Download Unlock File User Mach - Ricoh Aficio MP C5502 | User Guide - Page 817
Web Image Monitor: Fax Received File Web Image Monitor: Fax Received File These settings are in [Print Job/Stored File]. Settings Print Delete Download Edit detailed information (Detailed information icon) User Mach N/W File Unset Set - - - - R/W R/W *1 *1 - - - - R/W R/W *1 *1 - - Ricoh Aficio MP C5502 | User Guide - Page 818
Privileges Web Image Monitor: Printer: Print Jobs These settings are in [Print Job/Stored File]. Users can use the printer documents stored themselves or stored when user authentication is off. The printer documents stored by other users are not displayed. Settings Print User Mach N/W File Unset - Ricoh Aficio MP C5502 | User Guide - Page 819
• Full Users configured for full control privileges. • Owner Either the . -: Cannot execute. Settings Printing Details Preview Change Access Priv Change Password Unlock Files Combine Files Read R/W R/W R/W - Edit R/W R/W R/W - E/D R/W R/W R/W - Full R/W R/W R/W - Owner R/W R/W R/W - File - - Ricoh Aficio MP C5502 | User Guide - Page 820
9. Checking Operation Privileges Settings Insert File Delete Pages Print Specified Page Duplicate File Delete File Read - - R/W R/W - Edit - - R/W R/W - E/D R/W R/W R/W R/W R/W Full R/W R/W R/W R/W R/W Owner R/W*1 R/W*1 R/W R/W R/W*1 File - - - - R/W *1 The owner can change operation - Ricoh Aficio MP C5502 | User Guide - Page 821
configured for edit/delete privileges. • Full Users configured for full control privileges. • Entry User whose personal information is registered in the Address Book. The person who knows the user login name and password. • User The user administrator. Understanding the symbols R/W: Execute, change - Ricoh Aficio MP C5502 | User Guide - Page 822
Operation Privileges Settings Login Password SMTP Authentication Folder Authentication LDAP Authentication Available Functions Print Volum. Use Limit. Read W*1 R/W R/W R/W Fax Dest. Settings Fax Destination Select Line International TX Mode Adv. Features Read R R R R Edit R/W R/W R/W R/W E/D - Ricoh Aficio MP C5502 | User Guide - Page 823
Use E-mail Address for Send via SMTP Server Folder Settings SMB/FTP/NCP SMB: Path FTP: Server Name FTP: Path FTP: Port Number NCP: Path NCP: Connection Type Connection Test Add to Group Settings Registration No. Search Switch Title List of Operation Privileges for Address Books Read R R Edit - Ricoh Aficio MP C5502 | User Guide - Page 824
9. Checking Operation Privileges • When either or both of [Restrict Adding of User Destinations (Fax)] or [Restrict Adding of User Destinations (Scanner)] of [Extended Security] are set to [On], regardless of the user's operation privileges, access to the Address Book is rescinded from any user - Ricoh Aficio MP C5502 | User Guide - Page 825
United States and/or other countries. Mac OS and Bonjour are trademarks of Apple Windows Vista®, Internet Explorer®, and Outlook are either registered trademarks or trademarks of Microsoft Corporation in the United States and/or other countries. NetWare is a registered trademark of Novell, Inc. PCL - Ricoh Aficio MP C5502 | User Guide - Page 826
Edition • The product names of Windows Server 2008 are as follows: Microsoft® Windows Server® 2008 Standard Microsoft® Windows Server® 2008 Enterprise • The product names of Windows 2008 R2 are as follows: Microsoft® Windows Server® 2008 R2 Standard Microsoft® Windows Server® 2008 R2 Enterprise 382 - Ricoh Aficio MP C5502 | User Guide - Page 827
certificate 135 IPP authentication password 182 IPsec 149 IPsec settings 151 IPsec telnet setting commands 166 K Kerberos authentication 43, 184 L LDAP authentication 52 Limitation on print volume per user 84 Locked Print 201 Log file management-Control panel 207 Log file management - Ricoh Aficio MP C5502 | User Guide - Page 828
Operational issues 299 P Password for stored files 185 Password lockout function 70 Password Policy 266 PDFs with electronic signatures 148 Print from Media 82 Print volume use 84 Printer job authentication 64 R Remote Service 265 Restrict Adding of User Destinations (Fax)..75, 264 Restrict - Ricoh Aficio MP C5502 | User Guide - Page 829
- Ricoh Aficio MP C5502 | User Guide - Page 830
EN GB EN US EN AU D143-7040 © 2011
-
 1
1 -
 2
2 -
 3
3 -
 4
4 -
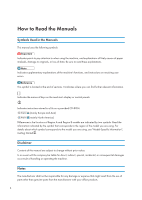 5
5 -
 6
6 -
 7
7 -
8
-
9
-
10
-
11
-
12
-
13
-
14
-
15
-
16
-
17
-
18
-
19
-
20
-
21
-
22
-
23
-
24
-
25
-
26
-
27
-
28
-
29
-
30
-
31
-
32
-
33
-
34
-
35
-
36
-
37
-
38
-
39
-
40
-
41
-
42
-
43
-
44
-
45
-
46
-
47
-
48
-
49
-
50
-
51
-
52
-
53
-
54
-
55
-
56
-
57
-
58
-
59
-
60
-
61
-
62
-
63
-
64
-
65
-
66
-
67
-
68
-
69
-
70
-
71
-
72
-
73
-
74
-
75
-
76
-
77
-
78
-
79
-
80
-
81
-
82
-
83
-
84
-
85
-
86
-
87
-
88
-
89
-
90
-
91
-
92
-
93
-
94
-
95
-
96
-
97
-
98
-
99
-
100
-
101
-
102
-
103
-
104
-
105
-
106
-
107
-
108
-
109
-
110
-
111
-
112
-
113
-
114
-
115
-
116
-
117
-
118
-
119
-
120
-
121
-
122
-
123
-
124
-
125
-
126
-
127
-
128
-
129
-
130
-
131
-
132
-
133
-
134
-
135
-
136
-
137
-
138
-
139
-
140
-
141
-
142
-
143
-
144
-
145
-
146
-
147
-
148
-
149
-
150
-
151
-
152
-
153
-
154
-
155
-
156
-
157
-
158
-
159
-
160
-
161
-
162
-
163
-
164
-
165
-
166
-
167
-
168
-
169
-
170
-
171
-
172
-
173
-
174
-
175
-
176
-
177
-
178
-
179
-
180
-
181
-
182
-
183
-
184
-
185
-
186
-
187
-
188
-
189
-
190
-
191
-
192
-
193
-
194
-
195
-
196
-
197
-
198
-
199
-
200
-
201
-
202
-
203
-
204
-
205
-
206
-
207
-
208
-
209
-
210
-
211
-
212
-
213
-
214
-
215
-
216
-
217
-
218
-
219
-
220
-
221
-
222
-
223
-
224
-
225
-
226
-
227
-
228
-
229
-
230
-
231
-
232
-
233
-
234
-
235
-
236
-
237
-
238
-
239
-
240
-
241
-
242
-
243
-
244
-
245
-
246
-
247
-
248
-
249
-
250
-
251
-
252
-
253
-
254
-
255
-
256
-
257
-
258
-
259
-
260
-
261
-
262
-
263
-
264
-
265
-
266
-
267
-
268
-
269
-
270
-
271
-
272
-
273
-
274
-
275
-
276
-
277
-
278
-
279
-
280
-
281
-
282
-
283
-
284
-
285
-
286
-
287
-
288
-
289
-
290
-
291
-
292
-
293
-
294
-
295
-
296
-
297
-
298
-
299
-
300
-
301
-
302
-
303
-
304
-
305
-
306
-
307
-
308
-
309
-
310
-
311
-
312
-
313
-
314
-
315
-
316
-
317
-
318
-
319
-
320
-
321
-
322
-
323
-
324
-
325
-
326
-
327
-
328
-
329
-
330
-
331
-
332
-
333
-
334
-
335
-
336
-
337
-
338
-
339
-
340
-
341
-
342
-
343
-
344
-
345
-
346
-
347
-
348
-
349
-
350
-
351
-
352
-
353
-
354
-
355
-
356
-
357
-
358
-
359
-
360
-
361
-
362
-
363
-
364
-
365
-
366
-
367
-
368
-
369
-
370
-
371
-
372
-
373
-
374
-
375
-
376
-
377
-
378
-
379
-
380
-
381
-
382
-
383
-
384
-
385
-
386
-
387
-
388
-
389
-
390
-
391
-
392
-
393
-
394
-
395
-
396
-
397
-
398
-
399
-
400
-
401
-
402
-
403
-
404
-
405
-
406
-
407
-
408
-
409
-
410
-
411
-
412
-
413
-
414
-
415
-
416
-
417
-
418
-
419
-
420
-
421
-
422
-
423
-
424
-
425
-
426
-
427
-
428
-
429
-
430
-
431
-
432
-
433
-
434
-
435
-
436
-
437
-
438
-
439
-
440
-
441
-
442
-
443
-
444
-
445
-
446
-
447
-
448
-
449
-
450
-
451
-
452
-
453
-
454
-
455
-
456
-
457
-
458
-
459
-
460
-
461
-
462
-
463
-
464
-
465
-
466
-
467
-
468
-
469
-
470
-
471
-
472
-
473
-
474
-
475
-
476
-
477
-
478
-
479
-
480
-
481
-
482
-
483
-
484
-
485
-
486
-
487
-
488
-
489
-
490
-
491
-
492
-
493
-
494
-
495
-
496
-
497
-
498
-
499
-
500
-
501
-
502
-
503
-
504
-
505
-
506
-
507
-
508
-
509
-
510
-
511
-
512
-
513
-
514
-
515
-
516
-
517
-
518
-
519
-
520
-
521
-
522
-
523
-
524
-
525
-
526
-
527
-
528
-
529
-
530
-
531
-
532
-
533
-
534
-
535
-
536
-
537
-
538
-
539
-
540
-
541
-
542
-
543
-
544
-
545
-
546
-
547
-
548
-
549
-
550
-
551
-
552
-
553
-
554
-
555
-
556
-
557
-
558
-
559
-
560
-
561
-
562
-
563
-
564
-
565
-
566
-
567
-
568
-
569
-
570
-
571
-
572
-
573
-
574
-
575
-
576
-
577
-
578
-
579
-
580
-
581
-
582
-
583
-
584
-
585
-
586
-
587
-
588
-
589
-
590
-
591
-
592
-
593
-
594
-
595
-
596
-
597
-
598
-
599
-
600
-
601
-
602
-
603
-
604
-
605
-
606
-
607
-
608
-
609
-
610
-
611
-
612
-
613
-
614
-
615
-
616
-
617
-
618
-
619
-
620
-
621
-
622
-
623
-
624
-
625
-
626
-
627
-
628
-
629
-
630
-
631
-
632
-
633
-
634
-
635
-
636
-
637
-
638
-
639
-
640
-
641
-
642
-
643
-
644
-
645
-
646
-
647
-
648
-
649
-
650
-
651
-
652
-
653
-
654
-
655
-
656
-
657
-
658
-
659
-
660
-
661
-
662
-
663
-
664
-
665
-
666
-
667
-
668
-
669
-
670
-
671
-
672
-
673
-
674
-
675
-
676
-
677
-
678
-
679
-
680
-
681
-
682
-
683
-
684
-
685
-
686
-
687
-
688
-
689
-
690
-
691
-
692
-
693
-
694
-
695
-
696
-
697
-
698
-
699
-
700
-
701
-
702
-
703
-
704
-
705
-
706
-
707
-
708
-
709
-
710
-
711
-
712
-
713
-
714
-
715
-
716
-
717
-
718
-
719
-
720
-
721
-
722
-
723
-
724
-
725
-
726
-
727
-
728
-
729
-
730
-
731
-
732
-
733
-
734
-
735
-
736
-
737
-
738
-
739
-
740
-
741
-
742
-
743
-
744
-
745
-
746
-
747
-
748
-
749
-
750
-
751
-
752
-
753
-
754
-
755
-
756
-
757
-
758
-
759
-
760
-
761
-
762
-
763
-
764
-
765
-
766
-
767
-
768
-
769
-
770
-
771
-
772
-
773
-
774
-
775
-
776
-
777
-
778
-
779
-
780
-
781
-
782
-
783
-
784
-
785
-
786
-
787
-
788
-
789
-
790
-
791
-
792
-
793
-
794
-
795
-
796
-
797
-
798
-
799
-
800
-
801
-
802
-
803
-
804
-
805
-
806
-
807
-
808
-
809
-
810
-
811
-
812
-
813
-
814
-
815
-
816
-
817
-
818
-
819
-
820
-
821
-
822
-
823
-
824
-
825
-
826
-
827
-
828
-
829
-
830
 |
 |
Printed in China
US
EN
D143-7008
D1437008
Read this manual carefully before you use this machine and keep it
handy for future reference. For safe and correct use, be sure to read the
Safety Information in this manual before using the machine.
For information not in the printed manual,
refer to the HTML/PDF
fi
les on the supplied
CD-ROM.
Appendix
Information for This Machine
Safety Information
Manuals Provided with This Machine
Read This First