| Section |
Page |
| <GRAPHIC> |
1 |
| <GRAPHIC> |
1 |
| <GRAPHIC> |
1 |
| Operating Instructions |
1 |
| <GRAPHIC> |
1 |
| <GRAPHIC> |
1 |
| <GRAPHIC> |
1 |
| Read this manual carefully before you use this product and keep it handy for future reference. |
1 |
| Read this manual carefully before you use this product and keep it handy for future reference. |
1 |
| For safety, please follow the instructions in this manual. |
1 |
| RICOH COMPANY, LTD. |
2 |
| RICOH COMPANY, LTD. |
2 |
| RICOH COMPANY, LTD. |
2 |
| 15-5, Minami Aoyama 1-chome, |
2 |
| Minato-ku, Tokyo 107-8544, Japan |
2 |
| <GRAPHIC> |
2 |
| <GRAPHIC> |
2 |
| <GRAPHIC> |
2 |
| Overseas Affiliates |
2 |
| U.S.A. |
2 |
| U.S.A. |
2 |
| U.S.A. |
2 |
| U.S.A. |
2 |
| RICOH CORPORATION |
2 |
| RICOH CORPORATION |
2 |
| 5 Dedrick Place |
2 |
| West Caldwell, New Jersey 07006 |
2 |
| Phone: +1-973-882-2000 |
2 |
| The Netherlands |
2 |
| The Netherlands |
2 |
| RICOH EUROPE B.V. |
2 |
| RICOH EUROPE B.V. |
2 |
| Groenelaan 3, 1186 AA, Amstelveen |
2 |
| Phone: +31-(0)20-5474111 |
2 |
| United Kingdom |
2 |
| United Kingdom |
2 |
| RICOH UK LTD. |
2 |
| RICOH UK LTD. |
2 |
| Ricoh House, |
2 |
| 1 Plane Tree Crescent, Feltham, |
2 |
| Middlesex, TW13 7HG |
2 |
| Phone: +44-(0)20-8261-4000 |
2 |
| Germany |
2 |
| Germany |
2 |
| RICOH DEUTSCHLAND GmbH |
2 |
| RICOH DEUTSCHLAND GmbH |
2 |
| Mergenthalerallee 38-40, |
2 |
| 65760 Eschborn |
2 |
| Phone: +49-(0)6196-9060 |
2 |
| France |
2 |
| France |
2 |
| RICOH FRANCE S.A. |
2 |
| RICOH FRANCE S.A. |
2 |
| 383, Avenue du Général de Gaulle |
2 |
| BP 307-92143 Clamart Cedex |
2 |
| Phone: +33-(0)-821-01-74-26 |
2 |
| Spain |
2 |
| Spain |
2 |
| RICOH ESPAÑA S.A. |
2 |
| RICOH ESPAÑA S.A. |
2 |
| Avda. Litoral Mar, 12-14, |
2 |
| 08005 Barcelona |
2 |
| Phone: +34-(0)93-295-7600 |
2 |
| Italy |
2 |
| Italy |
2 |
| RICOH ITALIA SpA |
2 |
| RICOH ITALIA SpA |
2 |
| Via della Metallurgia 12, |
2 |
| 37139 Verona |
2 |
| Phone: +39-045-8181500 |
2 |
| Hong Kong |
2 |
| Hong Kong |
2 |
| RICOH HONG KONG LTD. |
2 |
| RICOH HONG KONG LTD. |
2 |
| 21/F., Tai Yau Building, |
2 |
| 181, Johnston Road, |
2 |
| Wan Chai, Hong Kong |
2 |
| Phone: +852-2862-2888 |
2 |
| Singapore |
2 |
| Singapore |
2 |
| RICOH ASIA PACIFIC PTE.LTD. |
2 |
| RICOH ASIA PACIFIC PTE.LTD. |
2 |
| 260 Orchard Road, |
2 |
| #15-01/02 The Heeren, |
2 |
| Singapore 238855 |
2 |
| Phone: +65-830-5888 |
2 |
| Printed in Japan |
2 |
| AE AE |
2 |
| B048-8608 |
2 |
| Introduction |
3 |
| Introduction |
3 |
| Introduction |
3 |
| This manual contains detailed instructions on the operation and maintenance of this machine. To g... |
3 |
| This manual contains detailed instructions on the operation and maintenance of this machine. To g... |
3 |
| Please read the Safety Information before using this machine. It contains important information r... |
3 |
| Notes: |
3 |
| Notes: |
3 |
| Notes: |
3 |
| Notes: |
3 |
| Some illustrations might be slightly different from your machine. |
3 |
| Certain options might not be available in some countries. For details, please contact your local ... |
3 |
| Warning: |
3 |
| Warning: |
3 |
| Use of controls or adjustment or performance of procedures other than those specified in this man... |
3 |
| Use of controls or adjustment or performance of procedures other than those specified in this man... |
3 |
| Two kinds of size notation are employed in this manual. With this machine refer to the metric ver... |
3 |
| Two kinds of size notation are employed in this manual. With this machine refer to the metric ver... |
3 |
| Two kinds of size notation are employed in this manual. With this machine refer to the metric ver... |
3 |
| For good copy quality, Ricoh recommends that you use genuine Ricoh toner. |
3 |
| For good copy quality, Ricoh recommends that you use genuine Ricoh toner. |
3 |
| For good copy quality, Ricoh recommends that you use genuine Ricoh toner. |
3 |
| Ricoh shall not be responsible for any damage or expense that might result from the use of parts ... |
3 |
| Ricoh shall not be responsible for any damage or expense that might result from the use of parts ... |
3 |
| Ricoh shall not be responsible for any damage or expense that might result from the use of parts ... |
3 |
| Power Source |
3 |
| Power Source |
3 |
| 220V - 240V, 50/60Hz, 7A |
3 |
| 220V - 240V, 50/60Hz, 7A |
3 |
| Please be sure to connect the power cord to a power source as above. For details about power source, |
3 |
| Where symbols are used on or near switches, they mean an under in accordance with IEC 60417: |
4 |
| Where symbols are used on or near switches, they mean an under in accordance with IEC 60417: |
4 |
| Where symbols are used on or near switches, they mean an under in accordance with IEC 60417: |
4 |
| Where symbols are used on or near switches, they mean an under in accordance with IEC 60417: |
4 |
| a means POWER ON. |
4 |
| a means POWER ON. |
4 |
| a means POWER ON. |
4 |
| c means STAND BY. |
4 |
| c means STAND BY. |
4 |
| Copyright © 2001 |
4 |
| Copyright © 2001 |
4 |
| Ricoh Co., Ltd. |
4 |
| Safety Information |
5 |
| Safety Information |
5 |
| Safety Information |
5 |
| When using your equipment, the following safety precautions should always be followed. |
5 |
| When using your equipment, the following safety precautions should always be followed. |
5 |
| Safety During Operation |
5 |
| Safety During Operation |
5 |
| In this manual, the following important symbols are used: |
5 |
| In this manual, the following important symbols are used: |
5 |
| <TABLE> |
6 |
| <TABLE> |
6 |
| <TABLE> |
6 |
| <TABLE> |
6 |
| <TABLE> |
6 |
| <TABLE> |
6 |
| <TABLE BODY> |
6 |
| <TABLE ROW> |
6 |
| • Connect the power cord directly into a wall outlet and never use an extension cord. |
6 |
| • Connect the power cord directly into a wall outlet and never use an extension cord. |
6 |
| • Connect the power cord directly into a wall outlet and never use an extension cord. |
6 |
| • Connect the power cord directly into a wall outlet and never use an extension cord. |
6 |
| • Only connect the machine to the power source described on the inside front cover of this manual. |
6 |
| • Only connect the machine to the power source described on the inside front cover of this manual. |
6 |
| • Avoid multi-wiring. |
6 |
| • Avoid multi-wiring. |
6 |
| • Do not damage, break or make any modifications to the power cord. Do not place heavy objects on... |
6 |
| • Do not damage, break or make any modifications to the power cord. Do not place heavy objects on... |
6 |
| • Do not plug or unplug the power cord with your hands wet. Otherwise, an electric shock might oc... |
6 |
| • Do not plug or unplug the power cord with your hands wet. Otherwise, an electric shock might oc... |
6 |
| • Disconnect the power plug (by pulling the plug, not the cable) if the power cable or plug becom... |
6 |
| • Disconnect the power plug (by pulling the plug, not the cable) if the power cable or plug becom... |
6 |
| • Make sure the wall outlet is near the machine and freely accessible so that in event of an emer... |
6 |
| • Make sure the wall outlet is near the machine and freely accessible so that in event of an emer... |
6 |
| • Turn off the power and disconnect the power plug (by pulling the plug, not the cable) if any of... |
6 |
| • Turn off the power and disconnect the power plug (by pulling the plug, not the cable) if any of... |
6 |
| • Do not take apart or attempt any modifications to this machine. There is a risk of fire, electr... |
6 |
| • Do not take apart or attempt any modifications to this machine. There is a risk of fire, electr... |
6 |
| • To avoid hazardous electric shock or laser radiation exposure, do not remove any covers or scre... |
6 |
| • To avoid hazardous electric shock or laser radiation exposure, do not remove any covers or scre... |
6 |
| • Some parts of the machine are at a high voltage and could give you an electric shock. Also, if ... |
6 |
| • Some parts of the machine are at a high voltage and could give you an electric shock. Also, if ... |
6 |
| • Do not keep using the machine with a fault or defect. Contact your service representative. |
6 |
| • Do not keep using the machine with a fault or defect. Contact your service representative. |
6 |
| • If the machine looks damaged or breaks down, smoke is coming out, there is a strange smell or a... |
6 |
| • If the machine looks damaged or breaks down, smoke is coming out, there is a strange smell or a... |
6 |
| • Do not put any metal objects or containers holding water (e.g. vases, flowerpots, glasses) on t... |
6 |
| • Do not put any metal objects or containers holding water (e.g. vases, flowerpots, glasses) on t... |
6 |
| • Do not incinerate spilled toner or used toner. Toner dust might ignite when exposed to an open ... |
6 |
| • Do not incinerate spilled toner or used toner. Toner dust might ignite when exposed to an open ... |
6 |
| • Disposal can take place at our authorized dealer or at appropriate collection sites. |
6 |
| • Disposal can take place at our authorized dealer or at appropriate collection sites. |
6 |
| • Dispose of the used toner cartridge in accordance with the local regulation. |
6 |
| • Dispose of the used toner cartridge in accordance with the local regulation. |
6 |
| <TABLE> |
7 |
| <TABLE> |
7 |
| <TABLE> |
7 |
| <TABLE> |
7 |
| <TABLE> |
7 |
| <TABLE> |
7 |
| <TABLE BODY> |
7 |
| <TABLE ROW> |
7 |
| • When you pull out the plug from the socket, grip the plug to avoid damaging the cord and causin... |
7 |
| • When you pull out the plug from the socket, grip the plug to avoid damaging the cord and causin... |
7 |
| • When you pull out the plug from the socket, grip the plug to avoid damaging the cord and causin... |
7 |
| • When you pull out the plug from the socket, grip the plug to avoid damaging the cord and causin... |
7 |
| • Unplug the power cord from the wall outlet before you move the equipment. While moving the equi... |
7 |
| • Unplug the power cord from the wall outlet before you move the equipment. While moving the equi... |
7 |
| • When the machine will not be used for a long time, unplug the power cord. |
7 |
| • When the machine will not be used for a long time, unplug the power cord. |
7 |
| • If you use the machine in a confined space, make sure there is a continuous air turnover. |
7 |
| • If you use the machine in a confined space, make sure there is a continuous air turnover. |
7 |
| • Keep the machine away from humidity and dust. A fire or an electric shock might occur. |
7 |
| • Keep the machine away from humidity and dust. A fire or an electric shock might occur. |
7 |
| • Do not place the machine on an unstable or tilted surface. If it topples over, it could cause i... |
7 |
| • Do not place the machine on an unstable or tilted surface. If it topples over, it could cause i... |
7 |
| • After you move the machine, fix it with the caster fixture. Otherwise, the machine might move o... |
7 |
| • After you move the machine, fix it with the caster fixture. Otherwise, the machine might move o... |
7 |
| • Protect the equipment from dampness or wet weather, such as rain, snow, and so on. |
7 |
| • Protect the equipment from dampness or wet weather, such as rain, snow, and so on. |
7 |
| • Do not allow paper clips, staples, or other small metallic objects to fall inside the equipment. |
7 |
| • Do not allow paper clips, staples, or other small metallic objects to fall inside the equipment. |
7 |
| • Do not reuse stapled paper. Do not use aluminum foil, carbon-containing paper or other conducti... |
7 |
| • Do not reuse stapled paper. Do not use aluminum foil, carbon-containing paper or other conducti... |
7 |
| • Do not eat or swallow toner. |
7 |
| • Do not eat or swallow toner. |
7 |
| • Keep toner (used or unused) and toner bottle out of the reach of children. |
7 |
| • Keep toner (used or unused) and toner bottle out of the reach of children. |
7 |
| • For environmental reasons, do not dispose of the equipment or expended supply waste at househol... |
7 |
| • For environmental reasons, do not dispose of the equipment or expended supply waste at househol... |
7 |
| • When removing misfed paper, do not touch the fusing section because it could be very hot. |
7 |
| • When removing misfed paper, do not touch the fusing section because it could be very hot. |
7 |
| • Do not touch the anti-humidity switch from inside the machine because it could be very hot. |
7 |
| • Do not touch the anti-humidity switch from inside the machine because it could be very hot. |
7 |
| • The inside of the machine could be very hot. Do not touch the parts with a label indicating the... |
7 |
| • The inside of the machine could be very hot. Do not touch the parts with a label indicating the... |
7 |
| • Rolls of paper can be heavy, so you should be careful when loading one. |
7 |
| • Rolls of paper can be heavy, so you should be careful when loading one. |
7 |
| • This machine has been tested for safety using this supplier's parts and consumables. We recomme... |
7 |
| • This machine has been tested for safety using this supplier's parts and consumables. We recomme... |
7 |
| • Our products are engineered to meet high standards of quality and functionality, and we recomme... |
7 |
| • Our products are engineered to meet high standards of quality and functionality, and we recomme... |
7 |
| • This equipment is only to be installed by a qualified service personnel. |
7 |
| • This equipment is only to be installed by a qualified service personnel. |
7 |
| ENERGY STAR Program |
8 |
| ENERGY STAR Program |
8 |
| <TABLE> |
8 |
| <TABLE> |
8 |
| <TABLE> |
8 |
| <TABLE BODY> |
8 |
| <TABLE ROW> |
8 |
| <GRAPHIC> |
8 |
| As an ENERGY STAR Partner, we have determined that this machine model meets the ENERGY STAR Guide... |
8 |
| <TABLE> |
8 |
| <TABLE> |
8 |
| <TABLE BODY> |
8 |
| <TABLE ROW> |
8 |
| The ENERGY STAR Guidelines intend to establish an international energy-saving system for developi... |
8 |
| The ENERGY STAR Guidelines intend to establish an international energy-saving system for developi... |
8 |
| When a product meets the ENERGY STAR Guidelines for energy efficiency, the Partner shall place th... |
8 |
| This product was designed to reduce the environmental impact associated with office equipment by ... |
8 |
| • Auto Off Mode |
8 |
| • Auto Off Mode |
8 |
| • Auto Off Mode |
8 |
| To conserve energy, this product automatically turns off 1 minute after the last copying or print... |
8 |
| For how to change the default interval before entering Auto Off mode, see Auto Off Time in |
8 |
| Specification |
8 |
| Specification |
8 |
| Specification |
8 |
| <TABLE> |
8 |
| <TABLE> |
8 |
| <TABLE> |
8 |
| <TABLE BODY> |
8 |
| <TABLE ROW> |
8 |
| FW780 |
8 |
| <TABLE ROW> |
8 |
| <TABLE ROW> |
8 |
| Auto Off mode |
8 |
| Power consumption |
8 |
| 1.0 W |
8 |
| <TABLE ROW> |
8 |
| Default interval |
8 |
| 30 minute |
8 |
| - Recycled Paper |
8 |
| - Recycled Paper |
8 |
| Please contact your sales or service representative for recommended recycled paper types that may... |
8 |
| How to Read this Manual |
9 |
| How to Read this Manual |
9 |
| Symbols |
9 |
| Symbols |
9 |
| In this manual, the following symbols are used: |
9 |
| In this manual, the following symbols are used: |
9 |
| This symbol indicates a potentially hazardous situation that might result in death or serious inj... |
9 |
| This symbol indicates a potentially hazardous situation that might result in minor or moderate in... |
9 |
| * The statements above are notes for your safety. |
9 |
| If this instruction is not followed, paper might be misfed, originals might be damaged, or data m... |
9 |
| This symbol indicates the prior knowledge or preparations required before operating. |
9 |
| This symbol indicates precautions for operation, or actions to take after misoperation. |
9 |
| This symbol indicates numerical limits, functions that cannot be used together, or conditions in ... |
9 |
| This symbol indicates a reference. |
9 |
| Keys that appear on the machine's panel display. |
9 |
| Keys built into the machine's operation panel. |
9 |
| TABLE OF CONTENTS |
10 |
| Guide to Components 1 |
10 |
| Copier Exterior 1 |
10 |
| Operation Panel 3 |
10 |
| 1. Basics |
10 |
| Turning on the Power 5 |
10 |
| Turn on the Main Power 5 |
10 |
| Turn off the Main Power 5 |
10 |
| Recommended Originals 6 |
10 |
| Non-recommended Originals 7 |
10 |
| Note for Leading and Side Edges of the Originals 7 |
10 |
| Recommended Paper 8 |
10 |
| Anti-humidity Heater 9 |
10 |
| Toner 10 |
10 |
| Handling Toner 10 |
10 |
| Toner Storage 10 |
10 |
| Used Toner 10 |
10 |
| 2. Copying |
10 |
| Basic Copying (Copying to sheets) 11 |
10 |
| Manual Feed Mode 16 |
10 |
| Using the Rear Table 19 |
10 |
| Copying onto Roll Paper 21 |
10 |
| Synchro Cutting 21 |
10 |
| Preset Cutting 24 |
10 |
| Variable Cutting 25 |
10 |
| 3. Copy Settings |
10 |
| Copying onto Other Media 27 |
10 |
| Adjusting the Fusing Temperature Manually 28 |
10 |
| Adjusting Copy Image Density 30 |
10 |
| Setting the Number of Copies (Repeated Copying) 31 |
10 |
| Setting a Leading/Trailing Edge Margin 32 |
10 |
| Partial Copying 34 |
10 |
| Programming Settings You Often Use 37 |
10 |
| A) Program key 37 |
10 |
| B) Changing the Default Setting 38 |
10 |
| User Tools 40 |
10 |
| Settings You Can Change with User Tools 42 |
10 |
| 4. Maintaining Your Copier |
11 |
| Changing The Used Toner Bottle 47 |
11 |
| Adding Toner 50 |
11 |
| Changing the Roll Paper Size 54 |
11 |
| Removing the Roll Paper Holder 54 |
11 |
| Setting the Roll Paper Holder 54 |
11 |
| Loading A Roll Of Paper 56 |
11 |
| 5. Troubleshooting |
11 |
| If Something Goes Wrong 61 |
11 |
| If Indicator Lights Up 61 |
11 |
| If Jams Occur 63 |
11 |
| If the Original is Jammed at the exit 63 |
11 |
| If Sheet Paper is Jammed in the Feed-in Slot 64 |
11 |
| If Sheet Paper is Jammed at the Paper Exit 65 |
11 |
| If Roll Paper Jams 66 |
11 |
| If You Cannot See the Roll Paper Jam 68 |
11 |
| Others 71 |
11 |
| Absolutely Nothing Happens 71 |
11 |
| Something Happens, but Set Paper or Paper Select Never Appear 71 |
11 |
| If Jams Occur Frequently 71 |
11 |
| If Copies Look Wrong 71 |
11 |
| White Spots Appear 71 |
11 |
| Creases 72 |
11 |
| Copies Come Out Dog eared 72 |
11 |
| Black Streaks Appear on Copies 72 |
11 |
| Daily Maintenance 73 |
11 |
| Clean the Exposure Glass & the Platen Plate 73 |
11 |
| Do's & Don'ts 74 |
11 |
| Where to Put Your Copier 75 |
11 |
| Machine Environment 75 |
11 |
| Power connection 76 |
11 |
| Access To Machine 77 |
11 |
| 6. Specifications |
11 |
| Copier 79 |
11 |
| Roll Feeder 81 |
11 |
| Options 83 |
11 |
| Guide to Components |
13 |
| Guide to Components |
13 |
| Guide to Components |
13 |
| Copier Exterior |
13 |
| Copier Exterior |
13 |
| <GRAPHIC> |
13 |
| <GRAPHIC> |
13 |
| <GRAPHIC> |
13 |
| 1.� Locks |
13 |
| 1.� Locks |
13 |
| 1.� Locks |
13 |
| Squeeze both locks (1a&1b) to open the unit. Open the unit to empty the used toner bottle and to ... |
13 |
| 2.� Front Cover |
13 |
| 2.� Front Cover |
13 |
| Open the cover (and the unit) to access the toner cartridge. |
13 |
| 3.� Original Guides |
13 |
| 3.� Original Guides |
13 |
| Use the guides to keep the original straight as you feed the original into the copier. |
13 |
| 4.� Original Table |
13 |
| 4.� Original Table |
13 |
| Place your original face up here. If you want to copy a stiff original that can't be bent, use th... |
13 |
| 5.� Operation Panel |
13 |
| 5.� Operation Panel |
13 |
| fi P.3 “Operation Panel” |
13 |
| fi P.3 “Operation Panel” |
13 |
| 6.� Rear Table |
13 |
| 6.� Rear Table |
13 |
| Place stiff originals face down here. |
13 |
| 7.� Roll Feeder |
13 |
| 7.� Roll Feeder |
13 |
| Feeds paper from a roll to the copier. |
13 |
| 8.� Paper Guides |
13 |
| 8.� Paper Guides |
13 |
| Use the guides to keep the copy paper straight as you feed it into the copier. |
13 |
| 9.� Bypass Table |
13 |
| 9.� Bypass Table |
13 |
| Use this table when you want to make copy one by one. |
13 |
| 10.� Table |
13 |
| 10.� Table |
13 |
| Holds your copier and the Roll Feeder. |
13 |
| 11.� Main switch |
14 |
| 11.� Main switch |
14 |
| Use this switch to turn the copier on and off. The copier will need about 3 minutes to warm up, i... |
14 |
| <GRAPHIC> |
14 |
| 12.� Copy Exit Guide |
14 |
| Makes sure that copies don't fall off as they come out. |
14 |
| <GRAPHIC> |
14 |
| 13.� Anti-humidity Heater Switch |
14 |
| When humidity is high, the paper in the paper roll tray may absorb moisture, which can effect the... |
14 |
| <GRAPHIC> |
15 |
| Operation Panel |
15 |
| <GRAPHIC> |
15 |
| <GRAPHIC> |
15 |
| <GRAPHIC> |
15 |
| 1.� Function indicators |
15 |
| 1.� Function indicators |
15 |
| 1.� Function indicators |
15 |
| These indicators show which setting you are currently editing. Press the Function Select key to c... |
15 |
| • The top indicator (Paper Length indicator) lights when the paper length is being set. |
15 |
| • The top indicator (Paper Length indicator) lights when the paper length is being set. |
15 |
| • The top indicator (Paper Length indicator) lights when the paper length is being set. |
15 |
| • The second indicator (Leading Edge indicator) lights when the leading margin is being set. |
15 |
| • The second indicator (Leading Edge indicator) lights when the leading margin is being set. |
15 |
| • The third indicator (Trailing Edge indicator) lights when the trailing margin is being set. |
15 |
| • The third indicator (Trailing Edge indicator) lights when the trailing margin is being set. |
15 |
| • The fourth indicator (Copy Counter indicator) lights when the number of copies is being set. |
15 |
| • The fourth indicator (Copy Counter indicator) lights when the number of copies is being set. |
15 |
| 2.� Paper Length display |
15 |
| 2.� Paper Length display |
15 |
| Shows the length of paper the Roll Feeder will send. |
15 |
| Preset Cut |
15 |
| Preset Cut |
15 |
| Preset Cut |
15 |
| Press to scroll through the preset paper lengths for the Roll Feeder. |
15 |
| Cut Select |
15 |
| Cut Select |
15 |
| Cut Select |
15 |
| Turns Synchro Cut or Preset/Variable Cut on and off. |
15 |
| 5.� Energy Saver |
15 |
| 5.� Energy Saver |
15 |
| 5.� Energy Saver |
15 |
| Shows that the machine is in a state of wait (Energy Saver). Press key 9. |
15 |
| 6.� Troubleshooting indicators |
15 |
| 6.� Troubleshooting indicators |
15 |
| fi P.61 “Troubleshooting” |
15 |
| fi P.61 “Troubleshooting” |
15 |
| 7.� Wait |
15 |
| 7.� Wait |
15 |
| 7.� Wait |
15 |
| Shows that the copier is not yet ready to copy. |
15 |
| 8.� Ready (d), Set Original(R), Set Paper (K), Bypass Select (a) |
15 |
| 8.� Ready (d), Set Original(R), Set Paper (K), Bypass Select (a) |
15 |
| 8.� Ready (d), Set Original(R), Set Paper (K), Bypass Select (a) |
15 |
| Ready and Set Original lights up when the copier is ready to receive an original.The |
15 |
| Clear Modes/Energy Saver |
15 |
| Clear Modes/Energy Saver |
15 |
| Clear Modes/Energy Saver |
15 |
| Cancels all current settings. When you hold down this key for three seconds or more, the copier e... |
15 |
| To exit Energy Saver mode, press this key again. |
15 |
| Program |
15 |
| Program |
15 |
| Program |
15 |
| Allows you to recall or set a program. |
15 |
| The program indicator(LED) lights after you store the setting. |
16 |
| Function Select |
16 |
| Function Select |
16 |
| Function Select |
16 |
| Press to change which setting you are editing. The current selection is shown by the indicators a... |
16 |
| • Paper Length |
16 |
| • Paper Length |
16 |
| • Paper Length |
16 |
| • Leading Edge |
16 |
| • Leading Edge |
16 |
| • Trailing Edge |
16 |
| • Trailing Edge |
16 |
| • Copy Counter |
16 |
| • Copy Counter |
16 |
| Also used for copying a selected portion of the original. |
16 |
| + |
16 |
| + |
16 |
| + |
16 |
| Press to increase the value being edited. |
16 |
| Press to decrease the value being edited. |
16 |
| 13.� Leading Edge/Trailing Edge/ Copy Counter |
16 |
| 13.� Leading Edge/Trailing Edge/ Copy Counter |
16 |
| 13.� Leading Edge/Trailing Edge/ Copy Counter |
16 |
| Displays the margin settings and the number of copies made. |
16 |
| 14.� Roll Feeder |
16 |
| 14.� Roll Feeder |
16 |
| 14.� Roll Feeder |
16 |
| Light up when you select Roll Feeder 1 or 2. |
16 |
| Paper Select/Cut |
16 |
| Paper Select/Cut |
16 |
| Paper Select/Cut |
16 |
| Use to select the paper feed type such as Roll feeder 1, 2 and Bypass Tray. Also press to stop a ... |
16 |
| Copy Media |
16 |
| Copy Media |
16 |
| Copy Media |
16 |
| Press to select the type of copy paper you are using. |
16 |
| The copier will apply more or less heat accordingly. |
16 |
| • The top indicator-Translucent paper indicator |
16 |
| • The top indicator-Translucent paper indicator |
16 |
| • The top indicator-Translucent paper indicator |
16 |
| • The bottom indicator-Film indicator |
16 |
| • The bottom indicator-Film indicator |
16 |
| Emergency Stop |
16 |
| Emergency Stop |
16 |
| Emergency Stop |
16 |
| Press to stop the copying process immediately. |
16 |
| Use if your original is getting stuck in the copier. |
16 |
| If you stop operation by pressing this key, remove the original. |
16 |
| 18.� Density |
16 |
| 18.� Density |
16 |
| 18.� Density |
16 |
| Shows the density level the copies will have. |
16 |
| Press the left key to make copies lighter. |
16 |
| Press the right key to make copies darker. |
16 |
| Start |
16 |
| Start |
16 |
| Start |
16 |
| Press to start copying when you select manual feed mode. Otherwise, the copy job automatically st... |
16 |
| 20.� Green |
16 |
| 20.� Green |
16 |
| 20.� Green |
16 |
| Lights up when you select the manual feed mode. |
16 |
| Clear/Stop |
16 |
| Clear/Stop |
16 |
| Clear/Stop |
16 |
| When entering numbers, press to cancel. |
16 |
| While copying, press to stop copying. |
16 |
| 1.� Basics |
17 |
| 1.� Basics |
17 |
| Turning on the Power |
17 |
| Turning on the Power |
17 |
| Turning on the Power |
17 |
| To turn the machine on, press the main switch. |
17 |
| To turn the machine on, press the main switch. |
17 |
| Turn on the Main Power |
17 |
| Turn on the Main Power |
17 |
| A Make sure that the power cord is firmly plugged into the wall outlet. |
17 |
| A Make sure that the power cord is firmly plugged into the wall outlet. |
17 |
| A Make sure that the power cord is firmly plugged into the wall outlet. |
17 |
| A Make sure that the power cord is firmly plugged into the wall outlet. |
17 |
| B Turn on the main switch. |
17 |
| B Turn on the main switch. |
17 |
| <GRAPHIC> |
17 |
| Turn off the Main Power |
17 |
| A Turn off the main switch. |
17 |
| A Turn off the main switch. |
17 |
| A Turn off the main switch. |
17 |
| A Turn off the main switch. |
17 |
| <GRAPHIC> |
18 |
| Recommended Originals |
18 |
| • You can set originals with weight in the range 21g/m |
18 |
| • You can set originals with weight in the range 21g/m |
18 |
| • You can set originals with weight in the range 21g/m |
18 |
| • You can set originals with weight in the range 21g/m |
18 |
| • You can set original with sizes between 914¥3,000mm (W¥L), 36\ |
18 |
| • You can set original with sizes between 914¥3,000mm (W¥L), 36\ |
18 |
| • You can not use the Repeated Copying function in the following cases: |
18 |
| • You can not use the Repeated Copying function in the following cases: |
18 |
| When using the Carrier Sheet. |
18 |
| When setting an original longer than 1,200mm (48\ |
18 |
| • Fix the curl of originals to within the following range: |
18 |
| • Fix the curl of originals to within the following range: |
18 |
| • For the curl of the leading edge and the trailing edge: R50mm (2.0\ |
18 |
| • For the curl of the leading edge and the trailing edge: R50mm (2.0\ |
18 |
| • For the curl of the leading edge and the trailing edge: R50mm (2.0\ |
18 |
| <GRAPHIC> |
18 |
| • For the curl of the whole paper: f30mm (1.2\ |
18 |
| <GRAPHIC> |
18 |
| • When you copy the following originals, set them in the rear table: |
18 |
| fi P.19 “Using the Rear Table” |
18 |
| fi P.19 “Using the Rear Table” |
18 |
| • Thick originals (0.19mm ~1mm) |
18 |
| • Thick originals (0.19mm ~1mm) |
18 |
| • Thick originals (0.19mm ~1mm) |
18 |
| • Originals less than 297mm (11\ |
18 |
| • Originals less than 297mm (11\ |
18 |
| • When you copy the following originals, use the carrier sheet to set them: |
18 |
| • When you copy the following originals, use the carrier sheet to set them: |
18 |
| • Piled originals |
18 |
| • Piled originals |
18 |
| • Piled originals |
18 |
| • Folded originals |
18 |
| • Folded originals |
18 |
| • Taped or pasted originals |
18 |
| • Taped or pasted originals |
18 |
| • Originals which have a hole near the leading edge 40mm (1.6\ |
18 |
| • Originals which have a hole near the leading edge 40mm (1.6\ |
18 |
| • Dog-eared originals |
18 |
| • Dog-eared originals |
18 |
| • Creased, torn, or clipped-out originals |
18 |
| • Creased, torn, or clipped-out originals |
18 |
| • Wavy originals |
18 |
| • Wavy originals |
18 |
| • Pasted originals |
18 |
| • Pasted originals |
18 |
| • Originals whose leading edge is not straight |
18 |
| • Originals whose leading edge is not straight |
18 |
| • Curled originals |
19 |
| • Curled originals |
19 |
| Non-recommended Originals |
19 |
| Non-recommended Originals |
19 |
| The following types of originals are not recommended. |
19 |
| The following types of originals are not recommended. |
19 |
| • Wet originals |
19 |
| • Wet originals |
19 |
| • Wet originals |
19 |
| • Originals with cardboard stuck on the leading edge |
19 |
| • Originals with cardboard stuck on the leading edge |
19 |
| • Originals with clips or staples |
19 |
| • Originals with clips or staples |
19 |
| • Originals with wet ink or white-out |
19 |
| • Originals with wet ink or white-out |
19 |
| • Carbon paper |
19 |
| • Carbon paper |
19 |
| • Originals made of materials other than paper or film |
19 |
| • Originals made of materials other than paper or film |
19 |
| (thermosensitive paper, aluminum foil, etc.) |
19 |
| Note for Leading and Side Edges of the Originals |
19 |
| Note for Leading and Side Edges of the Originals |
19 |
| Margins on the leading and side edges of originals are not copied as shown in the illustration. |
19 |
| Margins on the leading and side edges of originals are not copied as shown in the illustration. |
19 |
| • a=0±3mm (0.12”) |
19 |
| • a=0±3mm (0.12”) |
19 |
| • a=0±3mm (0.12”) |
19 |
| • b1+b2<0±2mm (0.08”) (A1L) |
19 |
| • b1+b2<0±2mm (0.08”) (A1L) |
19 |
| <GRAPHIC> |
20 |
| Recommended Paper |
20 |
| Standard paper sizes that can be used in this copier are shown below. |
20 |
| Standard paper sizes that can be used in this copier are shown below. |
20 |
| <TABLE> |
20 |
| <TABLE> |
20 |
| <TABLE BODY> |
20 |
| <TABLE ROW> |
20 |
| Metric version |
20 |
| Inch version |
20 |
| Bypass |
20 |
| Roll Feeder |
20 |
| <TABLE ROW> |
20 |
| A0 |
20 |
| E (36\ |
20 |
| K |
20 |
| K |
20 |
| <TABLE ROW> |
20 |
| A1 |
20 |
| D (24\ |
20 |
| KL |
20 |
| KL |
20 |
| <TABLE ROW> |
20 |
| A2 |
20 |
| C (18\ |
20 |
| KL |
20 |
| KL |
20 |
| <TABLE ROW> |
20 |
| A3 |
20 |
| B (12\ |
20 |
| KL |
20 |
| KL |
20 |
| <TABLE ROW> |
20 |
| A4 |
20 |
| A (9\ |
20 |
| K |
20 |
| K |
20 |
| When you make a copy on a non-standard size of paper, set the paper in the bypass tray. |
20 |
| When you make a copy on a non-standard size of paper, set the paper in the bypass tray. |
20 |
| Weight of paper suitable for this copier: 51g/m |
20 |
| Do not use the following kinds of paper or a paper jam might occur. |
20 |
| • Bent, folded, or creased paper |
20 |
| • Bent, folded, or creased paper |
20 |
| • Bent, folded, or creased paper |
20 |
| • Torn paper |
20 |
| • Torn paper |
20 |
| • Perforated paper |
20 |
| • Perforated paper |
20 |
| • Non-smooth paper |
20 |
| • Non-smooth paper |
20 |
| • Slippery paper |
20 |
| • Slippery paper |
20 |
| • Thin paper that has low stiffness |
20 |
| • Thin paper that has low stiffness |
20 |
| Do not make a copy on paper with any kind of coating, such as thermosensitive paper, art paper, a... |
20 |
| Do not use paper with strong curls at the edges or corners. (Curls rising more than 5mm (1/4\ |
20 |
| When you make copies on film, take out the copies delivered to the copy exit guide one sheet at a... |
20 |
| If copying to natural tracing paper (all pulp, translucent paper) at a relative humidity of 35% o... |
20 |
| A If the paper was left out of its package for 5 minutes or more, remove the first 1000mm (39.3\ |
20 |
| A If the paper was left out of its package for 5 minutes or more, remove the first 1000mm (39.3\ |
20 |
| A If the paper was left out of its package for 5 minutes or more, remove the first 1000mm (39.3\ |
20 |
| A If the paper was left out of its package for 5 minutes or more, remove the first 1000mm (39.3\ |
20 |
| A If the paper was left out of its package for 5 minutes or more, remove the first 1000mm (39.3\ |
20 |
| B If copies come out wavy or with white spots, use translucent paper instead of natural tracing p... |
20 |
| B If copies come out wavy or with white spots, use translucent paper instead of natural tracing p... |
20 |
| C Always keep the paper in a bag when not using it. |
20 |
| C Always keep the paper in a bag when not using it. |
20 |
| • Store the paper in a sealed polyvinyl bag if not used for a long period. |
20 |
| • Store the paper in a sealed polyvinyl bag if not used for a long period. |
20 |
| If it gets humid, paper will curl or wave which can cause a paper jam or part of the image not to... |
20 |
| • When you use paper in high humidity under hot conditions, take out only the necessary amount of... |
21 |
| • When you use paper in high humidity under hot conditions, take out only the necessary amount of... |
21 |
| Anti-humidity Heater |
21 |
| Anti-humidity Heater |
21 |
| • When humidity is high, the paper in the paper roll tray may absorb moisture, which can effect t... |
21 |
| • When humidity is high, the paper in the paper roll tray may absorb moisture, which can effect t... |
21 |
| • When humidity is high, the paper in the paper roll tray may absorb moisture, which can effect t... |
21 |
| • When humidity is high, the paper in the paper roll tray may absorb moisture, which can effect t... |
21 |
| Toner |
22 |
| Toner |
22 |
| Handling Toner |
22 |
| Handling Toner |
22 |
| <TABLE> |
22 |
| <TABLE> |
22 |
| <TABLE> |
22 |
| <TABLE> |
22 |
| <TABLE> |
22 |
| <TABLE BODY> |
22 |
| <TABLE ROW> |
22 |
| <GRAPHIC> |
22 |
| • Do not incinerate used toner, toner bottles or toner cartridges. |
22 |
| • Toner dust might ignite when exposed to an open flame. |
22 |
| • Dispose of toner bottles and the used toner cartridges according to local regulations. |
22 |
| <TABLE> |
22 |
| <TABLE> |
22 |
| <TABLE> |
22 |
| <TABLE> |
22 |
| <TABLE BODY> |
22 |
| <TABLE ROW> |
22 |
| <GRAPHIC> |
22 |
| • Do not eat or swallow toner. |
22 |
| • Keep toner (used or unused), toner bottles, and toner cartridges out of reach of children. |
22 |
| <TABLE> |
22 |
| <TABLE> |
22 |
| <TABLE> |
22 |
| <TABLE> |
22 |
| <TABLE BODY> |
22 |
| <TABLE ROW> |
22 |
| <GRAPHIC> |
22 |
| • This machine has been tested for safety using this supplier's parts and consumables. We recomme... |
22 |
| • If you use toner other than the recommended, a fault might occur. |
22 |
| • If you use toner other than the recommended, a fault might occur. |
22 |
| • If you use toner other than the recommended, a fault might occur. |
22 |
| • If you want to add toner, |
22 |
| • If you want to add toner, |
22 |
| Toner Storage |
22 |
| Toner Storage |
22 |
| • Store toner cartridges horizontally in a cool, dark place. |
22 |
| • Store toner cartridges horizontally in a cool, dark place. |
22 |
| • Store toner cartridges horizontally in a cool, dark place. |
22 |
| • Store toner cartridges horizontally in a cool, dark place. |
22 |
| • Do not leave toner cartridges in your car on a hot day for a long period of time or anywhere th... |
22 |
| • Do not leave toner cartridges in your car on a hot day for a long period of time or anywhere th... |
22 |
| • Never store toner where it will be exposed to heat. |
22 |
| • Never store toner where it will be exposed to heat. |
22 |
| • Do not lay heavy objects on toner bottles. |
22 |
| • Do not lay heavy objects on toner bottles. |
22 |
| Used Toner |
22 |
| Used Toner |
22 |
| • Toner cannot be re-used. |
22 |
| • Toner cannot be re-used. |
22 |
| • Toner cannot be re-used. |
22 |
| • Toner cannot be re-used. |
22 |
| • Put the used toner in the plastic bag and dispose of it according to local regulations. |
22 |
| • Put the used toner in the plastic bag and dispose of it according to local regulations. |
22 |
| 2.� Copying |
23 |
| 2.� Copying |
23 |
| Basic Copying (Copying to sheets) |
23 |
| Basic Copying (Copying to sheets) |
23 |
| Use bypass table or roll feeder to copy onto paper. |
23 |
| Use bypass table or roll feeder to copy onto paper. |
23 |
| For acceptable types of original and paper, |
23 |
| For acceptable types of original and paper, |
23 |
| If you use bypass teble, place one sheet of paper and never insert more than one sheet of paper. |
23 |
| If the copy paper is curled, place it with the curl facing downwards. |
23 |
| When you set A0 size (36\ |
23 |
| When setting an original or paper longer than 1,200mm (48”), pull down the Original stopper (opti... |
23 |
| <GRAPHIC> |
23 |
| Do not use paper which is cut obliquely. When the difference between the right side and the left ... |
23 |
| <GRAPHIC> |
23 |
| You cannot copy to both sides of the paper at the same time. |
23 |
| The machine needs about 3 minutes to warm up after being turned on before copies can be made. The... |
23 |
| You can set either the paper or an original (from bypass tray or roll feeder) first. When you hav... |
23 |
| Do not lean on the copy table or lay heavy objects on it. |
24 |
| Pick up a sheet of copy, everytime you finish copying. |
24 |
| <TABLE> |
24 |
| <TABLE> |
24 |
| <TABLE> |
24 |
| <TABLE> |
24 |
| <TABLE BODY> |
24 |
| <TABLE ROW> |
24 |
| • If during copying your original gets stuck in the copier, press the {Emergency Stop} key. |
24 |
| • If during copying your original gets stuck in the copier, press the |
24 |
| <GRAPHIC> |
24 |
| • If you stop operation by pressing this key, remove the original. |
24 |
| A Turn on the main switch. |
24 |
| A Turn on the main switch. |
24 |
| A Turn on the main switch. |
24 |
| <GRAPHIC> |
24 |
| B When the |
24 |
| <GRAPHIC> |
24 |
| C Select any copy settings you require, such as the media type or copy density. |
24 |
| Press the |
25 |
| <GRAPHIC> |
25 |
| If you select two roll feeder, select one of the roll. |
25 |
| If you select two roll feeder, select one of the roll. |
25 |
| If you select the Bypass table, center the paper |
25 |
| <GRAPHIC> |
25 |
| D Open the guides to keep the edge of the original from slipping into the paper entrance. |
25 |
| <GRAPHIC> |
26 |
| E Set the original guide to match the width of the original. |
26 |
| <GRAPHIC> |
26 |
| F Center your original |
26 |
| <GRAPHIC> |
26 |
| If you want to feed manually, use the manual feed mode. Press the |
26 |
| If you want to feed manually, use the manual feed mode. Press the |
26 |
| <GRAPHIC> |
27 |
| G The original is fed through to the rear table. |
27 |
| <GRAPHIC> |
27 |
| H When the original is being sent back, the machine scans the original and starts copying. |
27 |
| <GRAPHIC> |
27 |
| I The copy is delivered at the back of the copier. |
27 |
| <GRAPHIC> |
27 |
| You must always pick up copies everytime, otherwise copy paper will pile up without rule. |
27 |
| You must always pick up copies everytime, otherwise copy paper will pile up without rule. |
27 |
| J After copying has finished, hold the original with one hand, press the Clear/Stop key, and remo... |
28 |
| J After copying has finished, hold the original with one hand, press the Clear/Stop key, and remo... |
28 |
| <GRAPHIC> |
28 |
| Do not hold down or pull out the original during copying. Do not put heavy object on the original... |
28 |
| Do not hold down or pull out the original during copying. Do not put heavy object on the original... |
28 |
| If you do not insert the original in a certain interval after inserting the paper, the paper will... |
28 |
| If you do not insert the paper in a certain interval after the original, the original will be eje... |
28 |
| If the copier is idle for a certain interval after you have used it, the machine resets itself to... |
28 |
| You can preset the initial settings of the copier |
28 |
| Manual Feed Mode |
28 |
| Manual Feed Mode |
28 |
| When you need to make larger sized paper, you can feed paper manually by using this function. If ... |
28 |
| When you need to make larger sized paper, you can feed paper manually by using this function. If ... |
28 |
| A When the |
28 |
| A When the |
28 |
| A When the |
28 |
| <GRAPHIC> |
29 |
| B If any previous settings remain, press the |
29 |
| <GRAPHIC> |
29 |
| C Press the |
29 |
| <GRAPHIC> |
29 |
| The green indicator, which is next to the start key, goes on. |
29 |
| If you want to use this setting as a default, |
29 |
| If you want to use this setting as a default, |
29 |
| D Select any copy settings you require, such as the media type or copy density. |
29 |
| D Select any copy settings you require, such as the media type or copy density. |
29 |
| Press the |
29 |
| <GRAPHIC> |
29 |
| If you select two roll feeder, select one of the roll. |
29 |
| If you select two roll feeder, select one of the roll. |
29 |
| If you select the Bypass table, Center the paper |
30 |
| <GRAPHIC> |
30 |
| E Set the original guides to match the original size mark. Place the original |
30 |
| <GRAPHIC> |
30 |
| Do not force to remove the original once you set it and if you want to change the position of you... |
30 |
| Do not force to remove the original once you set it and if you want to change the position of you... |
30 |
| <GRAPHIC> |
30 |
| F If you are ready to make copy, press the |
30 |
| G The original is fed through to the rear table. |
31 |
| G The original is fed through to the rear table. |
31 |
| <GRAPHIC> |
31 |
| H When the original is being sent back, the machine reads the original and starts copying. |
31 |
| <GRAPHIC> |
31 |
| With Repeated Copying, the original is repeatedly fed through and sent back until all copies have... |
31 |
| I Copies are delivered at the rear of the machine. |
31 |
| I Copies are delivered at the rear of the machine. |
31 |
| <GRAPHIC> |
31 |
| Using the Rear Table |
31 |
| Set thick originals or originals less than 297(11”)mm in width and more than 1,200( 48”)mm in len... |
31 |
| Set thick originals or originals less than 297(11”)mm in width and more than 1,200( 48”)mm in len... |
31 |
| You cannot use the following functions when using the rear table. |
31 |
| You cannot use the following functions when using the rear table. |
31 |
| • Repeated Copying |
31 |
| • Repeated Copying |
31 |
| • Repeated Copying |
31 |
| • Synchro Cut with roll paper (The machine beeps.) |
32 |
| • Synchro Cut with roll paper (The machine beeps.) |
32 |
| • Partial Copying |
32 |
| • Partial Copying |
32 |
| A Choose any copy settings you require. |
32 |
| A Choose any copy settings you require. |
32 |
| A Choose any copy settings you require. |
32 |
| B For manual copying, set the paper. |
32 |
| B For manual copying, set the paper. |
32 |
| C Pull up the guide to avoid paper misfeeds. |
32 |
| C Pull up the guide to avoid paper misfeeds. |
32 |
| D Insert the original |
32 |
| D Insert the original |
32 |
| <GRAPHIC> |
32 |
| E When the machine scans the original and starts copying, support the original with your hands at... |
32 |
| F Press the |
32 |
| F Press the |
32 |
| <GRAPHIC> |
32 |
| If the paper is hardly to remove, |
32 |
| Copying onto Roll Paper |
33 |
| Copying onto Roll Paper |
33 |
| The paper will be fed to the copier from the Roll Feeder. You can copy onto roll paper using the ... |
33 |
| The paper will be fed to the copier from the Roll Feeder. You can copy onto roll paper using the ... |
33 |
| • Synchro cutting |
33 |
| • Synchro cutting |
33 |
| • Synchro cutting |
33 |
| • Preset cutting |
33 |
| • Preset cutting |
33 |
| • Variable cutting |
33 |
| • Variable cutting |
33 |
| If unused roll paper is left in the copier, cut 1000mm (39.3\ |
33 |
| If unused roll paper is left in the copier, cut 1000mm (39.3\ |
33 |
| When you want to copy a long original, curled original, or the thin original (less than 0.1mm) wh... |
33 |
| <TABLE> |
33 |
| <TABLE> |
33 |
| <TABLE> |
33 |
| <TABLE> |
33 |
| <TABLE BODY> |
33 |
| <TABLE ROW> |
33 |
| • If during copying your original gets stuck in the copier, press the {Emergency Stop} key. |
33 |
| • If during copying your original gets stuck in the copier, press the |
33 |
| <GRAPHIC> |
33 |
| • If you stop operation by pressing this key, remove the original. |
33 |
| Synchro Cutting |
33 |
| Synchro Cutting |
33 |
| This function cuts roll paper automatically according to the original length. |
33 |
| This function cuts roll paper automatically according to the original length. |
33 |
| This feature can cut length of paper in the range of 280mm to 3,000mm, 11”to 118”. |
33 |
| This feature can cut length of paper in the range of 280mm to 3,000mm, 11”to 118”. |
33 |
| A Press the |
34 |
| A Press the |
34 |
| A Press the |
34 |
| <GRAPHIC> |
34 |
| The |
34 |
| B Press the |
34 |
| B Press the |
34 |
| <GRAPHIC> |
34 |
| The Synchro indicator (2) lights up. |
34 |
| C Press the |
34 |
| C Press the |
34 |
| <GRAPHIC> |
34 |
| D Select any copy settings you require. |
34 |
| E Set the original guides to match the width of the original. |
35 |
| E Set the original guides to match the width of the original. |
35 |
| <GRAPHIC> |
35 |
| F Make sure that the |
35 |
| <GRAPHIC> |
35 |
| G Center your original |
35 |
| <GRAPHIC> |
35 |
| Press the |
35 |
| Press the |
35 |
| H After copying has finished, hold the original with one hand, press the |
36 |
| H After copying has finished, hold the original with one hand, press the |
36 |
| <GRAPHIC> |
36 |
| To cancel copying, press the |
36 |
| To cancel copying, press the |
36 |
| To call off on-going copying, for example, when you have inserted a wrong blueprint, press the |
36 |
| Preset Cutting |
36 |
| Preset Cutting |
36 |
| This function cuts roll paper to a selected length. The paper is cut to this length regardless of... |
36 |
| This function cuts roll paper to a selected length. The paper is cut to this length regardless of... |
36 |
| The default preset cut lengths are as follows. Metric Version: 1189mm, 841mm, 594mm, 420mm, 297mm... |
36 |
| The default preset cut lengths are as follows. Metric Version: 1189mm, 841mm, 594mm, 420mm, 297mm... |
36 |
| A Press the |
36 |
| A Press the |
36 |
| A Press the |
36 |
| <GRAPHIC> |
37 |
| B Press the |
37 |
| <GRAPHIC> |
37 |
| The |
37 |
| C Press the |
37 |
| C Press the |
37 |
| D Choose any copy settings you require. |
37 |
| D Choose any copy settings you require. |
37 |
| E Continue from step E |
37 |
| E Continue from step E |
37 |
| Variable Cutting |
37 |
| Variable Cutting |
37 |
| This function cuts roll paper in a length you specify. |
37 |
| This function cuts roll paper in a length you specify. |
37 |
| Length can be cut from 280mm to 3,000mm, 11\ |
37 |
| Length can be cut from 280mm to 3,000mm, 11\ |
37 |
| A Press the |
37 |
| A Press the |
37 |
| A Press the |
37 |
| <GRAPHIC> |
37 |
| The |
37 |
| B Press the |
37 |
| B Press the |
37 |
| C Press the |
38 |
| C Press the |
38 |
| <GRAPHIC> |
38 |
| You can change the settings by 1mm (0.1”) steps. |
38 |
| D Choose any copy settings you require. |
38 |
| D Choose any copy settings you require. |
38 |
| E Press the |
38 |
| E Press the |
38 |
| <GRAPHIC> |
38 |
| F Continue from step E |
38 |
| 3.� Copy Settings |
39 |
| 3.� Copy Settings |
39 |
| Copying onto Other Media |
39 |
| Copying onto Other Media |
39 |
| To copy onto translucent paper, film, use the |
39 |
| To copy onto translucent paper, film, use the |
39 |
| <TABLE> |
39 |
| <TABLE> |
39 |
| <TABLE BODY> |
39 |
| <TABLE ROW> |
39 |
| Type of paper |
39 |
| Type of paper |
39 |
| Type of paper |
39 |
| Media setting |
39 |
| Media setting |
39 |
| Media setting |
39 |
| <TABLE ROW> |
39 |
| Plain paper |
39 |
| Both indicators off |
39 |
| <TABLE ROW> |
39 |
| Film |
39 |
| Film indicator on |
39 |
| <TABLE ROW> |
39 |
| Translucent paper |
39 |
| Translucent paper indicator on |
39 |
| <TABLE ROW> |
39 |
| Heavy paper |
39 |
| Translucent paper indicator on |
39 |
| <TABLE ROW> |
39 |
| Thin paper |
39 |
| No indicator or the film indicator if necessary. |
39 |
| If you are not sure of what type of paper you have, check the label on the paper package to confi... |
39 |
| A Press the |
39 |
| A Press the |
39 |
| A Press the |
39 |
| <GRAPHIC> |
39 |
| The |
39 |
| The |
39 |
| B When the |
40 |
| B When the |
40 |
| Even if you select the media type correctly, creasing might occur depending on the temperature or... |
40 |
| Even if you select the media type correctly, creasing might occur depending on the temperature or... |
40 |
| Adjusting the Fusing Temperature Manually |
40 |
| Adjusting the Fusing Temperature Manually |
40 |
| A Press the |
40 |
| A Press the |
40 |
| A Press the |
40 |
| A Press the |
40 |
| <GRAPHIC> |
40 |
| B Hold down the |
40 |
| C Press the |
40 |
| C Press the |
40 |
| <GRAPHIC> |
40 |
| • Plain paper : 1234567 |
40 |
| • Plain paper : 1234567 |
40 |
| • Plain paper : 1234567 |
40 |
| • Translucent paper: 1234 |
40 |
| • Translucent paper: 1234 |
40 |
| • Film : 1234 |
40 |
| • Film : 1234 |
40 |
| D After you have finished setting the temperature, press the |
40 |
| D After you have finished setting the temperature, press the |
40 |
| E Choose any copy settings you require, and then start copying. |
41 |
| E Choose any copy settings you require, and then start copying. |
41 |
| The new fusing temperature for the selected paper type is cleared when you press the |
41 |
| The new fusing temperature for the selected paper type is cleared when you press the |
41 |
| Adjusting Copy Image Density |
42 |
| Adjusting Copy Image Density |
42 |
| To make copies darker or lighter, change the density setting. There are 14 density levels (=7 not... |
42 |
| To make copies darker or lighter, change the density setting. There are 14 density levels (=7 not... |
42 |
| • Standard density level (Default) |
42 |
| • Standard density level (Default) |
42 |
| • Standard density level (Default) |
42 |
| • 3 darker levels |
42 |
| • 3 darker levels |
42 |
| • 10 lighter levels |
42 |
| • 10 lighter levels |
42 |
| Set the density with the |
42 |
| The indicator shows seven levels at a time. When you start from the standard image density, the m... |
42 |
| The indicator shows seven levels at a time. When you start from the standard image density, the m... |
42 |
| The brighter notch shows which level is now set. If you go lower than the leftmost notch, the Lig... |
42 |
| <GRAPHIC> |
42 |
| If you change the copy image density while repeat copying, the next copy job will come out with n... |
42 |
| A Press the |
42 |
| A Press the |
42 |
| A Press the |
42 |
| <GRAPHIC> |
42 |
| B Each time you press the |
42 |
| Setting the Number of Copies (Repeated Copying) |
43 |
| Setting the Number of Copies (Repeated Copying) |
43 |
| You can preset the number of copies (1 to 10) you want to make. Repeated copying means making two... |
43 |
| You can preset the number of copies (1 to 10) you want to make. Repeated copying means making two... |
43 |
| With this feature, the image might be copied at a slant. Whether this happens depends on the orig... |
43 |
| With this feature, the image might be copied at a slant. Whether this happens depends on the orig... |
43 |
| You cannot use the repeated copy function in the following cases: |
43 |
| A Press the |
43 |
| A Press the |
43 |
| A Press the |
43 |
| <GRAPHIC> |
44 |
| Setting a Leading/Trailing Edge Margin |
44 |
| You can set a margin on the leading or trailing edge of the copy when you use Roll Feeder in the ... |
44 |
| You can set a margin on the leading or trailing edge of the copy when you use Roll Feeder in the ... |
44 |
| <GRAPHIC> |
44 |
| You can set up to a ±99mm, ±4.0\ |
44 |
| You can set up to a ±99mm, ±4.0\ |
44 |
| When you set a leading margin, the copy image is shifted to the trailing edge. The copy image is ... |
44 |
| A Press the |
44 |
| A Press the |
44 |
| A Press the |
44 |
| <GRAPHIC> |
44 |
| B Press the |
44 |
| To clear the value, press the |
44 |
| To clear the value, press the |
44 |
| C If you want to set both margins, press the Function select key and specify the other margin. |
44 |
| C If you want to set both margins, press the Function select key and specify the other margin. |
44 |
| D Using the original table, insert the leading edge of the original first. |
45 |
| D Using the original table, insert the leading edge of the original first. |
45 |
| <GRAPHIC> |
45 |
| If you use the rear table, insert the original trailing edge first. |
45 |
| If you use the rear table, insert the original trailing edge first. |
45 |
| Partial Copying |
46 |
| Partial Copying |
46 |
| The Partial Copy function copies only a part of an original. |
46 |
| The Partial Copy function copies only a part of an original. |
46 |
| You need to enter start and end points in the feed direction of the original . |
46 |
| <GRAPHIC> |
46 |
| You cannot use the Partial Copying function when using the Rear Table. |
46 |
| You cannot use the Partial Copying function when using the Rear Table. |
46 |
| You cannot use the Partial Copying function for originals shorter than 255mm. |
46 |
| If you set the start point within 155 mm of the leading edge of the original, the copier will reg... |
46 |
| The minimum available space between the start point and the end point is 30 mm. |
46 |
| If you do not set the end point after setting the start point (a), the copier will regard the tra... |
46 |
| If you set the start point within 40mm of the trailing edge of the original, the copier will canc... |
46 |
| If you set the end point within 40mm of the trailing edge of the original, the copier will regard... |
46 |
| In the Synchro Cutting function, the copier will cut the paper in a length from the start point t... |
46 |
| When the Partial Copying function is selected, the copier will reset the settings for the trailin... |
46 |
| A Hold down the |
46 |
| A Hold down the |
46 |
| A Hold down the |
46 |
| A \ |
47 |
| <GRAPHIC> |
47 |
| B Slide the paper straight into the copier until it stops, or press the |
47 |
| <GRAPHIC> |
47 |
| C Set the original. |
47 |
| <GRAPHIC> |
47 |
| D Press the |
47 |
| The \ |
47 |
| The copier starts copying. |
48 |
| <GRAPHIC> |
48 |
| E Press the |
48 |
| The \ |
48 |
| <GRAPHIC> |
48 |
| F After the paper has been delivered, press the |
48 |
| G Hold down the |
48 |
| G Hold down the |
48 |
| The \ |
48 |
| Programming Settings You Often Use |
49 |
| Programming Settings You Often Use |
49 |
| There are two ways of programming settings you often use. |
49 |
| There are two ways of programming settings you often use. |
49 |
| A) Store the settings in the |
49 |
| B) Change the default settings to those you use most frequently. Whenever you turn on the machine... |
49 |
| A) Program key |
49 |
| A) Program key |
49 |
| Storing Settings in the Program Key |
49 |
| Storing Settings in the Program Key |
49 |
| You can store one setting for frequently use. |
49 |
| You can store one setting for frequently use. |
49 |
| You can store one setting for frequently use. |
49 |
| A Press the |
49 |
| A Press the |
49 |
| A Press the |
49 |
| <GRAPHIC> |
49 |
| B Input the settings you want to store. |
49 |
| C Make a copy. |
49 |
| C Make a copy. |
49 |
| The machine memorizes the types of job setting. |
49 |
| D Press the |
49 |
| D Press the |
49 |
| Recalling Settings Stored in the Program key |
50 |
| Recalling Settings Stored in the Program key |
50 |
| A Press the |
50 |
| A Press the |
50 |
| A Press the |
50 |
| A Press the |
50 |
| <GRAPHIC> |
50 |
| B Enter the number of copies required with the |
50 |
| <GRAPHIC> |
50 |
| C Make a copy. |
50 |
| B) Changing the Default Setting |
50 |
| B) Changing the Default Setting |
50 |
| A Turn off the main switch. |
50 |
| A Turn off the main switch. |
50 |
| A Turn off the main switch. |
50 |
| A Turn off the main switch. |
50 |
| <GRAPHIC> |
51 |
| B While holding down the |
51 |
| <GRAPHIC> |
51 |
| The |
51 |
| C Input the settings you want. |
51 |
| C Input the settings you want. |
51 |
| D Turn off the main switch. |
51 |
| D Turn off the main switch. |
51 |
| The next time you turn the copier on, the settings you programmed in step C will take effect. |
51 |
| The next time you turn the copier on, the settings you programmed in step C will take effect. |
51 |
| User Tools |
52 |
| User Tools |
52 |
| Access the User Tools to make the following adjustments: |
52 |
| Access the User Tools to make the following adjustments: |
52 |
| A1) Magnification Adjustment: allows you to adjust the vertical degree. |
52 |
| A2) Cut Length: allows you to adjust the cut length. |
52 |
| -25mm ~ +25mm (-1.0\ |
52 |
| A Hold down the |
52 |
| A Hold down the |
52 |
| A Hold down the |
52 |
| <GRAPHIC> |
52 |
| \ |
52 |
| B If you wish to adjust the Cut Length ( A2 ), press the |
52 |
| B If you wish to adjust the Cut Length ( A2 ), press the |
52 |
| C Press the |
52 |
| C Press the |
52 |
| <GRAPHIC> |
52 |
| The Paper Length display shows the current value. |
52 |
| D Use the |
53 |
| D Use the |
53 |
| <GRAPHIC> |
53 |
| E Press the |
53 |
| <GRAPHIC> |
53 |
| F Press the |
53 |
| <GRAPHIC> |
54 |
| Settings You Can Change with User Tools |
54 |
| This section is for the key operators in charge of this machine. You can change or set the machin... |
54 |
| This section is for the key operators in charge of this machine. You can change or set the machin... |
54 |
| For how to enter the User Tools program, press the |
54 |
| For how to enter the User Tools program, press the |
54 |
| <GRAPHIC> |
54 |
| • Fusing Temperature 1–Normal(+01) |
54 |
| • Fusing Temperature 1–Normal(+01) |
54 |
| • Fusing Temperature 1–Normal(+01) |
54 |
| 0: Mode 1, 1: Mode 2, 2: Mode 3, 3: Mode 4, 4: Mode 5, 5: Mode 6, 6: Mode 7 |
54 |
| 0: Mode 1, 1: Mode 2, 2: Mode 3, 3: Mode 4, 4: Mode 5, 5: Mode 6, 6: Mode 7 |
54 |
| Default: 2 |
54 |
| For details about each mode, contact your service representative. |
54 |
| • Fusing Temperature 2–High (+02) |
54 |
| • Fusing Temperature 2–High (+02) |
54 |
| • Fusing Temperature 2–High (+02) |
54 |
| 0: Mode 5, 1: Mode 6, 2: Mode 7, 3: Mode 8 |
54 |
| 0: Mode 5, 1: Mode 6, 2: Mode 7, 3: Mode 8 |
54 |
| Default: 0 |
54 |
| For details about each mode, contact your service representative. |
54 |
| • Fusing Temperature 3–Low(+03) |
54 |
| • Fusing Temperature 3–Low(+03) |
54 |
| • Fusing Temperature 3–Low(+03) |
54 |
| 0: Mode 2, 1: Mode 3, 2: Mode 4, 3: Mode 5 |
54 |
| 0: Mode 2, 1: Mode 3, 2: Mode 4, 3: Mode 5 |
54 |
| Default: 1 |
54 |
| For details about each mode, contact your service representative. |
54 |
| • Count Up/Down(+04) |
54 |
| • Count Up/Down(+04) |
54 |
| • Count Up/Down(+04) |
54 |
| 0: Count up, 1: Count down |
54 |
| 0: Count up, 1: Count down |
54 |
| Default: 0 |
55 |
| • Beeper On/Off(+05) |
55 |
| • Beeper On/Off(+05) |
55 |
| • Beeper On/Off(+05) |
55 |
| 0: On, 1: All Off, 2: Partially Off |
55 |
| 0: On, 1: All Off, 2: Partially Off |
55 |
| Default: 2(The beeper does not work if you use leading edge margin.) |
55 |
| • Paper Feed Out Waiting Time Setting(+06) |
55 |
| • Paper Feed Out Waiting Time Setting(+06) |
55 |
| • Paper Feed Out Waiting Time Setting(+06) |
55 |
| 0: 2min, 1: 1min, 2: 3min, 3: 4min, 4: 5 min |
55 |
| 0: 2min, 1: 1min, 2: 3min, 3: 4min, 4: 5 min |
55 |
| Default: 0 |
55 |
| • Manual Feed Start Time Setting(+07) |
55 |
| • Manual Feed Start Time Setting(+07) |
55 |
| • Manual Feed Start Time Setting(+07) |
55 |
| 0: 2.0sec, 1: 0.7sec, 2: 1.0sec, 3: 3.0sec, 4: 4.0sec, 5: 5.0sec |
55 |
| 0: 2.0sec, 1: 0.7sec, 2: 1.0sec, 3: 3.0sec, 4: 4.0sec, 5: 5.0sec |
55 |
| Default: 0 |
55 |
| • Lead Edge Increase/Decrease Speed Setting(+08) |
55 |
| • Lead Edge Increase/Decrease Speed Setting(+08) |
55 |
| • Lead Edge Increase/Decrease Speed Setting(+08) |
55 |
| 0: 0.10 sec, 1: 0.50 sec, 2: 0.25 sec, 3: 0.05 sec, 4: 0.02 sec |
55 |
| 0: 0.10 sec, 1: 0.50 sec, 2: 0.25 sec, 3: 0.05 sec, 4: 0.02 sec |
55 |
| Default: 0 |
55 |
| • Auto Reset Time Setting(+09) |
55 |
| • Auto Reset Time Setting(+09) |
55 |
| • Auto Reset Time Setting(+09) |
55 |
| 0: 2 min, 1: 1min, 2: 3 min, 3: 4 min, 4: 5 min, 5: None |
55 |
| 0: 2 min, 1: 1min, 2: 3 min, 3: 4 min, 4: 5 min, 5: None |
55 |
| Default: 0 |
55 |
| The machine cannot enter the Auto reset mode if the roll end indicator lights while copying repea... |
55 |
| The machine cannot enter the Auto clear if the toner end indicator lights. |
55 |
| • Auto Energy Saver Mode(+10) |
56 |
| • Auto Energy Saver Mode(+10) |
56 |
| • Auto Energy Saver Mode(+10) |
56 |
| 0: None, 1: Yes |
56 |
| 0: None, 1: Yes |
56 |
| Default: 0 |
56 |
| The machine can not enter the energy saving mode if toner end indicator lights. |
56 |
| • Screen Message Setting(+11) |
56 |
| • Screen Message Setting(+11) |
56 |
| • Screen Message Setting(+11) |
56 |
| 0: None, 1: \ |
56 |
| 0: None, 1: \ |
56 |
| Default: 0 |
56 |
| • Leading Edge Increase/Decrease Adjustment Preliminary Interval(+12) |
56 |
| • Leading Edge Increase/Decrease Adjustment Preliminary Interval(+12) |
56 |
| • Leading Edge Increase/Decrease Adjustment Preliminary Interval(+12) |
56 |
| 0: 3 intervals, 1: 1 interval, 2: 2 intervals, 3: 10 intervals |
56 |
| 0: 3 intervals, 1: 1 interval, 2: 2 intervals, 3: 10 intervals |
56 |
| Default: 0 |
56 |
| • Original Feed Out Waiting Time Setting(+13) |
56 |
| • Original Feed Out Waiting Time Setting(+13) |
56 |
| • Original Feed Out Waiting Time Setting(+13) |
56 |
| 0: 2mins, 1: 1min, 2: 3mins, 3: 4mins, 4: 5mins, 5: None |
56 |
| 0: 2mins, 1: 1min, 2: 3mins, 3: 4mins, 4: 5mins, 5: None |
56 |
| Default: 0 |
56 |
| • Original Feed Start Time Setting(+14) |
56 |
| • Original Feed Start Time Setting(+14) |
56 |
| • Original Feed Start Time Setting(+14) |
56 |
| 0: 1 sec, 1: 2 sec, 2: 3 sec, 3: 4 sec, 4: 5 sec, 5: 6 sec, 6: 7 sec |
56 |
| 0: 1 sec, 1: 2 sec, 2: 3 sec, 3: 4 sec, 4: 5 sec, 5: 6 sec, 6: 7 sec |
56 |
| Default: 3 |
56 |
| • Auto Off Time(+15) |
57 |
| • Auto Off Time(+15) |
57 |
| • Auto Off Time(+15) |
57 |
| Default: 30min |
57 |
| Default: 30min |
57 |
| Auto Off cannot be used in the following cases. |
57 |
| • When the Wait indicator goes on |
57 |
| • When the Wait indicator goes on |
57 |
| • When the Wait indicator goes on |
57 |
| • When the toner end indicator goes on |
57 |
| • When the toner end indicator goes on |
57 |
| • When the front door is open |
57 |
| • When the front door is open |
57 |
| • While copying |
57 |
| • While copying |
57 |
| • When a paper misfeed occurs or SC call appears |
57 |
| • When a paper misfeed occurs or SC call appears |
57 |
| • The machine cannot enter the Auto Off mode if the roll end indicator lights while copying repea... |
57 |
| • The machine cannot enter the Auto Off mode if the roll end indicator lights while copying repea... |
57 |
| • Original Hold Mode(+16) |
57 |
| • Original Hold Mode(+16) |
57 |
| • Original Hold Mode(+16) |
57 |
| 0: No, 1: Original Hold Mode |
57 |
| 0: No, 1: Original Hold Mode |
57 |
| Default: 1 |
57 |
| • Length Size Magnification(+17) |
57 |
| • Length Size Magnification(+17) |
57 |
| • Length Size Magnification(+17) |
57 |
| Default: 0.0 |
57 |
| Default: 0.0 |
57 |
| • Synchro-cut Length Adjustment(+19) |
57 |
| • Synchro-cut Length Adjustment(+19) |
57 |
| • Synchro-cut Length Adjustment(+19) |
57 |
| Default: 0 |
57 |
| Default: 0 |
57 |
| • Paper Length Up/Down Setting(+20) |
57 |
| • Paper Length Up/Down Setting(+20) |
57 |
| • Paper Length Up/Down Setting(+20) |
57 |
| 0: Down count, 1: Up count |
57 |
| 0: Down count, 1: Up count |
57 |
| Default: 0 |
57 |
| • Paper Length Up/Down Speed Setting(+21) |
57 |
| • Paper Length Up/Down Speed Setting(+21) |
57 |
| • Paper Length Up/Down Speed Setting(+21) |
57 |
| 0: 0.10 seconds, 1: 0.5 seconds, 2: 0.25 seconds, 3: 0.05 seconds, 4: 0.02 seconds, 5: 0.01 seconds |
58 |
| 0: 0.10 seconds, 1: 0.5 seconds, 2: 0.25 seconds, 3: 0.05 seconds, 4: 0.02 seconds, 5: 0.01 seconds |
58 |
| Default: 0 |
58 |
| • Fixed Paper Size Pattern Setting(+22) |
58 |
| • Fixed Paper Size Pattern Setting(+22) |
58 |
| • Fixed Paper Size Pattern Setting(+22) |
58 |
| • Optional Paper Size Setting(+23 ~ +32) |
58 |
| • Optional Paper Size Setting(+23 ~ +32) |
58 |
| • Optional Paper Size Setting(+23 ~ +32) |
58 |
| • Auto Off Function setting(+33) |
58 |
| • Auto Off Function setting(+33) |
58 |
| • Auto Off Function setting(+33) |
58 |
| 0: Disable, 1: Enable |
58 |
| 0: Disable, 1: Enable |
58 |
| Default: 1 |
58 |
| • Start Key Mode(+34) |
58 |
| • Start Key Mode(+34) |
58 |
| • Start Key Mode(+34) |
58 |
| 0: Off, 1: On |
58 |
| 0: Off, 1: On |
58 |
| Default: 0 |
58 |
| • Darker Image Density(+37) |
58 |
| • Darker Image Density(+37) |
58 |
| • Darker Image Density(+37) |
58 |
| — ID level 1 to 7-Darker image density and low contrast settings |
58 |
| —ID level 8 to 14-cannot be shifted |
58 |
| 0: Standard Density 1: Darker Image Density |
58 |
| 0: Standard Density 1: Darker Image Density |
58 |
| Default: 0 |
58 |
| 4.� Maintaining Your Copier |
59 |
| 4.� Maintaining Your Copier |
59 |
| Changing The Used Toner Bottle |
59 |
| Changing The Used Toner Bottle |
59 |
| When \ |
59 |
| When \ |
59 |
| <TABLE> |
59 |
| <TABLE> |
59 |
| <TABLE> |
59 |
| <TABLE> |
59 |
| <TABLE BODY> |
59 |
| <TABLE ROW> |
59 |
| <GRAPHIC> |
59 |
| • Do not incinerate used toner, toner bottle or toner cartridge. |
59 |
| • Toner dust might ignite when exposed to an open flame. |
59 |
| • Dispose of the used toner and the used toner cartridge according to local regulations. |
59 |
| <TABLE> |
59 |
| <TABLE> |
59 |
| <TABLE> |
59 |
| <TABLE> |
59 |
| <TABLE BODY> |
59 |
| <TABLE ROW> |
59 |
| <GRAPHIC> |
59 |
| • Do not eat or swallow toner. |
59 |
| • Keep toner (used or unused), toner bottle, and toner cartridge out of reach of children. |
59 |
| <TABLE> |
59 |
| <TABLE> |
59 |
| <TABLE> |
59 |
| <TABLE> |
59 |
| <TABLE BODY> |
59 |
| <TABLE ROW> |
59 |
| <GRAPHIC> |
59 |
| • This machine has been tested for safety using this supplier's parts and consumables. We recomme... |
59 |
| If the toner bottle overflows, toner particles could get inside the copier and cause damage. When... |
59 |
| If the toner bottle overflows, toner particles could get inside the copier and cause damage. When... |
59 |
| Do not use used toner. This will damage the machine. |
59 |
| A Open the upper unit of the copier. |
59 |
| A Open the upper unit of the copier. |
59 |
| A Open the upper unit of the copier. |
59 |
| <GRAPHIC> |
60 |
| B Unplug the code from the mainframe. |
60 |
| <GRAPHIC> |
60 |
| C Open the door on the right side of the copier ,and then carefully remove the plastic bottle. |
60 |
| <GRAPHIC> |
60 |
| Put the used toner to the plastic bag and dispose of it according to local regulations. Do not th... |
60 |
| Put the used toner to the plastic bag and dispose of it according to local regulations. Do not th... |
60 |
| D Place the bottle in the copier again, and then close the door. |
60 |
| D Place the bottle in the copier again, and then close the door. |
60 |
| <GRAPHIC> |
60 |
| E Plug in the code to the mainframe. |
60 |
| <GRAPHIC> |
61 |
| F Close the upper unit. |
61 |
| <GRAPHIC> |
62 |
| Adding Toner |
62 |
| When D is displayed, it is time to add toner. |
62 |
| When D is displayed, it is time to add toner. |
62 |
| When the indicator starts blinking, you can still copy about 53 feet of paper (16 m, 27 81/2\ |
62 |
| <TABLE> |
62 |
| <TABLE> |
62 |
| <TABLE> |
62 |
| <TABLE> |
62 |
| <TABLE BODY> |
62 |
| <TABLE ROW> |
62 |
| <GRAPHIC> |
62 |
| • Do not incinerate used toner, toner bottle or toner cartridge. |
62 |
| • Toner dust might ignite when exposed to an open flame. |
62 |
| • Dispose of the used toner and the used toner cartridge according to local regulations. |
62 |
| <TABLE> |
62 |
| <TABLE> |
62 |
| <TABLE> |
62 |
| <TABLE> |
62 |
| <TABLE BODY> |
62 |
| <TABLE ROW> |
62 |
| <GRAPHIC> |
62 |
| • Do not eat or swallow toner. |
62 |
| • Keep toner (used or unused), toner bottle, and toner cartridge out of reach of children. |
62 |
| <TABLE> |
62 |
| <TABLE> |
62 |
| <TABLE> |
62 |
| <TABLE> |
62 |
| <TABLE BODY> |
62 |
| <TABLE ROW> |
62 |
| <GRAPHIC> |
62 |
| • This machine has been tested for safety using this supplier's parts and consumables. We recomme... |
62 |
| If you use toner other than that recommended, a fault might occur. |
62 |
| If you use toner other than that recommended, a fault might occur. |
62 |
| When adding toner, do not turn off the main switch. If you do, your settings will be cleared. |
62 |
| Always add toner after the machine instructs you to add toner. |
62 |
| Do not use used toner. This will damage the machine. |
62 |
| A Lift the original table until it locks in place. |
62 |
| A Lift the original table until it locks in place. |
62 |
| A Lift the original table until it locks in place. |
62 |
| <GRAPHIC> |
63 |
| B Open the toner cartridge cover. |
63 |
| <GRAPHIC> |
63 |
| C Turn the old cartridge towards you. |
63 |
| Then, while pressing the cartridge to the right (A), lift the left end and remove the cartridge (B). |
63 |
| <GRAPHIC> |
63 |
| D Put the old toner cartridge in a plastic bag and dispose of it according to local regulations. |
63 |
| E Shake the new toner cartridge lightly 5 to 6 times to remove lumps. |
63 |
| E Shake the new toner cartridge lightly 5 to 6 times to remove lumps. |
63 |
| <GRAPHIC> |
63 |
| F Install the new cartridge. Make sure that the white circle labeled 1 on the cartridge faces up. |
63 |
| Make sure the cartridge is set well but don't push it in yet. |
64 |
| <GRAPHIC> |
64 |
| G Take the right edge of the seal and slowly remove it. |
64 |
| <GRAPHIC> |
64 |
| H Push the toner cartridge all the way to the left. |
64 |
| Then turn the toner cartridge all the way in, as shown. |
64 |
| <GRAPHIC> |
64 |
| If you can't close the toner cartridge cover, there might be problem setting the toner cartridge.... |
64 |
| If you can't close the toner cartridge cover, there might be problem setting the toner cartridge.... |
64 |
| I Close the toner cartridge cover and the original table. |
64 |
| I Close the toner cartridge cover and the original table. |
64 |
| The copier will need a few moments to warm up before it is ready to copy. |
65 |
| <GRAPHIC> |
66 |
| Changing the Roll Paper Size |
66 |
| Change the size guides on the left and right of the roll paper holder when you load different siz... |
66 |
| Change the size guides on the left and right of the roll paper holder when you load different siz... |
66 |
| Always follow the instructions below when adjusting the roll paper holder. Do not force the roll ... |
66 |
| Always follow the instructions below when adjusting the roll paper holder. Do not force the roll ... |
66 |
| Removing the Roll Paper Holder |
66 |
| Removing the Roll Paper Holder |
66 |
| A Push the paper holder inwards, and then pull it upwards to remove it. |
66 |
| A Push the paper holder inwards, and then pull it upwards to remove it. |
66 |
| A Push the paper holder inwards, and then pull it upwards to remove it. |
66 |
| A Push the paper holder inwards, and then pull it upwards to remove it. |
66 |
| <GRAPHIC> |
66 |
| The paper holder is attached with magnet and a hook. |
66 |
| The paper holder is attached with magnet and a hook. |
66 |
| The paper holder is on the right in this illustration. |
66 |
| Setting the Roll Paper Holder |
66 |
| Setting the Roll Paper Holder |
66 |
| A Insert the hook on the paper holder into (A), and then insert the protrusion into (B). |
66 |
| A Insert the hook on the paper holder into (A), and then insert the protrusion into (B). |
66 |
| A Insert the hook on the paper holder into (A), and then insert the protrusion into (B). |
66 |
| A Insert the hook on the paper holder into (A), and then insert the protrusion into (B). |
66 |
| <GRAPHIC> |
66 |
| Make sure the protrusions are firmly in the hole. |
66 |
| Make sure the protrusions are firmly in the hole. |
66 |
| Lock the lever until it clicks. |
66 |
| B Match the paper size as same as one shown in the windows . |
66 |
| B Match the paper size as same as one shown in the windows . |
66 |
| <GRAPHIC> |
66 |
| Standard paper sizes that can be used in this copier are shown below. |
66 |
| <TABLE> |
67 |
| <TABLE> |
67 |
| <TABLE BODY> |
67 |
| <TABLE ROW> |
67 |
| Metric version |
67 |
| Roll Feeder |
67 |
| <TABLE ROW> |
67 |
| A0 |
67 |
| K |
67 |
| <TABLE ROW> |
67 |
| A1 |
67 |
| KL |
67 |
| <TABLE ROW> |
67 |
| A2 |
67 |
| KL |
67 |
| <TABLE ROW> |
67 |
| A3 |
67 |
| KL |
67 |
| <TABLE ROW> |
67 |
| A4 |
67 |
| K |
67 |
| Loading A Roll Of Paper |
68 |
| Loading A Roll Of Paper |
68 |
| When C is displayed, it is time to install a new roll of paper. |
68 |
| When C is displayed, it is time to install a new roll of paper. |
68 |
| <TABLE> |
68 |
| <TABLE> |
68 |
| <TABLE> |
68 |
| <TABLE> |
68 |
| <TABLE BODY> |
68 |
| <TABLE ROW> |
68 |
| <GRAPHIC> |
68 |
| • Rolls of paper can be heavy, so you should be careful when loading one. |
68 |
| • Be careful when replacing the roll paper or removing misfed paper by following the operating in... |
68 |
| • Do not touch the anti-humidity switch from inside the machine because it could be very hot. |
68 |
| When removing paper rolls, lift the roll holders on both sides of the paper roll before removing ... |
68 |
| When removing paper rolls, lift the roll holders on both sides of the paper roll before removing ... |
68 |
| <GRAPHIC> |
68 |
| A Pull out the Roll Feeder. |
68 |
| A Pull out the Roll Feeder. |
68 |
| A Pull out the Roll Feeder. |
68 |
| B Hold both sides of the empty paper roll and remove it from the unit. |
68 |
| B Hold both sides of the empty paper roll and remove it from the unit. |
68 |
| <GRAPHIC> |
69 |
| C Raise the lever on the paper holder (A), and then pull out the roll holder from the empty core(B). |
69 |
| <GRAPHIC> |
69 |
| D Set the paper holder to the roll core (A), and then lower the lever (B). |
69 |
| <GRAPHIC> |
69 |
| Insert the paper roll as far as it will go. |
69 |
| Insert the paper roll as far as it will go. |
69 |
| E Hold both sides of the paper roll and install it securely in the paper holder. |
69 |
| E Hold both sides of the paper roll and install it securely in the paper holder. |
69 |
| <GRAPHIC> |
69 |
| The flap of the paper roll should be on the buttom. See below. |
69 |
| The flap of the paper roll should be on the buttom. See below. |
69 |
| <GRAPHIC> |
70 |
| If applicable, adjust the roll paper position and lock the lever. |
70 |
| You may hardly to adjust the roll paper position when you set 914mm (“36 ). In this case, take ou... |
70 |
| Do not force to remove the paper holder when you need to change the paper size. For how to remove... |
70 |
| F Rotate the paper roll slowly until the flap is almost fed into the rubber part of the roller (A... |
70 |
| F Rotate the paper roll slowly until the flap is almost fed into the rubber part of the roller (A... |
70 |
| <GRAPHIC> |
71 |
| Do not hold the paper knob from side. It may cause you touching a sticky oil. For how to turn the... |
71 |
| Do not hold the paper knob from side. It may cause you touching a sticky oil. For how to turn the... |
71 |
| <GRAPHIC> |
71 |
| Make sure that the paper is not loose. Insert it straight into the roller. |
71 |
| Watch carefully to make sure that the flap of the paper is inserted between the feeder and the ro... |
71 |
| For how to change the Roll 2, refer to the following illustration: |
71 |
| <GRAPHIC> |
71 |
| G Hold the paper (B), and then slide the cutter (A). |
71 |
| <GRAPHIC> |
71 |
| Slide the cutter one way only, otherwise paper waste may pile up inside the machine. |
71 |
| Slide the cutter one way only, otherwise paper waste may pile up inside the machine. |
71 |
| H Turn the knob anticlockwise about 1/4 to adjust the paper position. |
71 |
| H Turn the knob anticlockwise about 1/4 to adjust the paper position. |
71 |
| <GRAPHIC> |
72 |
| I Close the Roll Feeder. |
72 |
| 5.� Troubleshooting |
73 |
| 5.� Troubleshooting |
73 |
| If Something Goes Wrong |
73 |
| If Something Goes Wrong |
73 |
| If you have problems with your copier, consult the following pages. If a service indicator lights... |
73 |
| If you have problems with your copier, consult the following pages. If a service indicator lights... |
73 |
| If Indicator Lights Up |
73 |
| If Indicator Lights Up |
73 |
| If one of the indicators shown appears on the operation panel, turn to the appropriate page and f... |
73 |
| If one of the indicators shown appears on the operation panel, turn to the appropriate page and f... |
73 |
| <TABLE> |
73 |
| <TABLE> |
73 |
| <TABLE BODY> |
73 |
| <TABLE ROW> |
73 |
| What appears |
73 |
| What it means |
73 |
| What to do |
73 |
| <TABLE ROW> |
73 |
| x |
73 |
| The original or copy paper is jammed somewhere. |
73 |
| See the following section. |
73 |
| <TABLE ROW> |
73 |
| L |
73 |
| The copier needs a technician. |
73 |
| Call your service representative. |
73 |
| <TABLE ROW> |
73 |
| M |
73 |
| A cover ,unit, or the fusing unit cover was left open. |
73 |
| Close it. Press firmly. |
73 |
| <TABLE ROW> |
73 |
| C |
73 |
| The paper roll is finished. |
73 |
| Put in a new roll of paper. fi P.56. |
73 |
| <TABLE ROW> |
73 |
| D |
73 |
| The toner cartridge is empty, or almost empty. |
73 |
| Replace the toner cartridge. fi P.50. |
73 |
| <TABLE ROW> |
73 |
| c |
73 |
| Wait until the ready indicator lights. |
73 |
| Wait. If it stays on for an unusually long time, call your service representative. |
73 |
| <TABLE ROW> |
74 |
| E |
74 |
| The used toner bottle is full. |
74 |
| Empty the used toner bottle. fi P.47. |
74 |
| If Jams Occur |
75 |
| If Jams Occur |
75 |
| If the Original is Jammed at the exit |
75 |
| If the Original is Jammed at the exit |
75 |
| If the paper or original gets stuck in the copier, remove both original and paper. |
75 |
| If the paper or original gets stuck in the copier, remove both original and paper. |
75 |
| If the paper or original gets stuck in the copier, remove both original and paper. |
75 |
| A Lift the original table. |
75 |
| A Lift the original table. |
75 |
| A Lift the original table. |
75 |
| <GRAPHIC> |
75 |
| B Very gently pull the original out of the feed-out slot. Be careful not to tear it. |
75 |
| <GRAPHIC> |
75 |
| C Close the original table. Press firmly on both sides until it clicks into place. |
75 |
| <GRAPHIC> |
76 |
| If Sheet Paper is Jammed in the Feed-in Slot |
76 |
| <TABLE> |
76 |
| <TABLE> |
76 |
| <TABLE> |
76 |
| <TABLE> |
76 |
| <TABLE> |
76 |
| <TABLE BODY> |
76 |
| <TABLE ROW> |
76 |
| <GRAPHIC> |
76 |
| • The fusing unit can be very hot. Do not touch any parts under the fusing cover. If necessary, w... |
76 |
| A Squeeze the locks on each side of the copier and lift the unit. |
76 |
| A Squeeze the locks on each side of the copier and lift the unit. |
76 |
| A Squeeze the locks on each side of the copier and lift the unit. |
76 |
| <GRAPHIC> |
76 |
| B Pull out the copy paper. Do not leave any scraps of paper in the copier. |
76 |
| <GRAPHIC> |
76 |
| C Close the unit. Press firmly on both sides until it clicks into place. |
76 |
| <GRAPHIC> |
77 |
| If Sheet Paper is Jammed at the Paper Exit |
77 |
| <TABLE> |
77 |
| <TABLE> |
77 |
| <TABLE> |
77 |
| <TABLE> |
77 |
| <TABLE> |
77 |
| <TABLE BODY> |
77 |
| <TABLE ROW> |
77 |
| <GRAPHIC> |
77 |
| • The fusing unit can be very hot. Do not touch any parts under the fusing cover. If necessary, w... |
77 |
| A Squeeze the locks on each side of the copier and lift the moddle unit between the original tabl... |
77 |
| A Squeeze the locks on each side of the copier and lift the moddle unit between the original tabl... |
77 |
| A Squeeze the locks on each side of the copier and lift the moddle unit between the original tabl... |
77 |
| <GRAPHIC> |
77 |
| B Open the fusing unit cover. |
77 |
| <GRAPHIC> |
77 |
| C Slowly pull the paper out. If there are scraps left inside, open the inner cover, wait for the ... |
77 |
| <GRAPHIC> |
78 |
| D Close the unit and all covers. Press firmly on both sides until it clicks into place. |
78 |
| <GRAPHIC> |
78 |
| If Roll Paper Jams |
78 |
| If roll paper jams inside the roll feeder, you still might need to check everywhere to remove the... |
78 |
| If roll paper jams inside the roll feeder, you still might need to check everywhere to remove the... |
78 |
| <TABLE> |
78 |
| <TABLE> |
78 |
| <TABLE> |
78 |
| <TABLE> |
78 |
| <TABLE BODY> |
78 |
| <TABLE ROW> |
78 |
| <GRAPHIC> |
78 |
| • Be careful when replacing the roll paper or removing misfed paper by following the operating in... |
78 |
| • Do not touch the anti-humidity switch from inside the machine because it could be very hot. |
78 |
| A Open the Roll Feeder. |
78 |
| A Open the Roll Feeder. |
78 |
| A Open the Roll Feeder. |
78 |
| B Slowly pull up the edge of the paper. |
78 |
| B Slowly pull up the edge of the paper. |
78 |
| <GRAPHIC> |
78 |
| C Slide the cutter knob(A) to cut the edge of the roll paper, and then remove the jammed paper(B). |
78 |
| <GRAPHIC> |
79 |
| Slide the cutter one way only, otherwise paper waste may pile up inside the machine. |
79 |
| Slide the cutter one way only, otherwise paper waste may pile up inside the machine. |
79 |
| D Rotate the paper roll in the direction of the arrow until you can see the edge of the paper. |
79 |
| D Rotate the paper roll in the direction of the arrow until you can see the edge of the paper. |
79 |
| <GRAPHIC> |
79 |
| E Turn the knob anticlockwise about 1/4 to adjust the paper position. |
79 |
| <GRAPHIC> |
79 |
| F Slowly rotate the paper roll until the edge of the paper is fed into the rubber part of the rol... |
79 |
| <GRAPHIC> |
79 |
| Do not hold the paper knob from side. It may cause you touching a sticky oil. For how to turn the... |
79 |
| Do not hold the paper knob from side. It may cause you touching a sticky oil. For how to turn the... |
79 |
| <GRAPHIC> |
80 |
| Make sure that the paper is not loose. Insert it straight into the roller. |
80 |
| Watch carefully to make sure that the flap of the paper is inserted between the feeder and the ro... |
80 |
| G Close the Roll Feeder. |
80 |
| G Close the Roll Feeder. |
80 |
| If You Cannot See the Roll Paper Jam |
80 |
| If You Cannot See the Roll Paper Jam |
80 |
| If roll paper jams inside the roll feeder, you still might need to check everywhere to remove the... |
80 |
| If roll paper jams inside the roll feeder, you still might need to check everywhere to remove the... |
80 |
| <TABLE> |
80 |
| <TABLE> |
80 |
| <TABLE> |
80 |
| <TABLE> |
80 |
| <TABLE BODY> |
80 |
| <TABLE ROW> |
80 |
| <GRAPHIC> |
80 |
| • The fusing unit can be very hot. Do not touch any parts under the fusing cover. If necessary, w... |
80 |
| • Be careful when replacing the roll paper or removing misfed paper by following the operating in... |
80 |
| • Do not touch the anti-humidity switch from inside the machine because it could be very hot. |
80 |
| A Open the Roll Feeder. |
80 |
| A Open the Roll Feeder. |
80 |
| A Open the Roll Feeder. |
80 |
| B Rotate the paper roll in the direction of the arrow until you can see the edge of the paper. |
80 |
| B Rotate the paper roll in the direction of the arrow until you can see the edge of the paper. |
80 |
| <GRAPHIC> |
80 |
| C Cut the edge of the paper with the cutter or scissors. |
80 |
| <GRAPHIC> |
81 |
| D Hold the paper (B ), and then slide the cutter (A). |
81 |
| <GRAPHIC> |
81 |
| Slide the cutter one way only, otherwise paper waste may pile up inside the machine. |
81 |
| Slide the cutter one way only, otherwise paper waste may pile up inside the machine. |
81 |
| E Turn the knob anticlockwise about 1/4 to adjust the paper position. |
81 |
| E Turn the knob anticlockwise about 1/4 to adjust the paper position. |
81 |
| <GRAPHIC> |
81 |
| F Slowly rotate the paper roll until the edge of the paper is fed into the rubber part of the rol... |
81 |
| <GRAPHIC> |
81 |
| Do not hold the paper knob from side. It may cause you touching a sticky oil. For how to turn the... |
81 |
| Do not hold the paper knob from side. It may cause you touching a sticky oil. For how to turn the... |
81 |
| <GRAPHIC> |
81 |
| Make sure that the paper is not loose. Insert it straight into the roller. |
81 |
| Watch carefully to make sure that the flap of the paper is inserted between the feeder and the ro... |
82 |
| G Close the Roll Feeder. |
82 |
| G Close the Roll Feeder. |
82 |
| Others |
83 |
| Others |
83 |
| If a puzzling or recurring problem occurs, check the following before calling a service represent... |
83 |
| If a puzzling or recurring problem occurs, check the following before calling a service represent... |
83 |
| Absolutely Nothing Happens |
83 |
| Absolutely Nothing Happens |
83 |
| • Is the main switch on? |
83 |
| • Is the main switch on? |
83 |
| • Is the main switch on? |
83 |
| • Is the main switch on? |
83 |
| • Is the power cord plugged in? |
83 |
| • Is the power cord plugged in? |
83 |
| • Did a breaker or a fuse blow out? |
83 |
| • Did a breaker or a fuse blow out? |
83 |
| Something Happens, but Set Paper or Paper Select Never Appear |
83 |
| Something Happens, but Set Paper or Paper Select Never Appear |
83 |
| • Check the indicators on the control panel. If any of them are lit, turn to |
83 |
| • Check the indicators on the control panel. If any of them are lit, turn to |
83 |
| • Check the indicators on the control panel. If any of them are lit, turn to |
83 |
| • Check the indicators on the control panel. If any of them are lit, turn to |
83 |
| If Jams Occur Frequently |
83 |
| If Jams Occur Frequently |
83 |
| • Is your paper creased, damp, or otherwise damaged? |
83 |
| • Is your paper creased, damp, or otherwise damaged? |
83 |
| • Is your paper creased, damp, or otherwise damaged? |
83 |
| • Is your paper creased, damp, or otherwise damaged? |
83 |
| • Are there visible bits of paper or other objects stuck in the machine? If there are, remove them. |
83 |
| • Are there visible bits of paper or other objects stuck in the machine? If there are, remove them. |
83 |
| • Are you inserting the paper and original in straight? Always feed paper in straight. |
83 |
| • Are you inserting the paper and original in straight? Always feed paper in straight. |
83 |
| If Copies Look Wrong |
83 |
| If Copies Look Wrong |
83 |
| • Are copies too dark or too light? Adjust the density ( |
83 |
| • Are copies too dark or too light? Adjust the density ( |
83 |
| • Are copies too dark or too light? Adjust the density ( |
83 |
| • Are copies too dark or too light? Adjust the density ( |
83 |
| • Is the background dirty no matter what kind of original you are copying? Make sure the exposure... |
83 |
| • Is the background dirty no matter what kind of original you are copying? Make sure the exposure... |
83 |
| • Is the image skewed? Make sure to insert the paper and the original straight into the machine. ... |
83 |
| • Is the image skewed? Make sure to insert the paper and the original straight into the machine. ... |
83 |
| White Spots Appear |
83 |
| White Spots Appear |
83 |
| • On the copy: try placing your copy paper with the other side facing up. |
83 |
| • On the copy: try placing your copy paper with the other side facing up. |
83 |
| • On the copy: try placing your copy paper with the other side facing up. |
83 |
| • On the copy: try placing your copy paper with the other side facing up. |
83 |
| • At the leading edge: try placing your copy paper sideways. |
83 |
| • At the leading edge: try placing your copy paper sideways. |
83 |
| • At the trailing edge: try giving a rising curl to the trailing edge. The curl should go up, not... |
83 |
| • At the trailing edge: try giving a rising curl to the trailing edge. The curl should go up, not... |
83 |
| Creases |
84 |
| Creases |
84 |
| • Try setting your copy paper sideways. |
84 |
| • Try setting your copy paper sideways. |
84 |
| • Try setting your copy paper sideways. |
84 |
| • Try setting your copy paper sideways. |
84 |
| • If long creases appear on copies, try setting your copy paper sideways, or try changing the cop... |
84 |
| • If long creases appear on copies, try setting your copy paper sideways, or try changing the cop... |
84 |
| • If creases appear on copies made to transparent film, try setting your film sheets sideways. |
84 |
| • If creases appear on copies made to transparent film, try setting your film sheets sideways. |
84 |
| Copies Come Out Dog eared |
84 |
| Copies Come Out Dog eared |
84 |
| • Try setting your copy paper with the other side facing up. |
84 |
| • Try setting your copy paper with the other side facing up. |
84 |
| • Try setting your copy paper with the other side facing up. |
84 |
| • Try setting your copy paper with the other side facing up. |
84 |
| • Make sure your copy paper is undamaged. |
84 |
| • Make sure your copy paper is undamaged. |
84 |
| Black Streaks Appear on Copies |
84 |
| Black Streaks Appear on Copies |
84 |
| • Check that the exposure glass is clean. |
84 |
| • Check that the exposure glass is clean. |
84 |
| • Check that the exposure glass is clean. |
84 |
| • Check that the exposure glass is clean. |
84 |
| Daily Maintenance |
85 |
| Daily Maintenance |
85 |
| Clean the Exposure Glass & the Platen Plate |
85 |
| Clean the Exposure Glass & the Platen Plate |
85 |
| You should clean the copy and original tables with a damp cloth, and then wipe them with a dry cl... |
85 |
| You should clean the copy and original tables with a damp cloth, and then wipe them with a dry cl... |
85 |
| Clean the exposure glass and the original drive roller with a damp cloth, and then wipe them with... |
85 |
| <GRAPHIC> |
85 |
| Clean the platen plate with a damp cloth, then wipe it with a dry cloth. |
85 |
| <GRAPHIC> |
86 |
| Do's & Don'ts |
86 |
| <TABLE> |
86 |
| <TABLE> |
86 |
| <TABLE> |
86 |
| <TABLE> |
86 |
| <TABLE> |
86 |
| <TABLE BODY> |
86 |
| <TABLE ROW> |
86 |
| <GRAPHIC> |
86 |
| • When you move the machine, unplug the power cord from the wall outlet to avoid fire or electric... |
86 |
| • When the machine will not be used for a long time, unplug the power cord. |
86 |
| • Do not touch areas on or around the fusing unit. These areas get hot. |
86 |
| • Do not touch areas on or around the fusing unit. These areas get hot. |
86 |
| • Do not touch areas on or around the fusing unit. These areas get hot. |
86 |
| • After copies are made continuously, the exposure glass may feel warm. This is not a malfunction. |
86 |
| • After copies are made continuously, the exposure glass may feel warm. This is not a malfunction. |
86 |
| • The area around the ventilation hole may feel warm. This is caused by exhaust air and is not a ... |
86 |
| • The area around the ventilation hole may feel warm. This is caused by exhaust air and is not a ... |
86 |
| • Do not turn off the main switch while copying. Before turning off the main switch, make sure th... |
86 |
| • Do not turn off the main switch while copying. Before turning off the main switch, make sure th... |
86 |
| • The machine might fail to produce good copy images if there is condensation inside caused by a ... |
86 |
| • The machine might fail to produce good copy images if there is condensation inside caused by a ... |
86 |
| • Do not open the covers of the machine while copying. If you do, misfeeds might occur. |
86 |
| • Do not open the covers of the machine while copying. If you do, misfeeds might occur. |
86 |
| • Do not move the machine while copying. |
86 |
| • Do not move the machine while copying. |
86 |
| • The supplier shall not be liable for any loss or damage resulting from a failure of the machine... |
86 |
| • The supplier shall not be liable for any loss or damage resulting from a failure of the machine... |
86 |
| • Do not place more than one sheet of paper at a time on the bypass table. |
86 |
| • Do not place more than one sheet of paper at a time on the bypass table. |
86 |
| • Center your paper on the copy table using the size marks. Then slide the paper straight into th... |
86 |
| • Center your paper on the copy table using the size marks. Then slide the paper straight into th... |
86 |
| • When copying to a long sheet of paper, lightly hold the sheet as the copier pulls it in so that... |
86 |
| • When copying to a long sheet of paper, lightly hold the sheet as the copier pulls it in so that... |
86 |
| • Do not make two sided copies. |
86 |
| • Do not make two sided copies. |
86 |
| • If you open the unit, make sure you close it within 5 minutes to keep light from damaging the c... |
86 |
| • If you open the unit, make sure you close it within 5 minutes to keep light from damaging the c... |
86 |
| • When copying to sheets 35\ |
86 |
| • When copying to sheets 35\ |
86 |
| • If your paper has an uneven or slanted edge, do not insert this edge in first. |
86 |
| • If your paper has an uneven or slanted edge, do not insert this edge in first. |
86 |
| • Do not make copies longer than 118 inches (3 m). |
86 |
| • Do not make copies longer than 118 inches (3 m). |
86 |
| • Do not insert originals made of paper less the 52.3 g/m |
86 |
| • Do not insert originals made of paper less the 52.3 g/m |
86 |
| Where to Put Your Copier |
87 |
| Where to Put Your Copier |
87 |
| Your copier should be installed by a qualified technician. If you need to transport your copier t... |
87 |
| Your copier should be installed by a qualified technician. If you need to transport your copier t... |
87 |
| You can of course move your copier around your office without calling the service center. If you ... |
87 |
| Machine Environment |
87 |
| Machine Environment |
87 |
| Your machine's location should be carefully chosen because environmental conditions greatly affec... |
87 |
| Your machine's location should be carefully chosen because environmental conditions greatly affec... |
87 |
| Optimal Environmental Conditions |
87 |
| Optimal Environmental Conditions |
87 |
| <TABLE> |
87 |
| <TABLE> |
87 |
| <TABLE> |
87 |
| <TABLE> |
87 |
| <TABLE> |
87 |
| <TABLE BODY> |
87 |
| <TABLE ROW> |
87 |
| <GRAPHIC> |
87 |
| • Keep the machine away from humidity and dust. A fire or an electric shock might occur. |
87 |
| • Do not place the machine on an unstable or tilted surface. If it topples over, it could cause i... |
87 |
| <TABLE> |
87 |
| <TABLE> |
87 |
| <TABLE> |
87 |
| <TABLE> |
87 |
| <TABLE BODY> |
87 |
| <TABLE ROW> |
87 |
| <GRAPHIC> |
87 |
| • If you use the machine in a confined space, make sure there is a continuous air turnover. |
87 |
| • Temperature: 50˚ to 86˚F (15˚ to 30˚C) |
87 |
| • Temperature: 50˚ to 86˚F (15˚ to 30˚C) |
87 |
| • Temperature: 50˚ to 86˚F (15˚ to 30˚C) |
87 |
| • Humidity: 20 to 80% RH |
87 |
| • Humidity: 20 to 80% RH |
87 |
| • To avoid possible ozone build-up make sure to install this copier in a large well ventilated ro... |
87 |
| • To avoid possible ozone build-up make sure to install this copier in a large well ventilated ro... |
87 |
| • Set your copier on a strong and level base. The copier must be level within less than a quarter... |
87 |
| • Set your copier on a strong and level base. The copier must be level within less than a quarter... |
87 |
| Environments to Avoid |
87 |
| Environments to Avoid |
87 |
| • Locations exposed to direct sunlight or strong light (more than 1500 lux) |
87 |
| • Locations exposed to direct sunlight or strong light (more than 1500 lux) |
87 |
| • Locations exposed to direct sunlight or strong light (more than 1500 lux) |
87 |
| • Locations exposed to direct sunlight or strong light (more than 1500 lux) |
87 |
| • Dusty areas |
87 |
| • Dusty areas |
87 |
| • Areas with corrosive gasses |
87 |
| • Areas with corrosive gasses |
87 |
| • Altitudes of over 6500 feet (2000 m) |
88 |
| • Altitudes of over 6500 feet (2000 m) |
88 |
| • Areas prone to strong vibrations |
88 |
| • Areas prone to strong vibrations |
88 |
| • Locations directly exposed to cool air from an air conditioner or heat from a nearby heater (Su... |
88 |
| • Locations directly exposed to cool air from an air conditioner or heat from a nearby heater (Su... |
88 |
| • Locations near a diazo copy machine |
88 |
| • Locations near a diazo copy machine |
88 |
| Power connection |
88 |
| Power connection |
88 |
| <TABLE> |
88 |
| <TABLE> |
88 |
| <TABLE> |
88 |
| <TABLE> |
88 |
| <TABLE> |
88 |
| <TABLE BODY> |
88 |
| <TABLE ROW> |
88 |
| <GRAPHIC> |
88 |
| • Only connect the machine to the power source described on the inside front cover of this manual. |
88 |
| <TABLE> |
88 |
| <TABLE> |
88 |
| <TABLE> |
88 |
| <TABLE> |
88 |
| <TABLE BODY> |
88 |
| <TABLE ROW> |
88 |
| <GRAPHIC> |
88 |
| • Avoid multi-wiring. |
88 |
| • Do not damage, break or make any modifications to the power cord. Do not place heavy objects on... |
88 |
| • Do not plug or unplug the power cord with your hands wet. Otherwise, an electric shock might oc... |
88 |
| <TABLE> |
88 |
| <TABLE> |
88 |
| <TABLE> |
88 |
| <TABLE> |
88 |
| <TABLE BODY> |
88 |
| <TABLE ROW> |
88 |
| <GRAPHIC> |
88 |
| • Make sure the wall outlet is near the machine and freely accessible so that in event of an emer... |
88 |
| <TABLE> |
88 |
| <TABLE> |
88 |
| <TABLE> |
88 |
| <TABLE> |
88 |
| <TABLE BODY> |
88 |
| <TABLE ROW> |
88 |
| <GRAPHIC> |
88 |
| • When you move the machine, unplug the power cord from the wall outlet to avoid fire or electric... |
88 |
| • When the machine will not be used for a long time, unplug the power cord. |
88 |
| <TABLE> |
88 |
| <TABLE> |
88 |
| <TABLE> |
88 |
| <TABLE> |
88 |
| <TABLE BODY> |
88 |
| <TABLE ROW> |
88 |
| <GRAPHIC> |
88 |
| • When you pull out the plug from the socket, grip the plug to avoid damaging the cord and causin... |
88 |
| • Connect the copier to a power source meeting the specifications on the inside front cover of th... |
88 |
| • Connect the copier to a power source meeting the specifications on the inside front cover of th... |
88 |
| • Connect the copier to a power source meeting the specifications on the inside front cover of th... |
88 |
| • Do not set anything on the power cord. |
88 |
| • Do not set anything on the power cord. |
88 |
| • Voltage must not fluctuate more than 10%. |
88 |
| • Voltage must not fluctuate more than 10%. |
88 |
| • Make sure the copier is grounded. |
88 |
| • Make sure the copier is grounded. |
88 |
| • Make sure the plug is firmly inserted into the power outlet. |
89 |
| • Make sure the plug is firmly inserted into the power outlet. |
89 |
| • Make sure the power outlet is close to the copier and easily accessible at all times. |
89 |
| • Make sure the power outlet is close to the copier and easily accessible at all times. |
89 |
| Access To Machine |
89 |
| Access To Machine |
89 |
| Place the copier near a power source and provide clearance as shown. |
89 |
| Place the copier near a power source and provide clearance as shown. |
89 |
| <GRAPHIC> |
89 |
| 1. Rear: more than 60cm, 23.7” |
89 |
| 2. Right: more than 60cm, 23.7” |
89 |
| 3. Left: more than 60cm, 23.7” |
89 |
| 4. Front: more than 100cm, 40.0” |
89 |
| 6.� Specifications |
91 |
| 6.� Specifications |
91 |
| Copier |
91 |
| Copier |
91 |
| <TABLE> |
91 |
| <TABLE> |
91 |
| <TABLE> |
91 |
| <TABLE BODY> |
91 |
| <TABLE ROW> |
91 |
| Configuration |
91 |
| Console with roll feeder |
91 |
| <TABLE ROW> |
91 |
| Process |
91 |
| Dry electrostatic transfer system |
91 |
| <TABLE ROW> |
91 |
| Scanning |
91 |
| Original moving over a fixed fiber optics array |
91 |
| <TABLE ROW> |
91 |
| Originals |
91 |
| Sheet |
91 |
| <TABLE ROW> |
91 |
| Original Reference Position |
91 |
| Center |
91 |
| <TABLE ROW> |
91 |
| Original Size |
91 |
| Maximum: 914 (W) ¥ 3,000mm (L) (36\ |
91 |
| Maximum: 914 (W) ¥ 3,000mm (L) (36\ |
91 |
| Minimum: A4 K (210 (W) ¥ 297mm (L)) (8.5\ |
91 |
| <TABLE ROW> |
91 |
| Copy Size |
91 |
| Maximum: 914 (W) ¥ 3,000mm (L) (36\ |
91 |
| Maximum: 914 (W) ¥ 3,000mm (L) (36\ |
91 |
| Minimum: A4 K (210 (W) ¥ 297mm (L)) (8.5\ |
91 |
| <TABLE ROW> |
91 |
| Warm-up Time |
91 |
| Within 3 minutes at a room temperature of 74�F (23�C) |
91 |
| <TABLE ROW> |
92 |
| First Copy |
92 |
| Within 25 seconds (A1 L , 23\ |
92 |
| <TABLE ROW> |
92 |
| Copying Speed |
92 |
| 3600mm (141.7\ |
92 |
| <TABLE ROW> |
92 |
| Auto Reset Time |
92 |
| 2 minutes (can also be turned off or set to 1,3,4 or 5 minutes) |
92 |
| <TABLE ROW> |
92 |
| Reproduction Ratio |
92 |
| Fixed: 1 to 1 |
92 |
| <TABLE ROW> |
92 |
| Paper Feed |
92 |
| manual feed/roll feeder |
92 |
| <TABLE ROW> |
92 |
| Toner replenishment |
92 |
| Cartridge system |
92 |
| <TABLE ROW> |
92 |
| Self-diagnostic codes |
92 |
| LED indicators |
92 |
| <TABLE ROW> |
92 |
| Power Source |
92 |
| North America: 120V, 60Hz, 12A |
92 |
| North America: 120V, 60Hz, 12A |
92 |
| Europe: 220�240V, 50/60Hz, 7A |
92 |
| <TABLE ROW> |
92 |
| Power consumption |
92 |
| Maximum 1.4kW |
92 |
| <TABLE ROW> |
92 |
| Noise emission |
92 |
| Stand by: less than 57dB |
92 |
| Stand by: less than 57dB |
92 |
| Copy cycle: less than 75dB (copier only) |
92 |
| <TABLE ROW> |
92 |
| Measurements made following ISO7779 |
92 |
| <TABLE ROW> |
93 |
| Dimension (W ¥ D ¥ H) |
93 |
| 1,080mm ¥ 623mm ¥ 480mm (42.5\ |
93 |
| <TABLE ROW> |
93 |
| Weight |
93 |
| 80kg (176lb) |
93 |
| Roll Feeder |
93 |
| Roll Feeder |
93 |
| <TABLE> |
93 |
| <TABLE> |
93 |
| <TABLE> |
93 |
| <TABLE BODY> |
93 |
| <TABLE ROW> |
93 |
| Number of loaded paper rolls |
93 |
| 1 roll (Type780A) |
93 |
| 2 roll (Type78 0B) |
93 |
| <TABLE ROW> |
93 |
| Acceptable Roll Size |
93 |
| Width: 210, 257, 297, 364, 420, 515, 594, 660, 728, 800, 841, 880, 914mm |
93 |
| Width: 210, 257, 297, 364, 420, 515, 594, 660, 728, 800, 841, 880, 914mm |
93 |
| Roll length: less than 150mm |
93 |
| Maximum: 914mm (36\ |
93 |
| Maximum: 914mm (36\ |
93 |
| Minimum: 210mm (8.5\ |
93 |
| Width: 210, 257, 297, 364, 420, 515, 594, 660, 728, 800, 841, 880, 914mm |
93 |
| Width: 210, 257, 297, 364, 420, 515, 594, 660, 728, 800, 841, 880, 914mm |
93 |
| Roll length: less than 150mm |
93 |
| Maximu m: 914 mm (36\ |
93 |
| Maximu m: 914 mm (36\ |
93 |
| Minimu m: 210 mm (8.5\ |
93 |
| <TABLE ROW> |
93 |
| Roll Diameter |
93 |
| Within 170mm (6.7\ |
93 |
| Within 170mm (6.7\ |
93 |
| <TABLE ROW> |
93 |
| Roll Core |
93 |
| 75.7mm – 77mm(2.98\ |
93 |
| 75.7mm – 77mm(2 .98\ |
93 |
| <TABLE ROW> |
94 |
| Dimension (W ¥ D ¥ H) |
94 |
| 1,200mm¥ 720mm ¥ 775mm (48 ¥ 28.3 ¥ 30.5\ |
94 |
| 1,200m m ¥ 720mm ¥ 775mm (48 ¥ 28.3 ¥ 30.5\ |
94 |
| <TABLE ROW> |
94 |
| Weight |
94 |
| 78kg (172lb) |
94 |
| 86kg (189lb) |
94 |
| Options |
95 |
| Options |
95 |
| • Copy Tray Type 780 |
95 |
| • Copy Tray Type 780 |
95 |
| • Copy Tray Type 780 |
95 |
| • Copy Tray Type 780 |
95 |
| INDEX |
96 |
| A |
96 |
| B |
96 |
| C |
96 |
| D |
96 |
| E |
96 |
| G |
96 |
| H |
96 |
| I |
96 |
| L |
96 |
| M |
96 |
| N |
96 |
| O |
96 |
| P |
96 |
| R |
96 |
| S |
97 |
| T |
97 |
| U |
97 |
| V |
97 |
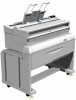
 1
1 2
2 3
3 4
4 5
5 6
6 7
7

