Ricoh IS760 Operating Instructions
Ricoh IS760 Manual
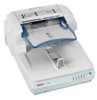 |
View all Ricoh IS760 manuals
Add to My Manuals
Save this manual to your list of manuals |
Ricoh IS760 manual content summary:
- Ricoh IS760 | Operating Instructions - Page 1
Operating Instructions Guide to Components Setting up the Scanner Installing Software Setting Originals Using the TWAIN Driver Appendix Read this manual carefully before you use this machine and keep it handy for future reference. For safe and correct use, be sure to read the Safety Information - Ricoh IS760 | Operating Instructions - Page 2
This manual contains detailed instructions and notes on the operation and use of this machine. For your safety and benefit, read this manual carefully before using the machine. Keep this manual in a handy place for quick reference. Two kinds of size notation are employed in this manual. With - Ricoh IS760 | Operating Instructions - Page 3
CONTENTS Safety Information 1 Safety During Operation 1 Energy Star Program 4 Manuals for This Scanner 5 How to Read This Manual 6 1. Guide to Components Guide to This Scanner 7 Understanding Indicators 9 DIP Switches...10 2. Setting up the Scanner Confirmations Before the Setup 11 Location - Ricoh IS760 | Operating Instructions - Page 4
TWAIN Driver 60 6. Appendix Troubleshooting 63 Error Indicators...63 When the Original is Jammed or Double Fed in the ADF 64 When the Originals are Not Fed Correctly 66 When Scanning is Not Performed as Expected 66 When an Error Message Appears 67 When in Installation and Other Problems 70 - Ricoh IS760 | Operating Instructions - Page 5
Safety Information When using this machine, the following safety precautions should always be followed. Safety During Operation In this manual, the following important symbols are used: R WARNING: Indicates a potentially hazardous situation which, if instructions are not followed, could result in - Ricoh IS760 | Operating Instructions - Page 6
equipment. • You suspect that your equipment needs service or repair. • Your equipment's cover has Do not use with a power source with a voltage different from the specified voltage. Do not use a power those specified in this manual. The inside of the scanner contains high-voltage components that - Ricoh IS760 | Operating Instructions - Page 7
could be very hot. Do not touch the parts with a label indicating the "hot surface". Otherwise functionality, and we recommend that you only use the expendable supplies available at an authorized when closing the Automatic Document Feeder (ADF). • This scanner weighs approximately 72.8 lbs. • Make - Ricoh IS760 | Operating Instructions - Page 8
after the last operation was performed. To operate the unit from this mode, see the instructions below. • Method instructions from the PC. Note ❒ The Low-Power mode does not work in the following conditions. • When an error occurs. • When a document is placed on the Original Table. ❖ Specifications - Ricoh IS760 | Operating Instructions - Page 9
and efficient operation of this scanner, all users should read and follow the instructions carefully. ❖ Quick Installation Guide Describes how to install the scanner. ❖ Operating Instructions (this manual) Provides all of the information how to install, set up, and use the scanner. This manual is - Ricoh IS760 | Operating Instructions - Page 10
notes for your safety. Important If this instruction is not followed, paper might be misfed, originals might be damaged, or data might be lost. Be sure to read this. Preparation This symbol indicates information or preparations required prior to operating. Note This symbol indicates precautions for - Ricoh IS760 | Operating Instructions - Page 11
to Components Guide to This Scanner ADC002S 1. ADF (Automatic Document Feed- 7. DIP Switches er) Allows you to automatically load multi- Use to set the operation mode of this scanner. ⇒ p.10 "DIP Switches" ple originals into this machine. 2. Paper Thickness Changeover Le- ver 8. Hard Reset - Ricoh IS760 | Operating Instructions - Page 12
4. Exposure Glass Set the original here when you do not use the ADF scanning. 5. ADF Cover Open when clearing the misfed originals or cleaning the rollers. ADC003S 6. Lock Screw This is to lock the scanning parts inside when you transport this machine. Remove this screw when you set up this machine - Ricoh IS760 | Operating Instructions - Page 13
mode Power Off Machine Busy Scanning operation in progress *1 Documents in place Originals are set to the ADF Error detection Error No originals are set to the ADF No error or the current status Scan Wait SADF When SADF mode or during standby for the manual scan *1 Sometimes it looks like - Ricoh IS760 | Operating Instructions - Page 14
Guide of this scanner with the used when the SCSI synchronous transmission is set. You can turn the DIP Switch No.2 OFF (SCSI synchronous transmission enabled) when using the scanner only with the SCSI connection. ❒ A malfunction with SCSI synchronous transmission may occur if you use - Ricoh IS760 | Operating Instructions - Page 15
explains how to setup the scanner to get it ready for use, and how to make necessary connections. Confirmations Before the Setup Location, Space and cause injury. Place the scanner on a level, stable, vibrating-free surface. • Allowable inclination of the surface for installation is within 0.2inch - Ricoh IS760 | Operating Instructions - Page 16
fall within the ranges shown below. ADC123S Important ❒ Save the box and cushioning material in which the scanner was packed so that they can be used if it is necessary to transport the scanner in the future. ❒ When the machine is moved from a cold location to a warm location, sud- den temperature - Ricoh IS760 | Operating Instructions - Page 17
Confirmations Before the Setup Disengaging the lock for transportation In this section, we explain how to disengage the lock after you take the scanner out of the package for transportation. A Remove two lock screws fixed on the back of this machine. 2 ADC082S Note ❒ Use a coin to remove the lock - Ricoh IS760 | Operating Instructions - Page 18
Setting up the Scanner C The removed lock screws are to be kept on the back of the was. Reference Regarding how to set the Background Panel, please refer to the step B E of p.54 "Changing the Color of the Background Panel for the Expo- sure Glass". D Turn the lock lever on the back of this machine to - Ricoh IS760 | Operating Instructions - Page 19
Confirmations Before the Setup Note ❒ Be sure to set the lock lever to the "Unlock" position. Turning the power on leaving the lock lever to the "Lock" position could result not only in failure in scanning but in malfunction of the machine. 2 15 - Ricoh IS760 | Operating Instructions - Page 20
Setting up the Scanner Installing Options Installing the Image-Processing Unit Important 2 ❒ Touch any metallic material before touching the image-processing unit to re- move static from your body. Note ❒ Use the accessory tool to remove or fix the screws. A Turn OFF the power to this product - Ricoh IS760 | Operating Instructions - Page 21
Installing Options D Remove the seven screws on the cover of the scanner control unit. 2 ADC064S E Open the cover of the scanner control unit. ADC011S F Connect the connector at the bottom surface of the image-processing unit to the connector of the scanner control unit, and fix with one accessory - Ricoh IS760 | Operating Instructions - Page 22
Setting up the Scanner I Fix the scanner control unit with three screws. J Removed cables must connect in former state. Installing the IEEE1394 Interface Board 2 Important ❒ Touch any metallic material before touching the IEEE interface board to re- move static from your body. Note ❒ The - Ricoh IS760 | Operating Instructions - Page 23
Installing Options D Remove the seven screws on the cover of the scanner control unit. 2 ADC064S E Open the cover of the scanner control unit. ADC011S F Remove the USB 2.0 interface board fixed with 6 screws. ADC077S 19 - Ricoh IS760 | Operating Instructions - Page 24
control unit into the main unit. Note ❒ Be sure to place the scanner on the level surface when inserting the scanner control unit. ❒ Insert the scanner control unit till you see the screw holes. J Fix the scanner control unit with three screws. K Removed cables must connect in former state. 20 - Ricoh IS760 | Operating Instructions - Page 25
of the scanner ON before the software installation. If scanner operation. • This scanner is compliant for SCAM (SCSI Configured Automatically). If you use SCAM corresponding to SCSI board and driver operation. Please contact and ask your service representative about the recommended SCSI board. 21 - Ricoh IS760 | Operating Instructions - Page 26
the SCSI ID A Open the cover of the switch box on the lower left of the frontside of the scanner. 2 ADC015S Note ❒ Push the knob of the cover to the left and pull the cover to open. Press the Hard Reset Switch if you changed the SCSI ID while the power is ON. ⇒ p.34 "Using the Hard Reset Switch" 22 - Ricoh IS760 | Operating Instructions - Page 27
the SCSI ID Automatically Note ❒ If you use the SCSI board without SCAM function or the SCSI ID is overlapping with the other SCSI device, set the SCSI ID manually. A Open the cover of the switch box on the lower left of the frontside of the scanner. 2 ADC015S Note ❒ Push the knob of - Ricoh IS760 | Operating Instructions - Page 28
computer and all of the SCSI connected devices. B Daisy chain the computer, scanner and SCSI connected devices. 2 ADC018S Note ❒ Connect the SCSI cable to either cover of the switch box on the lower left of the frontside of the scanner. ADC015S Note ❒ Push the knob of the cover to the left and pull - Ricoh IS760 | Operating Instructions - Page 29
Connecting to the Computer Note ❒ Press the Hard Reset Switch if you changed the SCSI ID while the power is ON. ⇒ p.34 "Using the Hard Reset Switch" 2 25 - Ricoh IS760 | Operating Instructions - Page 30
SCSI connected devices. 2 ADC020S C Open the cover of the switch box on the lower left of the frontside of the scanner. ADC015S Note ❒ Push the knob of the cover to the left and pull the cover to open. D Set the DIP Switch No.3 to the ON - Ricoh IS760 | Operating Instructions - Page 31
SCSI ID while the power is ON. ⇒ p.34 "Using the Hard Reset Switch" Using the Scanner only with the SCSI Connection You can set the scanner to the SCSI synchronous transmission for high-speed data transfer and shorten the total scan time. The USB and the optional IEEE1394 2 connection cannot - Ricoh IS760 | Operating Instructions - Page 32
Connecting with USB Interface Note ❒ Please use the recommended USB cable. Using other cables might occur an ir- regular operation. As for the recommended cables, please ask your service representative. 2 ❒ You can connect the scanner to two computers at the same time. One with the SCSI - Ricoh IS760 | Operating Instructions - Page 33
IEEE1394 interface board. ❒ An irregular operation might occur for the IEEE1394 interface board of some PC. Please use the recommended IEEE1394 interface board for your PC. As for the recommended boards, please ask you service representative. ❒ You can connect the scanner to three computers at the - Ricoh IS760 | Operating Instructions - Page 34
Setting up the Scanner B Confirm the DIP Switch No.2 is in the ON position. 2 ADC080S Press the Hard Reset Switch if you changed the DIP Switch while the pow- er is ON. ⇒ p.34 "Using the Hard Reset Switch" C Connect the IEEE1394 cable to the IEEE1394 connector. ADC023S Note ❒ Connect the cable to - Ricoh IS760 | Operating Instructions - Page 35
power outlet with multiple devices plugged in. These could create the risk of fire or 2 electric shock. • Avoid the use of an extension cord. • Do not damage, break, twist or modify the Power Cord. Placing heavy objects on the cord, pulling on or bending it - Ricoh IS760 | Operating Instructions - Page 36
the Scanner Important ❒ Be sure to remove the lock screws. Turning the power on without removing the screws could result not only in failure in scanning but power with the lock lever set to "Lock" could result in failure in scanning or in malfunction of this machine. D Push the power cord plug all - Ricoh IS760 | Operating Instructions - Page 37
Power On/Off Turning the Power On/Off Important ❒ Do not turn the power of the scanner ON before the software installation. If you run the "Found New Hardware Wizard" beforehand, you will not be able to install the software correctly. When the "Found New Hardware Wiz- ard" started before the - Ricoh IS760 | Operating Instructions - Page 38
Setting up the Scanner Using the Hard Reset Switch You need to hard reset the scanner when validate the settings of the DIP Switches or the Rotary Switch. To hard reset the scanner, you can turn off the scanner and turn it on again, or follow the procedures below. 2 A Open the cover of the switch - Ricoh IS760 | Operating Instructions - Page 39
be used for the TWAIN compliant applications. Preparation Start installation, retaining the power of the scanner OFF. System Requirements Install TWAIN Driver to the computer that meets the system requirements below. (A "recommended" environment is for scanning documents by 16,770K Full color Mode - Ricoh IS760 | Operating Instructions - Page 40
directory. C Click [TWAIN DRIVER]. The installer of the TWAIN driver starts. Follow the instructions on the screen. D Turn the power of the scanner ON. ADC125S E Re-start the computer. The installation completes here for the computer with the operation systems, Windows 95 and Windows NT4.0. For the - Ricoh IS760 | Operating Instructions - Page 41
.txt". Be sure to read them before use. -Changing the connecting interface When you change the connecting interface from the interface first installed, change the cable to the new interface and start from step D. "Scanner Driver(s), Utilities and Operating Instructions" CD-ROM is not required. Note - Ricoh IS760 | Operating Instructions - Page 42
manage various types of file data, such as scanned images, or documents as if they were one file. This software is compatible with a TWAIN driver. You can use this software to scan documents with this scanner. System Requirements 3 Install DeskTopBinder Lite to the computer that meets the system - Ricoh IS760 | Operating Instructions - Page 43
on to the computer as a member of the Administrators group, for installation to Windows 2000/XP, or Windows Server 2003. A Start Windows, and then insert the supplied CD-ROM labeled "Scanner Driver(s), Utilities and Operating Instructions" into the CD-ROM drive of the client computer. The CD-ROM - Ricoh IS760 | Operating Instructions - Page 44
scanner OFF. System Requirements 3 Install ISIS Driver to the computer that meets the system requirements below. • Hardware PC/AT compatible • Display Resolution 1024 × 768 pixels, 256 colors or higher (16,770K colors or higher recommended) • Operating Systems Windows 98/98 SE/Me/2000(Service - Ricoh IS760 | Operating Instructions - Page 45
directory. C Click [ISIS DRIVER]. The installer of the ISIS driver starts. Follow the instructions on the screen. D Turn the power of the scanner ON. ADC125S E Re-start the computer. The installation completes here for the computer with the operation systems, Windows 95 and Windows NT4.0. For the - Ricoh IS760 | Operating Instructions - Page 46
-Changing the connecting interface When you change the connecting interface from the interface first installed, change the cable to the new interface and start from step D. "Scanner Driver(s), Utilities and Operating Instructions" CD-ROM is not required. Note ❒ Please confirm the DIP Switch when you - Ricoh IS760 | Operating Instructions - Page 47
a ISIS driver. You can use this software to scan documents with this scanner. System Requirements Install QuickScan to the computer that meets the system requirements below. • Hardware PC/AT compatible 3 • CPU Pentium II or faster (Pentium II 400 MHz or faster recommended) • Memory 64 MB or - Ricoh IS760 | Operating Instructions - Page 48
Installing Software 3 44 - Ricoh IS760 | Operating Instructions - Page 49
(69mm) × 3.5" (90mm) • Both side color, Both side monochrome (The duplex model machine only) Maximum: 12" (297mm) × 17" (432mm) Minimum: 2.7" (69mm) × 3.5" (90mm) Note ❒ When you scan the thick originals - originals thicker than 128g/m2 (242.5bls) - with the ADF, set the paper thickness changeover - Ricoh IS760 | Operating Instructions - Page 50
scanner can detect the following document sizes automatically. ❖ When the Background Panel is Black All of the original size can be detected from Exposure glass and ADF (216mm × 279mm) S A3 (11.7" × 16.5", 297mm × 420mm) R B4JIS (10" × 14.3", 257mm × 364mm) R A4 (8.3" × 11.7", 210mm × 297mm) R - Ricoh IS760 | Operating Instructions - Page 51
images • Originals containing solid images around their edges 4 ❖ Originals that cannot be set in the ADF Placing the following types of originals in the ADF can cause paper misfeeds • Originals with perforated lines • Originals with indexes, tags, or other projecting parts • The originals with - Ricoh IS760 | Operating Instructions - Page 52
Originals Placing the Original on the Exposure Glass Important ❒ Be careful not to pinch your fingers when closing the ADF. A Lift the Pressure Panel. 4 ADC030S B With the side to be scanned facing down, place the original on the exposure glass, and align it with the home position and scale. ADC103S - Ricoh IS760 | Operating Instructions - Page 53
❖ Precautions when placing an original in the ADF • For information about the originals that cannot be placed in the ADF, see p.47 "Originals that cannot be set in the ADF". Important ❒ Attempting to use unsuitable originals in the ADF can lead to a misfeed and damage to the originals. Place such - Ricoh IS760 | Operating Instructions - Page 54
Setting Originals Important ❒ Do not hold the stopper to open the ADF. B Align the originals. To have the originals scanned in order, set the originals in order illustrated below. • Simplex scanning 4 ADC062S • Duplex scanning ADC063S C Fan the originals and align them well. 50 - Ricoh IS760 | Operating Instructions - Page 55
the root part of the original guide located over the original tray ditch. ❒ Be careful not to drop any alien objects such as paper clip, dust, etc. into the original tray ditch. ❒ Check that the ADF is closed. E Set the paper thickness changeover lever to your side when you scan the thick originals - Ricoh IS760 | Operating Instructions - Page 56
to enable auto original size detection or scan in clear images. Important ❒ Change the settings of the TWAIN driver from [Back.Panel] tab in [Initial Settings] of the driver dialog. ❒ Make sure that the color of the Background Panel for Exposure Glass, ADF and settings made in [Back.Panel] tab - Ricoh IS760 | Operating Instructions - Page 57
the Background Panel ADC036S The unit which stores the Background Panel for the ADF is drawn out. D Push down a lever on the left, and change the color of the Background Pan- 4 el by rotating the screw on the right to the ∆mark position. ADC037S Note ❒ Turn the slit in the way shown - Ricoh IS760 | Operating Instructions - Page 58
of the Background Panel for the Exposure Glass Note ❒ To change the color of the Background Panel for the Exposure Glass, reverse the panel. A 4 ADC071S B Place the Background Panel on the Exposure Glass, with the color to use downside. ADC072S Note ❒ Set the Background Panel so as to align the blue - Ricoh IS760 | Operating Instructions - Page 59
Changing the Color of the Background Panel C Align upper right of the Background Panel, with the home position for originals. ADC073S 4 1. Home position D Close the Pressure Panel slowly, - Ricoh IS760 | Operating Instructions - Page 60
Setting Originals 4 56 - Ricoh IS760 | Operating Instructions - Page 61
may be different depending on the application you use. ⇒ "Scanning Originals"B-F Place the originals. ⇒ "Scanning Originals"G Make the scan settings. ⇒ "Scanning Originals"H Click [Scan] on the TWAIN driver. ⇒ "Scanning Originals"I Save the scanned image. Menu and procedure may be different - Ricoh IS760 | Operating Instructions - Page 62
while, the dialog box of the TWAIN driver that operates the scanner appears. G Place the Originals. Note ❒ Place the originals either on the Exposure Glass or on the ADF. See p.48 "Placing Originals" for details. H Make the scan settings. Note ❒ View the TWAIN driver help files for the details of - Ricoh IS760 | Operating Instructions - Page 63
from Scanner] on the TWAIN driver, press the {Start} key after you clicked [Scan...]. The image is scanned. It will be displayed in the DeskTopBinder Viewer and the TWAIN driver dialog will close. Note ❒ With DeskTopBinder Lite, it is possible to edit and print scan files. For more information - Ricoh IS760 | Operating Instructions - Page 64
size smaller. Endorser User set charactors /Date/Counter: You can add the information mentioned in the left to the scanned images. You can change the size and the fonts of the endorser. ICM: (in [Color Matching]) ← When you enable ICM, the TWAIN Driver will match the color data according to - Ricoh IS760 | Operating Instructions - Page 65
TWAIN Driver Functions About Explanation Original Size Auto detect(Mixed-size) When the Background Panel is black, an optional /Auto detect(Uni-size) width and length of originals will be automati- /Various fixed form sizes cally detected for both ADF Wave While using ADF, it detects - Ricoh IS760 | Operating Instructions - Page 66
Using the TWAIN Driver 5 62 - Ricoh IS760 | Operating Instructions - Page 67
6. Appendix Troubleshooting Error Indicators The following table shows the meaning of error indicators of this machine, and how to fix the errors. ADC112S Error description Solution - - - ❍ ❍ ❍ ❍ The ADF or ADF Close the ADF or - cover is not fully ADF cover. closed. An original is - Ricoh IS760 | Operating Instructions - Page 68
Appendix When the Original is Jammed or Double Fed in the ADF When the original jammed in or double fed to the ADF, remove the original by the following procedure. A Open the ADF cover and remove if the original is jammed. ADC046S B Remove the original if it is jammed in the cove of the - Ricoh IS760 | Operating Instructions - Page 69
low: A Take off the Background Panel. Reference ⇒ p.54 "Changing the Color of the Background Panel for the Exposure Glass" B Turn down blue levers on both sides. ADC036S The unit which stores the Background Panel for the ADF is drawn out. C Remove the jammed original. 6 ADC067S Note ❒ Regarding - Ricoh IS760 | Operating Instructions - Page 70
magnets are fixed on the magnet catch and the cover is closed tightly. When Scanning is Not Performed as Expected Condition The scanned image is dirty. The originals are damaged when fed to the ADF. Image is distorted or out of position. Possible Cause and Required Action • The Exposure Glass - Ricoh IS760 | Operating Instructions - Page 71
the same size of originals. Please use black background for the mixed-size in particular. 6 When an Error Message Appears Message Possible Cause Required Action Cannot find the • The TWAIN driver • Check the cables and connectors to scanner. cannot find the scan- see if it is connected - Ricoh IS760 | Operating Instructions - Page 72
. • There is an error in parameter setting to the scanner. • Reinstall the TWAIN driver. • If the same error occurs again, please call the service representative. Error has occurred in the scanner driver. • There is an error in the • Restart the operating system. driver, scanner, or in • If - Ricoh IS760 | Operating Instructions - Page 73
areas that area. registered. you do not use. Double Feed has • Double Feed (More • To continue scanning, replace the occurred. Do you want to than 2 sheets of original was fed into the double fed originals to the ADF and Click [Yes]. Scanning restarts after 6 ADF at once) has oc- you click - Ricoh IS760 | Operating Instructions - Page 74
. The computer with Win- • Windows failed to dows 2000/XP freezes update the USB when scanning with USB driver when the connection. Service Pack is in- stalled. Required Action • First, install the TWAIN Driver from "Scanner Driver(s), Utilities and Operating Instructions" CD-ROM. Then start - Ricoh IS760 | Operating Instructions - Page 75
electrical shock. We recommend periodically cleaning the scanner to ensure that it is in optimum operating condition. Clean the rollers every three months Automatic Document Feeder (ADF) with a dry, clean cloth when there is dust or soiling present inside. Note ❒ Please make good use of the packed - Ricoh IS760 | Operating Instructions - Page 76
off the power of the scanner and unplug the power cord from the out- let. B Wipe all around the Feed Roller with a tightly wrung cloth, by turning the roller with your fingers. ADC106S 6 1. Feed Roller Note ❒ Always make sure to clean the Feed Roller after scanning a document written in pencil - Ricoh IS760 | Operating Instructions - Page 77
Cleaning Cleaning Under the Pressure Panel A Turn off the power of the scanner and unplug the power cord from the out- let. B Lift the Pressure Panel. C Wipe the Background Panel, the ADF Exposure Glass 1, and the Exposure Glass with the cleaning cloth or a dry and soft cloth, taking a good care of - Ricoh IS760 | Operating Instructions - Page 78
Cleaning Under the Background Panel Note ❒ The cleaning procedures below are not necessary for the simplex model. A Turn off the power of the scanner and unplug the power cord from the out- let. B Lift the Pressure Panel. C Take off the Background Panel. 6 ADC035S Reference ⇒ p.54 "Changing the - Ricoh IS760 | Operating Instructions - Page 79
tightly wrung cloth. 6 ADC053S 1. Rollers Reference Regarding how to set back the store box for the ADF Background Panel, please refer to the step E of p.52 "Changing the Color of the Background Panel for the ADF" Regarding how to set the Background Panel for the Exposure Glass, please refer to p.54 - Ricoh IS760 | Operating Instructions - Page 80
Cover A Turn off the power of the scanner and unplug the power cord from the out- let. B Open the cover of the ADF. C Wipe the rollers with a tightly wrung cloth, by turning them with your fin- gers. 6 ADC110S 1. Rollers D Wipe the rollers in the cove with a tightly wrung - Ricoh IS760 | Operating Instructions - Page 81
in every six months. However, please clean it properly when it gets dirty. A Turn off the power of the scanner and unplug the power cord from the out- let. B Open the ventilation cover panel on the left side of the ADF, and clean the inside filter and the ventilation panel. ADC056S 6 77 - Ricoh IS760 | Operating Instructions - Page 82
radio wave regulations and material regulations) differ in each country. Use of this product and its consumable supplies, etc. in foreign countries in violation of these regulations may be punishable by law. • Information regarding measures for ensuring safe transport can be obtained from an - Ricoh IS760 | Operating Instructions - Page 83
remain on for at least 20 seconds, and then turn it off. B Set the Lock Lever on the left side of the scanner to the "Lock" position. ADC068S C Fix it with the two lock screws kept on the back of the Pressure Panel. A Lift the Pressure Panel, and - Ricoh IS760 | Operating Instructions - Page 84
refer to the proce- dures B - E of p.54 "Changing the Color of the Background Panel for the Exposure Glass". D Turn 90 degrees the Use a coin to tightly fix the lock screws. D Disconnect all cables connected to the scanner. E Place the scanner in original box and transport. Important ❒ This scanner - Ricoh IS760 | Operating Instructions - Page 85
Disposing of the Scanner Disposing of the Scanner When you want to dispose of your scanner, contact your dealer or a service representative. 6 81 - Ricoh IS760 | Operating Instructions - Page 86
happen that you cannot per- form a scanning operation with the relevant settings due to the limitation of the TWAIN-compliant application you use for scanning. For information about the maximum data size that the application can handle, see the manual 6 that comes with the application. When - Ricoh IS760 | Operating Instructions - Page 87
" × 17" 1,826 7,304 16,435 29,218 - - - - 81/2" × 14" 1,162 4,648 10,458 18,593 29,052 - - - 81"/2 × 13" 1,079 4,316 9,711 17,265 26,977 - 16,435 22,370 29,218 Values: Data size in KB 6 When [8 Colors] or [8 Colors(Photo)] is Selected Scan Area A3 B4 A4 B5 A5 B6 A6 11" × 17" 81/2" × - Ricoh IS760 | Operating Instructions - Page 88
Appendix When [16770K colors] is Selected Scan Area 100dpi 200dpi 300dpi 400dpi 500dpi 600dpi 700dpi 800dpi A3 158 - - - 81/2" × 13" 3,237 12,949 29,135 51,796 80,932 - - - 81/2" × 11" 2,739 10,957 24,653 43,828 68,481 - - - 51/2" × 81/2" 1,369 5,478 12,326 21,914 34,240 49,306 - Ricoh IS760 | Operating Instructions - Page 89
Image Processing Unit Type B Installation of this option enables the following visual image processing by use of the TWAIN driver. ❖ Binary(Auto Image) When you binary-scan Set when you Binary-scan an original consisting of both texts and photos. You can set the photo part alone as the para- - Ricoh IS760 | Operating Instructions - Page 90
Appendix Specifications 6 86 Type Scanning method Scanning area *1 flatbed type color scanner with ADF Fixed document scanning and moving document scanning The duplex model enables scanning of both sides of an original simultaneously. ❖ ADF • One side color Main direction: 12 inch (297 mm) Max., - Ricoh IS760 | Operating Instructions - Page 91
H) Weight Simplex Scanner: Approximately 68.3 lbs (31 kg) Duplex Scanner: Approximately 72.8 lbs (33 kg) *1 The maximum scanning range varies by the level of resolution and grade. *2 Actual length of time for the scanning varies by your PC performance and environ- ments. *3 ipm: images per minute - Ricoh IS760 | Operating Instructions - Page 92
77 G Guide to This Scanner, 7 H Hard Reset Switch, 7, 34 I IEEE1394 Board, 18 IEEE1394 Interface Unit Type IS760, 85 Image-Processing Unit, 16 Image Processing Unit Type B, 85 Indicators, 7 In Normal State, 9 With Error, 63 Installing DeskTopBinder Lite, 38 ISIS Driver, 40 QuickScan, 43 TWAIN Driver - Ricoh IS760 | Operating Instructions - Page 93
Setting Originals, 45 Sizes Automatically Detected, 46 Specifications, 86 {Start} key, 7 Surroundings for Setup, 11 T Transporting, 78 Troubleshooting, 63 Turning the Power On/Off, 33 TWAIN Driver Example of the Scanning, 58 Functions, 60 Installation, 35 Procedure Breakdown, 57 U USB 2.0 Interface - Ricoh IS760 | Operating Instructions - Page 94
MEMO 90 EN USA G418-8602 - Ricoh IS760 | Operating Instructions - Page 95
In accordance with IEC 60417, this machine uses the following symbols for the main power switch: a means POWER ON. b means POWER OFF. Copyright © 2004 - Ricoh IS760 | Operating Instructions - Page 96
Image Scanner Operating Instructions EN USA G418-8602
-
 1
1 -
 2
2 -
 3
3 -
 4
4 -
 5
5 -
 6
6 -
 7
7 -
8
-
9
-
10
-
11
-
12
-
13
-
14
-
15
-
16
-
17
-
18
-
19
-
20
-
21
-
22
-
23
-
24
-
25
-
26
-
27
-
28
-
29
-
30
-
31
-
32
-
33
-
34
-
35
-
36
-
37
-
38
-
39
-
40
-
41
-
42
-
43
-
44
-
45
-
46
-
47
-
48
-
49
-
50
-
51
-
52
-
53
-
54
-
55
-
56
-
57
-
58
-
59
-
60
-
61
-
62
-
63
-
64
-
65
-
66
-
67
-
68
-
69
-
70
-
71
-
72
-
73
-
74
-
75
-
76
-
77
-
78
-
79
-
80
-
81
-
82
-
83
-
84
-
85
-
86
-
87
-
88
-
89
-
90
-
91
-
92
-
93
-
94
-
95
-
96
 |
 |

Image Scanner
Operating Instructions
Read this manual carefully before you use this machine and keep it handy for future reference. For safe and correct use, be sure to read the Safety
Information in this manual before using the machine.
Guide to Components
Setting up the Scanner
Installing Software
Setting Originals
Using the TWAIN Driver
Appendix