Ricoh MP C3503 Manuals
Ricoh MP C3503 Manual
 |
View all Ricoh MP C3503 manuals
Add to My Manuals
Save this manual to your list of manuals |
Ricoh MP C3503 manual content summary:
- Ricoh MP C3503 | Manuals - Page 1
centrally and print on demand. • To reduce network load. How to use in copy mode... A Press [Store File]. B Enter a user name, file name, or password if necessary. C Specify a folder in which to store the document if necessary. D Press [OK]. E Place the originals. F Make the scanning settings for
-
 1
1
 |
 |
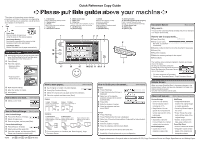
Quick Reference Copy Guide
c
Please put this guide above your machine
g
© 2013
EN
GB
EN US
EN AU D148-7533
Chapter references in this guide refer to the bundled OI CD; Copy/ Document Server and Paper Specifications and Adding Paper.
A
See if original is 1-sided or 2-sided (duplex).
B
Press [Dup./Combine/Series].
C
Select the original and copy types and/or the orientation.
D
Place the originals, and then press [Start].
Duplex
1-Sided
→
2-Sided
Copies two 1-sided pages
on one 2-sided page.
2-Sided
→
2-Sided
Copies one 2-sided page on
one 2-sided page.
Combine
1-sided Combine
Copies multiple 1-sided or
2-sided originals on one side
of copy paper.
2-sided Combine
Copies multiple 1-sided
originals on two sides of
copy paper.
Copies multiple 2-sided
originals on two sides of
copy paper.
For more functions on Combine, see “Basic Copying”, Copy/
Document Server.
A
Press the
{
Home
}
key on the top left of the control
panel. Flick the screen to the left, and then press
the [Copier] icon on the Home screen 4.
B
Press [Reset].
C
Place the originals.
•
Exposure Glass
(Face down)
•
Auto Document
Feeder (Face up)
D
Make desired settings.
E
Enter the number of copies.
F
Press [Start].
Paper Size
You can check the paper size
using the scale on the exposure glass.
Auto Image Density
Dark texture originals will be copied so that
background will not be reproduced.
Auto Paper Select
Selects a suitable size of paper automatically.
Paper Size
Paper Size
Tips
How to make Copies...
(Placing Originals, Paper Specifications
and Adding Paper, Basic Copying)
Auto Reduce/Enlarge
A
Press [Auto Reduce / Enlarge].
B
Select the paper size.
C
Place the originals, and then press [Start].
Preset Reduce/Enlarge
A
Press [Reduce / Enlarge].
B
Select a ratio, and then press [OK].
C
Place the originals, and then press [Start].
(Paper size is selected automatically.)
How to Reduce/Enlarge...
(Basic Copying)
Reduce/Enlarge
Zoom: You can specify
the reproduction ratio in
increments of 1%.
Magnification: You can
specify the horizontal and
vertical reproduction ratios,
individually.
Series Copies
Separately copies the
front and back of a 2-sided
original onto two sheets.
Booklet/Magazine
Copies two or more
originals in page order.
•
•
•
•
Edit/Stamp
Image Repeat/Double
Copies: The original image
is copied repeatedly.
Centering: Moves image to
the center.
Erase: Erases the center
and/or all four sides of the
original image.
Stamps: Copies with the
date, page numbers, etc.
Cover/Slip Sheet
Covers: Create cover sheets.
Designate: Copies certain
pages of the original onto
designation sheets.
•
•
•
•
•
•
Advanced features
(Basic Copying)
How to save paper...
(Basic Copying)
How to finish your document...
Staple
A
Press [Finishing].
B
Press [Finisher] when the key is
displayed.
C
Select one of the stapling
positions (Copies will be sorted
automatically).
D
Press [OK].
E
Enter the number of copies.
F
Place the originals, and then
press [Start].
Punch
A
Press [Finishing].
B
Press [Finisher] when the key is displayed.
C
Select one of the punch hole positions (Copies will be hole punched).
D
Press [OK].
E
Enter the number of copies.
F
Place the originals, and then press [Start].
Staple and Punch can be done at the same time.
Availability of finishing depends on your configuration.
Simple Screen
Why use it...
•
To store often used documents centrally and print on demand.
• To reduce network load.
How to use in copy mode...
A
Press [Store File].
B
Enter a user name,
file name, or password
if necessary.
C
Specify a folder in which to store the document if necessary.
D
Press [OK].
E
Place the originals.
F
Make the scanning settings for the original.
G
Press [Start].
The machine stores scanned originals in memory and makes
one set of copies.
To find your document, press the
{
Home
}
key on the top left of the control
panel, and press the [Document Server]
icon on the screen.
For more functions on Document
Server, see “Document Server”, Copy/ Document Server.
When you press [Simplfied Scrn.], the screen changes to the
simple screen. Letters and keys are displayed at a larger size,
making operations easier.
Only the main functions can be used.
(Basic Copying)
Document Server
A
Select a color mode.
How to select a color mode...
(Color Copying)
*The shape of the machine, screen displays,
procedures, and titles in references vary depending
on the machine you are using. Also, not all functions
are available on all machines.
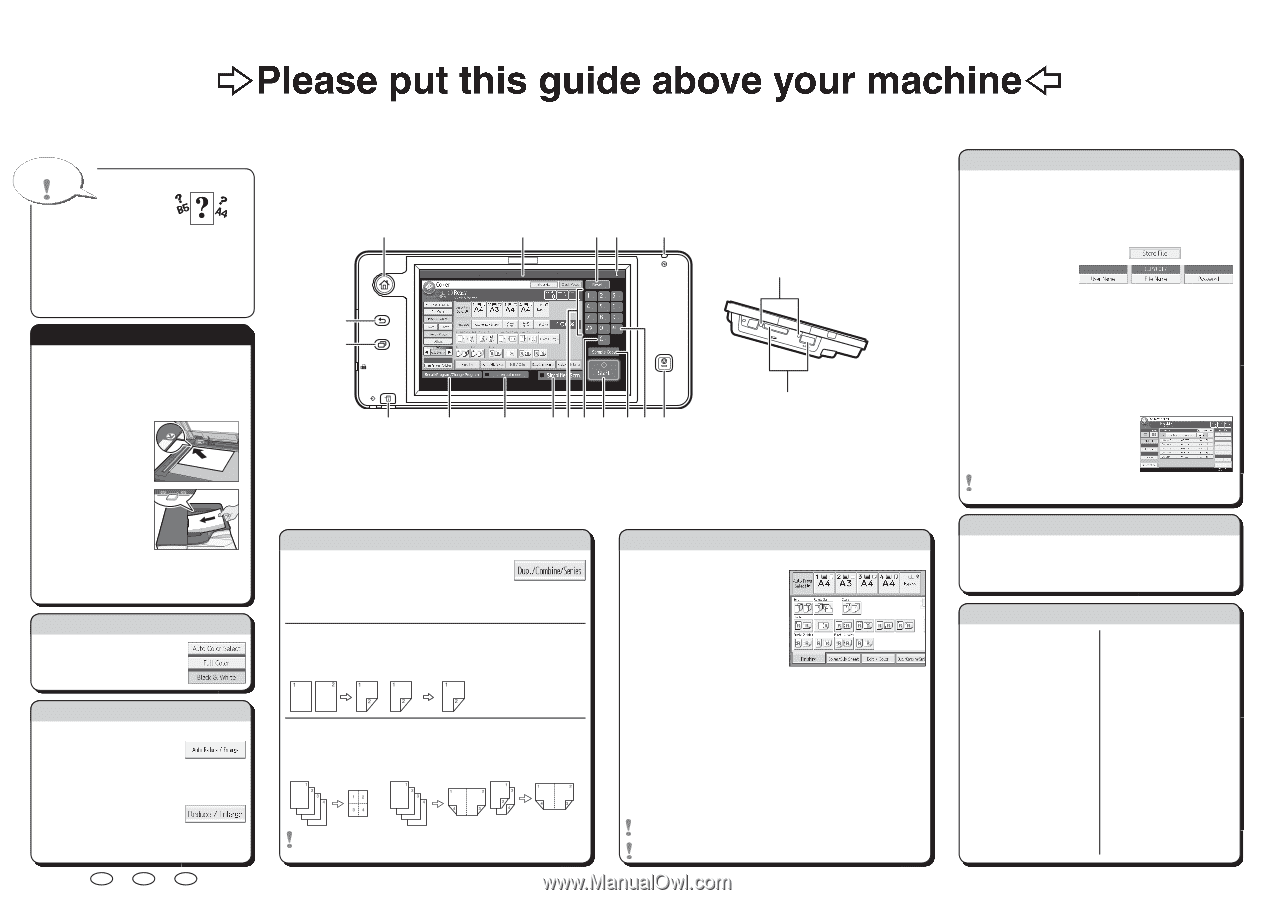
1.
{
Home
}
key
Press to display the [Home] screen.
2. Display panel
3. [Reset]
Press to clear the current settings.
4. Energy Saver
5. Main power indicator
6. Media access lamp
7. Media slots
8.
{
Stop
}
key
Press to stop a job in progress, such as
copying, scanning, faxing, or printing.
9. [#] (Enter key)
10. [Sample Copy]
11. [Start]
Press to start copying, printing,
scanning, or sending.
12. [C] (Clear key)
Press to delete a number entered.
13. Number keys
14. [Simplfied Scrn.]
15. [Interrupt mode]
16. [Recall/Program/Change Program]
Press to register frequently used
settings, or to recall registered settings.
17.
{
Check Status
}
key
18.
{
Menu
}
key
19.
{
Return
}
key
(Basic Copying, Advanced Copying)
☺
1
9
8
11
2
3
4
5
18
12
13
17
10
19
6
7
14
15
16