Roku HD1000 User Guide - Page 23
Tip #5: Zoom in on the action, Tip #6: Panning for gold
 |
UPC - 029610841001
View all Roku HD1000 manuals
Add to My Manuals
Save this manual to your list of manuals |
Page 23 highlights
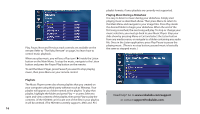
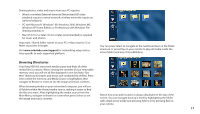
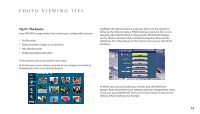
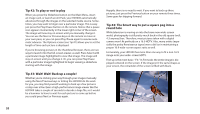
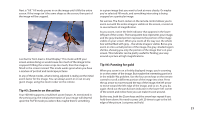
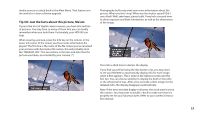
Next is "Fill." Fill mode zooms in on the image until it fills the entire screen. If the image isn't the same shape as the screen, then part of the image will be cropped. Last but far from least is SmartDisplay.™ This mode will fill your screen unless doing so would cause too much of the image to be cropped. If filling the screen crops too much, then the image is fitted to the screen instead. This mode works great when you have a mixture of portrait and landscape pictures. In any of these modes, what is being adjusted is really just the initial zoom factor for the image. You can always zoom in or out on any given image, using the zoom rocker on the remote. Tip #5: Zoom in on the action Your HD1000 supports a multilevel zoom feature. As mentioned in the previous tip, the initial presentation of your image will depend upon the Fit/Fill mode you select. But, maybe there's something in a given image that you want to look at more closely. Or maybe you've selected Fill mode, and something interesting is being cropped on a particular image. No worries. The Zoom rocker on the remote control allows you to zoom out until the entire image is visible on the screen, or zoom in to several levels of magnification. As you zoom, notice the little indicator that appears in the lower left part of the screen. The transparent box represents your image, and the gray shaded portion represents the portion of the image visible on your screen. When you zoom all the way out, the whole box will be filled with gray - the whole image is visible. But as you zoom in onto a small portion of the image, the gray-shaded region shrinks, showing you only the portion of the image that's on your screen. This indicator can be pretty useful for finding your way around a picture at high magnifications. Tip #6: Panning for gold When you zoom in on a freshly displayed image, you're zooming in on the center of the image. But maybe the interesting part isn't in the middle! No problem. Use the four arrow keys on the remote control to scroll a different portion of the image into view. Press the up arrow to move toward the top of the image, the left arrow to move toward the left edge of the image, and so on. As you do, again check out the pan & zoom indicator in the lower-left corner of the screen and notice how you can make it scoot around. By the way, both the Zoom keys and the arrow keys repeat if you hold them down. No need to press Left 20 times to get to the left edge of the picture. Just press and hold. 21
-
 1
1 -
2
-
3
-
4
-
5
-
6
-
7
-
8
-
9
-
10
-
11
-
12
-
13
-
14
-
15
-
16
-
17
-
 18
18 -
 19
19 -
 20
20 -
 21
21 -
 22
22 -
 23
23 -
 24
24 -
 25
25 -
 26
26 -
 27
27 -
 28
28 -
29
-
30
-
31
-
32
-
33
-
34
-
35
 |
 |
