Roku HD1000 User Guide - Page 24
Tip #7: Which way is up? - software
 |
UPC - 029610841001
View all Roku HD1000 manuals
Add to My Manuals
Save this manual to your list of manuals |
Page 24 highlights
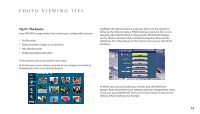
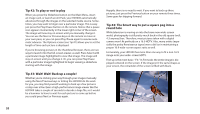
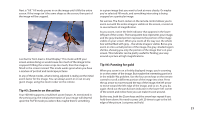
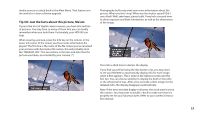
Tip #7: Which way is up? If you take a picture holding the camera right side up, you get what's called a "landscape" picture - one wider than it is tall. Sometimes, though, the subject calls for a "portrait" picture - one taken with the camera rotated 90 degrees to the left or right so that the resulting image is taller than it is wide. Some cameras actually have a built-in sensor which records whether the camera was rotated for a given picture. If you're lucky enough to have one of those cameras, your HD1000 will rotate the image right side up for you automatically. For the rest of us, there's the Rotate button on the remote. Statistically, most people rotate their cameras counterclockwise when they take a portrait picture, putting the top of the subject at the right edge of the recorded image. By default, pressing the rotate button on the HD1000 remote also rotates the picture counterclockwise, which for most images will put the top where it should be. Some people, however, rotate their cameras the other way. In the Options screen (see Tip #1), you can change the default rotation direction to match your preference. When you press the Rotate button on the remote, you'll notice that a rotation indicator pops up in the lower right corner of the screen. The direction of the arrow shows the direction of rotation. By the way, sometimes a picture might not be rotated in your "usual" direction. Perhaps you're looking at pictures taken by a friend, and they prefer to turn the camera the other way. Not to worry. As with Next and Previous, you can press the Rotate button more than once in quick succession. Three presses will rotate an opposite-direction picture to the right orientation - no need to wait for each rotation to complete. Finally, what if you want to get your pictures ready for a slideshow rather than having them initially pop up sideways? Easy. The Rotate button works in the thumbnail view as well. Just rotate the pictures so that their thumbnails look right, and your slideshow will look great. Two quick notes on the subject of rotation: First, some PC image editing software will rotate an image but leave the thumbnail in its original orientation. If you've used this type of software, your thumbnails won't be an accurate representation of what you'll see on screen. Second, in version 1.5 of the HD1000 software, your HD1000 does not remember image rotations once you've changed 22
-
 1
1 -
2
-
3
-
4
-
5
-
6
-
7
-
8
-
9
-
10
-
11
-
12
-
13
-
14
-
15
-
16
-
17
-
18
-
 19
19 -
 20
20 -
 21
21 -
 22
22 -
 23
23 -
 24
24 -
 25
25 -
 26
26 -
 27
27 -
 28
28 -
 29
29 -
30
-
31
-
32
-
33
-
34
-
35
 |
 |