Ryobi BE318-2 English Manual
Ryobi BE318-2 Manual
 |
View all Ryobi BE318-2 manuals
Add to My Manuals
Save this manual to your list of manuals |
Ryobi BE318-2 manual content summary:
- Ryobi BE318-2 | English Manual - Page 1
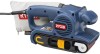
OPERATOR'S MANUAL BELT SANDER BE318 DOUBLE INSULATED Your new sander has been engineered and manufactured to Ryobi's high standard for dependability, ease of operation, and operator safety. Properly cared for, it will give you years of rugged, trouble-free performance. WARNING: To reduce the risk of - Ryobi BE318-2 | English Manual - Page 2
Operation ...9-14 Maintenance ...14-15 Parts, Ordering, and Service ...16 INTRODUCTION Your sander has many features for making the sander making it easy to maintain and operate. WARNING: Do not attempt to use this tool until you have read thoroughly and understand completely the operator's manual - Ryobi BE318-2 | English Manual - Page 3
INSTRUCTIONS and support the workpiece the rate for parts, and any other condition that may affect the tool's operation. If damaged, have the tool serviced before using. Many accidents are caused by poorly maintained tools. Use only accessories that are recommended by the manufacturer for your model - Ryobi BE318-2 | English Manual - Page 4
servicing a tool, use only identical replacement parts. Follow instructions in the Maintenance section of this manual. Use of unauthorized parts or failure to follow Maintenance Instructions , loan them these instructions also. WARNING: Some dust created by power sanding, sawing, grinding, drilling - Ryobi BE318-2 | English Manual - Page 5
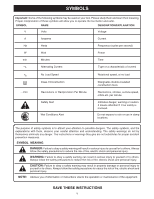
and the explanations with them, deserve your careful attention and understanding. The safety warnings do not by themselves eliminate any danger. The instructions or warnings they give are not substitutes for proper accident prevention measures. SYMBOL MEANING DANGER: Failure to obey a safety warning - Ryobi BE318-2 | English Manual - Page 6
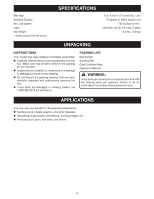
are damaged or missing, please call 1-800-525-2579 for assistance. PACKING LIST Belt Sander Sanding Belt Dust Collection Bag Operator's Manual WARNING: If any parts are missing do not operate your tool until the missing parts are replaced. Failure to do so could result in possible serious personal - Ryobi BE318-2 | English Manual - Page 7
and should be performed only by a qualified service technician. For service, we suggest you return the tool to your nearest authorized service center for repair. Always use original factory replacement parts when servicing. ELECTRIC MOTOR Your sander has a precision built electric motor. It should - Ryobi BE318-2 | English Manual - Page 8
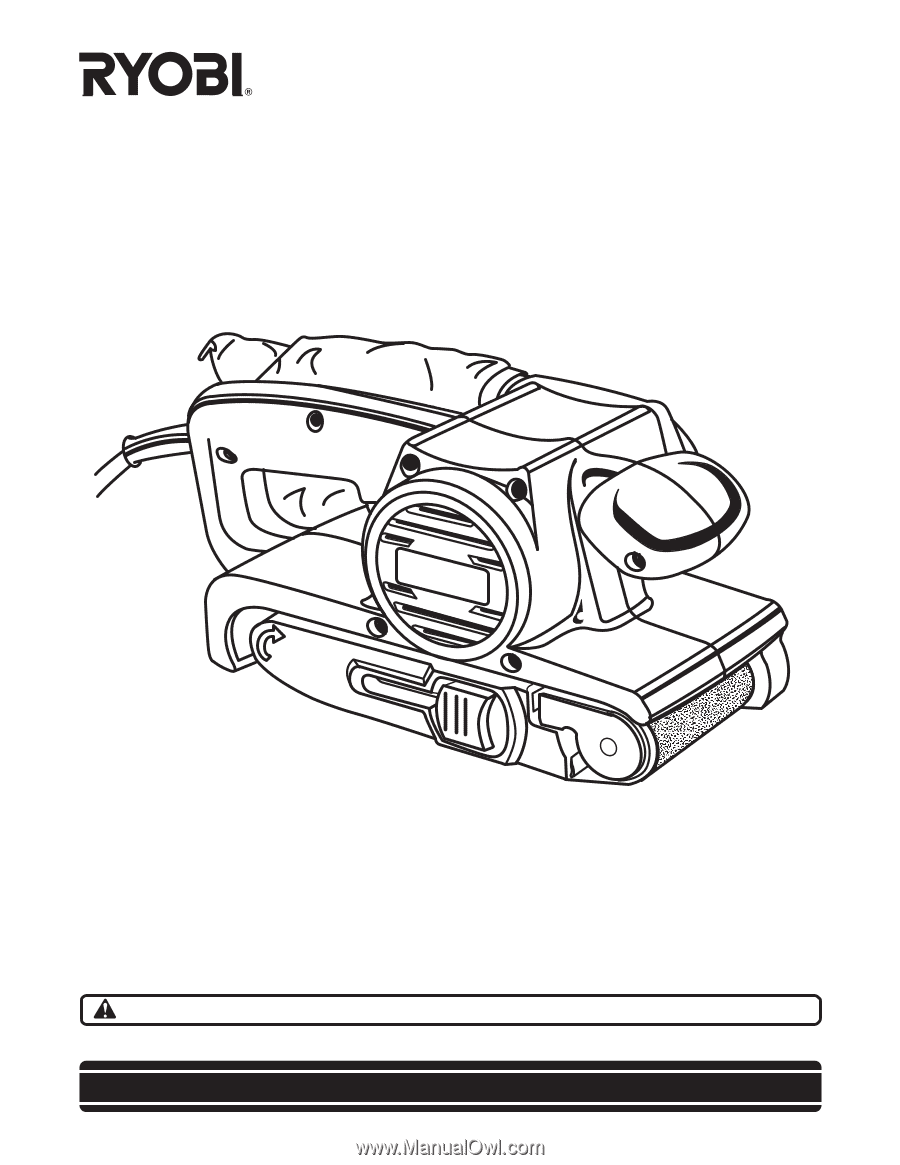
FEATURES DUST COLLECTION BAG REAR HANDLE FRONT HANDLE TENSION RELEASE LEVER SANDING BELT Fig. 1 WARNING: Do not attempt to modify this tool or create accessories not recommended for use with this tool. Any such alteration or modification is - Ryobi BE318-2 | English Manual - Page 9
the trigger switch if you might need to suddenly stop the sander. WARNING: Before connecting the sander to a power supply, make sure it is not in the . SELECTING SANDING BELTS Selecting the correct size and type of sanding belt is an important step in achieving a high quality sanded finish. Aluminum - Ryobi BE318-2 | English Manual - Page 10
the old sanding belt at this time. Install the sanding belt. CAUTION: If the sanding belt is not a bidirectional belt, ensure that the arrow inside the belt is pointing in the direction of the rotation (clockwise when looking into the open side of the sander). Installing unidirectional sanding belts - Ryobi BE318-2 | English Manual - Page 11
the tracking screw slowly clockwise. NOTE: Turn the tracking screw until you are sure the sanding belt is secure, i.e, it will not come off the sander or contact internal parts. CAUTION: If the sanding belt wears excessively on the inner edge, it is probably adjusted too far inward and is rubbing - Ryobi BE318-2 | English Manual - Page 12
elsewhere and cause fire. To reduce the risk of fire always empty your dust bag frequently (10-15 minutes) while sanding and never store or leave a sander without totally emptying its dust bag. Also follow the recommendations of the coatings manufacturers. Follow these directions to empty the dust - Ryobi BE318-2 | English Manual - Page 13
sander and the front handle to guide the sander. NOTE: Allowing the sander to remain in one place will result in an uneven surface. WARNING: Keep a firm grip on the sander fingers rest over the front or right edge of the sander. If the sanding belt were to run off, or if it were not properly adjusted, your - Ryobi BE318-2 | English Manual - Page 14
sander is not designed for contour sanding. Sanding on the front roller could cause irregularity in the sanding belt tracking. MAINTENANCE WARNING: When servicing use only identical Ryobi replacement parts. Use of any other parts highly abrasive to bearings, brushes, commutators, etc. Consequently, - Ryobi BE318-2 | English Manual - Page 15
starting causing possible serious injury. Remove the sanding belt from the sander. Refer to "TO INSTALL/CHANGE SANDING BELTS" earlier in this manual. Remove the belt cover screws and the belt cover. WARNING: Never attempt to operate the belt sander without the belt cover in place. Force the old - Ryobi BE318-2 | English Manual - Page 16
MANUAL BELT SANDER BE318 it for loose or exposed wires and cut or worn insulation. **Ampere rating (on tool faceplate) 0-2.0 Cord Length 25' 16 50' 16 100' PARTS WHEN ORDERING REPAIR PARTS, ALWAYS GIVE THE FOLLOWING INFORMATION: • MODEL NUMBER BE318 • SERIAL NUMBER 983000-130 7-03 RYOBI
-
 1
1 -
 2
2 -
 3
3 -
 4
4 -
 5
5 -
 6
6 -
 7
7 -
8
-
9
-
10
-
11
-
12
-
13
-
14
-
15
-
16
 |
 |
Your new sander has been engineered and manufactured to Ryobi's high standard for dependability, ease of
operation, and operator safety. Properly cared for, it will give you years of rugged, trouble-free performance.
WARNING:
To reduce the risk of injury, the user must read and understand the operator’s manual.
Thank you for buying a Ryobi belt sander.
OPERATOR'S MANUAL
BELT SANDER
BE318
DOUBLE INSULATED
SAVE THIS MANUAL FOR FUTURE REFERENCE