Ryobi BE318-2 English Manual - Page 13
Operating The Sander
 |
View all Ryobi BE318-2 manuals
Add to My Manuals
Save this manual to your list of manuals |
Page 13 highlights
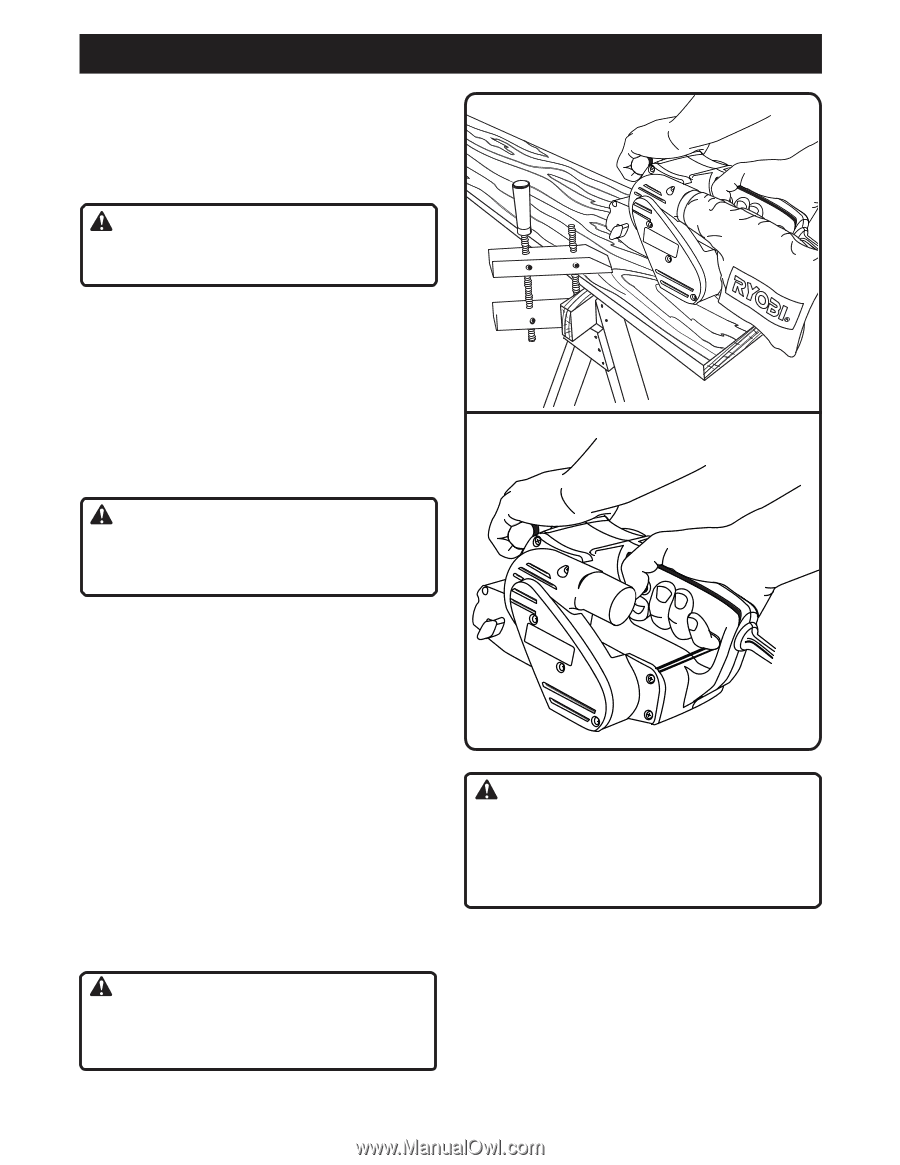
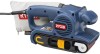
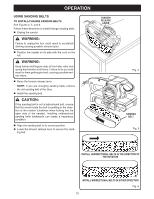
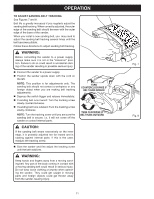
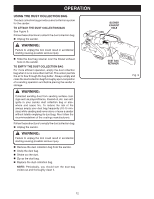
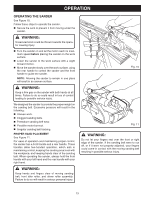
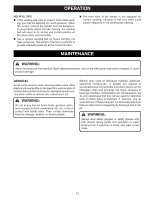
OPERATION OPERATING THE SANDER See Figure 10. Follow these steps to operate the sander. Secure the work to prevent it from moving under the sander. WARNING: Unsecured work could be thrown towards the operator causing injury. Turn the sander on and let the motor reach its maximum speed before placing the sander on the work surface. Lower the sander to the work surface with a slight forward motion. Move the sander slowly over the work surface, using the rear handle to control the sander and the front handle to guide the sander. NOTE: Allowing the sander to remain in one place will result in an uneven surface. WARNING: Keep a firm grip on the sander with both hands at all times. Failure to do so could result in loss of control leading to possible serious injury. We designed the sander to provide the proper weight on the sanding belt. Excessive pressure will result in the following: Uneven work. Clogged sanding belts. Premature sanding belt wear. Possible motor burnout. Irregular sanding belt tracking. PROPER HAND PLACEMENT See Figure 11. For ease of operation and maintaining proper control, the sander has a front handle and a rear handle. These handles allow two-handed operation, which aids in maintaining control, keeping the sanding area level with the workpiece, and keeping hands clear of the sanding belt. When operating the sander, always hold the front handle with your left hand and the rear handle with your right hand. WARNING: Keep hands and fingers clear of moving sanding belt, front idler roller, and driver roller assembly. Failure to do so will result in serious personal injury. Fig. 10 Fig. 11 WARNING: Do not let your fingers rest over the front or right edge of the sander. If the sanding belt were to run off, or if it were not properly adjusted, your fingers could come in contact with the moving sanding belt resulting in possible serious injury. 13
-
 1
1 -
2
-
3
-
4
-
5
-
6
-
7
-
 8
8 -
 9
9 -
 10
10 -
 11
11 -
 12
12 -
 13
13 -
 14
14 -
 15
15 -
 16
16
 |
 |